
- •Disclaimer
- •Contact
- •Table of Contents
- •Welcome to REAKTOR
- •System Requirements
- •REAKTOR Modes: Full, Player and Demo
- •How to Get Started
- •The REAKTOR Documentation
- •Special Formatting used in this Document
- •Basic Settings in REAKTOR
- •Configuring the Audio Hardware
- •Accessing the Audio and MIDI Settings… dialog
- •Selecting an Audio Hardware Device
- •Selecting a Sample Rate
- •Adjusting Output Latency
- •Routing: Assigning REAKTOR's Inputs
- •Routing: Assigning REAKTOR's Outputs
- •Configuring the MIDI Hardware
- •Loading and Playing
- •A Few Important Buttons
- •Ensembles, Instruments and KOMPLETE Instruments
- •Loading Carbon 2
- •Opening the Sidepane
- •Opening the Browser
- •Loading a File
- •Playing Carbon 2 and its Snapshots
- •Loading a Snapshot
- •Adjusting the Sound
- •Switching Effects
- •Changing the Filter Movement
- •Changing the Filter Settings
- •Saving Your Settings
- •Modifying a REAKTOR Ensemble
- •Recap
- •Using the Browser to Load the Ensemble
- •Instruments inside Ensembles
- •Junatik Panel Overview
- •The Difference Between an Ensemble and an Instrument
- •Snapshot Master for Plug-In and Snapshot Hierarchies
- •Snapshot Hierarchy as seen in Properties
- •Recall by MIDI and Snapshot Master for Plug-In
- •Snapshot Properties for the Junatik Instrument
- •Snapshot with a REAKTOR Switch Turned Off
- •Snapshot Flexibility
- •Swapping the Delay Instrument for a Reverb Instrument
- •Opening a REAKTOR Structure
- •Removing an Instrument from the Structure
- •Using the Bowser to Search for Instruments
- •Connecting the Instrument to the Audio Out
- •Making the Connections
- •Resetting the Positions of Instruments in the Ensemble Panel
- •Restoring the Correct Snapshot Hierarchy
- •Opening the Instrument Properties
- •Creating a Sequenced Synthesizer
- •Recap and Overview
- •Creating the Synth Sequencer Ensemble
- •Create a New Ensemble
- •Using the Browser to Load the Instruments
- •Making the Synth Sequencer Work
- •Overview of the Structure
- •Removing the Unwanted Instrument
- •Connecting ANALOG Outputs to the Audio Out
- •Overview of Monoliner and ANALOG
- •Making the MIDI Connections between Instruments
- •Using Internal MIDI Connections
- •REAKTOR Run and Stop Buttons
- •Looking More Closely at Monoliner
- •Changing the Direction and Speed
- •Number of Steps, Step Offset and Shuffle/Swing
- •GATE, VELOCITY and PITCH Knobs and On/Off Buttons
- •Exploring the Snapshots/Show Hints
- •Exploring Snapshots in Monoliner and ANALOG
- •Show/Hide Hints
- •Exploring a REAKTOR Sampler
- •Recap and Overview
- •Using the Browser to Launch Memory Drum 2
- •Replacing and Editing Samples in the Sample Map Editor
- •Opening the Map and Playing the Samples
- •Using Replace in the Edit Sample List
- •Using Add from the Edit Sample List
- •The Memory Drum Interface
- •Changing Pitch for Just one Sample Slot
- •Exploring the Memory Drum Snapshots
- •Building a Synth Using Macros
- •What is a Macro
- •Preparation
- •Loading a New Ensemble
- •Removing the Default Instrument
- •Inserting a New Instrument
- •Connecting the Instrument to the Audio Out
- •Adding an Oscillator and an ADSR Env to the Instrument
- •Inserting an Oscillator
- •Inserting the ADSR Env
- •Inserting Pitch and Gate Modules
- •Connecting the Pitch and Gate Modules
- •Safe Output Level
- •Inserting the Filter
- •Inserting the Filter Macro and Doing Some Rewiring
- •Unlocking the Panel to Move the Macros
- •Adding a Second Oscillator and a Mixer
- •Adding a Second Oscillator Using Duplicate
- •Using Properties to Rename the Oscillator Macros
- •Adding a Mixer
- •Increasing the Number of Mixer Inputs
- •Adding Faders and Connecting them to the Mixer
- •Connecting the NotePitch Module to the ADSR Envelopes and Filter
- •Tidying Up in the Instrument Panel
- •Changing the Appearance of the Faders
- •Playing Your Synth and Making Changes to the Sound
- •Changing the Oscillators Waveform, Resetting the Filter and Output Level
- •Creating some Snapshots
- •Saving Your Work Using Save As
- •Make a Sampler Using REAKTOR Modules
- •Recap and Overview
- •What Kind of Sampler?
- •Building the Basic Structure
- •Load up a New Ensemble
- •Inserting the First Modules
- •Inserting the Envelope
- •Adding the Controls for the Envelope
- •Making the Connections
- •Connecting the Sampler to the 2 Audio Voice Combiners
- •Connecting the NotePitch and Gate Modules
- •Loading a Sample into the Sampler
- •Opening the Sample Map Editor from the View Menu
- •Adding a Sample to the Sample Map Editor
- •Tidying Up the Appearance and Moving the Modules
- •Moving Modules in the Structure
- •Deleting unwanted Modules
- •Using the Panel Lock Button to Move the Knobs
- •Adding More Samples and Changing their Settings
- •Changing the Settings of the Existing Sample
- •Adding More Samples
- •Sample Reverse and Other Playback Possibilities
- •Looping, and Direction Buttons
- •Transposing a Sample
- •Adding a Filter
- •Inserting the Filter Into the Structure
- •Creating the Filter Controls and Making the Connections
- •Tidying Up the Appearance in the Instrument Panel
- •Using Save Ensemble to Update Your Already Saved Sampler
- •Modifying the Existing Sampler
- •Inserting the Selector
- •Connecting the Filter Outputs
- •Increasing the Number of Selector Inputs
- •Adding the Position Fader and Changing its Range
- •Final connections and Panel Appearance
- •Explore Your Sampler and Make Some Snapshots
- •What’s Next?

Modifying a REAKTOR Ensemble
Connecting the Instrument to the Audio Out
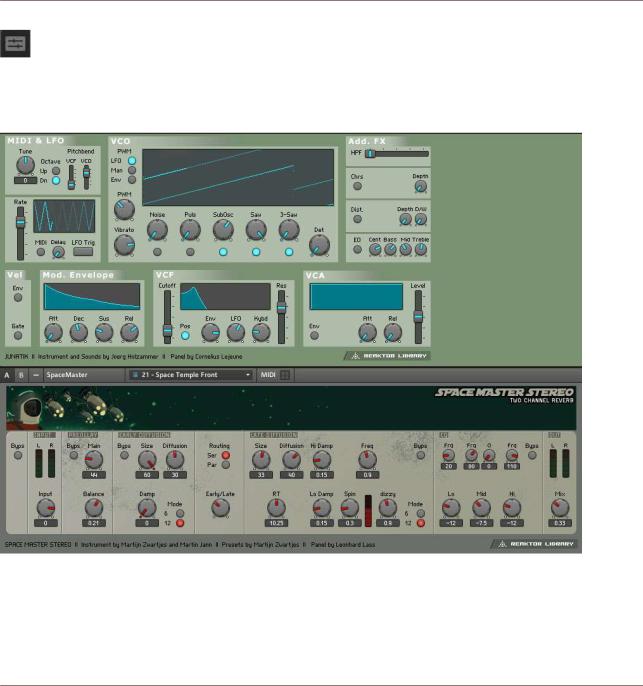
Fig. 4.20 SpaceMaster in Panel View
4.7Connecting the Instrument to the Audio Out
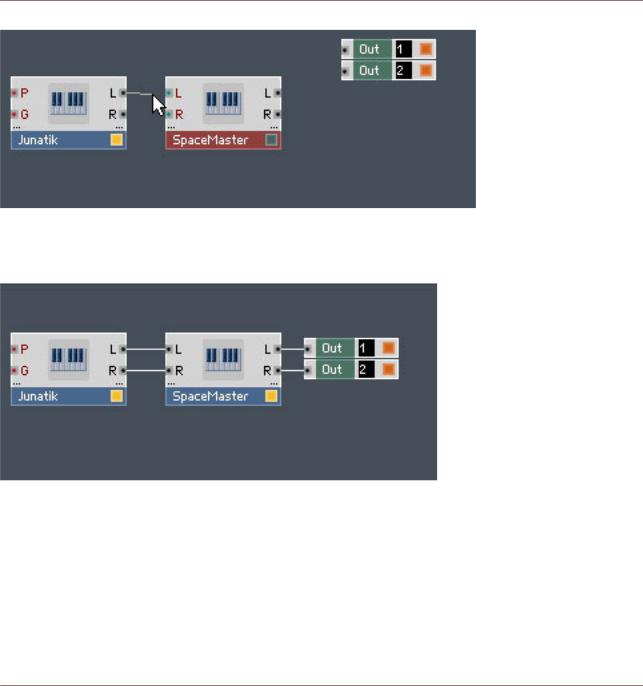
Now we need to connect the Junatik to the SpaceMaster Reverb and the Reverb to the Au dio Out Terminals.
4.7.1Making the Connections
1.Click and hold on the L Output (or the small dot beside it) of the Junatik Instrument, and then drag your mouse towards the L Input of the SpaceMaster. When you do this, you should see a wire being dragged by your mouse as your cursor turns into a pointed finger. When you reach the SpaceMaster L Input or the dot beside it, let go of your mouse button.
REAKTOR 5.5 - Getting Started Guide - 51

Modifying a REAKTOR Ensemble
Connecting the Instrument to the Audio Out
2.Repeat this with all the connections—including connecting the L and R Outputs from the SpaceMaster to the 1 and 2 Inputs of the Audio Out Terminals.
After having done that, it should look like this:
Fig. 4.21 SpaceMaster connected to Junatik and the Ouputs
Now we need to check how our two Instruments look in the Ensemble Panel.
4.7.2Resetting the Positions of Instruments in the Ensemble Panel
Now it is possible that the insertion procedure has placed the SpaceMaster Instrument above the Junatik Instrument in the Ensemble's Panel—if this has not happened, skip this bit. To change the position, all you have to do is:
1.Go to Panel View by pressing the Panel button in the Sidebar.
REAKTOR 5.5 - Getting Started Guide - 52

Modifying a REAKTOR Ensemble
Connecting the Instrument to the Audio Out
2.Select the SpaceMaster Panel by clicking on its name.
3.Then click and drag the Instrument so that it is below the Junatik, and then let go—it should snap into place. So the Junatik will back at the top!
Fig. 4.22 Junatik on top
REAKTOR 5.5 - Getting Started Guide - 53