

BRITTON Michael R - Drawing Hands
.pdfdrawing HANDS
Michael R. Britton
All rights reserved.
Drawing Hands
Michael R. Britton
Tackling the hand has always intimidated artists all those fingers twisting and turning; knuckles and veins rippling; and then there is the thumb! Quite likely we either hide the hands, put them into pockets or simply scribble them and hope that no one will notice.
This handout distills the hand to its most basic components. If we think of the hand as a collection of rectangles much like blocks of wood the obstacles of drawing the hand are quickly eliminated. Onto these blocks of wood we will add the muscles, tendons and knuckles and, voila, we will have a well resolved hand.
First, we have to overcome our symbolic preconception of what the hand looks like. A common error in drawing the hand is the banana finger syndrome. These are fingers lacking any structure
no bones, no knuckles, no muscles. Hence such hands are caricatures.
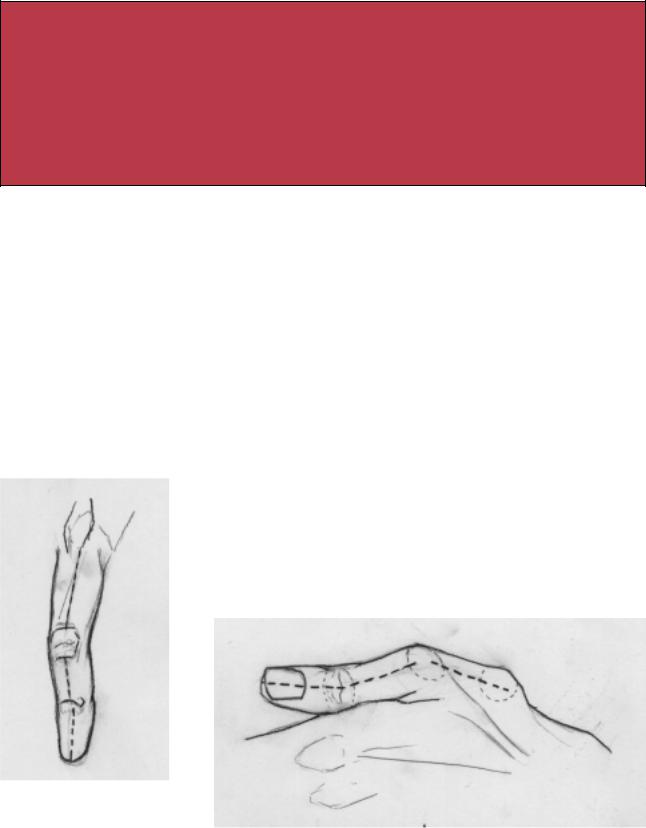
Note the finger; it is seldom straight. The finger bends and changes direction at each knuckled intersection. It is also drawn with straight lines. The proportions of the finger knuckles are always ½ from the larger knuckle to the finger tip.
The thumb is separate and opposite from the fingers. It enjoys a far greater range of movement than the fingers; it can cross the entire palm or extend outwards. The thumb is also critical in picking up things or holding a pencil. Take special note of the ball of the thumb, this is the anchor point from which the thumb is developed.
Page 1
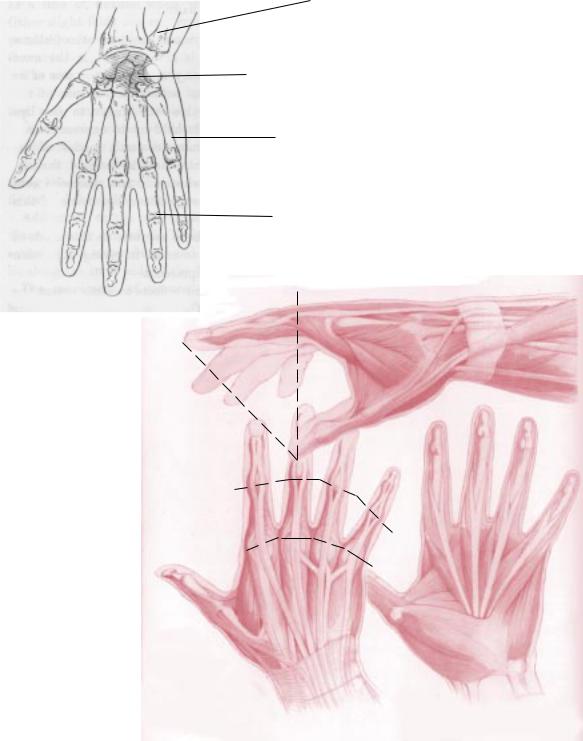
The Anatomy of the Hand
Ulna
 Radius
Carpus
Metacarpus
Phalanges
The hand is an architectural marvel. Every element of the hand has a distinct relationship
to every other element. In this side view, the thumb (distal phalanx) plumbs with the knuckle.
The knuckles are aligned in a curve.
Back of Hand |
Palm View |
Page 2

The Hand (Back view)
The extensor tendons are distributed over the back of the hand. Those to the thumb and little finger remain separate.
1.Extensor communis digitorum
2.Abductor minimi digiti
3.Dorsal interosseous
4.Adductor pollicis
5.Extensor carpi ulnaris
6.Extensor minimi digiti
7.Extensor longus pollicis
8.Extensor brevis pollicis
9.Extensor ossis metacarpi pollicis
1. Extensor carpi ulnaris
2. Extensor communis digitorum
3. Extensor ossis metacarpi pollicis
4. Extensor brevis pollicis
5. Extensor carpi radialis bevior
6. Extensor carpi radialis longior
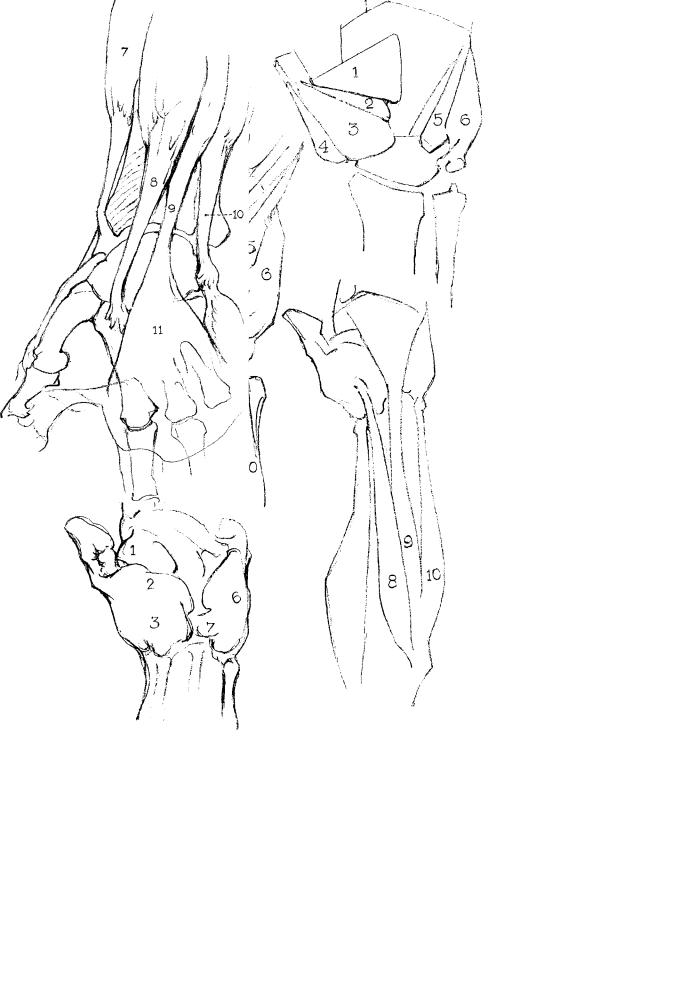
The Hand (Palmer view)
1.Adductor transversus pollicis
2.Flexor brevis pollicis
3.Abductor pollicis
4.Opponens pollicis
5.Flexor brevis minimi digiti
6.Abductor minimi digiti
7.Annular ligament
8.Flexor carpi radialis
9.Palmaris longus
10.Flexor carpi ulnaris
7.Supinator longus
8.Flexor carpi radialis
9.Tendon of the palmaris longus
10.Flexor carpi ulnaris
11.Palmar fascia

Block in the metacarpus as if it was a rectangular piece of wood. In drawing we must simplify elements to the extreme.
The problem of foreshortening is easily solved by imagining things as cubes and rectangles in perspective.
Do not get trapped in details!
Look for the underlying geometric forms
Page 3

The metacarpus is cupped. It does not naturally lay flat. Try flattening your palm on a table. It takes considerable effort.
Note how the finger joints relate to each other.
The metacarpal bones radiate out from the carpus to form the primary knuckles.
Page 4

From the initial rectangle, visualize the hand as a series of flat planes. This exercise helps you to focus on the way light falls on the hand, and
creates a crude, but surprisingly convincing, illusion of three dimensions.
Extreme Foreshortening
Breaking down the forms to rectangular boxes in perspective and plumbing makes extreme foreshortening a much easier task.
Page 5
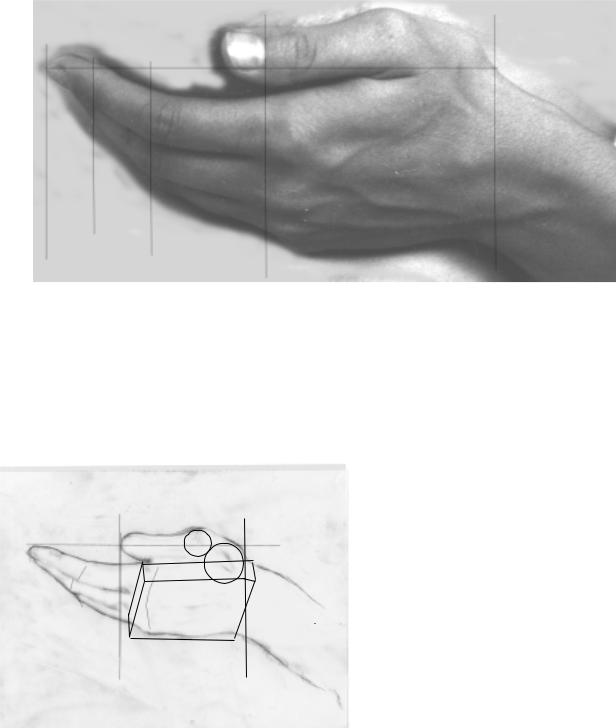
Basic Proportions of theHand
1/2
1/2 1/2
The knuckles are approximately half-way from the carpus to the finger tips. The first set of finger joints are half-way from the knuckles to the finger tips. The second set of finger joints are half-way from the first set of finger joints to the finger tips.
Beginning to draw the hand
First you have to establish the size of the hand. Mark the heel and the finger tips. Indicate the width of the hand relative to the length. Next indicate the arc of the knuckles, then the finger joints.
As you sketch in the gestural arabesque bear in mind the underlying geometry.
Page 6

Block in the big dark. At this stage you should keep the big dark just one value. Don’t worry about the light darks, dark darks, etc.
After blocking in, plumb and grid the relationships of the knuckles and finger joints. Develop the metacarpals from the wrist. From there the individual fingers are developed.
Now that the underlying structure is set, model the big lights with a kneaded eraser. Now the arabesque can be refined and corrections made. Drawing is like building a house; don’t move in the furniture before you’ve poured the cement for the foundation!
The veins of the hand appear midway in the metacarpus and dive in between the knuckles. Look closely at your sitter’s hands. There is often a ‘V’ or vein trunk just before the first and second knuckle.
Page 7