

BRITTON Michael R - Drawing Skulls Part 2
.pdfDrawing
Skulls Part 2
March 2005
Michael R. Britton
Drawing from life is always better. Especially for learning. Copying from a photograph is fraught with peril. Foremost is that you are working from a two-dimensional reference. The other problem with drawing from a photograph is that the camera ‘s eye and the artist’s eye ‘see’ things differently. The camera’s singular eye distorts and flattens, yet curiously when we look at photographs we accept them as being accurate and true to life. The essayist John Berger writes about this phenomenom indepth in his book ‘About Looking’. Yet when a photograph is copied exactly and the resultant drawing viewed separately without the photograph present the distortions are readily apparent.
But there are problems, too, inherent in drawing from life. These problems are mostly within our mind’s eye. When we look at an object what we ‘see’ can dramatically conflict with what we believe we are ‘seeing’.
1-800-427-2468
© All rights reserved.
Many times we simply refuse to believe that what we have just ‘sighted and measured’ is true. Even after many years of drawing and painting I still experience this phenomenom – but I have learned to ‘give it a go’. That is, I may believe that a certain measure just cannot be. ‘It’s illogical,’ my left-brain will be shouting. But I have to override my misgivings and always, always that weird measure proves to be the true one.
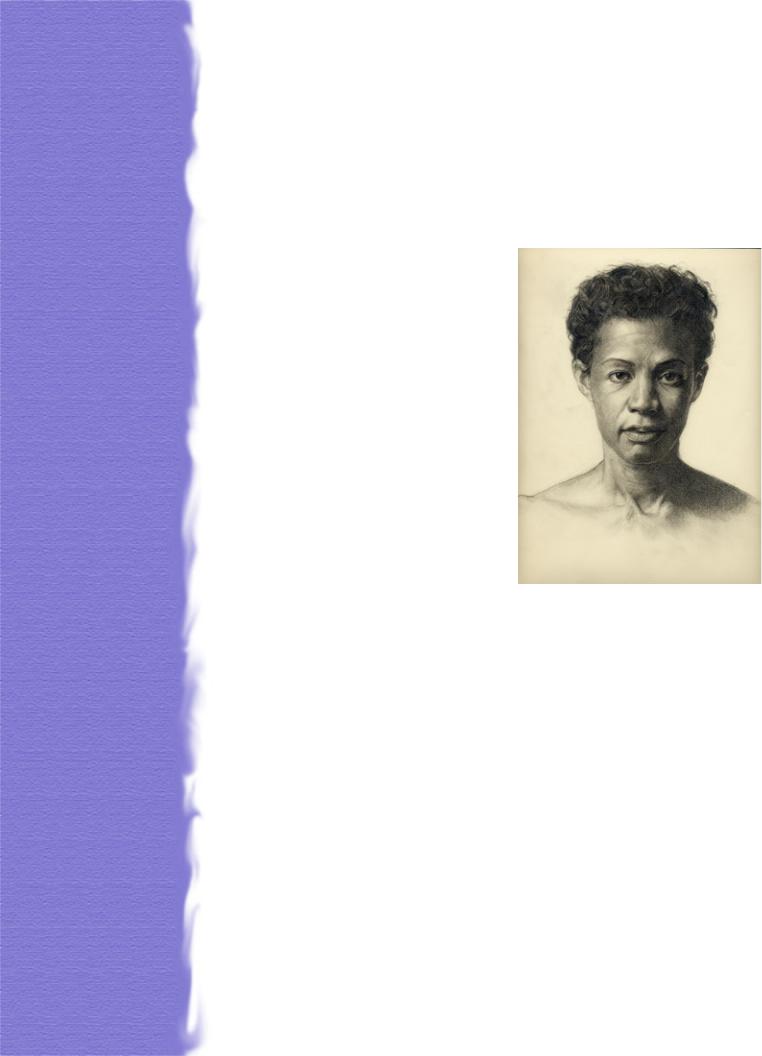
A case in point is this graphite drawing of mine. I had the devil of a time correctly placing her eyes. I kept insisting on placing them too high. The reason for my doing so was that, for some reason, I could not believe how short the distance was from the top of her alae nasi (wings of her nose) to the medial canthus (the inside corner of her eyes). The root of this problem
is my inherent symbolic preconception of where the eyes should be. And this issue of symbolic preconceptions is a major factor is drawing difficulties.
Curiously, the placement of the sternal notch at the base of the neck caused little problems. Probably because this model’s sternal notch was dramatically off-center. That is the way she is. A question to pose
is whether one should ‘correct’ the model’s flaws. That is a matter of aesthetics that you need to determine for yourself. I prefer the ‘flaws’. They give a more human quality to the work.
There is a third element to ‘seeing’. Master artists, in particular, the great Masters, often deliberately distort the proportions and gestural movements in their drawings and paintings. A better term to use rather than ‘distortion’ is ‘dynamic construction’. The finest artists employ dynamic construction to effect a poetic sense to their work through an undulating rhythm of line and tone. Although their drawings look to be out of proportion they are deliberately stretched and pulled.

This is a study by the French master J.A.D. Ingres, Study for the Princesse de Broglie, 1853. It is pencil on paper measuring 11 3/4 x 6 1/2”. The figure is deliberately distorted placing much emphasis on the standing hip.
The British painter Stanley Spencer dynamically constructs an exceedingly delicate and poetic tone in this 1931 portrait drawing of his wife Hilda. The whereabouts of this exquisite drawing is unknown. It may have perished in the London blitz of World War II or may be stored and forgotten in an attic.
There is a difference between drawings that are dynamically constructed and those that are merely poorly proportioned. Dynamically constructed drawings possess a rhythmic power that fully engages the viewer.
The first step is to acquire the skills to draw realistically. Once one has attained these skills then the greater issues of art-making can be explored. The rewards are immense. Technical virtuousity alone does not produce effective art. On the other hand, not having the requisite technical skills severely limits an artist’s growth.
How then does one begin to study portrait drawing? Using the methods of skill development that I teach in the Mastering Portrait Drawing DVD Workshop your best solution is to work from the skull. The skull plays a major role in determining the likeness of your sitters. The muscles of the face are thin and stretched over the skeletal structures. And, importantly, too, you are working from life, not a flat, two-dimensional photograph.
I am not dismissing the practice of working from photographs – they are an invaluable resource. Artists as diverse as Ingres, Degas, Eakins, Sargent, etc. have worked extensively from photographs. I will discuss
the manifold possibilities of working from photographs in a later newsletter.
Drawing the Skull – Part 2
This is the second part of Drawing the Skull. If you did not receive Part 1, click here to download it.
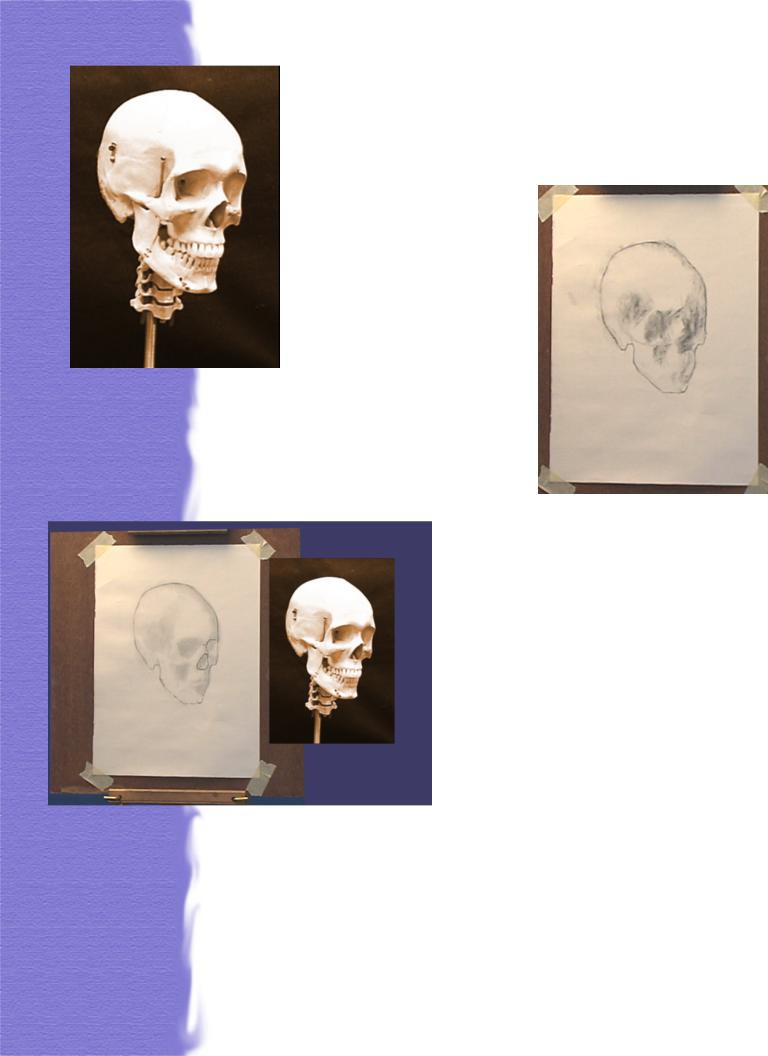
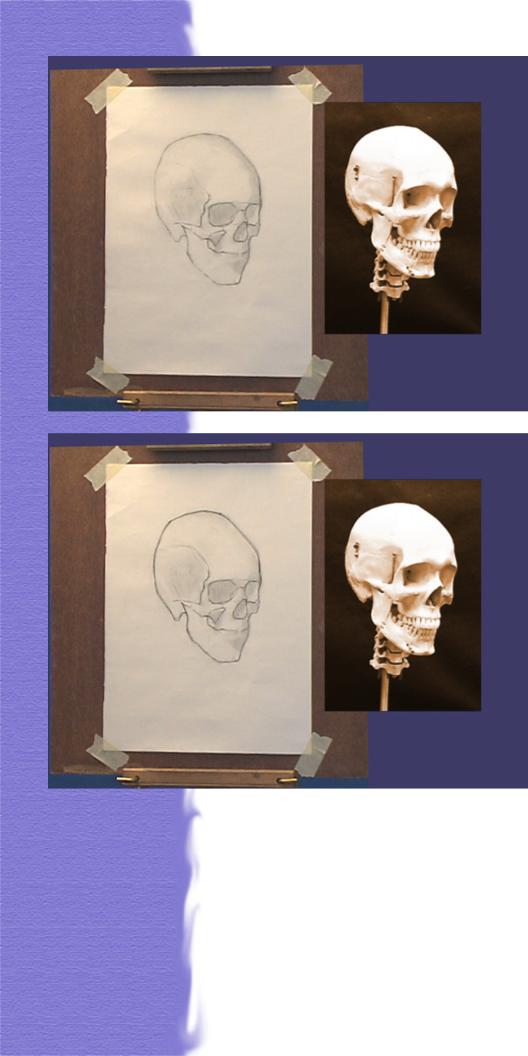
Not a pretty picture.
This is what I call the ‘ugly duckling’ phase. Using a small 1/2” piece of vine charcoal I roughly blocked-in the primary dark values. The primary darks are best seen and simplified by squinting down and looking through your eyelashes as if you were looking into the sun.
The vine charcoal is easily smudged down and worked with both my index and little fingers to better resolve the initial tone.
A kneaded eraser is used to clean-up and paint out the lights. This gives me a better idea of how to place the features.
The first feature to be placed is the Nasal Aperture. (The base of the nose was established earlier in Part 1.) The small, ledgelike protuberance at the base of the nose is called the Anterior Nasal Spine.
From the Anterior Nasal Spine you need to take you best guess at where the apex of the Nasal Aperture is. The brow ridge has already been established, therefore, your best solution is to ‘feel’ your way down from the brow ridge through the length of the bilateral nasal bones. This is drawing with a tactile sensibility – feeling your way along the shortest distance of a form to succinctly place an element. This skill takes time and diligence to acquire. And, yes, this is taught in the Mastering Portrait Drawing DVD Workshop.
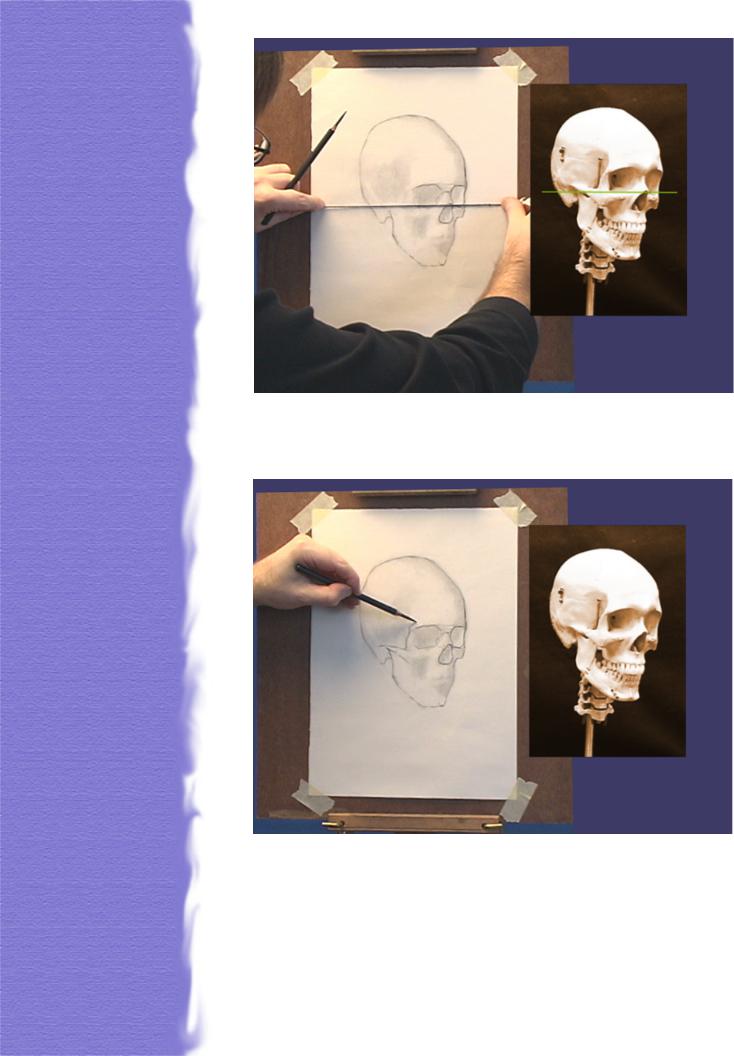
Using my plumb line I can now verify the horizontal relationship of the nasal aperture’s apex to the condyle. On the skull they are aligned. So, too, should they be aligned on my drawing.
Now the zygomatic arch, external orbital apophysis and eye socket can be sketched in. Again, you want to draw with a tactile sensibility ‘feeling’ your way across the form. An excellent way to develop your tactile sense of form is to close your eyes and run you fingers lightly over the skeletal features. Uttering the anatomical terms as you ‘feel’ them, like a Buddhist mantra, will train your sub-conscious mind. This training will be reflected in your drawing.
Once the initial structures are correctly placed and proportioned everything, well, almost everything, else will fall into place. Just like a jig-saw puzzle, it is simply a matter of fitting in the pieces. What I’ve done here
is fit in the zygomatic process
(the frontal part of the cheek bone) and my first placing of the alveolar process (gum line will suffice) and maxilla.
It is never a good idea to remain focused on just one element. Discipline yourself to stop and move onto something else. Everything should develop equally. You do not want to find yourself in the position of having drawn the finest ear, for example, in the history of art, but finding that it is too large and in the wrong place!
At this juncture I’ve added the superior temporal line that runs along the upper side of the skull and have corrected the arabesque.
Now comes the matter of the teeth and the lower jaw. Drawing teeth require some discussion and are best focused on separately. The April issue of the Drawing Newsletter will feature the teeth.