

Build The Ultimate Custom PC (2005)
.pdfChapter 17 — Final Tweaks and Installing Windows XP 299
To create a partition on the empty space, press C or press Enter. (In this example, we will press Enter.)
There is a difference between the two options. At this stage if you press Enter, then all the drive space will be used for the partition, whereas pressing C allows you to choose the size of this partition; for example, if you wanted to turn a single disk into two or more logical drives (see Figures 17-8 and 17-9). To simplify the process, you are going to use the whole of the drive for the partition, so you can simply press Enter.
FIGURE 17-8: Option presented when pressing Enter.
FIGURE 17-9: Options presented when pressing C.

300 Part III — Starting and Testing Your PC
Eagle-eyed readers may have noticed that we only have a small drive listed — this is because in order to get screenshots for this book we have to install Windows XP into a virtual PC using software known as VMware Workstation that enables you to create a number of virtual PCs within one single physical PC. (For more details on virtual computing with VMware visit www.vmware.com.)
Notice how our new partition is now displayed as C: (see Figure 17-10). This will become the main system C drive on the final PC.
FIGURE 17-10: New partition labeled as C drive.
4.The space is currently RAW, which means that it’s not been formatted — that stage comes next. Press Enter to continue or Esc to make changes.
5.Next are the formatting options (see Figure 17-11). There are four to choose from:
■Quick format using the NTFS file system
■Quick format using the FAT file system
■Standard format using the NTFS file system
■Standard format using the FAT file system
It is recommended that you choose the option to carry out a standard format using the NTFS (New Technology File System) file system. The NTFS file system offers you far greater robustness and protection from data errors than FAT (File Allocation Table), and by carrying out a full format you will be get to check the disk’s data surface for errors, which is always a good idea with new drives. You are free to choose FAT as a file system

Chapter 17 — Final Tweaks and Installing Windows XP 301
for your PC, but unless you know of a specific reason why you really need it, you probably don’t need it!
FIGURE 17-11: Formatting options.
The drive will now be formatted — if you have a big drive don’t be surprised if this takes some time. See Figure 17-12.
FIGURE 17-12: Formatting in progress.

302 Part III — Starting and Testing Your PC
6.After this, the Setup Wizard will check for the necessary disk space in order to install Windows XP and then begin copying system files from the CD to the hard drive. See Figure 17-13.
FIGURE 17-13: Setup checking for adequate disk space.
7.After this the Setup Wizard will create a list of files to be copied to the hard drive and then begin the copy process. See Figures 17-14 and 17-15.
FIGURE 17-14: Creating a list of files to be copied during installation.

Chapter 17 — Final Tweaks and Installing Windows XP 303
FIGURE 17-15: Copying files.
This process will take quite some time. (See Figures 17-16 and 17-17.) You might want to take a break away from the keyboard and maybe get a cup of coffee or take a short walk.
FIGURE 17-16: File copy process is a long operation.

304 Part III — Starting and Testing Your PC
FIGURE 17-17: Initializing installation.
After the install process, the PC will reboot and the process will continue from a graphical interface (see Figure 17-18).
FIGURE 17-18: Automatic reboot after file copy.

Chapter 17 — Final Tweaks and Installing Windows XP 305
Second Stage of the Installation
Your PC should now begin to look a bit familiar to regular Windows users. The next splash screen looks a lot like the regular Windows XP startup screen (see Figure 17-19).
FIGURE 17-19: Splash screen.
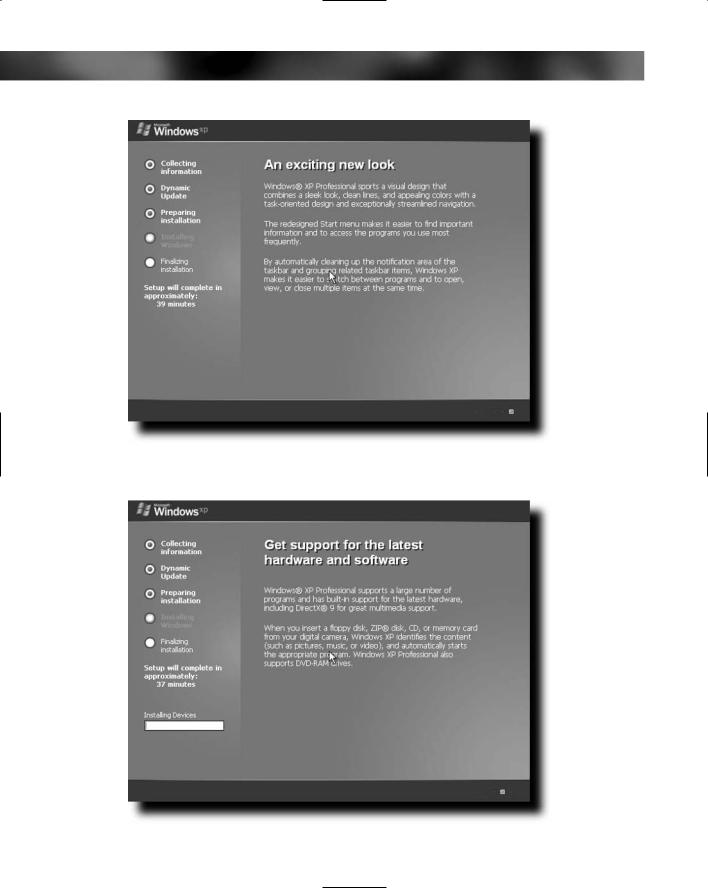
The next stage of the installation will feature what’s known as the taster screens (see Figure 17-20). These screens contain information about Windows XP that newcomers might be interested in. If you’ve never installed Windows XP on a PC before you won’t have seen these screens, so you might want to watch and read.
While this is going on, Windows will do a number of things in the background such as installing drivers for devices (see Figure 17-21).
Also, at this point you should notice that you have a working pointer, as shown in Figure 17-22!
306 Part III — Starting and Testing Your PC
FIGURE 17-20: Taster screen on the right — here telling you about the exciting new Windows look.
FIGURE 17-21: Setup continues is graphical mode.

Chapter 17 — Final Tweaks and Installing Windows XP 307
FIGURE 17-22: A working pointer will come in handy soon!
At the left side of the Installation Wizard, you will be given a time estimate of how long the installation will take. If you have built a PC of reasonable specification, then this will be an overestimate of how long the process will take!
Entering Information
Don’t go too far away from the PC at this stage of the installation, though. This process does require some input on your part!
1.The first such input is to choose the regional and language options (see Figure 17-23).
The default is to set the language to English (United States), the location to the United States, and the keyboard to the U.S. keyboard layout. If you are in the United States, great, if not, click on Customize... and Details... to change these settings. See Figures 17-24 and 17-25. Click Next to proceed with the installation.
2.In the Personalize Your Software screen, enter your name and company name (if applicable), and click Next when you are done. See Figure 17-26.

308 Part III — Starting and Testing Your PC
FIGURE 17-23: Regional settings.
FIGURE 17-24: Customizing options.