

Cisco Secure VPN Exam Certification Guide - Cisco press
.pdf448 Chapter 10: Cisco VPN 3000 LAN-to-LAN with Preshared Keys
15 What three key sizes may be used with DSA when installing certificates using SCEP?
The answers to this quiz are listed in Appendix A, “Answers to the “Do I Know This Already?” Quizzes and Q&A Sections.” The suggestions for your next steps, based on quiz results, are as follows:
•1 on any quizlet—Review the appropriate sections of the “Foundation Topics” section of this chapter, based on Table 10-1. Then proceed to the “Foundation Summary” section, the “Q&A” section, and then the scenarios at the end of the chapter.
•9 or less overall score—Read the entire chapter, including the “Foundation Topics” and “Foundation Summary” sections, the “Q&A” section, and the scenarios at the end of the chapter.
•10–12 overall score—Begin with the “Foundation Summary” section, continue with the “Q&A” section, and then the scenarios. If you have difficulty with a particular subject area, read the appropriate part in the “Foundation Topics” section.
•13–15 overall score—If you feel you need more review on these topics, go to the “Foundation Summary” section, the “Q&A” section, and then the scenarios. Otherwise, skip this chapter and go to the next chapter.

LAN-to-LAN Configuration 449
Foundation Topics
Overview of LAN-to-LAN VPN
41 Cisco VPN 3000 IPSec LAN-to-LAN
A LAN-to-LAN VPN is where two separate LANs are connected with a secure tunnel. This tunnel can use PPTP, L2TP, or IPSec. The purpose of the LAN-to-LAN VPN is to connect the two networks together seamlessly without compromising the integrity, authenticity, and confidentiality of the data. You can establish a LAN-to-LAN VPN through any combination of VPN Concentrators, routers, or firewalls.
LAN-to-LAN connections are designed to make each of the affected networks appear to be directly connected despite their physical distance from each other. Although this connection may travel through the Internet or a nontrusted network, you are assured of security because of the use of encryption on all packets traveling between these networks. The following section deals with the mechanics of configuring a LAN-to-LAN connection.
LAN-to-LAN Configuration
42 LAN-to-LAN configuration
The LAN-to-LAN Wizard is an automated process that simplifies the task of connecting disparate LANs. However, to use the LAN-to-LAN Wizard, you must first have network lists configured. The following section provides the steps necessary to configure network lists before using the LAN-to-LAN Wizard.
Configuring Network Lists
Generating network lists allows you to specify what traffic should be encrypted. The first task is to set the default gateway and the default tunnel gateway. In the example shown in Figure 10-2, the public interface is set to 192.168.1.2/24. The private interface is set to 172.16.1.2. Nontunneled traffic will use the default gateway at 192.168.1.1. However, because you have checked the Override Default Gateway option, whenever you are using a tunnel, this will be your default gateway.

LAN-to-LAN Configuration 451
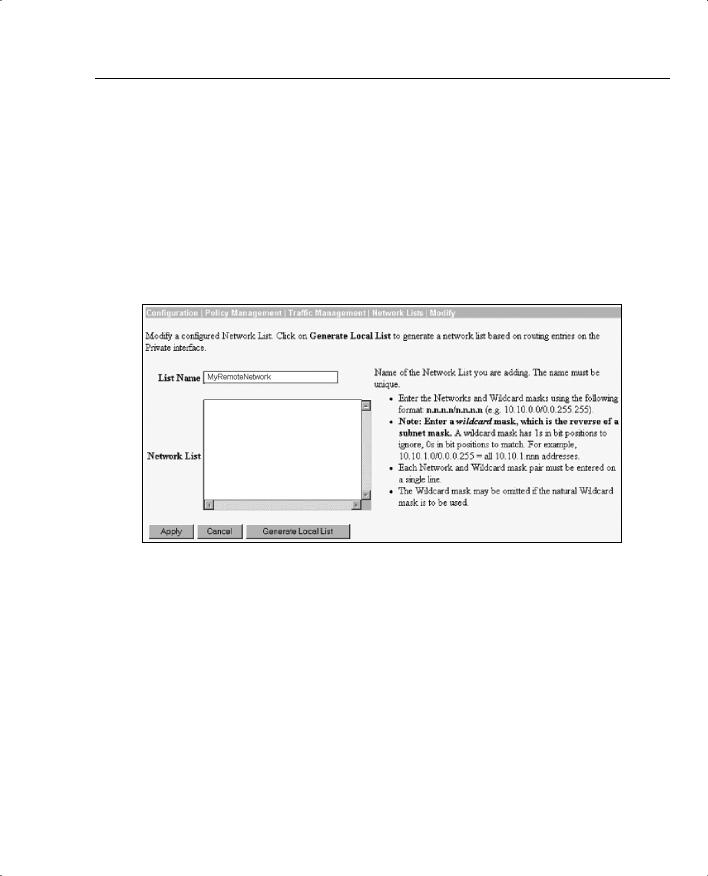
If you chose to modify an existing list, you will be taken to the Configuration | Policy Management | Traffic Management | Network Lists | Modify screen, as shown in Figure 10-4. Click a blank line within the Network List box. Next, enter the subnet and the wildcard mask in the following format: 192.168.1.0/0.0.0.255. The wildcard mask can be omitted if you want to use the default wildcard mask. Remember that a wildcard mask is different than a subnet mask. Enter as many networks as needed. Clicking the Generate Local List button on the bottom will create a list of all of the routing entries associated to the private interface. Make sure that you have at least two lists: one for the local networks and another for the remote networks.
Figure 10-4 Configuration | Policy Management | Traffic Management | Network Lists | Modify
Network lists must be reflexive on opposite sides of the VPN connection. The networks listed as being “inside” on one concentrator should reflect those listed as “outside” on the other concentrator. Should a specific network be unreachable through a VPN connection, one of the first items to check is that the network lists on both sides show the “missing” network.
Creating a Tunnel with the LAN-to-LAN Wizard
After you generate the network lists, you can use the LAN-to-LAN Wizard to create
your tunnel. Modifying, adding, or deleting LAN-to-LAN connections is done through the Configuration | System | Tunneling Protocols | IPSec LAN-to-LAN | Modify screen, shown in Figure 10-5. (Actually, you are taken to either the Modify or the Add screen depending on whether you are modifying or creating a new connection. Both screens are identical except for the title.) Here, name the connection with the unique name to_seattle. Then, choose
the interface, set the IP address of the peer, and choose to use preshared keys. You will send the entire certificate chain to the peer.

452 Chapter 10: Cisco VPN 3000 LAN-to-LAN with Preshared Keys
Figure 10-5 Configuration | System | Tunneling Protocols | IPSec LAN-to-LAN | Modify
Set the preshared key to mysharedkey. Choose to use ESP/MD5/HMAC-128 packet authorization and set the encryption to DES-56. Use IKE-DES-MD5 for the IKE Proposal field and choose None for the Routing field.
NOTE The Configuration | System | Tunneling Protocols | IPSec LAN-to-LAN | Modify screen is one of the most important screens within the VPN Concentrator configuration because you need to make so many choices.
If you are using Certificates of Authority, discussed in the sections, “SCEP Support Overview” and “Root Certificate Installation” later in this chapter, this screen is where you choose the digital certificate to use. This example uses preshared keys. However, clicking the list on the Digital Certificate field will show a list of existing certificates.
LAN-to-LAN Configuration 453
This screen is also where you choose whether to enable Network Auto discovery. Had you chosen Network Autodiscovery from the Network List drop-down menu, the system would have automatically generated a list of networks known by the remote peer. You still would see the bottom half of the screen, but any values within the bottom half would be ignored. Network Autodiscovery uses RIP to discover the networks attached to the Ethernet side of the concentrator. You must enable Inbound RIP RIPv2/v1 on the Ethernet interface on both concentrators. This is done on the Configuration | Interfaces screen.
The Configuration | System | Tunneling Protocols | IPSec LAN-to-LAN | Modify screen is also the “heart” of the connection process on the VPN Concentrator. You must access this screen any time a new connection is needed. You would do well to memorize the options on this screen.
On the bottom half of the screen, the local network list is shown, and then the remote network list is shown at the bottom. Alternatively, you could have used the IP address and wildcard mask for the local and remote connections. However, doing so means that only two single networks might be connected. If either side has more than a single network, the additional networks will not be reachable through this connection. Clicking the Apply button will bring you to a screen that verifies your configuration.
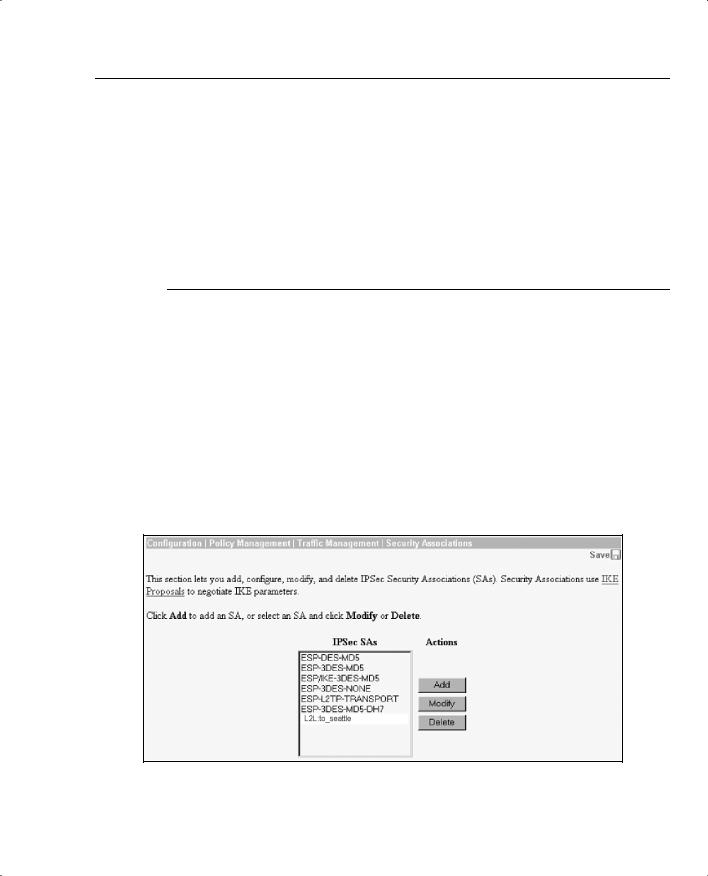
Using the menu system on the left, go to the Configuration | Policy Management | Traffic Management | Security Associations screen to see if you now have a new association. As shown in Figure 10-6, you should see the new association. This new association will appear at the bottom of the list. You can also use this screen to modify or delete an association.
Figure 10-6 Configuration | Policy Management | Traffic Management | Security Associations

454 Chapter 10: Cisco VPN 3000 LAN-to-LAN with Preshared Keys
SCEP Overview
43SCEP support overview
44Root certificate installation
45Identity certificate installation
Simple Certificate Enrollment Protocol (SCEP) is a protocol that eases your job as an administrator by enrolling devices with certificate authorities (CAs). The advantages of SCEP are that the job of the administrator are greatly simplified by removing much of the manual process previously required and added support for differing operating systems. Using SCEP enables the administrator to use certificates in much less time. Before you can understand SCEP, you first need to understand certificate management.
Certificate Management
Digital certificates are used for authentication. Certificates are a form of identification issued by a CA. The role of a CA is to be the trusted authority who authenticates the certificates by “signing” the certificate.
A CA certificate is used to sign other certificates. A certificate signed by itself is called a selfsigning or root certificate. When one certificate issues another, the issued certificate is referred to as a subordinate certificate.
A CA might also issue an identity certificate. Identity certificates are used on specific systems or hosts. An identity certificate authenticates that the device referred to by the certificate is actually a member of the specified group. VPN Concentrators require that at least one identity certificate and its associated root certificate is present before certificates are employed.
The VPN Concentrator accepts X.509 digital certificates, including SSL certificates, which are stored in an encrypted format in the flash memory.
The maximum number of certificates available on a concentrator varies based on the model and the type of certificate. Table 10-2 shows the maximum number of certificates allowed.

SCEP Overview 455
Table 10-2 Maximum Certificates
Model |
Certificate Limits |
|
|
3005 |
Total of 6 root or subordinate certificates. |
|
Total of 2 identity certificates. |
|
Only a single SSL can be installed. |
|
|
Other models |
Total of 20 root or subordinate certificates. |
|
Total of 20 identity certificates. |
|
Only a single SSL can be installed. |
|
|
SCEP automates a number of the steps necessary under the manual process of enrolling a CA. Instead of manually specifying a large number of parameters, such as company name and IP address, SCEP sends the certificate server this information automatically after reading the data from within the concentrator’s configuration.
SCEP can easily be used with the Cisco VPN Concentrators. SCEP allows administrators to easily obtain and maintain a CA. Since all CAs are sensitive to date and time, you should double-check that these are set correctly on both your server and your concentrator. NTP can be a valuable tool to overcome issues of disparate times and dates. IP connectivity is also required. Because filters and access lists can affect connections, ensure that the concentrator can communicate with the server before attempting to generate a certificate.
Root Certificate Installation via SCEP
Three steps must be accomplished to use any certificate, as follows:
Step 1 Enroll the VPN Concentrator with the CA.
Step 2 A certificate server issues and accepts an enrollment request.
Step 3 Configure the concentrator to use the certificate.
The following sections elaborate on each step.
Enrolling the Concentrator
The first step in generating a CA certificate via SCEP is to enroll the VPN Concentrator with a CA. If you want to use SCEP for enrolling identity or SSL certificates, the associated CA certificate must also be obtained by using SCEP.
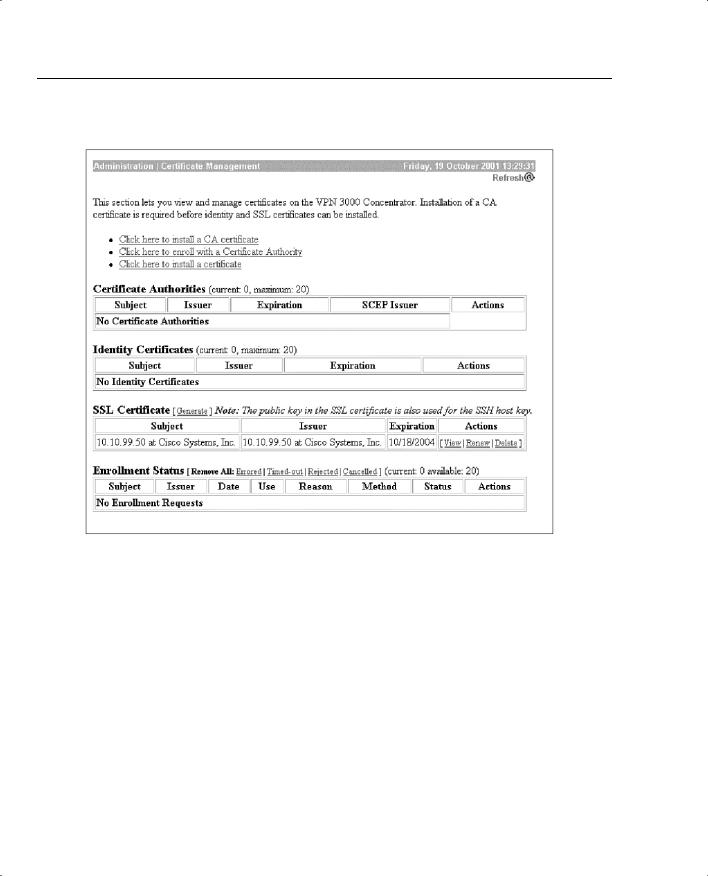
To install a certificate on a VPN Concentrator, start off on the Administration | Certificate Management screen, as shown in Figure 10-7. On this screen, choose Click here to install a CA certificate to start the process of generating a certificate.
SCEP Overview 457
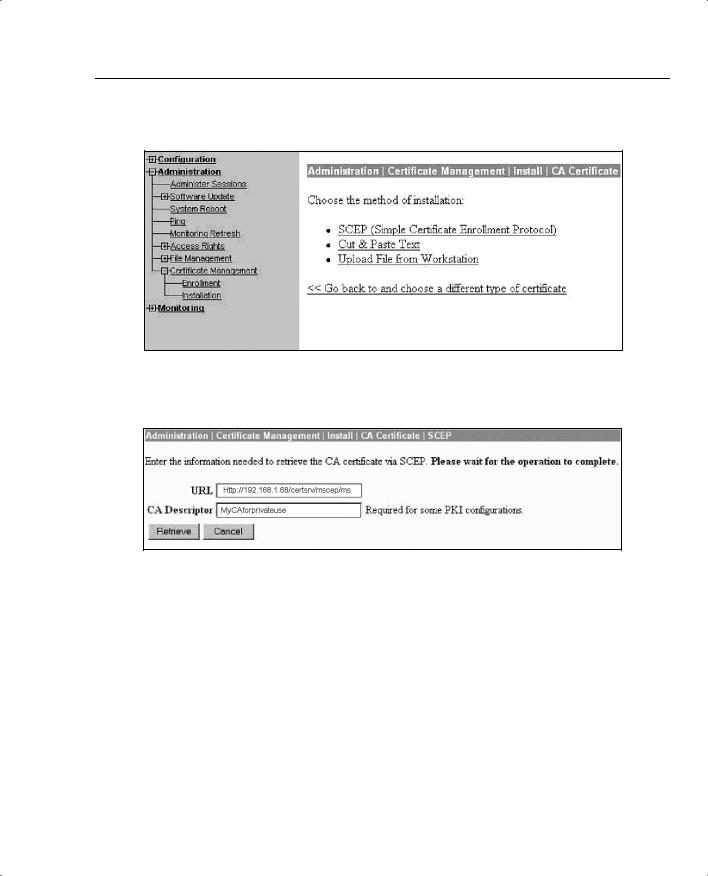
Figure 10-8 Administration | Certificate Management | Install | CA Certificate
Figure 10-9 Administration | Certificate Management | Install | CA Certificate | SCEP
On the Administration | Certificate Management | Install | CA Certificate | SCEP screen, you first enter the URL address of the machine containing the Dynamic Link Library (DLL) in order to retrieve the certificate. This URL might be either a website containing the DLL or a certificate server containing the DLL. The URL consists of the IP address, followed by the directory name and the name of the DLL itself. By default, the directory is named certsrv/mscep and the DLL is named mscep.dll. You must have the certsrv directory shared and have sufficient rights to access this directory.
Next, enter the name you want the certificate to be called. In this case, myCAforprivateuse is the certificate name. Click the Retrieve button to install the CA certificate on the VPN Concentrator. You are automatically transferred back to the Administration | Certificate Management screen.