

Embellishment
P eriod
embellishments include embroidery, braid or cord couched along the
lines of division and around the charges, spangles, beads and so on.
Figs 13 and 14 provide some examples. Details on the charges can be
drawn on with tailor’s chalk or vanishing (water or air soluble)
pen, and sewn over by hand or machine, or further embellished with
braid or cord. The ordinaries and fields can also be embellished.
eriod
embellishments include embroidery, braid or cord couched along the
lines of division and around the charges, spangles, beads and so on.
Figs 13 and 14 provide some examples. Details on the charges can be
drawn on with tailor’s chalk or vanishing (water or air soluble)
pen, and sewn over by hand or machine, or further embellished with
braid or cord. The ordinaries and fields can also be embellished.
Satouche braid can be sewn down by machine along the centre grove (sew with the threads, like this >>>). Fine cords can be machined using a zigzag stitch and invisible thread. Heavy cord is best sewn by hand. For a neat finish, take the ends of your cording or braid through to the back of the fabric. Poke a hole through the fabric using an awl. Push a threaded needle through the hole from underneath, loop over the end and pull the to the back. Fray the end to reduce bulk and sew down with a few stitches.
Fig 19 Pulling cord to back of fabric
A College tabard will normally be seen from a distance, so concentrate on those decorations which will give you the best impact for the least cost and effort. A Group tabard will get a lot more close court work, so your efforts will receive more scrutiny. If you are not sure, try out various options using scraps and see how they look close up and at a distance.
Assembly
Once your sections are complete, sew them together (if needed), to complete your outer layer.
N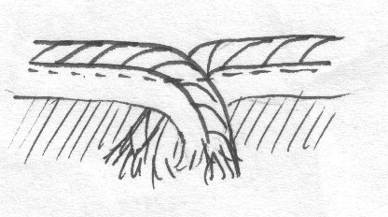 eck
eck
The neck will get a lot of wear, so a row of piping cord will add to both strength and appearance. Pin the piping (cord side in), with the stitching line 1.5cm from
the edge. Overlap at the centre back, taking both ends into the seamline for a neat finish. Sew the piping on and remove the pins.
Fig 20 Overlapping piping cord at back of neck
Fringe
Fringing adds an extra level of richness and pomp to a tabard. Pin it around the edge of the tabard, fluffy side in, with the stitching line 1.5cm from the edge. Take care at the corners – clip or fold as needed. Sew the fringe on and remove the pins.
Lining
L
Fig 21 Applying fringing – inside and outside corners

L
Fig 22 Clip corners before turning
After all your hard work, you might want to put a name tape in with a contact phone number/email address. Cleaning instructions are probably a useful precaution too, especially if it is a Group tabard.
Finally, press the whole thing and you are ready to take your next court or field job in style.