

C# ПІДРУЧНИКИ / c# / Sybex - VC#.NET.Programming
.pdfProvided that you are connected to a data source, the Data Link Properties dialog—which will be revisited in the next section—should allow you to choose a database server and database from drop-down lists of those available. Once you’ve completed the entries on the Provider and Connection tabs of this dialog and clicked OK, you’ll find the connection string corresponding to your entries in the underlying text file.
Adding Data Components
The Data components are found on the Data tab of the Toolbox.
To use a Data component, drag it from the Toolbox to a form. Like the other nonvisual components, Data components sit on the tray beneath the form.
Note Of course, if you prefer, you can also instantiate these components in code without using the visual interface provided by dragging and dropping.
Setting DataAdapter Properties
ADO.NET DataAdapter components (OleDbDataAdapter and SqlDataAdapter) each support four properties, which are Command objects of type OleDbCommand or SqlCommand, respectively, as shown in Table 12.6.
Table 12.6: Command-Object Properties of OleDbDataAdapter/SqlDataAdapter
Object |
|
Purpose |
|
|
|
SelectCommand |
|
Retrieves data from a database |
|
|
|
InsertCommand |
|
Inserts data into a database |
UpdateCommand
 Updates data in a database
DeleteCommand 
 Deletes data in a database
Datasets
A dataset is one or more tables of data. The data connectivity layer “pulls” data from a database and uses it to create a dataset. Items in the tables in the dataset are manipulated to perform the actions required by the program and, in some cases, are saved back to the database.
Although they’re very powerful, datasets are disconnected tables of data. This has great performance advantages, because processing can now be done on the client side without consuming database server resources. In some cases, however, you may need to be continuously connected to a database—in which case you will need to use the legacy ADO COM objects.
The first step toward creating a dataset is to add a DataAdapter component.
Adding a DataAdapter Component
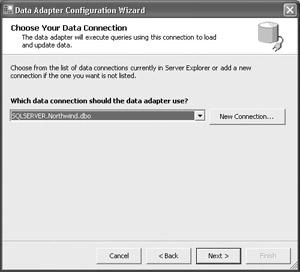
With a form open in its designer, add an SqlDataAdapter to the form by double-clicking the SqlDataAdapter component on the Data tab of the Toolbox. The Data Adapter Configuration Wizard will open; click Next to start the wizard. The second panel, shown in Figure 12.24, allows you to choose a data connection from the existing data connections or to create a new connection.
Figure 12.24: You can choose a data connection from the list of current data connections or create a new connection.
Creating a New Data Connection
To create a new connection, follow these steps:
1.Click the New Connection button in the Data Adapter Configuration Wizard. The Data Link Properties dialog will open, as shown in Figure 12.25, with the Connection tab active.
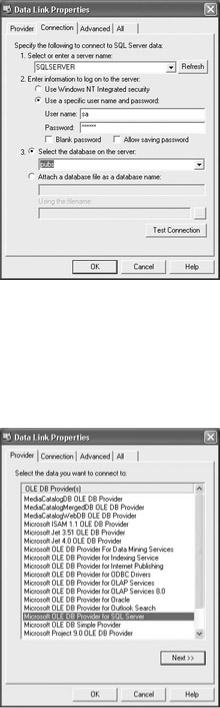
Figure 12.25: The Data Link Properties dialog allows you to create a new data connection.
2.The first step in using the Data Link Properties dialog is to select the OLE DB provider you want to use to connect to the data. Click the Provider tab and select your provider. Figure 12.26 shows the Provider tab with the Microsoft OLE DB Provider for SQL Server selected.
Figure 12.26: The Provider tab is used to select an OLE DB provider.
3.Click Next. The Connection tab will reopen. Use this tab to select the database you are connected to, either by typing in a database name or by browsing for it in a drop-down list. (In the case of a flat file Access connection, you can browse for the file using an Open file dialog.)
Note Depending on the provider you selected, the Connection tab is also used when a username and password are required for accessing a database server, to specify file types and connection strings, and to supply other information that may be required to successfully connect. For more information, see “Connection Strings” earlier in this chapter.
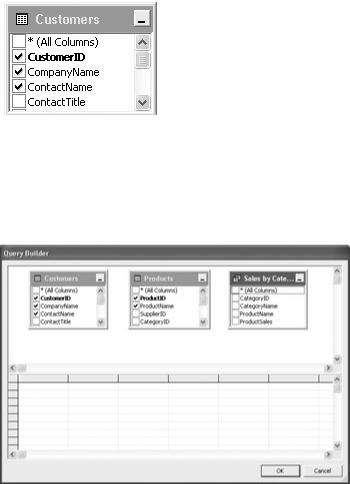
Note The primary key for the table is shown in bold in the Query Builder.
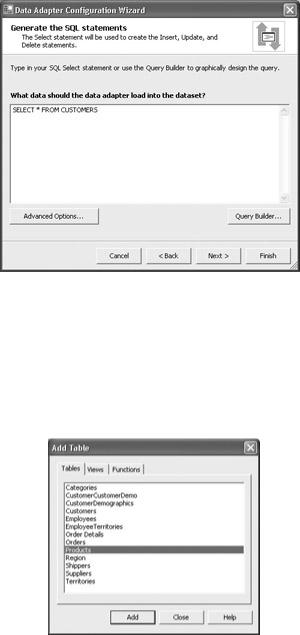
4.You can add multiple tables to your query by right-clicking in the upper pane and selecting Add Table from the context menu. In the new tables that you added, select the fields you would like to include, as shown in Figure 12.29.
Figure 12.29: Queries built in the Query Builder can include multiple tables.
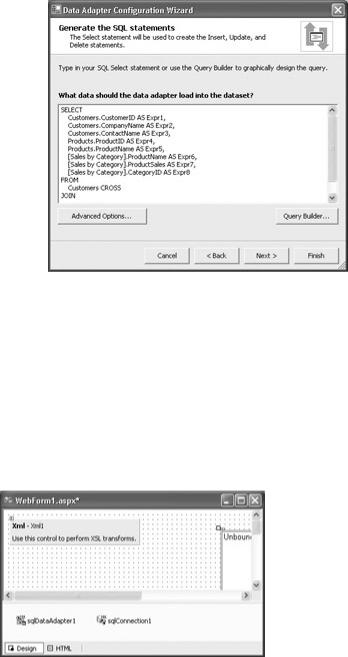
5.When you are satisfied with your query, click OK. The SQL statement will appear in the Data Adapter Configuration Wizard, as shown in Figure 12.30.
Note Figure 12.30 shows a relatively complex SELECT query. For the example that follows, I’ll use the simple query SELECT * FROM PRODUCTS.
6.
Figure 12.30: SQL generated by the Query Builder appears in the Data Adapter Configuration Wizard.
7.Click Next. The final panel of the wizard will list the tasks that the wizard has performed and give you warnings about anything left to do.
8.Click Finish. The wizard will complete its work.
Working with the Data Adapter
After you’ve added the DataAdapter component, you’ll notice that an SqlConnection component has been added to the tray beneath your form and synchronized with the SqlDataAdapter’s connection string.
Note If you need to reconfigure the DataAdapter, you can restart the wizard by right-clicking the SqlDataAdapter and selecting Configure Data Adapter.
Note that the properties of the SqlDataAdapter are accessible in the normal fashion in the Properties window. For example, if you’ve forgotten what your SQL query was (or wish to modify it), you can look at the CommandText property of the SqlDataAdapter’s SelectCommand.
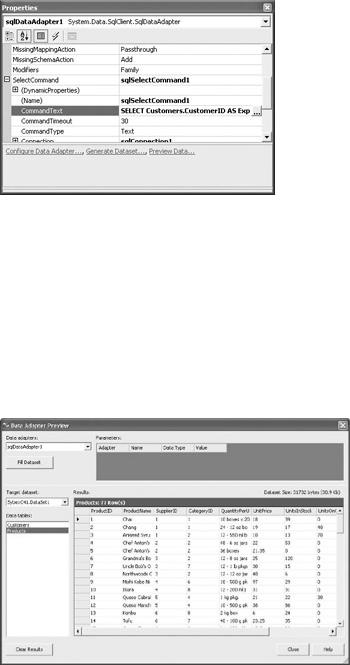
Note Clicking the button in the right column of the Properties window of the CommandText property opens the Query Builder interface.
Previewing the Dataset
Your next step will likely be to preview the dataset. To preview the dataset, choose Data →?Preview Data from the Visual Studio menus (or use the SqlDataAdapter’s context menu). The Data Adapter Preview dialog, shown in Figure 12.31, will open.
In this dialog, make sure that sqlDataAdapter1 is selected in the Data Adapters drop-down list. Next, click Fill Dataset. The Results panel will preview the dataset.
Figure 12.31: The Data Adapter Preview dialog allows you to preview the dataset.
Generating the Dataset
Finally, generate the dataset by selecting Data → Generate Dataset (or use the SqlDataAdapter’s context menu). The Generate Dataset dialog, shown in Figure 12.32, will open. Select New, and give the dataset a name (for example, DataSet1). Make sure the tables you want are selected. Also, make sure that the Add This Dataset to the Designer check box is checked. Click OK. The DataSet component will be added to the tray beneath your form
(so there are now three components on the tray).

Figure 12.32: The Generate Dataset dialog adds a DataSet component to your form.
You can also generate a dataset by adding a DataSet component from the Toolbox to your form.
Bingo! If you guessed that a DataSet is an XSD schema specifying the data elements that it represents as XML, you are exactly right. You can open the DataSet in its designer in the usual ways you’d suspect: for example, it appears as an .xsd file in Solution Explorer.
With the DataSet open as an XML schema in its designer, you can view it in tabular form or as "straight" XML (Figure 12.33).
Figure 12.33: A generated DataSet is an XSD schema.
Binding Controls to a Dataset
Now that we have our Data components in place, it’s time to do something with them. As a simple example, I’ll show you how to feed the ProductName and ProductID fields from the Northwind Products table into two ListBoxes. For this example, the query SELECT * FROM PRODUCTS was used to create the dataset.
Binding to a ListBox

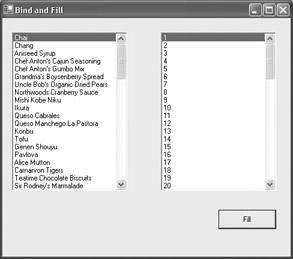
Figure 12.34: ListBoxes that have been connected to a DataSet can be set to display fields in a table.
Creating a Dataset in Code
Obviously, there is a great deal to the Visual Studio .NET data objects’ interfaces. This interface complexity being what it is, you will probably be pleasantly surprised to learn that you can easily build and use datasets and related data objects in code, without using the interface Microsoft provides. You may, in fact, find this a great deal simpler way to go about things.
As an example, let’s load the CompanyName data from the Northwind Customers table into a third ListBox.
Within the event procedure that will fill the ListBox, declare variables and assign them the connection string and SQL command:
string mySelectQuery = "SELECT * FROM Customers";
SqlConnection myConnection = new SqlConnection("data source=SQLSERVER;" + "initial catalog=Northwind;password=harold;user id=sa");
Next, instantiate the DataSet and set up the DataAdapter, using the connection string and SQL command:
DataSet theData = new DataSet();
SqlDataAdapter theAdapter = new SqlDataAdapter(mySelectQuery, myConnection);
Fill the DataSet using the DataAdapter:
theAdapter.Fill(theData, "Customers");
Load the ListBox as before:
listBox3.DataSource = theData.Tables["Customers"]; listBox3.DisplayMember = "CompanyName";
Note In this example, the DataSource property is set using the Tables collection of the DataSet.