

Visual CSharp 2005 Recipes (2006) [eng]
.pdf258 C H A P T E R 8 ■ G R A P H I C S, M U LT I M E D I A , A N D P R I N T I N G
Solution
Create a new instance of the System.Drawing.Text.InstalledFontCollection class, which contains a collection of FontFamily objects representing all the installed fonts.
How It Works
The InstalledFontCollection class allows you to retrieve information about currently installed fonts. It derives from the FontCollection class, which allows you to get a list of font families as a collection in the Families property.
The Code
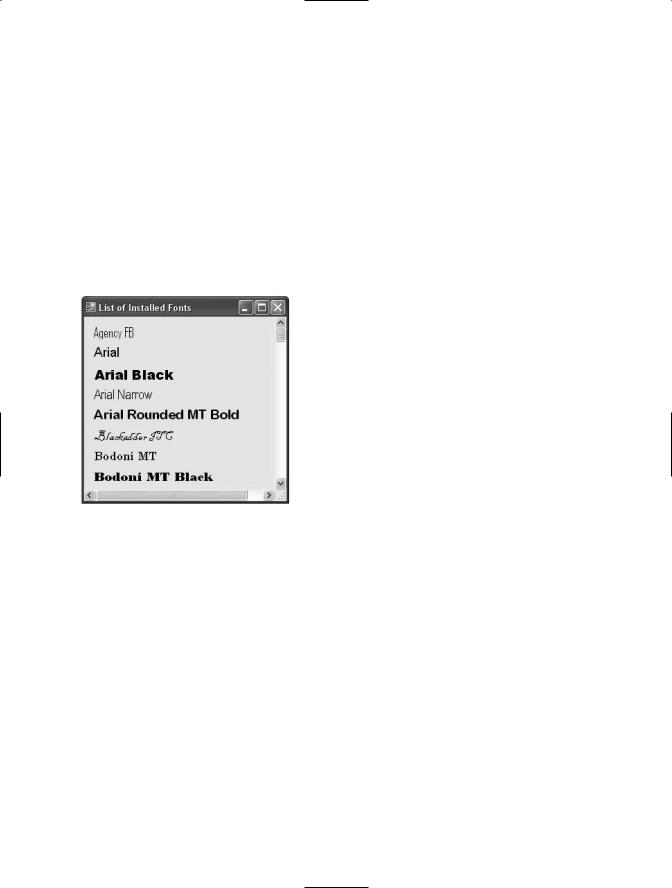
The following code shows a form that iterates through the font collection when it is first created. Every time it finds a font, it creates a new Label control that will display the font name in the given font face (at a size of 14 points). The Label is added to a Panel control named pnlFonts with AutoScroll set to true, allowing the user to scroll through the list of available fonts.
using System;
using System.Drawing; using System.Windows.Forms; using System.Drawing.Text;
namespace Apress.VisualCSharpRecipes.Chapter08
{
public partial class Recipe08_01: Form
{
public Recipe08_01()
{
InitializeComponent();
}
private void Recipe08_01_Load(object sender, EventArgs e)
{
// Create the font collection.
using (InstalledFontCollection fontFamilies = new InstalledFontCollection())
{
// Iterate through all font families. int offset = 10;
foreach (FontFamily family in fontFamilies.Families)
{
try
{
//Create a label that will display text in this font. Label fontLabel = new Label();
fontLabel.Text = family.Name; fontLabel.Font = new Font(family, 14); fontLabel.Left = 10;
fontLabel.Width = pnlFonts.Width; fontLabel.Top = offset;
//Add the label to a scrollable Panel. pnlFonts.Controls.Add(fontLabel); offset += 30;
}
C H A P T E R 8 ■ G R A P H I C S, M U LT I M E D I A , A N D P R I N T I N G |
259 |
catch
{
//An error will occur if the selected font does
//not support normal style (the default used when
//creating a Font object). This problem can be
//harmlessly ignored.
}
}
}
}
}
}
Figure 8-1 shows this simple test application.
Figure 8-1. A list of installed fonts
8-2. Perform Hit Testing with Shapes
Problem
You need to detect whether a user clicks inside a shape.
Solution
Test the point where the user clicked with methods such as Rectangle.Contains and Region.IsVisible
(in the System.Drawing namespace) or GraphicsPath.IsVisible (in the System.Drawing.Drawing2D namespace), depending on the type of shape.
How It Works
Often, if you use GDI+ to draw shapes on a form, you need to be able to determine when a user clicks inside a given shape. The .NET Framework provides three methods to help with this task:

260C H A P T E R 8 ■ G R A P H I C S, M U LT I M E D I A , A N D P R I N T I N G
•The Rectangle.Contains method, which takes a point and returns true if the point is inside a given rectangle. In many cases, you can retrieve a rectangle for another type of shape. For example, you can use Image.GetBounds to retrieve the invisible rectangle that represents the image boundaries. The Rectangle struct is a member of the System.Drawing namespace.
•The GraphicsPath.IsVisible method, which takes a point and returns true if the point is inside the area defined by a closed GraphicsPath. Because a GraphicsPath can contain multiple lines, shapes, and figures, this approach is useful if you want to test whether a point is contained inside a nonrectangular region. The GraphicsPath class is a member of the System.Drawing. Drawing2D namespace.
•The Region.IsVisible method, which takes a point and returns true if the point is inside the area defined by a Region. A Region, like the GraphicsPath, can represent a complex nonrectangular shape. Region is a member of the System.Drawing namespace.
The Code
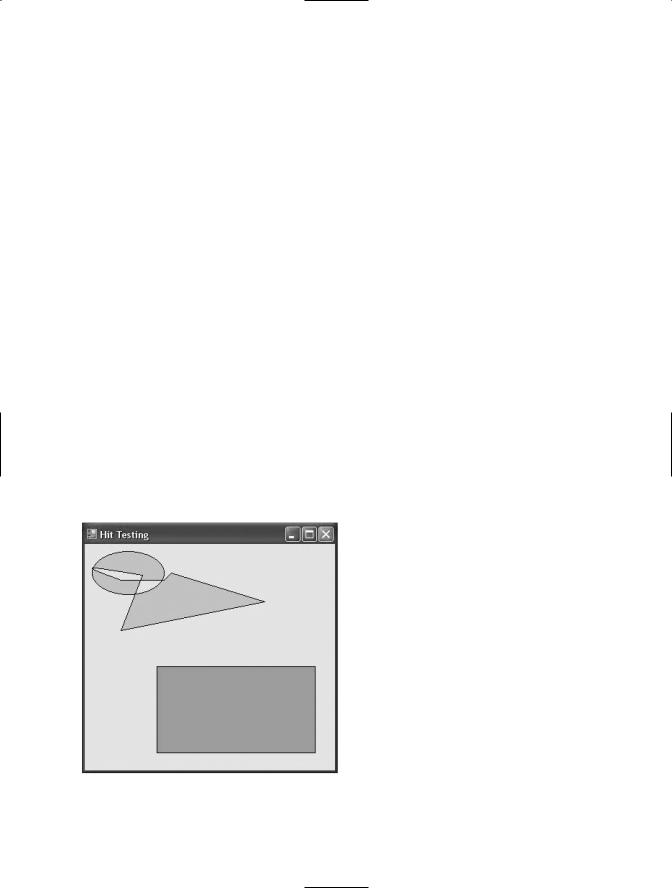
The following example shows a form that creates a Rectangle and a GraphicsPath. By default, these two shapes are given light-blue backgrounds. However, an event handler responds to the Form.MouseMove event, checks to see whether the mouse pointer is in one of these shapes, and updates the background to bright pink if the pointer is there.
Note that the highlighting operation takes place directly inside the MouseMove event handler. The painting is performed only if the current selection has changed. For simpler code, you could invalidate the entire form every time the mouse pointer moves in or out of a region and handle all the drawing in the Form.Paint event handler, but this would lead to more drawing and generate additional flicker as the entire form is repainted.
using System;
using System.Drawing; using System.Windows.Forms;
using System.Drawing.Drawing2D;
namespace Apress.VisualCSharpRecipes.Chapter08
{
public partial class Recipe08_02 : Form
{
//Define the shapes used on this form. private GraphicsPath path;
private Rectangle rectangle;
//Define the flags that track where the mouse pointer is. private bool inPath = false;
private bool inRectangle = false;
//Define the brushes used for painting the shapes.
Brush highlightBrush = Brushes.HotPink;
Brush defaultBrush = Brushes.LightBlue;
public Recipe08_02()
{
InitializeComponent();
}

C H A P T E R 8 ■ G R A P H I C S, M U LT I M E D I A , A N D P R I N T I N G |
261 |
private void Recipe08_02_Load(object sender, EventArgs e)
{
// Create the shapes that will be displayed. path = new GraphicsPath(); path.AddEllipse(10, 10, 100, 60); path.AddCurve(new Point[] {new Point(50, 50),
new Point(10,33), new Point(80,43)}); path.AddLine(50, 120, 250, 80); path.AddLine(120, 40, 110, 50); path.CloseFigure();
rectangle = new Rectangle(100, 170, 220, 120);
}
private void Recipe08_02_Paint(object sender, PaintEventArgs e)
{
Graphics g = e.Graphics;
// Paint the shapes according to the current selection. if (inPath)
{
g.FillPath(highlightBrush, path); g.FillRectangle(defaultBrush, rectangle);
}
else if (inRectangle)
{
g.FillRectangle(highlightBrush, rectangle); g.FillPath(defaultBrush, path);
}
else
{
g.FillPath(defaultBrush, path); g.FillRectangle(defaultBrush, rectangle);
}
g.DrawPath(Pens.Black, path); g.DrawRectangle(Pens.Black, rectangle);
}
private void Recipe08_02_MouseMove(object sender, MouseEventArgs e)
{
using (Graphics g = this.CreateGraphics())
{
// Perform hit testing with rectangle. if (rectangle.Contains(e.X, e.Y))
{
if (!inRectangle)
{
inRectangle = true;
// Highlight the rectangle. g.FillRectangle(highlightBrush, rectangle); g.DrawRectangle(Pens.Black, rectangle);
}
}
else if (inRectangle)
{
inRectangle = false;
262C H A P T E R 8 ■ G R A P H I C S, M U LT I M E D I A , A N D P R I N T I N G
//Restore the unhighlighted rectangle. g.FillRectangle(defaultBrush, rectangle); g.DrawRectangle(Pens.Black, rectangle);
}
// Perform hit testing with path. if (path.IsVisible(e.X, e.Y))
{
if (!inPath)
{
inPath = true;
// Highlight the path. g.FillPath(highlightBrush, path); g.DrawPath(Pens.Black, path);
}
}
else if (inPath)
{
inPath = false;
// Restore the unhighlighted path. g.FillPath(defaultBrush, path); g.DrawPath(Pens.Black, path);
}
}
}
}
}
Figure 8-2 shows the application in action.
Figure 8-2. Hit testing with a Rectangle and a GraphicsPath object

C H A P T E R 8 ■ G R A P H I C S, M U LT I M E D I A , A N D P R I N T I N G |
263 |
8-3. Create an Irregularly Shaped Control
Problem
You need to create a nonrectangular form or control.
Solution
Create a new System.Drawing.Region object that has the shape you want for the form, and assign it to the Form.Region or Control.Region property.
How It Works
To create a nonrectangular form or control, you first need to define the shape you want. The easiest approach is to use the System.Drawing.Drawing2D.GraphicsPath object, which can accommodate any combination of ellipses, rectangles, closed curves, and even strings. You can add shapes to a GraphicsPath instance using methods such as AddEllipse, AddRectangle, AddClosedCurve, and
AddString. Once you are finished defining the shape you want, you can create a Region object from this GraphicsPath—just submit the GraphicsPath in the Region class constructor. Finally, you can assign the Region to the Form.Region property or the Control.Region property.
The Code
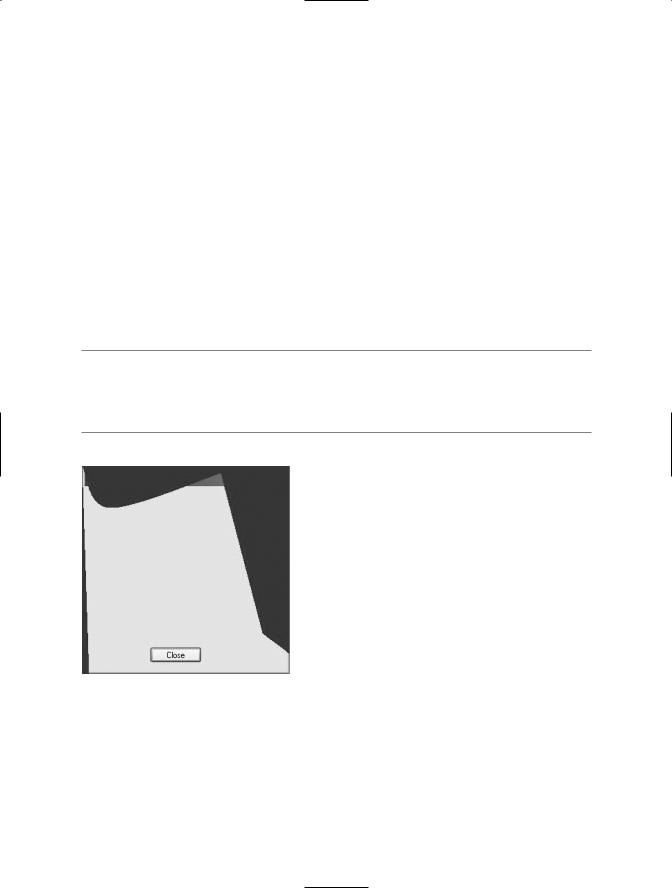
The following example creates an irregularly shaped form (shown in Figure 8-3) using two curves made of multiple points, which are converted into a closed figure using the GraphicsPath.CloseAllFigures method.
using System;
using System.Drawing; using System.Windows.Forms;
using System.Drawing.Drawing2D;
namespace Apress.VisualCSharpRecipes.Chapter08
{
public partial class Recipe08_03 : Form
{
public Recipe08_03()
{
InitializeComponent();
}
private void Recipe08_03_Load(object sender, EventArgs e)
{
GraphicsPath path = new GraphicsPath();
Point[] pointsA = new Point[]
{
new Point(0, 0), new Point(40, 60),
new Point(this.Width - 100, 10)
};
path.AddCurve(pointsA);
■

C H A P T E R 8 ■ G R A P H I C S, M U LT I M E D I A , A N D P R I N T I N G |
265 |
8-4. Create a Movable Sprite
Problem
You need to create a shape the user can manipulate on a form, perhaps by dragging it, resizing it, or otherwise interacting with it.
Solution
Create a custom control, and override the painting logic to draw a shape. Assign your shape to the Control.Region property. You can then use this Region to perform hit testing.
How It Works
If you need to create a complex user interface that incorporates many custom-drawn elements, you need a way to track these elements and allow the user to interact with them. The easiest approach in .NET is to create a dedicated control by deriving a class from System.Windows.Forms.Control. You can then customize the way this control is painted in the way its basic set of events is raised.
The Code
The following example shows a control that represents a simple ellipse shape on a form. All controls are associated with a rectangular region on a form, so the EllipseShape control generates an ellipse that fills these boundaries (provided through the Control.ClientRectangle property). Once the shape has been generated, the Control.Region property is set according to the bounds on the ellipse. This ensures events such as MouseMove, MouseDown, Click, and so on, will occur only if the mouse is over the ellipse, not the entire client rectangle.
The following code shows the full EllipseShape code:
using System;
using System.Drawing; using System.Windows.Forms;
using System.Drawing.Drawing2D;
namespace Apress.VisualCSharpRecipes.Chapter08
{
public partial class EllipseShape : Control
{
public EllipseShape()
{
InitializeComponent();
}
private GraphicsPath path = null;
private void RefreshPath()
{
//Create the GraphicsPath for the shape (in this case
//an ellipse that fits inside the full control area)
//and apply it to the control by setting
//the Region property.
path = new GraphicsPath(); path.AddEllipse(this.ClientRectangle); this.Region = new Region(path);
}

266 C H A P T E R 8 ■ G R A P H I C S, M U LT I M E D I A , A N D P R I N T I N G
protected override void OnPaint(PaintEventArgs e)
{
base.OnPaint(e); if (path != null)
{
e.Graphics.SmoothingMode = SmoothingMode.AntiAlias; e.Graphics.FillPath(new SolidBrush(this.BackColor), path); e.Graphics.DrawPath(new Pen(this.ForeColor, 4), path);
}
}
protected override void OnResize(System.EventArgs e)
{
base.OnResize(e);
RefreshPath();
this.Invalidate();
}
}
}
You could define the EllipseShape control in a separate class library assembly so you could add it to the Microsoft Visual Studio .NET Toolbox and use it at design time. However, even without taking this step, it is easy to create a simple test application. The following Windows Forms application creates two ellipses and allows the user to drag both of them around the form, simply by holding the mouse down and moving the pointer.
using System;
using System.Drawing; using System.Windows.Forms;
namespace Apress.VisualCSharpRecipes.Chapter08
{
public partial class Recipe08_04 : Form
{
public Recipe08_04()
{
InitializeComponent();
}
//Tracks when drag mode is on. private bool isDraggingA = false; private bool isDraggingB = false;
//The ellipse shape controls.
private EllipseShape ellipseA, ellipseB;
private void Recipe08_04_Load(object sender, EventArgs e)
{
// Create and configure both ellipses. ellipseA = new EllipseShape(); ellipseA.Width = ellipseA.Height = 100; ellipseA.Top = ellipseA.Left = 30; ellipseA.BackColor = Color.Red; this.Controls.Add(ellipseA);
ellipseB = new EllipseShape(); ellipseB.Width = ellipseB.Height = 100; ellipseB.Top = ellipseB.Left = 130;

C H A P T E R 8 ■ G R A P H I C S, M U LT I M E D I A , A N D P R I N T I N G |
267 |
ellipseB.BackColor = Color.Azure; this.Controls.Add(ellipseB);
// Attach both ellipses to the same set of event handlers. ellipseA.MouseDown += Ellipse_MouseDown;
ellipseA.MouseUp += Ellipse_MouseUp; ellipseA.MouseMove += Ellipse_MouseMove;
ellipseB.MouseDown += Ellipse_MouseDown; ellipseB.MouseUp += Ellipse_MouseUp; ellipseB.MouseMove += Ellipse_MouseMove;
}
private void Ellipse_MouseDown(object sender, MouseEventArgs e)
{
// Get the ellipse that triggered this event. Control control = (Control)sender;
if (e.Button == MouseButtons.Left)
{
control.Tag = new Point(e.X, e.Y); if (control == ellipseA)
{
isDraggingA = true;
}
else
{
isDraggingB = true;
}
}
}
private void Ellipse_MouseUp(object sender, MouseEventArgs e)
{
isDraggingA = false; isDraggingB = false;
}
private void Ellipse_MouseMove(object sender, MouseEventArgs e)
{
// Get the ellipse that triggered this event. Control control = (Control)sender;
if ((isDraggingA && control == ellipseA) || (isDraggingB && control == ellipseB))
{
// Get the offset.
Point point = (Point)control.Tag;
// Move the control.
control.Left = e.X + control.Left - point.X; control.Top = e.Y + control.Top - point.Y;
}
}
}
}
Figure 8-4 shows the user about to drag an ellipse.