

CodeVisionAVR
2.2.4.3 Executing an User Specified Program before Make
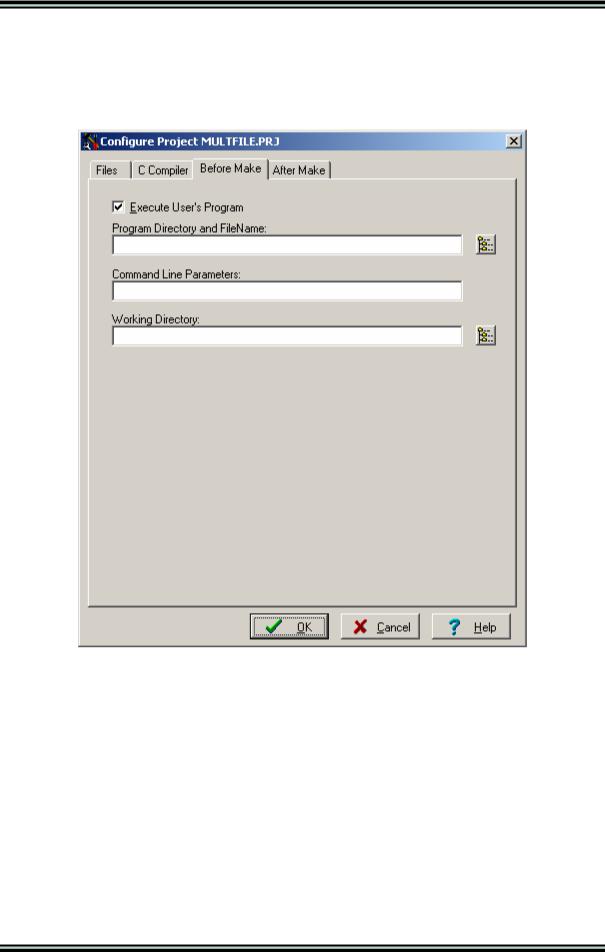
This option is available if you select the Before Make tab in the Project Configure window.
If you check the Execute User’s Program option, then a program, that you have previously specified, will be executed before the compilation/assembly process.
The following parameters can be specified for the program to be executed:
•Program Directory and File Name
•Program Command Line Parameters
•Program Working Directory.
© 1998-2007 HP InfoTech S.R.L. |
Page 33 |
CodeVisionAVR
2.2.4.4 Transferring the Compiled Program to the AVR Chip after Make
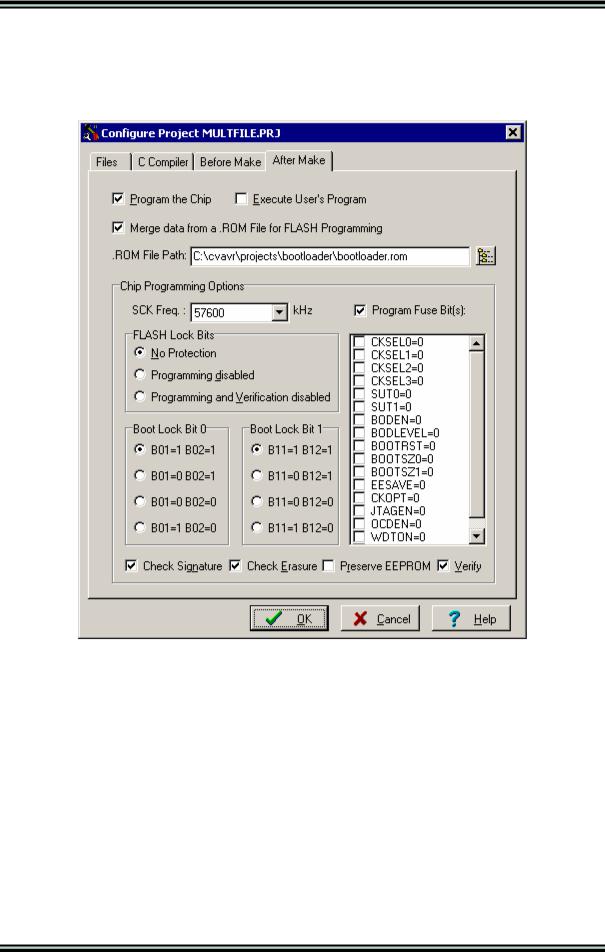
This option is available if you select the After Make tab in the Project Configure window.
If you check the Program the Chip option, then after successful compilation/assembly your program will be automatically transferred to the AVR chip using the built-in Programmer software.
The following steps are executed automatically:
•Chip erasure
•FLASH and EEPROM blank check
•FLASH programming and verification
•EEPROM programming and verification
•Fuse and Lock Bits programming
© 1998-2007 HP InfoTech S.R.L. |
Page 34 |

CodeVisionAVR
The Merge data from a .ROM File for FLASH Programming option, if checked, will merge in the FLASH programming buffer the contents of the .ROM file, created by the compiler after Make, with the data from the .ROM file specified in .ROM File Path.
This is useful, for example, when adding a boot loader executable compiled in another project, to an application program that will be programmed in the FLASH memory.
The SCK clock frequency used for In-System Programming with the STK500, AVRISP or AVRISP MkII can be specified using the SCK Freq. listbox. This frequency must not exceed ¼ of the chip’s clock frequency.
If the chip you have selected has Fuse Bit(s) that may be programmed, then a supplementary Program Fuse Bit(s) check box will appear.
If it is checked, than the chip’s Fuse Bit(s) will be programmed after Make.
The Fuse Bit(s) can set various chip options, which are described in the Atmel data sheets.
If a Fuse Bit(s) check box is checked, then the corresponding fuse bit will be set to 0, the fuse being considered as programmed (as per the convention from the Atmel data sheets).
If a Fuse Bits(s) check box is not checked, then the corresponding fuse bit will be set to 1, the fuse being considered as not programmed.
If you wish to protect your program from copying, you must select the corresponding option using the
FLASH Lock Bits radio box.
If you wish to check the chip's signature before programming you must use the Check Signature option.
To speed up the programming process you can uncheck the Check Erasure check box. In this case there will be no verification of the correctness of the FLASH erasure.
The Preserve EEPROM checkbox allows preserving the contents of the EEPROM during chip erasure.
To speed up the programming process you can uncheck the Verify check box.
In this case there will be no verification of the correctness of the FLASH and EEPROM programming.
Changes can be saved, respectively canceled, using the OK, respectively Cancel buttons.
© 1998-2007 HP InfoTech S.R.L. |
Page 35 |
CodeVisionAVR
2.2.4.5 Executing an User Specified Program after Make
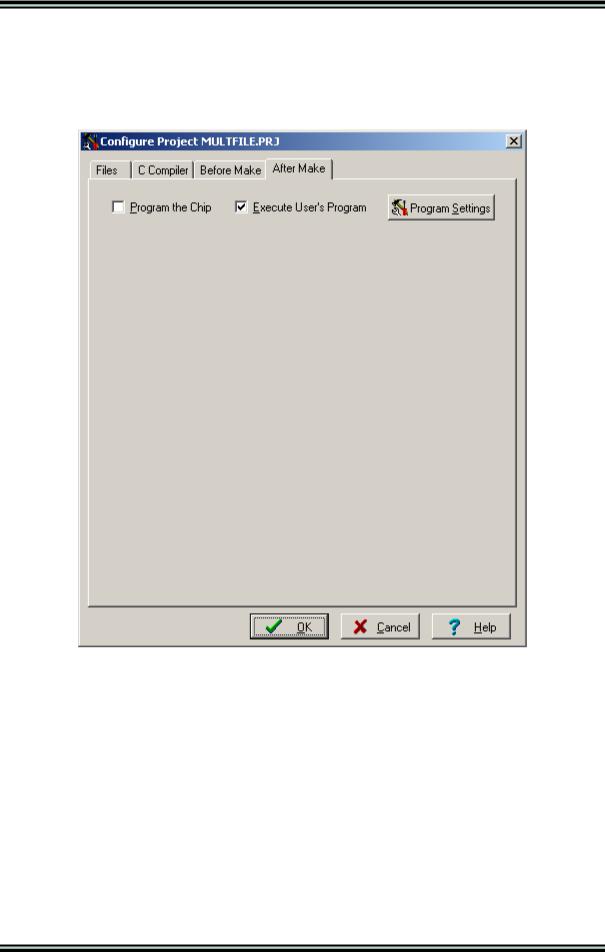
This option is available if you select the After Make tab in the Project Configure window.
If you check the Execute User’s Program option, then a program, that you have previously specified, will be executed after the compilation/assembly process.
© 1998-2007 HP InfoTech S.R.L. |
Page 36 |
CodeVisionAVR
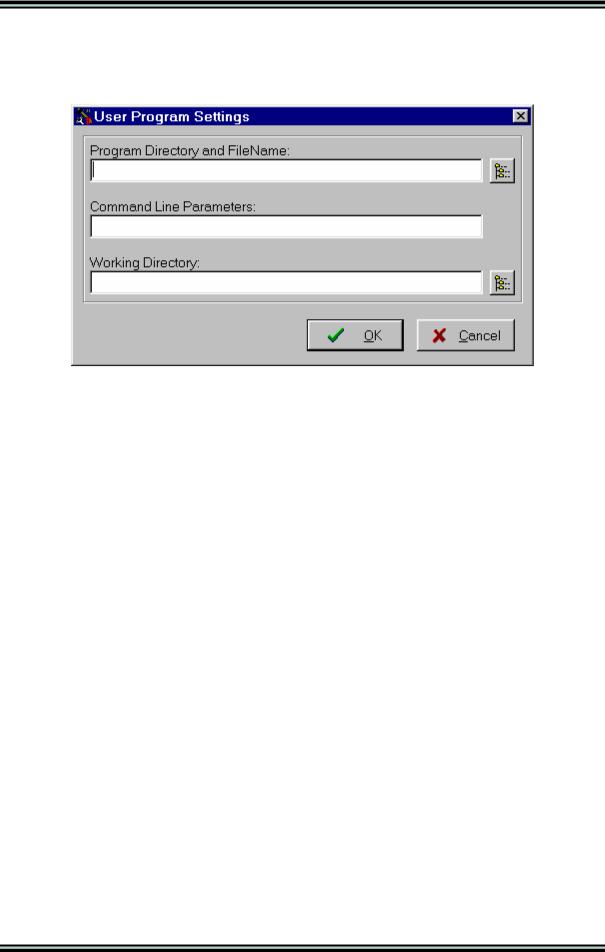
Using the Program Settings button you can modify the:
•Program Directory and File Name
•Program Command Line Parameters
•Program Working Directory
Changes can be saved, respectively canceled, using the OK, respectively Cancel buttons.
© 1998-2007 HP InfoTech S.R.L. |
Page 37 |