

ARM cross development with Eclipse, version 2 (J.P. Lynch, 2005)
.pdfClick on “Next” to accept c:/cygwin/usr/local/bin as the OCDRemote installation directory.
Clicking on “Install” will complete the OCDRemote installation.
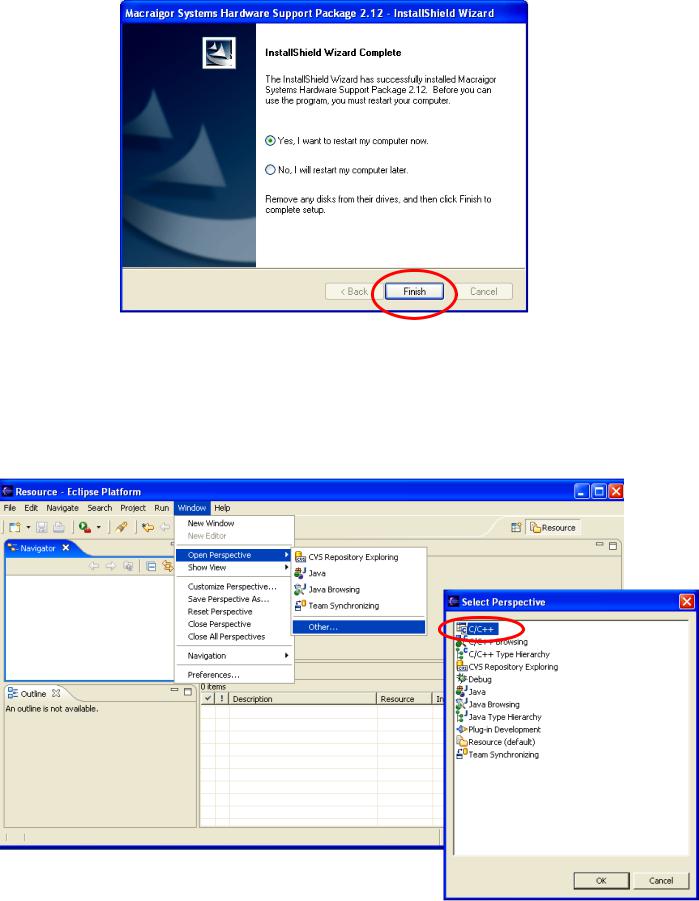
The Wizard completion screen lets you restart your computer to put OCDRemote into the Windows registry.
Just like the Philips ISP Flash Utility, we should install the Macraigor OCDremote utility as an “external tool” that can be accessed easily from the Eclipse CDT RUN pull-down menu.
Start up Eclipse and, if necessary, switch to the C/C++ perspective by clicking “Window – Open Perspective – Other – C/C++.”
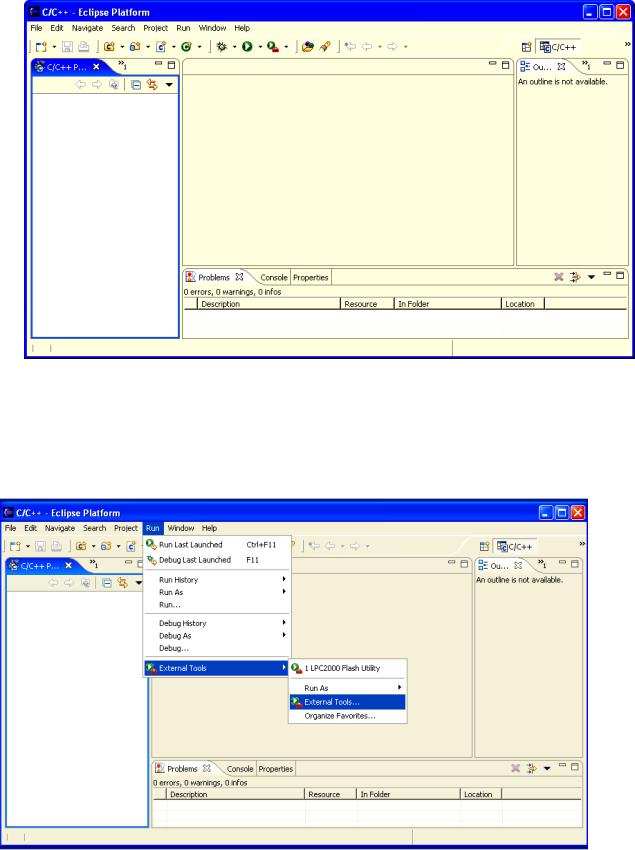
Switching perspectives brings up the C/C++ window (perspective) and this will be remembered when you re-enter Eclipse.
In a procedure similar to installing the Philips Flash Utility as an “External Tool”, click on “Run – External Tools – External Tools …” This will bring up the External Tools dialog.
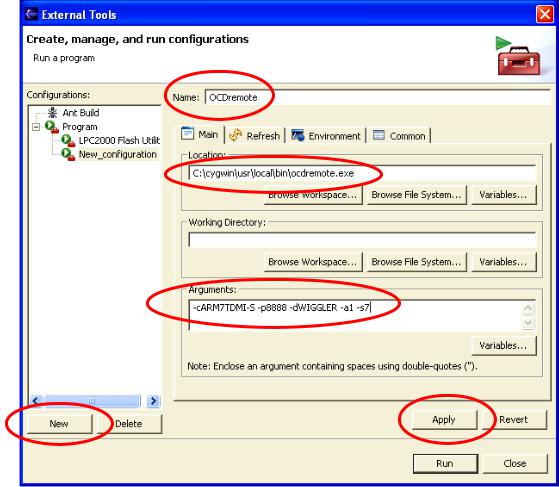
Click on “New” and replace the name with OCDremote. Use the “browse file system” to find it. It should be in the directory c:/cygwin/usr/local/bin.
The arguments needed to properly start the OCDremote are as follows:
-cARM7TDMI-S |
specifies the CPU being accessed |
-p8888 |
specifies the pseudo TCP-IP port being used |
-dWIGGLER |
specifies the JTAG hardware being used |
-a1 |
specifies LPT1 for the Wiggler |
-s7 |
specifies next-to-slowest speed |
It’s a good idea to not tamper with these values. Click on “Apply” to finish the setup.
Just like the Philips LPC2000 Flash Utility, we’d like to include the OCDremote application in our list of “favorite” External Tools. This allows us to quickly start the OCDremote JTAG server from within Eclipse.
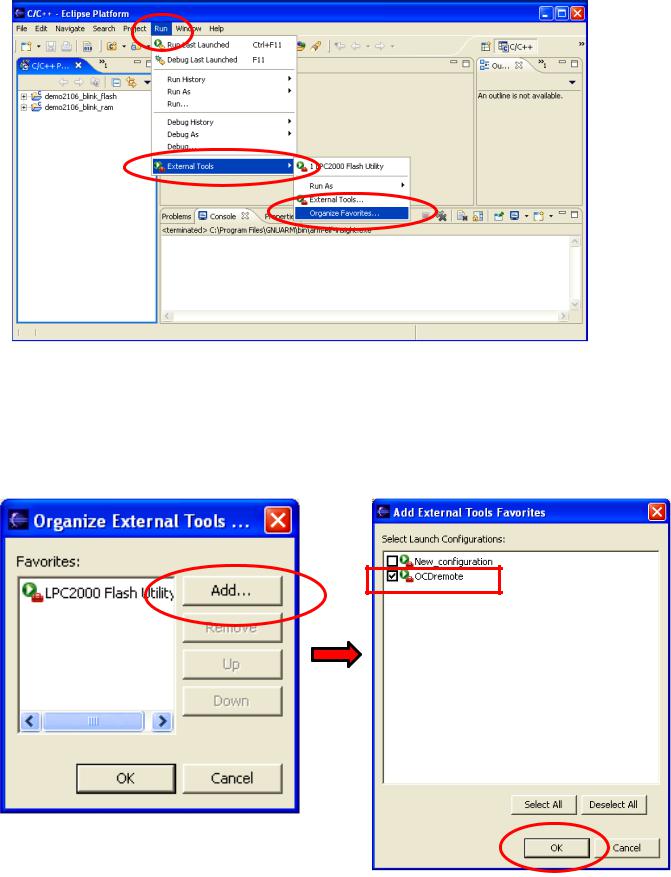
Click on “Run – External Tools – Organize Favorites”
Now click on “Add…” in the Organize External Tools … window and follow that by checking “OCDremote” in the Add External Tools Configurations: window. Click on “OK” to add the OCDremote to the list of favorites.
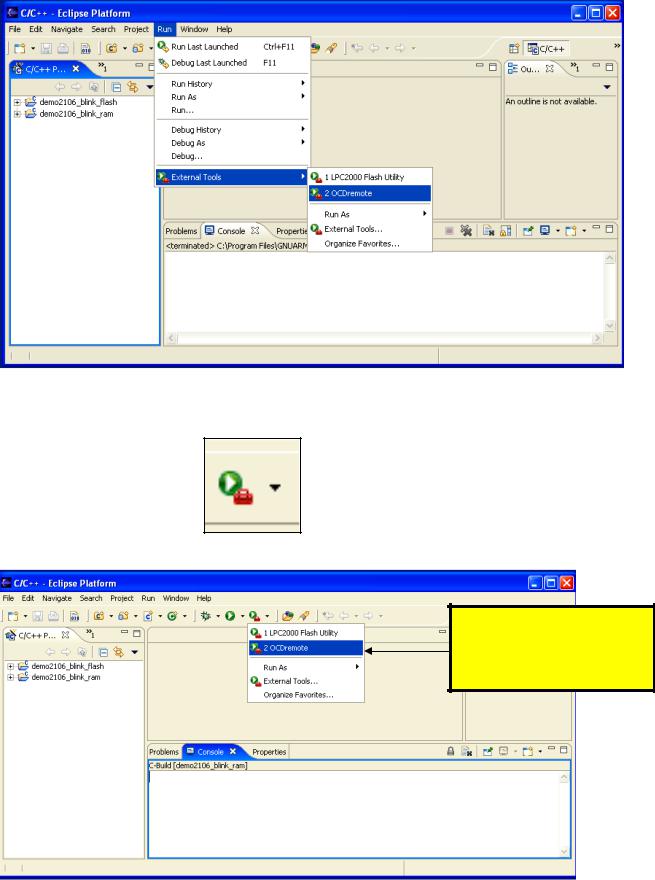
Now verify that the OCDremote is in the list of External Tools favorites. Click on “Run – External Tools” and see that it’s now included in the list of favorites.
Now is a good time to point out that there’s a handy shortcut button in Eclipse to run the External Tools. Click on the External Tools button’s down arrow to expand the list of available tools.
Click on either of the external tools to start them running.
10 Verifying the PATH Settings
There is one final and very crucial step to make before we complete our tool building. We have to ensure that the Windows PATH environment variable has entries for the Cygwin toolset, the GNUARM toolset and the OCDremote JTAG server.
These are the three paths that must be present in the Windows environment:
c:\cygwin\bin
c:\program files\gnuarm\bin c:\cygwin\usr\local\bin
To verify that these paths are present in Windows and to make changes if required, start the Windows Control Panel by clicking “Start – Control Panel”.
Now click on the “Advanced” tab below.
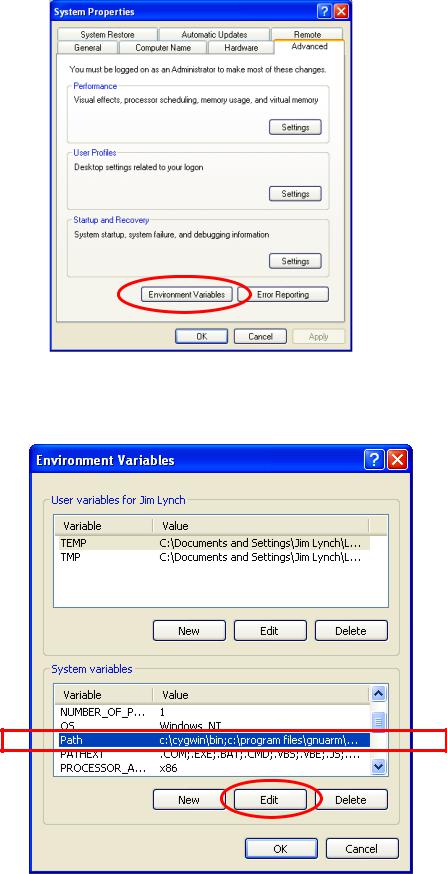
Now click on the “Environment Variables” button.
In the Environment Variables window, find the line for “Path” in the System Variables box on the bottom, click to select and highlight it and then click on “Edit”.
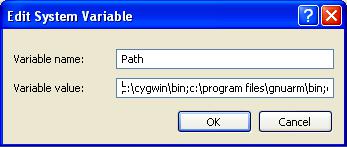
Take a very careful look at the “Edit System Variable” window (the Path Edit, in this case).
You should see the following paths specified, all separated by semicolons. The path is usually long and complex; you may find the bits and pieces for GNUARM interspersed throughout the path specification. I used cut and paste to place all my path specifications at the beginning of the specification (line); this is not really necessary.
You should see the following paths specified.
c:\cygwin\bin;c:\program files\gnuarm\bin;c:\cygwin\usr\local\bin
If any of the three is not present, now is the time to type them into the path specification.
I’ve found that not properly setting up the Path specification is the most common mistake made in configuring Eclipse to do cross-development.
This completes the setup of Eclipse and all the ancillary tools required to cross develop embedded software for the ARM microcomputer family (Philips LPC2000 family in specific).
If you stayed with me this far, your patience will soon be rewarded!
Or as Yoda would say, “Rewarded soon, your patience will be!”
11 Creating a Simple Eclipse Project
At this point, we have a fully-functioning Eclipse IDE capable of building C/C++ programs for the ARM microprocessor (specifically for the Olimex LPC-P2106 prototype board).
We will now create an Eclipse C project called “demo2106_blink_flash” that will blink the board’s red LED_J which is I/O port P0.7. This demo uses no interrupts and runs totally out of onboard flash memory. It has been intentionally designed to be as simple and as straightforward as possible.
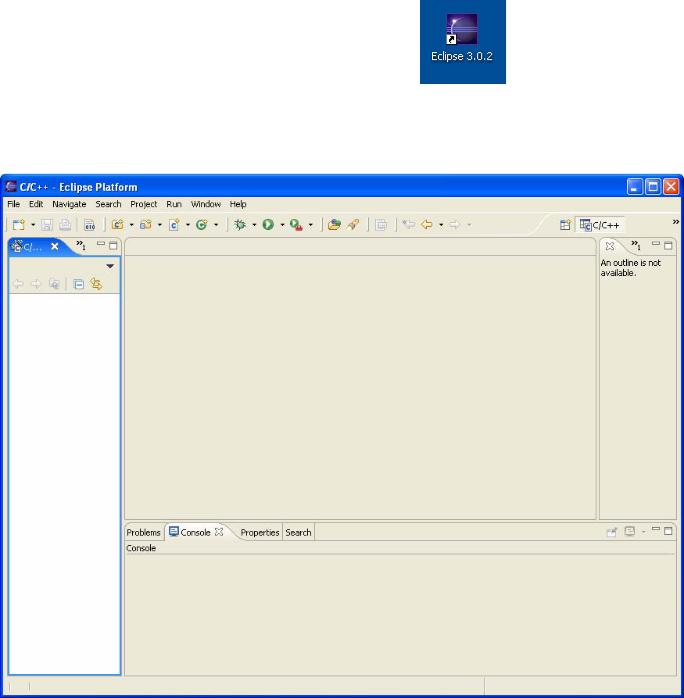
Click on our Eclipse desktop icon to start Eclipse.
Eclipse should start and present the C/C++ perspective as shown below. If not, select “Window - Open Perspective – Other - C/C++” to change to the C++ perspective.