

AUTO-TUNING ON APPROACH ACTIVATION (NAV FREQUENCIES)
NAVfrequenciesareautomaticallyloadedintotheNAV Frequency window on approach activation, regardless of the display unit being used.
 NOTE: The primary NAV frequency becomes auto-tuned upon loading an approach.
To auto-tune a NAV frequency if the desired approach is not already loaded:
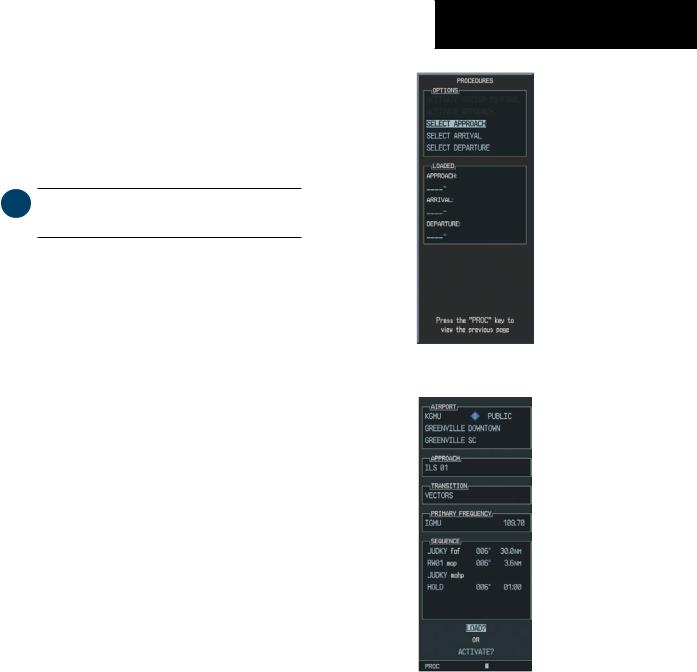
1.Press the PROC key to open the Procedures window.
2.Turn the large FMS knob to highlight the ‘SELECT APPROACH’ menu option and press the ENT key.
3.Use both the FMS knob and the ENT key as needed to select the desired airport, VOR/ILS approach and transition.
4.Turn the large FMS knob to highlight either the ‘LOAD?’ or ‘ACTIVATE?’ prompt and press the ENT key. The primary NAV frequency for the activated approach is loaded into the standby field of the selected NAV radio.
NAV/COM
Figure 3-28 Selecting an Approach
Figure 3-29 Loading an Approach
190-00498-00 Rev.A |
Garmin G1000 Pilot’s Guide for Cessna Nav III |
3-17 |
NAV/COM
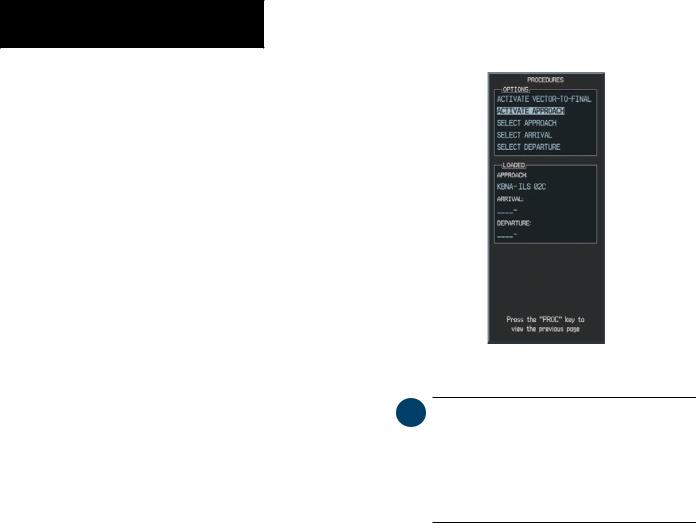
To auto-tune a NAV frequency if the desired approach is already loaded:
1.Press the PROC key to open the Procedures window.
2.Turn the large FMS knob to highlight the ‘ACTIVATE APPROACH’ menu option and press the ENT key. The approach primary NAV frequency becomes automatically loaded into the standby field of the selected NAV radio.
When loading or activating an approach, the primary NAVfrequencymaybeloadedintotheNAVtuningboxby highlighting the frequency inthe Select Approach window using the FMS knob, then pressing the ENT key.
If the system is in GPS mode when a VOR/ILS approach is loaded or activated, the approach primary NAV frequency is automatically loaded into the active field of NAV1.
The NAV frequency is automatically loaded upon vector-to-final activation. An approach can also be activated with the MENU key when the Flight Plan window is open.
Figure 4-30 Activating an Approach
 NOTE: When a VOR/ILS approach has been activatedinGPSmode,andtheILSCDICapture option is set to AUTO, the system switches to NAV mode as the final approach course is intercepted (within 15 nm from the FAF). See the Multi Function Display section for details.
3-18 |
Garmin G1000 Pilot’s Guide for Cessna Nav III |
190-00498-00 Rev.A |

G1000TM
Transponder