

Novation nova laptop manual
.pdfEFFECTS SECTION
|
EFFECTS SECTION |
|
|
C/F/P |
|
|
|
|
|
|
|
|
IN THE NORMAL POSITION |
|
|
|
|
|
|
|
|
Rev |
The section enclosed |
|
( D + R + C ) |
|
|
can be Morphed into |
|
|
|
|
|
||
|
|
|
|
|
different configurations |
|
|
|
|
Delay |
|
Input |
Dist |
EQ |
Comb |
Pan |
|
|
|
|
|
|
Output |
Below are diagrams showing how the different effects are connected in different configurations.
SERIES CONFIGURATIONS
D > R > C
Delay |
|
|
Rev |
|
|
C/F/P |
|
|
|
|
|||
|
|
|
|
|
|
|
R > D > C |
|
|
Rev |
Delay |
C/F/P |
C > D > R |
|
|
C/F/P |
Delay |
Rev |
D > C > R |
|
|
Delay |
C/F/P |
Rev |
R > C > D |
|
|
Rev |
C/F/P |
Delay |
C > R > D |
|
|
C/F/P |
Rev |
Delay |
89
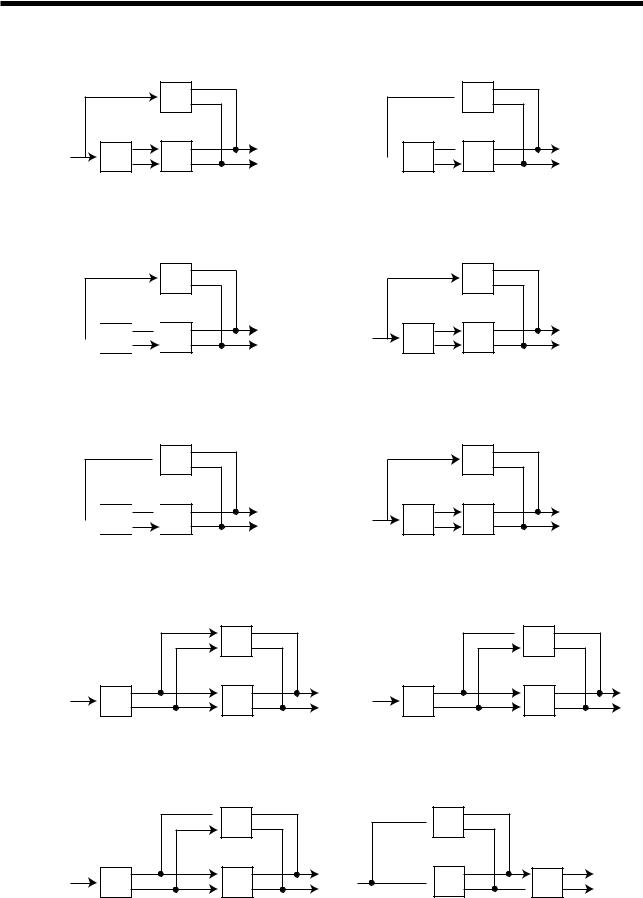
EFFECTS SECTION
SERIES/PARALELL CONFIGURATIONS D + [ R > C ]
|
Delay |
Rev |
C/F/P |
R + [ D > C ]
Rev

 Delay
Delay
 C/F/P
C/F/P
C + [ D > R ]
 C/F/P
C/F/P

 Delay
Delay 
 Rev
Rev
D > [ R + C ]
|
C/F/P |
Delay |
Rev |
C > [ D + R ]
 Delay
Delay
C/F/P |
Rev |
D + [ C > R ]
 Delay
Delay
 C/F/P
C/F/P  Rev
Rev
R + [ C > D ]
|
Rev |
C/F/P |
Delay |
C + [ R > D ]
|
C/F/P |
Rev |
Delay |
R > [ D + C ]
 C/F/P
C/F/P
Rev |
Delay |
[ R + C ] > D
 Rev
Rev
 C/F/P
C/F/P  Delay
Delay
90
EFFECTS SECTION
[ D + C ] > R |
|
[ D + R ] > C |
|
Delay |
|
Delay |
|
C/F/P |
Rev |
Rev |
C/F/P |
The range of this parameter is D+R+C, D>R>C, D>C>R, R>D>C, R>C>D, C>D>R, C>R>D, D+[R>C], D+[C>R], R+[D>C], R+[C>D], C+[D>R], C+[R>D], D>[R+C], R>[D+C], C>[D+R]. [R+C]>D, [D+C]>R & [D+R]>C. This parameter is memorised with a Program in Program Mode or memorised with a Program or Performance in Performance Mode depending on the value of the Part’s “Effects Used” parameter.
NOTE:
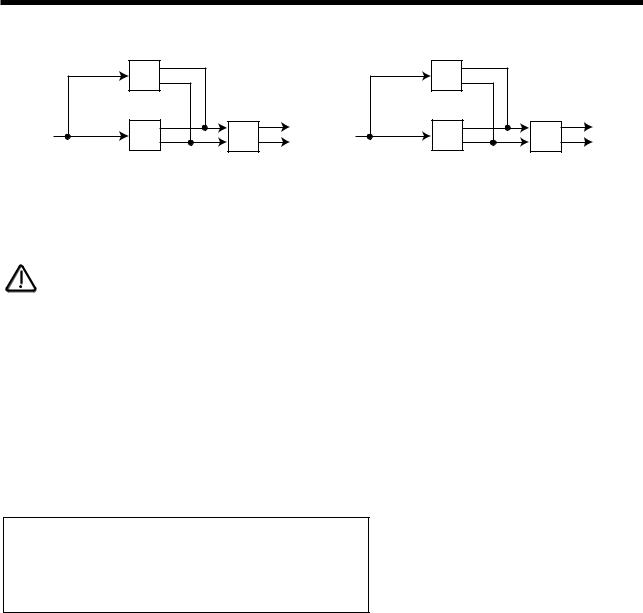
To use the different configurations, the Config morph parameter should be set to 127. If this parameter is set to 000, the “Normal” configuration D+R+C applies.
As can be seen the lower parameter is “Config morph”. In this case with a value of +10.
This parameter morphs the effect configuration from the “Normal” D+R+C configuration to any configuration selected by the Fx config parameter. Use the Lower Fast Data knob to adjust this parameter. If this parameter is set to the fully anticlockwise position ( 00 ) the config is “Normal” D+R+C. If this parameter is set to 127 the configuration will be the one selected by the Fx config parameter. In-between this, the configuration is somewhere between the two. This allows many interesting “Cross connections” to occur between the different effects blocks. The range of this parameter is 000 to 127. This parameter is memorised with a Program in Program Mode or memorised with a Program or Performance in Performance Mode depending on the value of the Part’s “Effects Used” parameter.
Page 5 looks like so:
Pass to effects:
Program only
As can be seen the parameter is “Pass to effects:”. In this case with a value of Program only.
This parameter allows the Audio inputs to be connected into the effects. Use the Lower Fast Data knob to adjust this parameter. If this parameter is set to Program only then the program will be connected to the effects chain of the Program or Part if in performance mode.
If this parameter is set to Audio input (1) only then the Audio from Input one will be will be connected to the effects chain of the program or Part if in performance mode & the program will be disconnected. If this parameter is set to Program & input (1) only then the Audio from Input one & the Program will be will be connected to the effects chain of the program or Part if in performance mode. Similar values are provided for Audio input 2. The range of this parameter is Program only, Audio input (1) only, Program & input (1), Audio input (2) only, & Program & input (2). This parameter is memorised with a Program in Program Mode or memorised with a Program or Performance in Performance Mode depending on the value of the Part’s “Effects Used” parameter.
91

EFFECTS SECTION
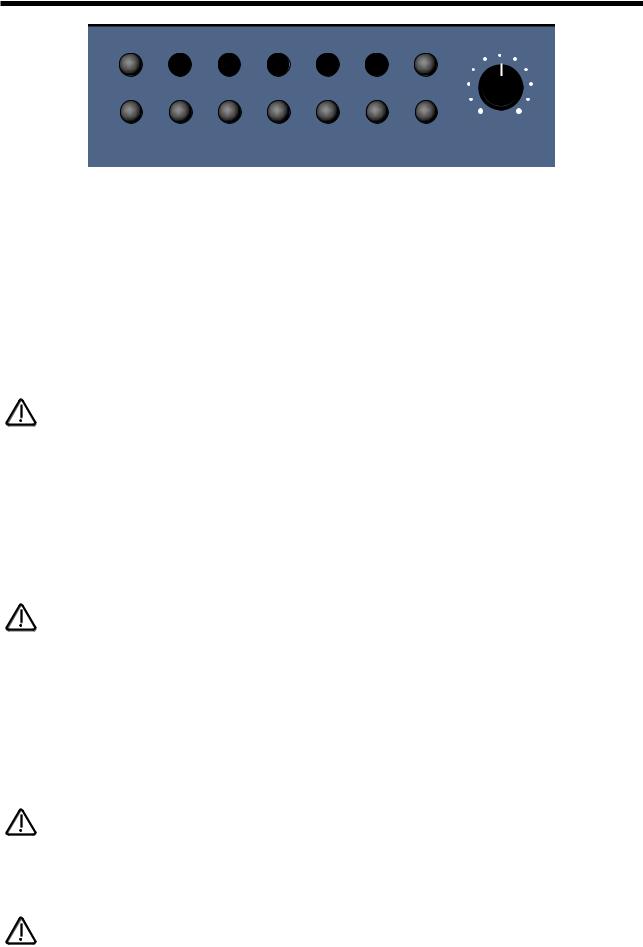
Menu - Button ( Pan selected )
When this button is pressed, a series of pages is available on the display containing parameters relevant to this section. In the Pan section there are 3 pages available.
Page 1 looks like so:
Pan |
type |
Autopan |
Pan |
speed |
O4O |
As can be seen the higher parameter is “Pan type” In this case with a value of Autopan.
This parameter determines in what way the panning effects are used. Use the higher Fast Data knob to adjust this parameter. In the Autopan position the Program is “Panned” automatically from Left to Right & back again. In the Tremolo position both Left & Right are controlled in sync creating the classic “Tremolo” effect. Another 2 phases are provided L-R & R-L. these are similar to Autopan but the effect is not symmetrical. The range of this parameter is Autopan, Tremolo, L-R & R-L. This parameter is memorised with a Program in Program Mode or memorised with a Program or Performance in Performance Mode depending on the value of the Part’s “Effects Used” parameter.
As can be seen the lower parameter is “Pan speed”. In this case with a value of 040.
This parameter determines the rate at which the Autopan & Tremolo effects run. Use the lower Fast Data knob to adjust this parameter. The range of this parameter is 000 to 127. This parameter is memorised with a Program in Program Mode or memorised with a Program or Performance in Performance Mode depending on the value of the Part’s “Effects Used” parameter.
Page 2 looks like so:
Pan |
depth |
O8O |
Dry |
level |
O2O |
As can be seen the higher parameter is “Pan depth” In this case with a value of 080.
This parameter controls the intensity of the Autopan & Tremolo effects. Use the higher Fast Data knob to adjust this parameter. In the 000 position there is no movement of sound in the stereo field & no change to the Program’s volume ( No Autopan or Tremolo effects will be heard ). As the value of this parameter is increased the Autopan & Tremolo have more & more effect. The range is 000 to 127 Off. This parameter is memorised with a Program in Program Mode or memorised with a Program or Performance in Performance Mode depending on the value of the Part’s “Effects Used” parameter.
As can be seen the lower parameter is “Dry level”. In this case with a value of 020.
This parameter determines how much “Dry” signal is in the mix. Use the lower Fast Data knob to adjust this parameter. This allows
“Pre” effects “Sends” arrangements to be realised. If this parameter is set to 000 no “Dry” sound from the Program will be heard. The sound you will hear will be 100% effect signals. i.e. If the Chorus “Send” is set to 127 & the “Dry level” parameter is set to 000 you will hear only the “Chorused” signal, none of the original. The range of this parameter is 000 to 127. This parameter is memorised with a Program in Program Mode or memorised with a Program or Performance in Performance Mode depending on the value of the Part’s “Effects Used” parameter.
92
EFFECTS SECTION
Page 3 looks like so:
Pan effects |
No |
The higher parameter is “Pan effects”. In this case with a value of No.
This parameter determines how the Effects behave when a sound is Panned between Left & Right in the Stereo image. Use the higher Data knob to adjust this parameter. When this parameter is set to No the sound is panned as it would be on a mixing desk. i.e. the sound can be panned hard Left or Right but Stereo effects such as the Comb filter, Phaser/Flanger/Chorus/Ensemble/ Rotary Speaker, Delay & Reverb will cause effects to appear on both the Left & Right channels ( just like Aux returns on a mixing desk ). Setting this parameter to On forces the Stereo effects to be panned as well as the source sound. i.e. if a sound is panned hard Left & this parameter is set to On, then only the Left side of the Stereo effects are heard. The range of this parameter is Yes & No. This parameter is memorised with a Program in Program Mode or memorised with a Program or Performance in Performance Mode depending on the value of the Part’s “Effects Used” parameter.
NOTE:
This is particularly handy when using the separate audio outputs as Mono outputs. Normally the audio outputs are treated as “Stereo pairs” when the “Pan effects” parameter is set to “No” as the “Pan” parameter behaves like it does on a Mixing console with effects routed via an Aux return. Setting the “Pan effects” parameter to “Yes” allows the user to pan the sound & the effects to a single Mono output.
NOTE:
If the “Pan effects” parameter is set to “Yes” & the sound is panned hard to the Left, then only the Left channel of the Stereo effects ( the Comb filter, Phaser/Flanger/Chorus/Ensemble/Rotary Speaker, Delay & Reverb ) will be heard. In the case of the Phaser/Flanger/Chorus/ Ensemble/Rotary Speaker effect this may introduce a slight “Wobbling” sensation to the sound. This is due to the Stereo nature of the effect & is normal ( If you monitor only one side of a Stereo version of the sound on your Mixer you will experience the same thing ).
Menu - Button ( Vocoder selected )
NOTE:
There is only 1 vocoder in the Nova. You cannot have a Performance with several different vocoders on different parts.
When this button is pressed a series of pages is available on the display containing parameters relevant to this section. In the Pan section there are 4 pages available.
Page 1 looks like so:
Sibilance |
level |
15 |
Sibilance |
type |
Hpass |
As can be seen the higher parameter is “Sibilance level” In this case with a value of 15.
This parameter determines the amount of sibilance there will be in the vocoded signal. Typically these are the “S” type of sounds in speech. Use the higher Fast Data knob to adjust this parameter. If this parameter is set to 00 no sibilance from the modulator’s signal will be passed to the output of the vocoder. If this parameter is set to 15 then large amounts of sibilance from the modulator will be passed to the output of the vocoder. The range of this parameter is 00 to 15. This parameter is memorised with a Program in Program Mode or memorised with Performance in Performance Mode.
93
EFFECTS SECTION
NOTE:
If there is no sibilance in the modulator’s signal then this parameter will appear to do nothing.
As can be seen the lower parameter is “Sibilance type”. In this case with a value of Hpass.
This parameter determines if the vocoder uses real sibilance filtered from the modulator or artificially generates it using noise. Use the lower Fast Data knob to adjust this parameter. In the Hpass mode, a High pass filter is used to extract the sibilance from the modulator. In the Noise mode noise is used to artificially generate sibilance. The range of this parameter is Hpass & Noise. This parameter is memorised with a Program in Program Mode or memorised with a Performance in Performance mode.
Page 2 looks like so:
Voc |
input |
Input (2) |
Voc |
insert |
Program |
As can be seen the higher parameter is “Voc input” In this case with a value of Input 2.
This parameter determines what is going to be the “Modulator” of the vocoder. Use the higher Fast Data knob to adjust this parameter. If this parameter is set to Input 1, input 1 will be the modulator. If this parameter is set to Input 2, input 2 will be the modulator. In performance mode, parts 1 to 6 can also be selected. The range of this parameter is Input 1 & input 2 in program mode & Input
1, Input 2 & parts 1 to 6 in performance mode. This parameter is memorised with a Program in Program Mode or memorised with a Program or Performance in Performance Mode .
As can be seen the lower parameter is “Voc insert”. In this case with a value of Program.
This parameter determines what is going to be the “Carrier” for the vocoder. Use the lower Fast Data knob to adjust this parameter. In Program mode, only the currently selected program can be used as the carrier for the vocoder & this parameter shows only the Program option for clarity. In Performance mode, any of the 6 parts can be used as the carrier for the vocoder. The range of this parameter is Program in Program Mode, Part 1 to Part 6 in Performance Mode. This parameter is memorised with a Program in Program Mode or memorised with a Program or Performance in Performance Mode.
Page 3 looks like so:
Vocoder width |
OO |
As can be seen the parameter is “Vocoder width” In this case with a value of 00.
This parameter determines how wide the stereo output of the vocoder will be. Use the higher Fast Data knob to adjust this parameter. If this parameter is set to 00, the output of the vocoder will be Mono. If this parameter is set to 15, the output of the vocoder will be Stereo. The range of this parameter is 00 to 15. This parameter is memorised with a Program in Program Mode or memorised with a Program or Performance in Performance Mode.
94
EFFECTS SECTION
Page 4 looks like so:
Vocoder
spectrum
As can be seen the display is showing “Vocoder spectrum”.
In this page the Nova displays the Audio spectrum of the modulator in 40 bands on the screen.
This is for display & is not memorised.
Copy - Button
This button only works in Performance mode.
The copy button in the effects section allows quick copying of effects parameters from a Program into the Performance Part buffer. This allows you to use a Program with completely different effects setting from that originally in the Program. It is not necessary to save the edited program to a memory location as the effects changes are stored with the Performance. Copying the effects is easy, just press the Copy button ( Copy button lit ) & select which effect you wish to copy from the Program - Delay, Reverb, Chorus, Dist/EQ/Config, Pan or Vocoder & Nova copies all the settings over.
95
PART EDIT SECTION
Part Edit
1 |
2 |
3 |
4 |
5 |
6 |
solo |
|
tune |
velocity |
in/out |
midi |
polyphony range |
mute |
level |
|
|
|||||||
This section contains all the knobs & buttons associated with the Part Edit Section.
Level - Knob
This knob adjusts the level of the currently selected Program. In Program mode this knob controls the “gain” of the Program. This can be considered to be similar to “gain” on a mixers channel. Use this knob in Program mode to set the headroom of the Program. If the Program has to much level in Program mode, distortion will occur in all Program & Performance mode. In Performance mode this knob controls the “level” of the Program. This can be considered to be similar to “Volume” slider on a mixers channel. If the Program is distorting regardless of the setting of this knob in Performance mode, the Program mode “level” is set to high. Select the distorting Program in Program mode & adjust this parameter until distortion ceases & rewrite the Program to memory. Then it will stop distorting in Performance mode. Fully anticlockwise the Program is not heard. Turning the knob clockwise turns the volume of the currently selected Program up. The range of this parameter is 000 to 127. This parameter is memorised with a Program in Program Mode or memorised with Performance in Performance Mode.
NOTE:
If a Program or Performance is distorting, it most likely because the “Level” of the Program is to high. Try reducing the level until distortion ceases.
Part 1 - Button
Part 2 - Button
Part 3 - Button
Part 4 - Button
Part 5 - Button
Part 6 - Button
NOTE:
These buttons select “Parts” in Performance Mode. In Program mode they can be used to Audition the currently selected Program. Simply press the Part buttons & a note will play as long as the button is held down. Part 1 button plays C1, Part 2 button plays F1, Part 3 button plays C2, Part 4 button plays F2, Part 5 button plays C3 & Part 6 button plays F3. Additionally in Program mode these buttons light to display the sequence of steps of an Arpeggiator pattern ( If the Arpeggiator is on & playing ).
These buttons select which Part of a Performance is going to be edited. Pressing any Part button will assign all the front panel to the Program assigned to the selected Part. To assign a different Program to this Part use the Bank & Prog Up & Down buttons to select in a new Program. Moving any knob will bring up the Parameter name on the display in the normal way. To return to the display showing the Part’s assigned Program simply press the appropriate Part button again. Any modifications to the Program made in this mode will have to be written into the Program. See Editing & Writing Performances on page 30 for details.
NOTE:
Part selection can be transmitted & recorded as controller data to a sequencer & the played back to the Nova.
Tune - Button
NOTE:
This button only works in Performance mode.
This button alters the Tuning of the Program assigned to the currently selected Part. When this button is pressed the display shows parameters relevant to this section.
96

PART EDIT SECTION
When this button is pressed the display shows:
Part semitone |
+O7 |
Part detune |
+25 |
As can be seen the higher parameter is “Part semitone”. In this case with a value of +07.
This parameter Transposes the Program by the number of semitones selected using the higher Fast Data knob. The range of this parameter is -24 to +24 semitones. This parameter is memorised with the Performance.
As can be seen the lower parameter is “Part detune”. In this case with a value of +25
This parameter Detunes the Program by the amount selected using the higher Fast Data knob. The range of this parameter is -64 to +63 cents. This parameter is memorised with the Performance.
Velocity - Button
This button only works in Performance mode.
This button assigns which Velocity curve is assigned to the currently selected Part. When this button is pressed the display shows parameters relevant to this section.
When this button is pressed the display shows:
Part velocity curve
Normal
As can be seen the higher parameter is “Part velocity curve”. In this case with a value of Normal.
This parameter determines the velocity response of the currently selected Part. Values are selected using the higher Fast Data knob. In the “Normal” position the Program plays in a normal velocity sensitive way ( If the Velocity parameter for the selected Program has been set to any positive value ). In the “Inverse” position the response is inverse to the normal velocity curve. i.e.
Louder sounds are produced by playing softly rather than hard ( If the Velocity parameter for the selected Program has been set to any positive value ). These two curves are ideal for creating velocity Cross fades between two different parts for Organ type sounds. The Cross Fade - Low & Cross Fade - High options are similar but provide a “Normal” overall response when used together in two different parts. The remaining options provide “Normal” velocity curve response “Up to” or “From” specific Velocity values. This enables “Velocity Switch” arrangements to be easily made by setting up appropriate curve on two parts. i.e. To Value 100 on one Part & From Value 101 on another. The range of this parameter is Normal, Inverse,Cross fade - High, Cross Fade - Low, To Value 60, From Value 61, To Value 70, From Value 71, To Value 80, From Value 81, To Value 90, From Value 91, To Value 100, From Value 101, To Value 110 & From Value 111. This parameter is memorised with the Performance.
97

PART EDIT SECTION
In/Out - Button
This button works in Program & Performance mode.
When this button is pressed a series of pages is available on the display containing parameters relevant to this section.
In the In/Out menu there are 2 pages available. There are a maximum of 2 parameters displayed. One for each line on the display. The “Fast Data” Knobs on the right of the display are used to alter these parameter’s values
Page 1 ( Performance Mode ) looks like so:
Part outputs |
1 & 2 |
Effects used |
Program |
As can be seen the higher parameter is “Part outputs”. In this case with a value of 1&2. This parameter determines which set of outputs the currently selected Part will be output from. Use the higher Fast Data knob to adjust this parameter. It is possible to have each Part go to an individual output ( Mono ). To do this set Part 1& 2 to go to outputs 1&2 then pan Part 1 to the Left
( output 1 ) & Part 2 ( output 2 ) to the Right with the panpot. Set Part 3&4 to go to outputs 3&4 then pan Part 3 to the Left ( output 3 ) & Part 4 ( output 4 ) to the Right with the panpot. Set Part 5&6 to go to outputs 5&6 then pan Part 5 to the Left
( output 5 ) & Part 6 ( output 6 ) to the Right with the panpot. The range of this parameter is 1&2, 3&4, 5&6 & 7&8. This parameter is memorised with the Performance.
NOTE:
If the Delay, Reverb, Chorus/Flanger/Phaser or Vocoder effects are used they will produce stereo signals over an output pair. To isolate a sound to a single mono output, it is necessary to make sure the send levels of these effects are set to 000.
As can be seen the lower parameter is “Effects used”. In this case with a value of Program. Use the lower Fast Data knob to adjust this parameter. This parameter determines if the Effects to be used by the Part will change when a MIDI Program Change message is received from the current settings to the settings of the new Program or not. This can be useful for dramatic changes in Effects by setting this parameter to Program, or this parameter can be useful for retaining the effects used on this Part when a MIDI Program Change is received by setting it to “Part”.
The range of this parameter is Program & Part. This parameter is memorised with the Performance.
Page 1 ( Program mode ) Page 2 ( Performance mode ) looks like so:
Trim 1 +OO
Trim 2 +OO
The inputs 1 & 2 can be monitored using this page. PPM meters show the level of both inputs. The levels of both of these signals can be boosted or cut by 10 dB using the Fast Data knobs. These parameters are memorised as Global.
NOTE:
The setting of these parameters is saved along with all the other Global parameters when the Global parameters are saved while in the Global menu.
MIDI - Button
This button only works in Performance mode.
When this button is pressed a series of pages is available on the display containing parameters relevant to this section.
In the MIDI menu there are 3 pages available. There are a maximum of 2 parameters displayed. One for each line on the display. The “Fast Data” Knobs on the right of the display are used to alter these parameter’s values.
98