


CHEMISTRY
CHEMICAL PROPERTIES
All materials you can see and many you can’t are grouped by certain characteristics. Examples of these characteristics include density, pressure, temperature, volume, phase, and atomic makeup. In this chapter we’ll look at questions relating to all of these, but we’ll focus on phase, density, and pressure.
Fun Facts
When lakes freeze in the winter, they freeze from the top down. So as the top freezes, the water below is actually protected from the cold by the ice. This is how fish can survive.
TRY THIS BOILING ICE
Most materials with mass usually exist in three different phases: solid, liquid, or gas. Each of these phases has its own set of unique properties, and those properties describe the material in very special ways. Take water, for example. Do you know what it looks like in its solid, liquid, and gas forms?

solid: a state in which a material is hard and usually very dense. A solid will maintain its shape even outside a container.
liquid: a state in which a material is a fluid and is less dense than a solid, yet more dense than a gas. A liquid will assume the shape of its container, but won’t expand in the container to do so.
gas: a high-energy state in which a material is a collection of molecules moving in random motion generally at high speeds. A gas will assume the shape of its container, but it will expand or compress in order to do so.
Second Law of Thermodynamics: heat always flows from a hotter object to a
colder object.
QUESTION
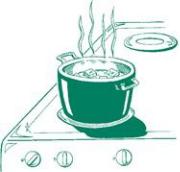
Why does a pot of boiling water stop boiling when an ice cube is put in it?
MATERIALS
Pot of water
Several ice cubes
Stove
PROCEDURE
1.Set the pot of water on the stove and turn the burner on high until the water boils. You might need to ask for permission or some assistance for this step.
2.Once the water has come to a steady boil, place several ice cubes into the pot, keeping the water boiling. Observe what happens.
WHAT’S HAPPENING
The boiling should have stopped immediately. Why is this? It’s because of the
Second Law of Thermodynamics. According to this law, the heat coming from the burner will always flow to the coldest object in the pot — in this case, the ice. So the heat from the burner stops making the hot water boil and starts making the solid water melt.
FOLLOW-UP
When the ice finally melts, will the water start boiling right away?1 Once the water boils again, notice the steam that rises from the pot. Where does it come from? It’s just the same water in another state, a gas, and it’s called water vapor.
We see it when we take a shower in a cold room, and whenever we see clouds or
fog in the sky.
Science Online
In 1869, a Russian chemist named Dmitri Mendeleev arranged all the known material in the universe into a chart that is now known as the Periodic Table of the Elements. Each element is defined by a certain arrangement of protons, electrons, and neutrons. The table is organized so that the elements are listed in order of their Atomic Number, the number of protons in the element.
Below you will find three links to interactive sites that show the Periodic Table.
Chemical Elements
www.chemicalelements.com
Chemicool
www.chemicool.com
Web Elements
www.webelements.com
Fun Facts
It takes nearly seven times more energy to melt 1 kilogram of ice than it does to boil 1 kilogram of water!
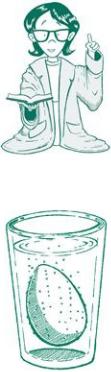
TRY THIS FLOATING GRAPE
One of the many ways you can describe a material is by its density. Density is nothing more than the measure of how solid something is. For example, water is less solid than a chunk of concrete, and its density is less than that of concrete.
Scientists use a formula involving mass (how much of the material there is) and volume (how much space the material takes up) to figure out an object’s density. The less dense it is, the less tightly packed the particles are, and the more space it tends to take up.
Density is what makes balloons float up in the air, ice cubes float in your drink, and rocks sink to the bottom of a lake. But it can also be tricky! Here’s a fun trick that is guaranteed to amaze your friends.
QUESTION
Can you make a grape float in the middle of a glass of water?
Fun Facts
The density of the sun is 1.41 times that of water. Here are the densities of the sun and all the planets in our Solar System as multiples of the density of water.
Sun: |
1.41 |
|
|
Mercury: |
5.43 |
|
|
Venus: |
5.42 |
|
|
Earth: |
5.52 |
|
|
Mars: |
3.93 |
|
|
Jupiter: |
1.33 |
|
|
Saturn: |
0.69 |
|
|
Uranus: |
1.32 |
|
|
Neptune: |
1.64 |
|
|
Pluto: |
2.06 |
|
|
KIDS’ LAB LESSONS
QUESTION Can you make a liquid float?
EXPERIMENT OVERVIEW You will be pouring liquids with different densities into the same container and producing a layered solution. Using colors, you will show how additional liquids poured into your solution find their way to the “right” layer. You will also “clean” some of the colored water and be invited to consider other possible color patterns.
SCIENCE CONCEPT Ice cubes float in water because ice is less dense than water. In the same way, an oil spill tends to ride on the surface of the water because oil is also less dense than water. However, solid objects, or even thicker liquids, will sink in water because they are denser than the water. To compare the densities of two or more materials, you can set up a liquid test container with layers of liquids, each with different density. By noticing how the materials separate from one another, scientists can identify unknown materials. This makes it easier to clean up pollution in lakes and streams.
MATERIALS
Red and blue food coloring Measuring cup
1 cup corn syrup
Clear glass bottle — empty 24–32-ounce glass bottles work well
1 cup vegetable oil
½cup water
½cup liquid bleach (Be very careful with bleach. Always ask for an adult’s help before using it.)
Fun Facts
The air we breathe is composed of several gases, but the two major ones are nitrogen and oxygen. The percentages are:
nitrogen (78%) oxygen (21%) other gases (1%)
PROCEDURE
1.Mix red food coloring into a measuring cup filled with the corn syrup. Pour the syrup into the bottle.
2.Pour the oil into the bottle on top of the corn syrup. Do these liquids mix?
3.Mix blue food coloring into a measuring cup filled with the water. Pour the water into the bottle on top of the oil. Give it several minutes to settle. Where does the water go when you pour it into the bottle? Can you explain why it does this?
4.At this point, you should have three distinct layers in your bottle. The bottom layer will be red; the middle, a thinner layer of blue; and the top layer will be clear.
5.Now pour the bleach into the mixture and observe what happens to the blue water. Again, allow several minutes for the mixture to settle.
Fun Facts
Did you know both cement and steel can float? Due to the Archimedes Principle, which says that objects are supported by a force equal to the weight of the water they displace, even heavy ships, if they are designed right, can float!
QUESTIONS FOR THE SCIENTIST
 What happened to the blue water?
 Can you describe where the bleach ended up?
 Why didn’t the bleach mix with the syrup?
CONCLUSION The first three liquids all have different densities and exist in layers in the bottle. When you added the bleach, it sank through the oil, because it is denser than oil. It is not as dense as corn syrup, so it did not sink through the bottom layer. This put it at the same layer as the blue water and it happens to mix easily with water. So the bleach and water were mixed and the bleach turned the blue water clear again!
FOLLOW-UP It would be fun to make a mixture that has red, white, and blue bands, in that order. This would mean dyeing the oil (the top layer) either red or blue. Why isn’t this possible in the setup you are using?
TRY THIS FLOATING WATER
Air is all around us. We breathe it, we use it to inflate the tires on our car, and
we feel it when the wind blows. One of the surprising aspects of air is that we can’t see it, we can’t taste it, and only in certain cases can we feel, hear, or smell it. Yet it is a critical piece of our lives.
When air is in a container, it exerts pressure on its surroundings. This pressure is what creates wind and weather, it’s what makes airplanes fly, it’s what makes curve balls curve, and it’s what keeps your car tires inflated and able to roll on the road. Simply put, air pressure is a part of everything we do.
Here’s an easy magic trick to do that isn’t really magic. Once you understand how air pressure works, you can amaze your friends once with the demonstration and then again when you explain how it works!
QUESTION
Can you make water float in the air?
Cool Quotes
Imagination is more important than knowledge. Knowledge is limited. Imagination encircles the world.
— Albert Einstein
MATERIALS
A small cup of water, clear plastic works best A sink, bathtub, or tray to catch any water that falls while you practice this demonstration A note card or other small piece of paper (the card must be large enough to fully cover the top of the cup)
PROCEDURE
1.Fill the cup about three-quarters full of water. The amount of water isn’t that important, although you may find it more difficult to do this if the cup is full.
2.While the cup is held over the sink, slowly turn it over and observe how the water pours out of the cup.
3.Now refill the cup with water and place the card on top of the cup, making sure that it covers the entire top.
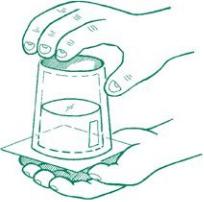
4.Press down gently but firmly on the card as you slowly rotate the cup upside down.
5.Keep your hand on the card for a few moments, then remove your hand. The card should stay in place and the water will appear to float inside the cup with nothing holding it up.
WHAT’S HAPPENING
When you tipped the cup over the first time, the water ran out because gravity pulled it down toward the sink. The only way to prevent this from happening is to find some force that counteracts gravity. Enter air pressure. When you add the card, you see the effects of air pressure. The air below the cup actually pushes up on the card, just like it pushes on everything around you. In this case, the upward force of air pressure is enough to cancel out the effect of gravity on the water and keep the water “floating” inside the cup. Depending on the strength of the card you use, you may notice that eventually some water begins to leak out. As this happens, the seal begins to break and the card is no longer able to prevent gravity from winning the battle. Soon all the water will spill out.
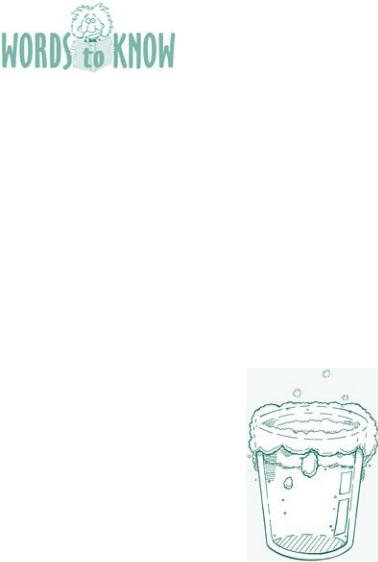
Egg-sactly!
Can you fill in the blanks to finish the following common sayings about eggs?
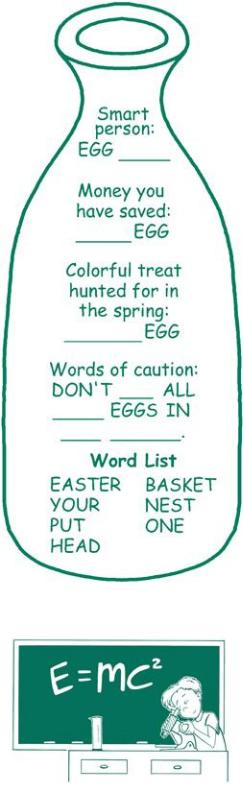
Choose words from the Word List found in the bottom of the bottle.
KIDS’ LAB LESSONS
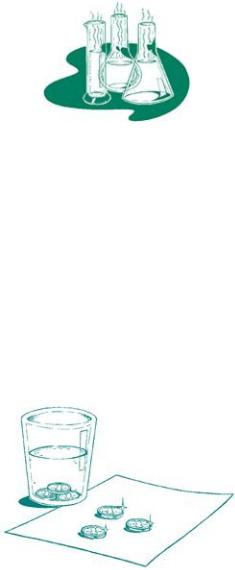
QUESTION Can you push an egg into a bottle without touching it?
EXPERIMENT OVERVIEW Air has the ability to make objects move into and out of places where they otherwise would not fit. In this experiment, you will force a hard-boiled egg into a bottle without touching the egg.
SCIENCE CONCEPT Air has an interesting behavior. It always flows from high pressure to low pressure. That is why when you get a hole in a tire on your bicycle the air leaks out. In this experiment, you’ll be placing a hard-boiled egg between high pressure (the outside air) and low pressure (the air inside the bottle). Air wants so badly to get inside the bottle, it will push away anything in its way (the egg)! You’ll use this principle to get the egg in.
To make it work, you will have to lower the pressure inside the bottle so much that the outside air forces the egg into the bottle. You will do this by placing lit matches inside the bottle. The matches will burn until the oxygen inside the bottle has been consumed. At this point, there is less air (since some of it was consumed by the fire) inside the bottle than there previously was, which results in decreased air pressure. As the outer air pushes into the bottle, the egg slides in.
MATERIALS
Wide-mouth bottle (20–32-ounce juice bottles will work but make sure that the egg is just barely too big. If the opening is too small, the egg will probably get stuck.) 1 hard-boiled egg with the shell removed 3 matches
A very small piece of paper (1″ × 1″)
PROCEDURE
Insertion
1.Place the hard-boiled egg on the mouth of the bottle. It should sit comfortably without falling off. You may try to push the egg into the bottle to verify that it does not easily fit.
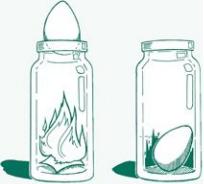
2.Remove the egg and place three lit matches into the bottle with the paper. Use matches only with adult supervision!
3.Quickly replace the egg on the mouth of the bottle, effectively sealing the top of the bottle.
4.Watch as the matches go out and the egg is pulled down into the bottle.
Removal
1.Turn the bottle upside down so the egg falls into the opening without coming out. Blow into the opening. (It is recommended to have an adult do this part.)
2.As the pressure inside the bottle increases, the egg should be pushed out of the bottle into your mouth.
QUESTIONS FOR THE SCIENTIST
 Why did the egg get pushed into the bottle?
 What did the burning matches have to do with this experiment?
 What are some other examples of air flowing from high pressure to low pressure?
CHEMICAL REACTIONS
Have you ever taken a bite of a lemon and had your mouth pucker up because it was so sour? Have you ever wondered why some foods taste the way they do? One reason is because of things called acids and bases. Lemons and other citrus fruits are filled with citric and ascorbic acids (vitamin C), which provide a wide range of health benefits. But they also make them taste sour. On the other hand, some foods we eat are called bases. They are on the other end of the acid scale and taste bitter. Bases include items such as baking soda (to make baked goods rise), antacid tablets (to help against indigestion and heartburn), and some soaps.

acid: materials that taste sour, like lemon. If strong enough, these can burn
your skin.
base: materials that taste bitter, like ground coffee. If strong enough (for
example, ammonia or bleach), these can also be dangerous.
Fun Facts
pH is what scientists use to measure the acidity of a substance. A pH value of 7.0 is called neutral, while a value higher than 7.0 indicates a base. pH values lower than 7.0 indicate acids. Here are some sample pH values for common foods:
Food |
pH |
|
|
Lemons |
2.3 |
|
|
Strawberries |
3.2 |
|
|
Tomatoes (whole) |
4.6 |
|
|
Potatoes |
6.1 |
|
|
Sweet corn |
7.3 |
|
|
White eggs |
8.0 |
|
|
TRY THIS RED CABBAGE INDICATOR
There are plenty of fancy ways to test to see if something is an acid or a base, but you can also do it simply in the comfort of your own home.
QUESTION
How can you figure out if something is an acid or a base?
MATERIALS
Cabbage indicator — the liquid from a jar of pickled red cabbage, available at the grocery store Eyedropper
1 small plate for each of the materials you wish to test. Below are some samples: Lemon juice Orange juice Baking soda Vinegar
Antacid tablet Tea bag — mix with water to make tea Ground coffee
indicator: a liquid (like the juice of a red cabbage) that tells you if something
is an acid or a base.
PROCEDURE
1.Pour some of the indicator into several small plates.
2.Drop a small amount of each test item onto a plate and watch what happens to the indicator.
WHAT’S HAPPENING
With some of the test samples, the indicator will turn a pink color. That is your clue that you’ve tested an acid. Other samples should have turned the indicator greenish blue. Those are the bases. Now that you know what to look for, can you find other acids and bases in your kitchen?
CAUTION: Some acids are very dangerous to humans. Be careful not to get any of the samples on your skin, and never try to eat or drink things that you are experimenting with.
Cool Quotes
The most exciting phrase to hear in science, the one that heralds new discoveries, is not “Eureka!” (I found it), but “That’s funny.…”
— Isaac Asimov, author and biochemist
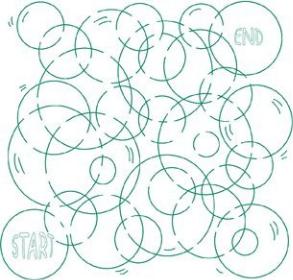
Amazing Bubbles
Can you find your way from START to END without bursting any of the bubbles?
TRY THIS RAW EGG PEELER
Now that you know how to find acids, you are ready to see what an acid can do to a common kitchen item.
QUESTION
How can you peel a raw egg?
MATERIALS
Raw egg
Vinegar
Small glass
PROCEDURE
1.Place the egg into the glass.
2.Pour enough vinegar into the glass to cover the entire egg.
3.Let it sit for a few days.
4.You should return to find that the eggshell has disappeared and your raw egg has become see-through. You may need to rub the surface to remove the last parts of the shell.
WHAT’S HAPPENING
The acid in vinegar slowly ate away at the eggshell until none of it remained. When you returned to find the see-through egg, you were really seeing the thin membrane that holds the egg inside the shell. You may have noticed quite a bit of bubbling during the “peeling” process. Eggshells are made of calcium carbonate, which reacts with vinegar (an acid) and makes calcium acetate, carbon dioxide (the bubbles you see), and water.
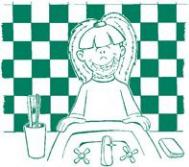
TRY THIS FOAMING AT THE MOUTH
You put something in your mouth every day that has the ability to produce bubbles in a similar fashion to the previous experiment. However, this doesn’t involve any acids, just toothpaste and a can of soda.
QUESTION
How can I make myself foam at the mouth?
MATERIALS
Baking soda toothpaste |
Carbonated soda or water |
|
|
Toothbrush |
Sink |
|
|
carbonated soda: a soft drink that has carbon dioxide gas in it, making it
fizzy.
PROCEDURE
1.Brush your teeth with the toothpaste as you normally would.
2.Instead of spitting when you are done, open your mouth and take a sip of the carbonated soda or water. You should feel fizzing in your mouth.
3.Open your mouth and let the foam come rolling out!
CAUTION: This should be performed only under adult supervision. Also, make sure you have a place for the foam to flow into. Never try to swallow it or keep it in your mouth. You could get very sick from swallowing too much of this mixture.

Fun Facts
New dental cleaning techniques involve using baking soda as an abrasive in place of scraping.
Baking soda toothpaste is an effective way of removing crayon marks from walls.
WHAT’S HAPPENING
The ingredients of baking soda toothpaste are designed to make some bubbles, as you’ve probably noticed during your normal brushing routine. Adding the carbonated beverage, which has carbon dioxide gas, produces a reaction that will keep the bubbles coming and coming.
KIDS’ LABS LESSONS
QUESTION What makes things fizzy?
EXPERIMENT OVERVIEW In this experiment, you will produce different combinations of mixtures that react to form fizzy solutions. You’ll start with a baking soda/vinegar mixture, and then move on to make your own safe-to-drink, though not particularly tasty, lemon soda.
SCIENCE CONCEPT Certain materials, when brought into contact with other materials, react in a way that forms bubbles. Acids and bases often combine to form carbon dioxide, which, as a gas, is what makes carbonated soda
fizzy. You’ll be experimenting with several common ingredients to determine
which react in this way.
MATERIALS
Part I |
Part II |
|
|
½ cup vinegar |
Food coloring |
|
|
20-ounce glass bottle |
A pitcher of water |
|
|
2 tablespoons baking soda |
3 teaspoons baking soda |
|
|
¼ cup water |
2 tablespoons sugar |
|
|
|
2 tablespoons lemon juice |
|
|
Part III
Large glass filled with water
Small (¼ pound at the largest) piece of dry ice (available at many grocery stores or fish markets — you may need an adult to buy and handle it for you)
PROCEDURE
Part I
1.Pour vinegar into the bottle.
2.Dissolve baking soda in water and pour the mixture into the bottle.
3.Watch what happens.
solution: a mixture of two or more liquids.
Part II
1.With the food coloring, color the water in your pitcher any color you like. This is just for looks, but you will be able to drink your concoction when you are done, so pick a color you would like to drink.
2.Stir in baking soda and sugar. Mix until they dissolve.
3.Add lemon juice and watch your drink become carbonated!
Part III
1.Place the dry ice in the water and watch what happens. CAUTION: Dry ice is very cold and should be handled only with gloves with close adult supervision.
QUESTIONS FOR THE SCIENTIST
 What kinds of materials reacted to make bubbles?
 How did your soda taste? Can you think of any ingredients you could add to improve the taste?
 Would your lemon drink work with any other fruit’s juice? Which fruits do you think would work?
 Could you use dry ice to make a carbonated soft drink?
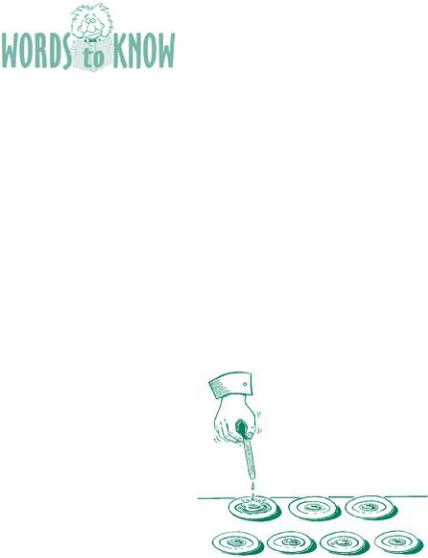
TRY THIS CLEANING PENNIES
Some chemical reactions can take dirty objects and make them clean by removing the dirt. Detergents do this with the dirt on your clothes and your dishes, and the soap you use in the bath or shower does the same for your body. But what about metals? They are harder to clean.
Fun Facts
Oxides are what metals produce when they encounter oxygen. The most famous oxide we know is iron oxide, or rust.
Coins circulate for about 25 years on average.
QUESTION
How do you clean a penny?
MATERIALS
Vinegar
Glass jar
Dirty pennies
1 teaspoon salt
What size T-shirt do you buy for a 200-pound egg?
Eggs-tra Large!
Science Online
For a fun look at how money is made and how much money is made, check out the U.S. Mint’s Web site at www.usmint.gov .
PROCEDURE
1.Pour vinegar into the jar until it is about half full.
2.Stir in salt until it dissolves.
3.Drop several dirty pennies into the vinegar.
4.After a few minutes, take out half of the pennies and lay them on a paper towel to dry.
5.Remove the other pennies and rinse them with water before letting them
dry.
6.Note the differences between the two groups of pennies after they have been out of the vinegar/salt solution for a while.
WHAT’S HAPPENING
The vinegar/salt solution is able to loosen the residue on the pennies, which is called copper oxide. With this residue removed, the pennies are shiny once more. When you rinse them off, the cleaning stops and they remain shiny. The unrinsed pennies still have some of the solution on them, and when oxygen in the air hits them, a new reaction occurs, turning the pennies a bluish-green color.
FOLLOW-UP
Try this same experiment with nickels, dimes, and quarters. Do you get the same results?2
Acid Bath
Oops! This young scientist tried to clean his friends’ copper ID bracelets. But the acid was too strong and it removed part of each letter! Question: Can you add the missing lines to complete the letters and see to whom each bracelet belongs?
KIDS’ LAB LESSONS
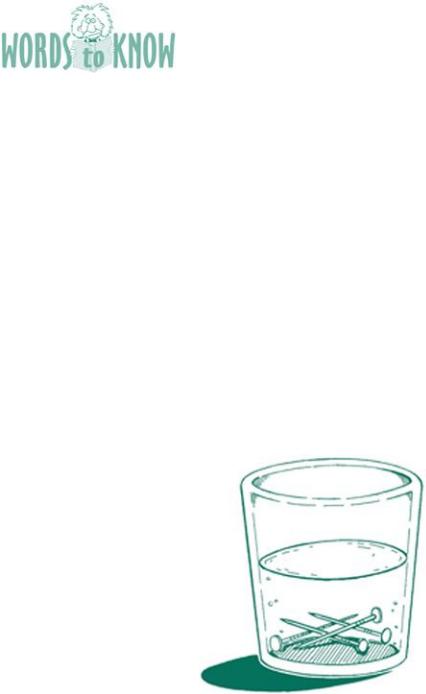
QUESTION How are metal things made shiny?
EXPERIMENT OVERVIEW Electroplating is the process of taking a metal and using it to coat something else. It is a complex process involving electricity and is difficult to perform in a home laboratory. This experiment is not electroplating in the true sense, but it does produce a transfer of copper from the pennies to the nails.
SCIENCE CONCEPT It’s possible to remove atoms of a material (like copper) and have them float around in a liquid without you seeing them. To retrieve them, you simply need to make them want to attach to the metal you want to coat. In this case, the vinegar/salt solution removes copper oxide atoms (the “dirt” on the pennies), and when they dissolve, they form copper atoms that want to attach to another metal. The nails attract the copper atoms floating in the water, and the atoms stick to them, coating them with copper.
MATERIALS
Vinegar/salt solution prepared as described in the “Cleaning Pennies” activity Two clean nails or metal paper clips Dirty pennies
electroplating: a process that uses one metal to coat another metal.
PROCEDURE
1.Prepare a solution of vinegar and salt as described in the previous activity.
2.Soak the dirty pennies in the vinegar/salt solution until they are clean.
3.Remove the pennies and set them aside.
4.Place your nails into the remaining solution and let them sit for a few hours.
5.When you are ready to remove the nails, remove them carefully and look closely to see if they have changed color. If they have not done so noticeably, return them to the solution. If you want to speed up the process, place more dirty pennies in the solution along with your nails.
QUESTIONS FOR THE SCIENTIST
 What is the coating on the nails?
 Why can’t you see that coating in the solution before you place the nails in
it?
CONCLUSION
You are observing a pretty amazing process. The acid solution not only removes the dirt (which is a combination of copper and oxygen called copper oxide), but in doing so, leaves copper atoms floating in the solution. These atoms are so small you can’t see them, but they will float in the acid solution until they find a negatively charged metal to stick to. When you place the nails in the acid, some of their atoms are also removed and they are left with a negative charge. The copper atoms are attracted to the nails and stick to them, giving them a slight copper tint.
SCIENCE FAIR PROJECT: CHEMISTRY
BUILD A HOME BAROMETER
When you watch the evening news, the weather reporters often refer to the barometric pressure as an indicator of both current conditions and the predicted weather. In particular, they will tell you if the pressure is rising or falling. Generally, falling pressure, or the presence of a low pressure system, indicates bad weather, and rising pressure, or the presence of a high pressure system, indicates improving weather. When air warms up, pressure tends to increase, while cooling air is usually accompanied by lower pressure. You will also find this if you climb a mountain. At the higher elevations, the air is thinner, which means the pressure is lower, and the air is also usually cooler.
It’s not hard to build your own barometer that will allow you to predict the weather from the comfort of your own home.
QUESTION
How does a barometer work?
EXPERIMENT OVERVIEW
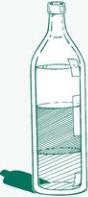
You will be building your own home barometer, which will allow you to track the weather over several days and predict the weather to come. You will be using water levels in an empty 2-liter bottle to record the rise and fall of the atmospheric pressure. After you gather a few days’ worth of data, you’ll be able to compare your predictions to those of the local weather forecasters!
SCIENCE CONCEPT
Barometers are used to measure the air pressure outside at any given time. They can also be used to predict the weather. This requires tracking pressure values over time to determine if there is a trend toward increased pressure or toward lowered pressure.
By measuring the height of the water in your bottle due to the air pressure outside the bottle, you’ll have a way to compare one day’s value to another.
Over time, you can use the changing heights to make your own predictions.
MATERIALS
Empty 2-liter plastic bottle (smaller bottles will work as well) |
Marking pen |
|
|
Fish tank |
Paper |
|
|
Water |
Knife or scissors |
|
|
PROCEDURE
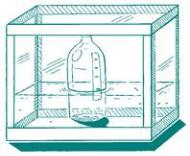
1.Use a knife or scissors to cut the bottom off the plastic bottle so that it sits evenly on the table. You may need to ask for help from an adult for this step.
2.Fill the pan about half full of water.
3.With the bottom cut off of the bottle, the cap must be screwed on and, inverted, the neck of the bottle becomes the bottom when filling. Fill the bottle with enough water so that when inverted, the water level inside the bottle is above that of the pan. It will look a little like a funnel as it is filled. Then it will be inverted and placed into the pan of water. Place the bottle in the water so that it sits evenly on the bottom of the pan. Make a small mark on the bottle indicating the height of the water.
4.Take a strip of paper and make a scale with evenly marked intervals. There should be a zero point on your strip of paper, with several markings above and below that mark. You will use this to track the changing heights of the water. To accurately show the small increments that you will want to measure, make your scale fairly small, perhaps starting with markings every
inch.
5.Attach your measuring scale to the side of the bottle, placing the zero point at the exact level of the water in the bottle.
6.Make one mark on your measuring scale at the beginning water level. Use your mark to indicate the date of your first measurement.
7.Wait 24 hours and measure again. Make another mark to represent your second measurement.
8.Continue measuring each day for one week. After the week has passed, take off the measuring scale, and look at your measurements.
QUESTIONS FOR THE SCIENTIST
 Did the height of the water change over the week?
 Did the height go up or down?
 What kind of change in air pressure produces this kind of change in your water level?
 What kind of weather would you predict based on the change in heights?
 Did your local weather match this prediction?
Now that you have tried this experiment, you can repeat it by making more measuring scales and actually predicting the upcoming weather.
Congratulations! You are a meteorologist!

meteorologist: a person who studies and reports weather conditions.
CONCLUSION
If air pressure increases, the outside air will press down on the water in the pan and push it up into the bottle. This will produce an increase in height of the water. When weather forecasters use the term “inches of mercury,” they are using a similar scale to measure the height of a different liquid due to the outside air pressure.
If the weather was pretty consistent during the course of the week, you may not have seen much change in your barometer. Don’t be discouraged! Try it again, and give yourself more time. This experiment will work all year long.