

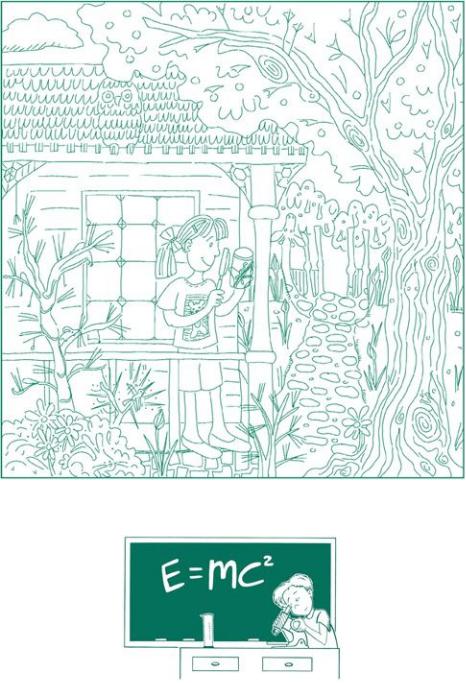
BIOLOGY
Life. We all have it. The world around us is full of it, from the birds in the air to the fish in the sea and all the land animals in between. But how does life really work? If you can answer that question, you will gain insight into one of the most widely studied topics in the natural world.
TRY THIS WATER COLORS
Humans and other animals are very complex creatures. So let’s first consider plants. Plants seem to be simple examples of the way life works. You plant them in the ground, water them, and let the sun shine on them. Pretty soon, they grow,
they bloom, and then they die. But inside a plant, there are processes happening that we don’t see — processes unlike anything else we encounter. Let’s begin to understand these processes with what everyone knows is the most important resource a plant can get: water.
QUESTION
How does water get from the ground to the leaves of a plant?
MATERIALS
4 full glasses of water at room temperature Red, blue, green, and yellow food coloring 3 white carnations from a florist Sharp knife
PROCEDURE
1.Mix one color into each of your four glasses. The stronger the color of the water, the more effective the experiment will be.
2.Place your first carnation into the glass of your choice. You may need to trim the stem if it’s too long.
3.Place your second carnation into another glass.
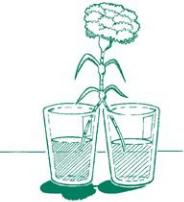
4.Take your final carnation and, with an adult’s help, slice the stem lengthwise so that it looks like two smaller stems, both of which remain attached to the flower.
5.Place one half of the stem into your third glass of colored water and the other half into the fourth and final glass.
6.Place the flowers out of the sunlight and wait a day or so. Then look at each of the flowers.
WHAT’S HAPPENING
Through a process called capillary action, water travels up through the stems of plants until it reaches the outermost parts of the flowers. You saw this when the flower of each carnation turned the color of the water it was sitting in. Even more interesting is that the split stem produced a flower with both colors in it. You could easily repeat this experiment with other flowers and other colors to see if they behave in the same way. Celery stalks with the leaves on also work well in this experiment.

capillary action: the process that allows water and other nutrients to move up from the ground to all parts of a plant.
FOLLOW-UP
When you water the plants in your yard, should you water the leaves or the ground around the bottom of the plant?1
(The answers to all Follow-Up Questions are at the end of the book. The number of the superscript marks the answer in the back.)
Why did the silly scientist keep his shirt on when he took a bath? Because the
label said “Wash and Wear.”
Science Online
ZooNet is a good starting point for information about animals, zoos, and more. Visit www.zoonet.org .
TRY THIS FALLING LEAVES
Some trees stay green the whole year round while others lose their leaves in the fall and winter and grow new leaves in the spring. If you’ve ever seen trees lose their leaves in the fall, you may have noticed that the leaves turn from green to yellow, red, or orange before eventually falling to the ground.
QUESTION
Where do the leaves get their colors?
MATERIALS
4–5 spinach leaves 1 drinking glass Spoon
Nail polish remover — ask a parent for help in getting this Coffee filter Scissors Tape
Pencil
PROCEDURE
1.Tear the leaves into small pieces.
2.Place the pieces into the bottom of the glass and mash them together with a spoon.
3.Add several teaspoons of nail polish remover to the leaf mush. Wait until the leaves settle at the bottom of the nail polish remover. If the remover does not cover all the leaves, add enough so that they are totally covered.
4.Cut a rectangle from the coffee filter. It should be slightly narrower than the glass.
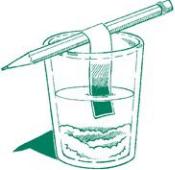
5.Tape the rectangle to the pencil and, when the leaves are settled, place the pencil across the top of the glass so that the coffee filter rests in the nail polish remover without touching the leaves.
6.Let the glass sit for several hours.

Cool Quotes
Autumn is a second spring when every leaf is a flower.
— Albert Camus, French novelist
WHAT’S HAPPENING
You should see many colors work their way up the coffee filter. The green you see comes from the chemical that makes leaves green — chlorophyll. But you should also see other colors, like red, yellow, and orange. These come from different chemicals that are also found in green leaves.
During the spring and summer, photosynthesis produces so much chlorophyll you can see only the green color in the leaves. But as the days get shorter, less chlorophyll is produced and the green fades away so that you can finally see the other colors. When the green is gone, the leaf is not far from falling to the ground.
FOLLOW-UP
When fall comes, watch the leaves change color. Can you tell what causes this to occur?2
chlorophyll: the chemical in plants that makes their leaves green.
photosynthesis: the process by which plants turn sunlight and water into
chlorophyll.
Fun Facts
Chlorophyll absorbs red and blue light and reflects green light back to your
eyes.

What do you call a scientist who carries a dictionary in her jeans pocket? A smarty pants!
KIDS’ LAB LESSONS
QUESTIONS Do seeds need light to grow? Do plants need light to grow?
EXPERIMENT OVERVIEW You’ve already seen what happens to some trees when they don’t get enough light — they lose their leaves. But plants and trees are different. In this experiment, you’ll get to explore whether or not seeds and plants need light to grow by placing some seeds and plants in the dark while others stay in the light. You will decide whether or not light makes a difference in their growth pattern. This experiment will take a few days since most processes with plants occur very slowly, but the results should be obvious and a little surprising.
SCIENCE CONCEPT Most gardeners believe that light and water are the basic needs of any plant. You’ll test that theory by letting some seeds grow in a dark setting while others grow in a light setting. You’ll then take two healthy plants and place one in a dark closet for a few days while the other sits in the sunshine. By doing this you will be using one of the most important pieces of the Scientific Method — testing one change at a time. It’s important that you treat the seeds and plants exactly the same except for where they are placed. By doing so, you will know whether light makes a difference.
MATERIALS
2 paper towels
2 small dishes
Pinto beans (available at a grocery store) Water
2 small, identical, healthy potted plants 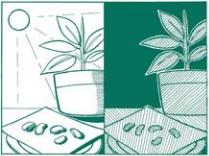
PROCEDURE
1.Fold the paper towels so that each fits onto a dish.
2.Place the folded paper towel on a dish and place several beans on each paper towel.
3.Pour just enough water onto the paper towel so that it is damp. Pour out any excess water from the dish.
4.Place one dish of beans in a closet where it will stay dark for several days.
5.Water the potted plants until their soil is just damp and place one of the plants beside the beans in the same dark location.
6.Place the second dish of beans in a well-lit place alongside the second plant.
7.After two days have passed, slightly dampen the two dishes containing the beans and water the potted plants. Make sure that you give each the same amount of water so you keep the experiment fair.
8.After a total of four days have passed, take the beans and plant out of the closet and place each by its sunlit partner.
QUESTIONS FOR THE SCIENTIST
 Which sample of beans grew better — the one in the dark or the one in the
light?
 Which sample of potted plant grew better — the one in the dark or the one in the light?
 If you were going to plant seeds, where would you put them — in a light place or in a dark place?
 Think about the amount of light where seeds and plants normally grow. Does this experiment confirm that those locations are the best places for growing?
 Do some seeds require different amounts of light? Experiment with different kinds of seeds and amounts of sunlight to see what factors most affect germination and growth.
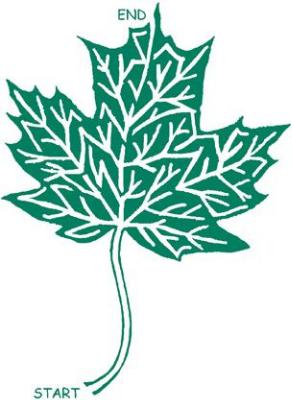
Totally Tubular
Can you find your way through all the tiny tubes in this leaf from START to END?
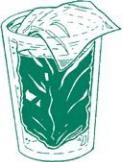
TRY THIS HOLE-Y WALLS
Another amazing talent plants have is the ability to absorb water right through their skin. This process is called osmosis, and you can do an experiment that shows how it works.
QUESTION
Can liquid really pass through walls?
MATERIALS
2 wide glasses or measuring cups Water
Tincture of iodine (available at a drugstore) Cornstarch
A small, sealable plastic bag
PROCEDURE
1.Fill both glasses approximately three-quarters full of water.
2.In one glass, mix two teaspoons of iodine with the water.
3.In the other glass, mix one tablespoon of cornstarch with the water, and pour about half of it into the plastic bag.
4.Seal the plastic bag and place it into the iodine mixture. You may need to wash the bag with water to make sure there is no cornstarch on the outside when you place it in the iodine.
5.Allow the bag to sit in the iodine for an hour and observe the changes that occur during that time. Meanwhile, drop a few drops of iodine into the glass with cornstarch in it and observe what happens.
WHAT’S HAPPENING
The cornstarch mixture turns a dark color when iodine is present. This was proved when you dropped the iodine into the second glass. Iodine also turns color when in the presence of a starch. However, you didn’t see the iodine
mixture in the first glass ever turn color. Somehow, iodine has passed through the wall into the plastic bag, but the cornstarch was not able to pass into the iodine. Cornstarch molecules are large, compared to those of iodine. More important, iodine molecules are smaller than the holes in the plastic bag (yes, there are holes in those bags!), so they can pass through. However, the holes are too small to allow cornstarch molecules to pass so they are held inside the bag. Thus the iodine mixture remains its original color.
Fun Facts
Diffusion and osmosis are two ways cells can get the nutrients they need to grow and be healthy.

osmosis: a process in which liquids pass through the walls of cells.
Science Online
Learn about gardening from experts at Better Homes and Gardens. Visit www.bhg.com/gardening/ .
KIDS’ LAB LESSONS
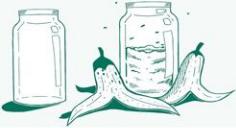
QUESTION Can you blow up a balloon with a banana?
EXPERIMENT OVERVIEW In this experiment, you will watch as a banana decomposes over time and inflates a balloon. The process is not something you can see, but the effects are unmistakable. As a follow-up, you can try other fruits to see if they produce the same results as they decompose.
SCIENCE CONCEPT Eventually, plants die. A banana is the fruit produced by a banana tree, and anyone who has ever seen a banana ripen and turn brown before it could be eaten will know that as it ripens and dies, it undergoes dramatic changes. When a banana decomposes, bacteria flock to it. Bacteria are so small you can’t see them. But not only are they there, they multiply and multiply by eating what’s left of the banana. In this manner of processing food,
they give off gas. Not a lot of gas, but with enough bacteria present, the gas will inflate the balloon. Your challenge, once you complete this experiment, is to try other fruits to see if they produce the same results.

bacteria: tiny organisms that live in everything. Some can make you sick, but many of them help keep you healthy.
MATERIALS
A very ripe banana A bowl
A small-mouth plastic or glass bottle A balloon PROCEDURE
1.Peel the banana (make sure it is very ripe) and mash it in the bowl until the lumps are gone.
2.Carefully scoop the banana mush into the bottle. This might be a little tricky (and messy!), but with patience, it can be done. (You may also want to try using a plastic knife to scoop the banana mush into the bottle. This may be easier.)
3.Place the balloon over the mouth of the bottle.
4.Place the bottle in a warm, sunny spot and watch the bottle over the course of a few days.
5.Measure the distance around the balloon each day to track the progress of the banana’s decay.

Fun Facts
Latex balloons come from the rubber tree, which produces enough sap to make three 10-inch balloons each day.
QUESTIONS FOR THE SCIENTIST
 What is causing the balloon to inflate?
 What is happening to the banana?
 How long did it take for the balloon to begin inflating?
FOLLOW-UP
Now that you have the procedure down, try mashing other ripe fruit (like apples, oranges, grapes, melons) and repeating the experiment. By comparing the growth rate of each fruit’s balloon, you will be able to determine which fruit decays the fastest.
CLEAN-UP
Be sure to clean up this experiment near a sink or somewhere outside. The smell is likely to be unpleasant and strong. Carefully dispose of all your materials before starting over.

Scientific Transformation
Can you turn a banana into a balloon in four steps? Start with the word BANANA on line one. In each of the next steps you can move one letter, change one letter into another (or two of the same letters into two other letters that are the same), or add one letter. Keep track of your changes on the empty lines.
Fun Facts
The largest worm ever found was 22 feet long.
ANIMALS
The animal kingdom includes more than 1 billion different sizes, shapes, and species. Some people spend their whole lives studying animals and barely even scratch the surface of all there is to learn. When you’re a kid, though, some of the most interesting groups of creatures are found right in your backyard — the creepers, the crawlers, and the buzzers.
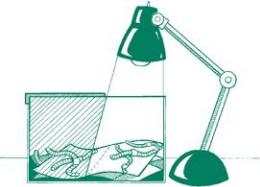
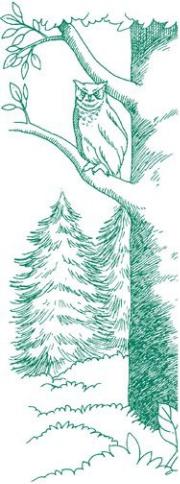
TRY THIS LIGHT FRIGHT
If you’ve ever been in your yard after a hard rain, or had the chance to dig up a large rock from your garden, chances are, you’ve run across a worm. Besides their being great for catching fish, most of us don’t know a lot about worms.
They may be a little odd to look at, and it may seem as though they don’t serve much of a purpose, but worms are very important to the earth. They actually make soil better for growing.
QUESTION
Do worms prefer light or darkness?
MATERIALS
Shoe box |
Earthworms, either from your |
|
|
Scissors |
yard or from a bait shop |
|
|
Paper towels |
Desk lamp |
|
|
PROCEDURE
1.Cut off about one-third of the lid of the shoe box.
2.Thoroughly wet several pieces of paper towel and lay them on the bottom of the box.
3.Place the worms on the paper towels toward one end of the box. Try to space them evenly so they don’t overlap one another. CAUTION: Make sure you handle the worms gently and with respect. A true scientist treats all creatures with care.
4.Place the lid on the box so the opening is on the same side as the worms.
5.Place the lamp above the box so that it sits about 1 to 2 feet higher than the top of the box.
6.Let the box sit for 15 to 30 minutes.
7.When you return, remove the lid and look at where the worms ended up.
WHAT’S HAPPENING
Worms tend to avoid light. That’s why they like the dirt so much. When you shined the light into the box, most of them moved as far away from the light as they could get. In some cases, worms will even crawl under the paper towel to avoid the light. Worms can’t see like we do, but they can sense light. When their nervous system senses the light, they immediately begin moving away from it.

nervous system: the system our bodies use to tell us how things feel.
FOLLOW-UP
With a hand-sized magnifying glass, look at the worm’s circulatory system. After your experiment, return your worms to the garden where they will help your plants grow.

Science Online
Worm Digest has a large store of information about worms, composting, and gardening. Visit www.wormdigest.org .
KIDS’ LAB LESSONS
If you’ve ever left fruit out on the counter a little too long, you’ve probably noticed the flies that seem to be attracted to it. Here is an interesting experiment to study about fruit flies.
QUESTION What do flies like to eat?
EXPERIMENT OVERVIEW You will be taking an overripe banana and leaving it to rot inside an open jar. Next to the jar with the banana will be a jar with nothing in it. In time, fruit flies will flock to the banana and help the decomposition process. Then, seemingly out of nowhere, small creatures called maggots will appear as well. Meanwhile, the empty jar will sit untouched. Once you have seen these results, you’ll be ready to extend the experiment to try other possibilities.
SCIENCE CONCEPT For many years, scientists believed that rotting fruit, like your banana, caused spontaneous generation. This means that life could spring up from nothing. Now we know that fruit flies eat the rotting fruit and use energy from the fruit to lay their eggs. Then we see the maggots. The fruit flies perform an important role. In a compost bin, leftover food is stored so that as it decomposes, it can be turned into nutrient-rich soil. The fruit flies help speed up that same process in your banana.
maggots: tiny wormlike creatures that grow into fruit flies.
MATERIALS
1 ripe banana
2 glass jars large enough to hold a banana
Fun Facts
Fruit flies live about two weeks.
PROCEDURE
1.Peel the banana and place it into one of the jars. Leave the other jar empty.
2.Put the jars in a place they won’t be disturbed for two weeks — preferably outdoors during warm weather.
3.Twice a day, observe the banana and keep a log of what you see. Include descriptions like color, consistency, smell, and the presence of flies or other living creatures.
4.Compare the contents of the empty jar to those of the jar with the banana.
5.After two weeks, look over your notes to mark the changes that occurred during that time.
QUESTIONS FOR THE SCIENTIST
 When did flies first appear?
 How long did it take for the banana to appear inedible?
 Where did the maggots come from?
 Can you think of any other creature that aids in the decomposing of discarded food?
FOLLOW-UP
Here are some variations on this experiment that you can try:
 Try putting a lid or a screen on the jar and see if you get the same results.
 Try another fruit, like an apple, orange, or a peach.
 Try placing the jars in different locations (light, dark, warm, cold, etc.).
TRY THIS ANIMAL CAMOUFLAGE
If you know someone who has been trained in the military, you might have seen them in uniforms called fatigues. Sometimes they are called camouflage because these uniforms make it difficult for others to see the wearers when they are in hiding. But some animals, like the chameleon, do this naturally and serve as models for how to do it right.

camouflage: how animals disguise themselves by blending into their
surroundings.
QUESTION
How do animals blend into their surroundings?
MATERIALS
2 large sheets of construction paper in each of three different colors Scissors A partner
PROCEDURE
1.Cut one sheet of each color into 2-inch by 2-inch squares.
2.Place all of the colored squares onto one of the large sheets while your partner closes his eyes.
3.When your partner opens his eyes, give him five seconds to grab as many colored squares as he can.
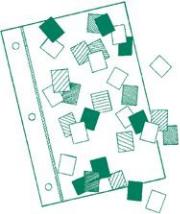
WHAT’S HAPPENING
Our eyes quickly notice sharp contrasts in color. You partner will usually pick out squares that are not the same color as the sheet they are lying on. When animals (and humans) use camouflage, they are taking advantage of the fact that when their colors match those around them (green frogs in grass, brown lizards on a tree branch) predators don’t see any contrast, and the animals are somewhat hidden. If you placed a brown frog in the grass or a green lizard on a tree branch, that animal would stand out and would not be protected.
FOLLOW-UP
If you know someone who owns sunglasses called Blue Blockers, ask if you can try them on. When you do, what colors do you see most strongly? Do you know why this is?3
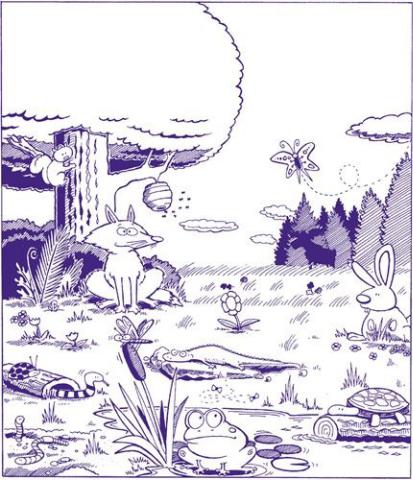
Eye Spy
Can you find the 10 creatures hiding in this picture?
KIDS’ LAB LESSONS
QUESTION Why are eggs shaped the way they are?
EXPERIMENT OVERVIEW You will be exploring the shapes of eggs and the incredible strength they possess despite their fragile structure. By carefully preparing the eggs, you’ll be able to place several books on top of four half-
shells without cracking the shells. As a follow-up, you’ll get to consider other versions of this test.
SCIENCE CONCEPT Eggs are shaped the way they are for many reasons. A simple one is that the egg shape doesn’t roll well. As a result, if a mother is sitting on her eggs and one gets away from her, it won’t roll far before it comes to a stop. This allows the mother to quickly retrieve it. Try this before you begin the experiment. Gently roll an egg across the table or counter. Notice how its unique shape prevents it from rolling far like a ball would.
Another reason for an egg’s shape is that the dome shape gives it more strength than almost any other shape. Some people can place an egg in the palm of their hand and squeeze as hard as they can and not break the egg. The force of the hand is spread over the entire surface of the egg and nowhere is the force great enough to cause the egg to break. If you want to try this, you should either do it outside or in a large sink, for if you don’t hold the egg just right, it will explode all over you!
MATERIALS
At least 4 raw eggs
Masking tape
Small scissors
Several books approximately the same size PROCEDURE
1.Gently crack the eggs and break the shells as near to the middle (horizontally) as you can. If you don’t get a good break, you’ll need to try another egg.
2.Pour the raw eggs into a bowl and fry them up for your family.
3.Rinse and dry the empty half-shells.
4.Place one strip of tape around the open end of each shell, leaving the jagged edge exposed.
5.Use the scissors to trim off the jagged edges, taking care not to break the remaining shell.

6.You should now have four rounded egg bottoms and four pointed egg tops.
7.Select the rounded bottoms and place them in a rectangle on a table, approximately where the corners of your books will be.
8.Predict how many books your eggs will hold.
9.Gently add books until cracks first appear. This is the point when it becomes important that the egg supports are all about the same size. Note how many books caused the eggs to crack the first time.
10.Continue adding books until the eggs collapse.
QUESTIONS FOR THE SCIENTIST
 Did your eggs hold more or less books than you predicted?
 Why do you think the eggs can hold so much weight when they can be broken so easily on the side of a mixing bowl?
 What changes could you make to this experiment so that, still using eggshells, even more books could be supported?
FOLLOW-UP Try using the pointed ends of the eggs and repeating the experiment. Which end of the eggshell held more weight? Think about the magicians who lie on beds of nails. How does this experiment explain the “trick”? Think about the use of snowshoes in lands where a large amount of snow falls. Do these walking aids have anything to do with your egg experiment?4
SCIENCE FAIR PROJECT: BIOLOGY
GRAVITY
You probably haven’t ever seen a plant growing down toward the ground with its leaves reaching for the dirt and its roots facing the sun. Why not? Plants seem to know which way is up, and they grow so that their roots grow down into the soil, while their leaves and flowers grow up toward the sun. As a budding scientist noticing this, your next step is to wonder exactly how it is that plants know to grow the way they do. It’s the perfect reason to design an experiment!
QUESTION
How do plants know to grow upward?
EXPERIMENT OVERVIEW
In this experiment, you’ll start by testing the reaction of a potted plant to being tipped on its side. Once you’ve seen how a mature plant behaves, you’ll grow beans and test them to see if they know which way is up.
SCIENCE CONCEPT
Find a hill in your town with trees growing on it, the steeper the better. Look closely at the direction the trunks are growing and you’ll see that they grow straight up despite the fact that the hill slopes below them. Plants have a knack for sensing gravity and growing their roots down while the stems and leaves grow vertically upward. This is because of a chemical they have called auxin. Auxin makes plants grow longer and when gravity acts, the auxin tends to fall to the low side of a plant and its leaves. This makes the lower sides of the stem and leaves grow slightly longer, which turns the plant upward. Roots act differently, as they are a different part of the plant. On the root, the auxin causes slower growth. So, when auxin gathers on the lower side of the root, the upper side
grows a little longer and the root turns downward. You’ll get to observe both
cases in this experiment.
MATERIALS
3 small, mature potted plants |
Several pinto beans |
|
|
Sunny location |
Paper towel |
|
|
Drinking glass |
Aluminum foil |
|
|
Water |
Camera |
|
|
PROCEDURE
MATURE PLANTS
1.Place all three potted plants in a sunny location, but tip one on its side toward the sun, tip another on its side away from the sun, and leave the third upright.
2.Water each plant as you would normally (you can turn them right-side-up to water them) and record their growth. This part of the experiment may take longer with some plants, so be patient. However, it shouldn’t take too long for the tipped plants to try to right themselves.
SEEDS
1. Soak the beans in the glass filled with water overnight before starting.
2.Pour out the water and place the beans to one side of a paper towel, folded in half.
3.Carefully, roll the beans up in the paper towel and wet it just so it’s moist, but not dripping.
4.Fold a piece of aluminum foil around the paper towel so that the entire towel is covered and sealed.
5.Place the aluminum foil containing the beans into the glass with one end up and let the beans sit for one week.
6.After a week has passed, open the foil and carefully unroll the paper towel. Do not touch the beans as you will be using them again. You will be reusing both the foil and paper towel as well, so take care not to rip either.
7.Record the direction of growth of both the stem parts of the beans and the roots. They should be just beginning to grow and show that they have found “up” despite their orientation when you put them in the glass.
8.Take a picture of the beans to document their growth.
9.Moisten the beans as before, repack them in the paper towel and aluminum foil, and return them to the glass. But this time point the end that was originally up toward the bottom (turn the foil upside down).
10.After another week passes, open the foil and record the new growth. You should notice that after the original direction of growth, the beans adjusted to being placed upside down and continued their growth in the “right” direction. Take another picture for documentation.
QUESTIONS FOR THE SCIENTIST
 What did you observe about the growth of the potted plants?
 Was there a difference between the growth of the plant tipped toward the sun and the plant tipped away from the sun?
 How do you know that it was gravity and not the sun or another factor that made the plants grow the way they did?
 Did the beans grow in the direction you expected during the first week?
 After the second week, did the direction of the stems and roots change?
 Why do you think this change occurred?
 Can you tell that the beans started in one direction and then changed? How can you tell?
CONCLUSION
From the time they are just seeds, plants have the ability to know which way is up and immediately begin growing in that direction. Mature plants already have their root system in place, but will continually adjust the direction of stem and leaf growth in order to find up. Some plants that grow very tall will actually wind their way through and around obstacles in order to find their way up.
As a follow-up, you can plant your beans in soil by placing them on their sides and watch them adjust once more to the direction of gravity. Soon enough, the stems will pop through the soil and the roots will find their way to the bottom.