Step 9: p&id Object Mapping
PI&D Object Mapping defines which AutoCAD® Plant 3D Object to insert if the user wants to insert an AutoCAD® P&ID Object from the P&ID Line List.
To make this work or to adapt this you select the P&ID class and assign an AutoCAD® Plant 3D class to it. In addition to that you can define which properties have to match.
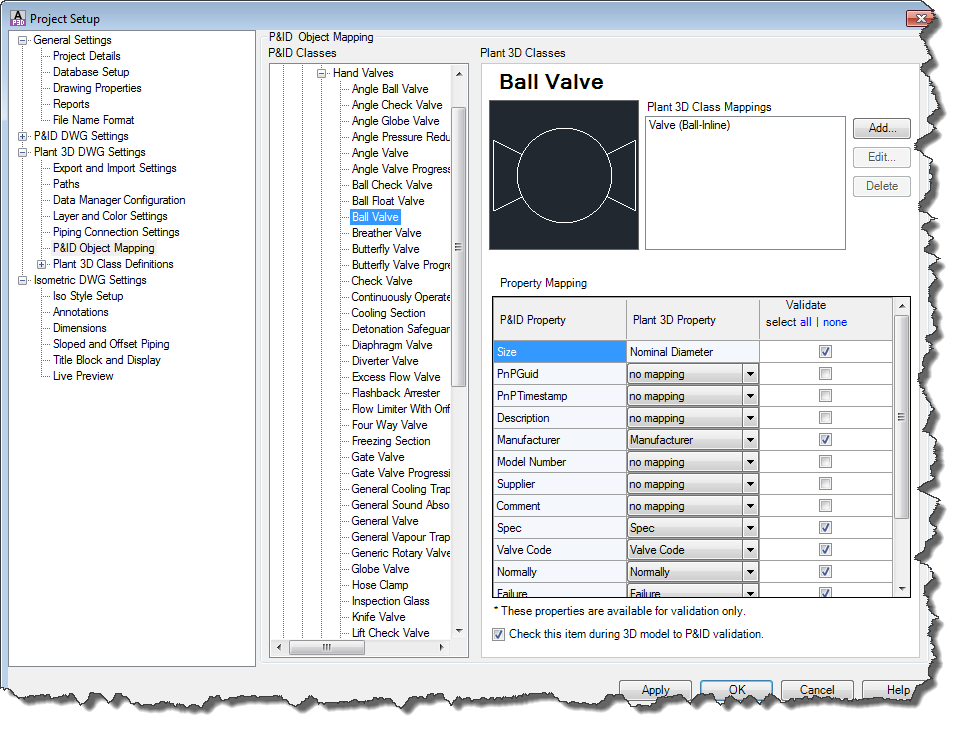
The mapping is used mostly for Valves. If you want to add another mapping for Valves there will be a sub-selection of different 3D Valves. This is unique to Valves. If you want to add a mapping for reducers you will see that there is no sub-selection.
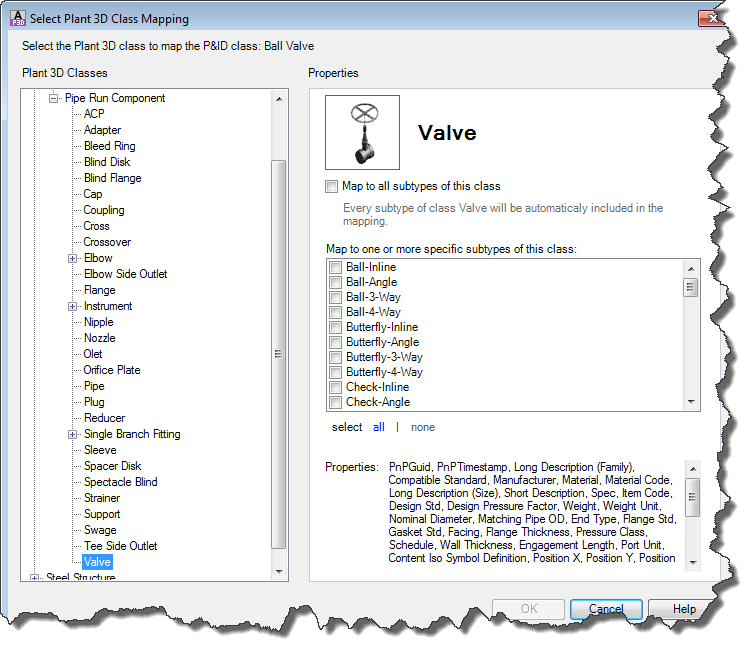
You have to decide yourself if the Object Mapping makes sense to you to help you speed up the process of inserting your AutoCAD P&ID Objects.
Create a folder structure
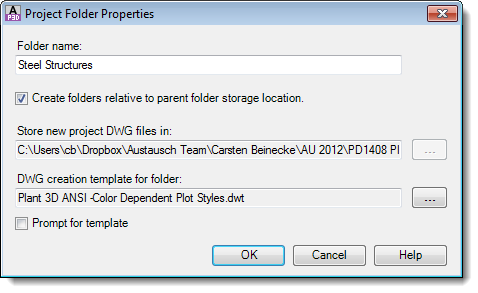
Sometimes it makes sense to create a default folder structure with Project Manager.
The way you set up your folder is completely up to you. You can create as a first level Areas and below these folders folders for different disciplines. Or you just create folders for the various disciplines.
If you create a folder you have the option to have the folder name as a sub-folder name in your project. This way your drawing files are stored in sub-folders.
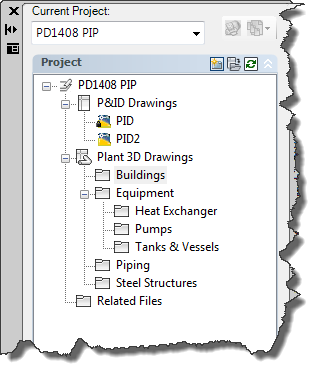
The result could look like this:
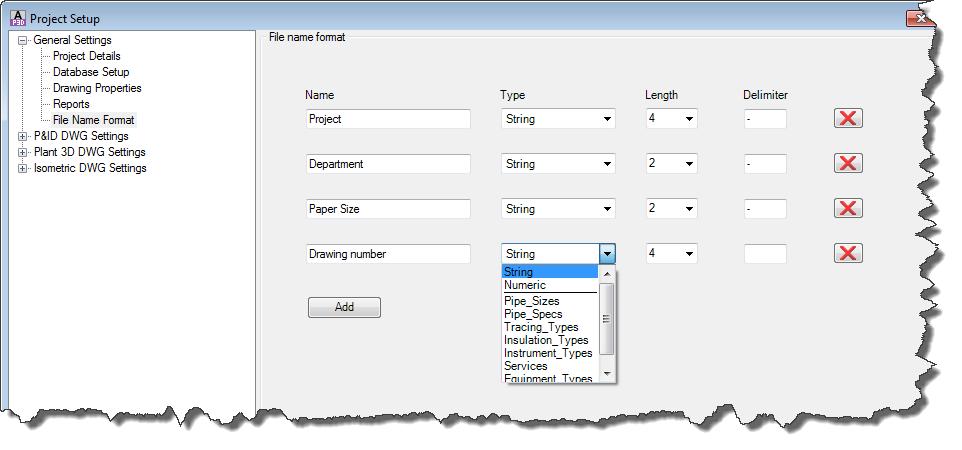
File Name Format
The File Name Format allows you to pre-define your own format on how the file name should be constructed. You can use either String or Numeric values or you can use Selection Lists (from the P&ID section).
If you then create a new drawing the dialog could look like this.
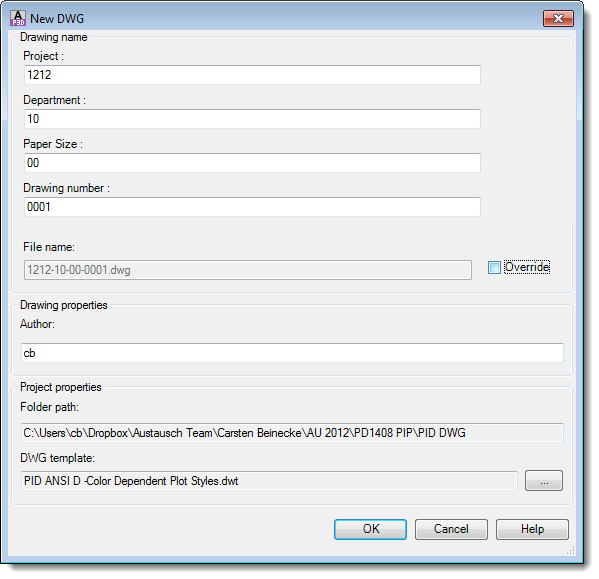
As you can see you still have the possibility to override the file name.
Installation in a network environment
This chapter is about how to put your content on your network folder. Your projects will be located on your network drive anyway (at least this is very likely).
Tool Palettes
By default the Tool Palettes are located on your local drive. If you create additional P&ID Symbols and put them on your Tool Palette, you will be the only one having them on your Tool Palette, but your colleagues are supposed to have them on their Tool Palettes as well.
So if you think about creating your own P&ID Symbols you should start exporting your Tool Palettes and put them on a central network folder.
Before everybody now starts importing the Tool Palettes from the network folder you might think about creating your own Workspace and import your Tool Palettes to that Workspace.
Ex- and Importing Tool Palettes for AutoCAD® P&ID is no different than vanilla AutoCAD®. So if this is new to you just look into the AutoCAD® Help.
3D Content
The Content folder for AutoCAD® Plant 3D will be installed by default on your C: drive. The Content folder you be modified when installing AutoCAD® Plant 3D already.
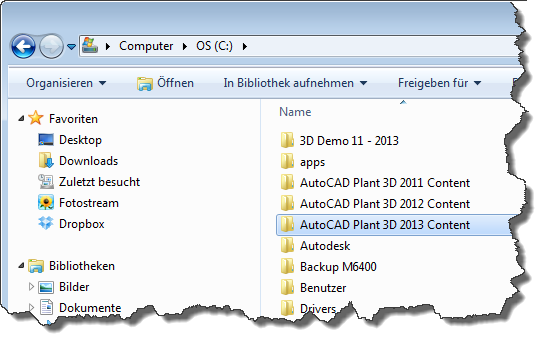
Having the Content folder on your network drive has several advantages. Firstly the network folder will be probably backed-up frequently. Secondly, multiple users can now access the content to manage the content and create new specs.
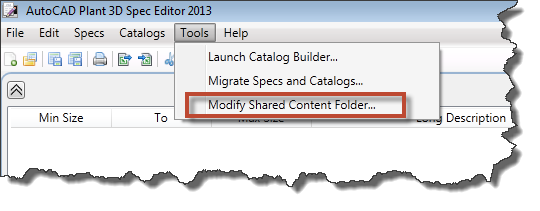
If you want to change the content folder after the installation you just need to type in the Command: PLANTMODIFYSHAREDCONTENTFOLDER
The following dialog shows up allowing you to change the content folder.
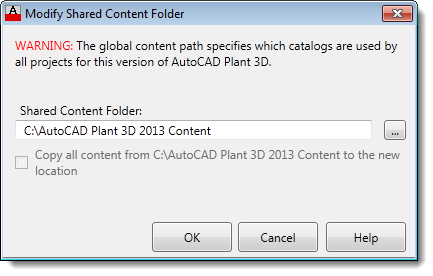
If you copied your content folder to the new location yourself you just need to change the Shared Content Folder.
If you didn’t copy the Content folder you just need to check the box below the path and AutoCAD® Plant 3D takes care of that as well.
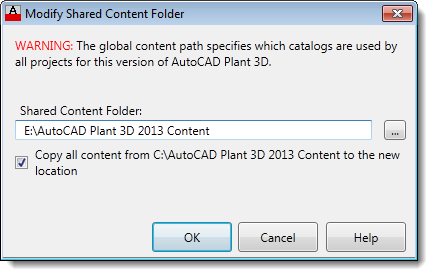
It is recommended that you “remove” your local Content folder so there will be no confusion about which Content folder is the current one. “Removing” of course can be renaming as well. Or just zip the Content folder.
You can change the Content folder in the Spec Editor as well. The dialog is the same as within AutoCAD® Plant 3D.