

Chapter 5: Battle Animation Editor
Note: This is a copy/paste from an old tutorial.
For some reason, this confuses some people. This isn’t fully custom animations, this is the basic animation thing using Nightmare.
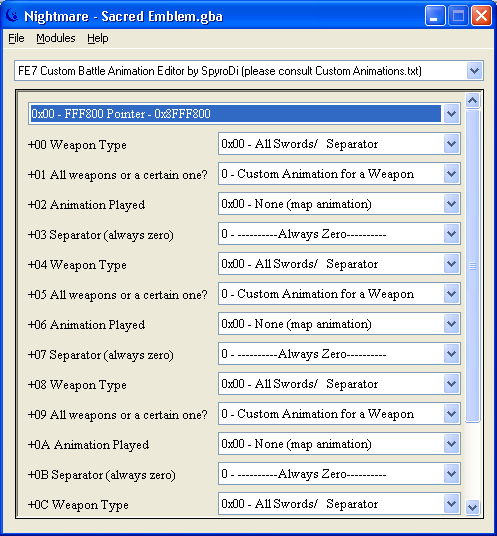
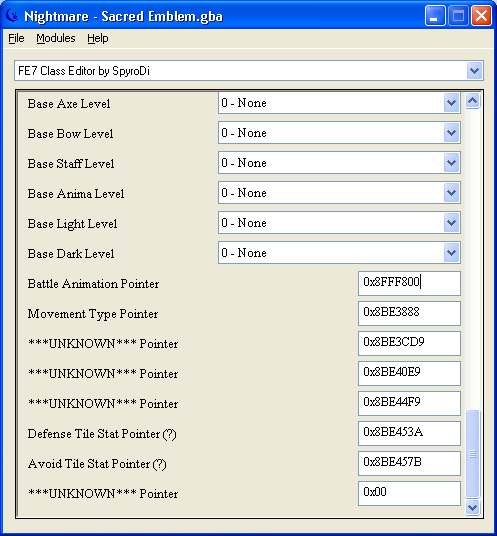
Load up Nightmare, the game, and the Custom Battle Animation module and the Class Editor. It should look like this.
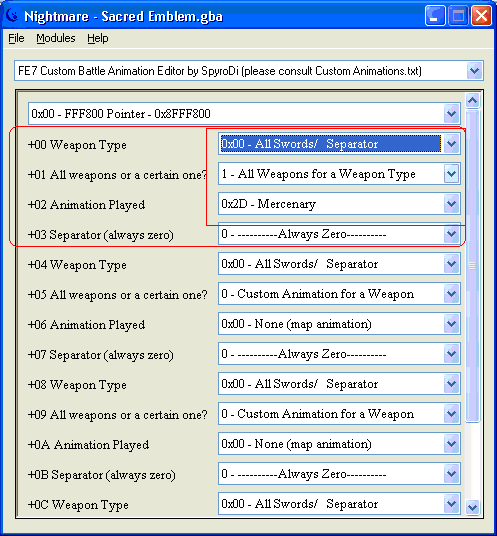
Now for each animation you need to select the weapon type. Let’s say we are making a mercenary animation. Then select All Swords (already selected).
For the second slot make it All Weapons because it is for all swords, not just one sword. Otherwise use Custom Animation for a Weapon.
Select the animation to use.
Don’t touch the separator. Then do the same thing for the next 3 slots, and a separator, continuing to however many you need. Then enter and ctrl+s and you are done with that part. It should look like this.
Now the game needs to know about this animation.
Go to the class editor.
Go down to the Battle Animation Pointer.
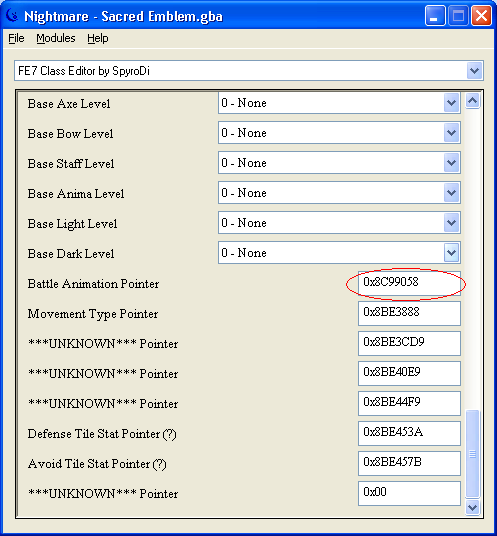
Change that to 0x8POINTER. 0x8 is the beginning of any pointer (except for expansion), and the pointer would be the number at the top of the custom battle animation pointer. Which is this one.
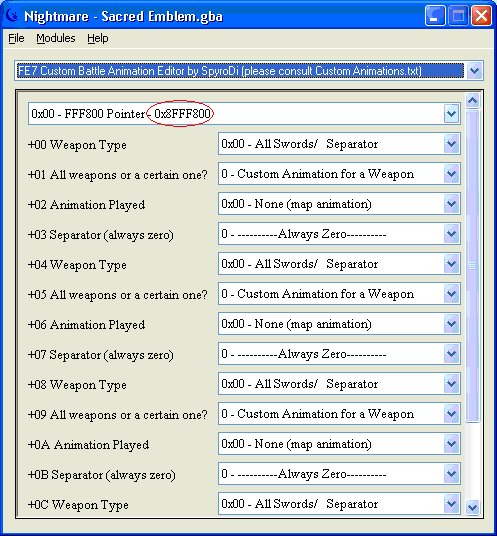
So that would be what you put in. 0x8FFF800. Now enter and ctrl+s again, and play as Eliwood. Should look like this.
And what happens in-game?
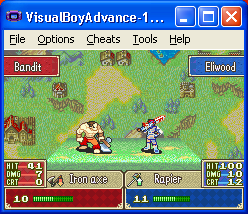
Ah! He’s messed up! That’s because of his palette, unfortunately. Remember, that this changes the class animation and not the character animation. For a custom character animation you either need a class just for them, or a custom battle sprite which will also be explained later (this is another type of custom battle sprite).
That’s all for today. =)
Chapter 6: Character Editor
I will do a run-down through this module.
At the top is a list of characters to edit. Generic units lack portraits, chibis, amongst other things. The tutorial characters are used in Lyn’s mode, while the non-tutorial ones are used in Eliwood’s/Hector’s mode. Lyn’s mode characters don’t have supports, but they can have them—you just have to add the support pointer to them.
IIRC unit 0xFB is labeled “Enemy” and is the generic enemy unit used in the arena, so I suggest that you don’t edit it. I would also not edit “Wall” or “Snag” at the end, as well as any other character that seems fishy or special (like the Fire Dragon, don’t edit him into something else—he is a special character).
Now, onto the actual data:
Character name – the index for the character name text. Type it into FEditor Adv.
Character description – same, but for description text.
Character number – used to reference the character. I suggest you don’t edit this.
Class (support viewer only) – only affects the class shown in the support viewer.
Portrait – the portrait used for the character.
Mini-portrait – default uses the portrait’s chibi, everything else is for generic enemies.
Affinity – self-explanatory.
Character number 2? – don’t edit, just to be safe.
Level – doesn’t affect the actual level. It affects autoleveling, I think. You’ll find more about this when using the Chapter Unit Editor or Event Assembler when you edit units.
Base stats – these are added to the class stats to get the FINAL character stats. Stats can be negative but might glitch if they are unless you use FEditor Adv’s autopatch.
Con bonus – same, it’s added to the class bonus. It can be negative as well.
Weapon levels – the weapon levels the unit has. Unless you’re hax like Athos, you can’t have more than 1 S level weapon—try and figure out how to do it like Athos if you want. Also, if the class has a base weapon level, it is used unless the character weapon level is higher.
Growths – self-explanatory, aren’t added to class growths, they are as you see them. For player characters, these are used; for enemy characters, class growths are used. The max a growth can be is 255.
Palette – which palette to use. Generic default colors are for generic enemies.
Custom battle sprite – gives the option to use a custom battle sprite/animation, but NOT use a custom class.
Character abilities – they are all pretty self-explanatory. You can combine values to have multiple skills from one list. For example, to have a character that could use steal and thief key (but not have the class ability to use it), you would do 0x04 + 0x08 = 0x0C.
Supports Data pointer – a pointer to support data… self-explanatory I suppose. 0x00 means no supports.