
- •Downloads:
- •Update Log:
- •Table of Contents:
- •Prologue: Bare Basics
- •Chapter 1: Key Terminology & Abbreviations
- •7Zip Archive – Supposedly the best file archiver there is, but not used as much, and thus less convenient. Requires 7zip or winRar to use.
- •VisualBoyAdvance – most people’s emulator of choice, almost always referred to as “vba” for short.
- •Chapter 2: Using Nightmare Modules
- •I upload anything that I think might be useful to someone on that site. Just use the menus and search until you find it.
- •Chapter 3: File Management
- •In order to be a successful hacker you need to have a lot of good management.
- •Chapter 4: Pointer Tables
- •Chapter 5: Battle Animation Editor
- •Chapter 6: Character Editor
- •Chapter 7: Class Editor
- •Chapter 8: Item Editor
- •Item icon – obvious
- •Chapter 9: Spell Association Editor
- •Chapter 13: Movement Cost Editor
- •If the value next to a type of terrain is ‘255’ then it is uncrossable because a unit won’t have 255 movement points.
- •Chapter 16: Battle Palette Reference Editor
- •If you want to know how to actually edit battle palettes’ colors, you can find that in a later chapter that I will make.
- •Chapter 17: Arena Class Editor
- •It’s a bit of work, but making cGs is quite rewarding, and it’s easier than some stuff, that’s for sure! Good luck with your cg making!
- •Chapter 20: Lyn’s Ending Editor
- •Chapter 21: Tutorial Editing/Getting Rid of the Tutorial
- •Part 2: Downloading the Programs
- •Part 3: Preparing Your midi
- •If you still have more than 10 tracks, you should find another midi. Sorry but, there are limits in life.
- •Part 4: Applying Blazer’s Beta Music Insertion/Instrument Patch
- •Part 5: Converting Your midi
- •Part 6: Making Your midi Repeat and Transferring it to Your rom
- •If the b1 and bc are next to each other then I can almost guarantee you want to replace it, so hit “replace” and do that with every instance and once you’re finished you’re good to go.
- •Part 7: Track Pointers & Repointing
- •Part 8: Finale- Assembling Your Song & Profit
- •If you don’t have this module, you’ll have to use this outdated way of doing it. Do check to see if you have the latest Nightmare Modules in general, but otherwise… well, sorry I guess. Xp
- •Part 9: Possible Errors & Wrap-up
- •Part 10: Documentation and Stuff
- •Atrius’ Notes:
- •Charon’s Notes:
- •Part 11: The Music Hacking Run-Down (Shorter Version of Tutorial & Walls of Text)
- •Part 12: Credits & Thanks
- •Chapter 25: Music Editing with Zahlman’s Song Editor
- •If you actually do type in help and press ‘enter’ on your keyboard, it’ll give you a list of commands, and tell you some stuff. Here’s the important stuff:
- •It worked! Great! I know how to import a song!
- •Chapter 26: Exporting Music with gba2midi
- •Chapter 27: Battle Background Graphics
- •If it doesn’t, I suggest double-checking all your settings (everything should be compressed) and make sure your width is set to 30 and your height is set to 32.
- •Chapter 28: Music Array Module
- •Chapter 29: Sound Room Editing
- •Chapter 30: Chapter Unit Editing with Nightmare
- •Chapter 31: Death Quotes
- •Chapter 32: Event iDs
- •Chapter 33: Battle Conversations
- •Chapter 34: Triangle Attacks
- •Chapter 35-36: The Animation Modules & Repointing Tutorial
- •It should look like this:
- •Chapter 37: Support Editing
- •Chapter 38: Miscellaneous Nightmare Modules
- •In this chapter I’m going to quickly run through what some other nightmare modules do.
- •Vendor/Armory Editors – edits the contents of vendors and armories.
- •Vulnerary Editor – edits the amount of hp restored by a vulnerary. (Default: 10)
- •Vulnerary Editor – edits the amount of hp restored by a vulnerary.
- •Chapter 40: Text Editing with fEditor Adv
- •Chapter 41: Portrait Formatting & Preparation
- •Chapter 42: Portrait Insertion with fEditor Adv
- •I wouldn’t mess with the palette editor (the colorful boxes).
- •Chapter 43: Locating Palettes
- •Chapter 44: Editing Palettes
- •I don’t exactly have a color I want to use for this title screen background, so I’m just going to show you how to get the rgb of some random color on a portrait.
- •If something didn’t work right, make sure you:
- •Chapter 45: Working with gbage
- •Chapter 46: Chapter Data Editor
- •Vision Distance is for Fog of War (fow). If it’s ‘0’, it’s assumed there is no fog of war.
- •Hold it! (Unless you aren’t hacking fe7!)
- •Chapter 47: Map Creation
- •I’m tired of writing this tutorial. Honestly. So from now on, I’m going to stop making so many wasteful comments like the one I am typing right now.
- •Chapter 48: Map Insertion
- •If you’re looking to make a totally new chapter (instead of being limited to the old game’s exact same scenes with exact same events) then read on, because I’m going to hack events next!
- •Chapter 49: Event Assembler Basics
- •I would just always add end guards since it’s not something you need to worry about too much.
- •Chapter 50: Events – The Layout
- •Including the stlb
- •Chapter 51: Events – The Event Codes
- •Items is just a list of items with a max of 4 starting items. I prefer to use the 3rd method of writing them, with the brackets and all. Each item is separated by a comma.
- •Chapter 52: Event Construction
- •VillageGate: // name of tile data group
- •Chapter 54: Chapter Creation Finishing Touches
- •Chapter 55: Importing Tilesets
- •Part 2: The First Frame
- •Part 1b: Palette Preparing
- •Part 2: Testing the Foundation to Your Animation
- •If all goes well, your guy should be standing, kinda like this.
- •Part 3: Making the Rest of Your Frames
- •Chapter 58: Custom Battle Animations – Scripts
- •I just pulled a Xeld. Had to do that at least once in this tutorial.
- •If you don’t know what a sound sounds like, just test it out with your animation and find out. Experiment with the codes if you need to.
- •Chapter 59: Custom Spell Animations
- •0X85 command count for this spell: 10
- •It’s true! It did work! It’s still very much a work in progress, as you can see, but the point is we got he test frame working. The rest just takes time, patience, and the attitude that you can do it!
- •Chapter 60: Weapon Icons
- •If you did, you are successful. Despite the odd format of the icons, you have spotted them, and that is what is most important, in my honest opinion.
- •I have this show up:
- •Chapter 61: Map Sprites
- •Chapter 62: Proper Betatesting
- •Chapter 63: vba’s Tools
- •Chapter 64: Other vba Options
- •In this chapter I’m going to detail some of vba’s semi-obscure but not totally obscure options. Knowing how to use vba will help you test your game in various ways.
- •Chapter 65: Recording Videos & Sound
- •Chapter 66: Fixing the Desync with VirtualDubMod & Video Rendering
- •Chapter 67: ips Patching & General Patching Information
- •Chapter 68: ups Patching
- •I suggest you read the ips patching tutorial (at least the beginning) if you haven’t done so as I will not be as thorough with this chapter as I was the previous.
- •In an extremely similar manner you can apply patches. Take a look.
- •Chapter 69: jfp Patching
- •Chapter 70: xDelta Patching
- •Chapter 71: Nightmare Module Format
- •It is recommended (for reasons of readability by humans) that a newline
- •Is unused ("null") for editboxes.
- •Chapter 72: Miscellaneous Information Archive
- •Chapter 73: Useful Links & Websites
- •Chapter 74: Bonus – Assembly Hacking
- •Preparations:
- •Part 1: Background Info
- •Part 2: Inserting an Assembly Hack
- •Part 2: Breaking Down Your First asm Hack
- •I digressed a lot, but back to the point:
- •Part 3: Second Example – More Codes, More Fun
- •Read other people’s doc.
- •Part 4: More Examples – “Speed-Analyzing”
- •It’s thumb. Write to offset 0. Start with label “Initial”. Push 5 registers and the last register, then start a loop counter in r2 with starting value 0x00.
- •Ifat *Conditional id* *asm routine pointer*
- •I may have mentioned this before, but finding where to hack routines is difficult. And I’m sure I mentioned that finding space for them is difficult.
- •It’s not super long, but it’s got some new things we need to learn. Let’s get started.
- •Part 5: Finding asm Routines & Basics of Using a Debugger
- •Warning: terms may not be accurate. In fact, they almost definitely aren’t accurate, as you’ve probably figured out by now.
- •I don’t know what the flags do either, but they’re there, right next to the window. That’s g.
- •I hope to hear of your achievements in the near future!
- •Final Chapter: Credits, Thanks, and the Epilogue
If you don’t know what a sound sounds like, just test it out with your animation and find out. Experiment with the codes if you need to.
Oh, there’s one thing the doc might have missed out on though. There is a special code that works like this: “S####”. ‘S’ stands for ‘sound’. It’s a sound code. Xeld made a special hack that made a new code that will play any sound. “####” is the hex of the sound. Oh, and it can play music, too. If you need to know the hex of the song or sound or whatever, just look it up in a music list that comes with Nightmare Modules.
Last thing—if your attack has multiple hits, you CAN’T USE C1A. So you have to use C51, which is like a ‘fake hit’. It makes the screen flash white, but it doesn’t add those blue things. But oh well—it’s still cool. Using C51 and C1F in conjunction will give the illusion that the enemy is being hit. The idea is like so:
ATTACK FRAME
ATTACK FRAME
C51
C1F
JUMP FRAME
RAISE SWORD UP
SWING DOWN FOR THE BIG FINAL CRUSH
C04
C1A
C1F
Where the “C04 / C1A / C1F” is the final hit, where the HP finally depletes.
Now that mode 1 is done, comes explaining the rest of the modes, which will be easy.
Mode 2 will be done for you.
Mode 3 works the same as the critical, except instead of C1A, it uses any value from C08 to C0C. I usually just use C08 because I know it works and while I don’t know what the other ones do, I am guessing that it is just a difference in the color of the critical hit effect.
Mode 4 will be done for you by FEditor Adv as well.
Mode 5 is the ranged mode, as we know. Instead of a hit with C04 / C1A / C1F, you put “C05”, which loads the spell animation. And that’s all there is to it—C05 will take care of the spell/ranged weapon or whatever.
Mode 6 is the above, but the critical. You know how to put frames together and add in codes to make it look and sound cooler, so go do that.
Mode 7 and 8 will probably be the same, since they are dodges, and most people don’t really care to make their dodges different. Put the actual dodging frames after C0E, and the return-to-standing frames after C01. Remember that the frame before the C01 will be the frame that the sprite stays on until the move is “completely dodged”… if that doesn’t make sense, don’t worry about it. Heheh…
Modes 9 through 11 can be some animation, but just know that the animation is just the idle frames, so it shouldn’t be anything special. I usually just keep it as my standing frame, which makes 3 modes automatically done, because all the template does is use standing frames in the first place.
Mode 12 can just be a copy/paste of mode 1, but with the attacks taken out. Meaning that, if you have multiple attacks, you need to put the C04, which will make the enemy do their dodge, during the first attack, or else it’ll look like *slash slash slash* *dodge the final slash, no damage* and it’ll just be wtf.
So if your animation looked like:
C03
C07
ATTACK FRAMES
C51
C1F
MORE ATTACK FRAMES
C04
C1A
C1F
OTHER ATTACK FRAMES
C01
RETURN TO BASE
C06
C0D
----------
It’d turn into
----------
C03
C07
ATTACK FRAMES
C04
MORE ATTACK FRAMES
C01
RETURN TO BASE
C06
C0D
-----------
If you didn’t notice, I moved the C04 back to BEFORE the first attack (remember, an attack can also be C51 / C1F), and I got rid of the hit sounds and hit effects, or else it’d look and sound like they were being attacked even though they dodged.
With mode 12 done, your animation script is done! Save everything and check for errors. You may have written something and forgot to comment it out, or you may have accidentally forgot to press enter and might have something like “C51C1F” on one line instead of two lines. You may have also typed “c23” instead of “C23”, which matters—the “C” in commands MUST BE CAPITALIZED. Also make sure you typed in all the file names for your frames right.
With the proofreading done, you can now insert your animation, which you already know how to do, because you once tested the very basic animation in the previous chapter. Insert it, and test it, and see how it is.
Is it too fast? Make the timings larger. Is it choppy? Well, you’d have to add more frames, so that’s a spriting issue. Do the sounds work right, and how well are they timed? Try playing around with the order and timings of things to fix that. Are there too many effects, or not enough? Delete/add commands as need be—the 0x85 command usage list found in FEditor Adv’s doc IS YOUR FRIEND. Lastly, are the frames aligned well? If not, go back to the frames in MS Paint and try and figure out what’s wrong.
Touch-up your animation and make sure it’s looking nice and spiffy. Be sure to test out the attack, critical, dodge, ranged, and ranged-critical animations, and anything else that might need testing.
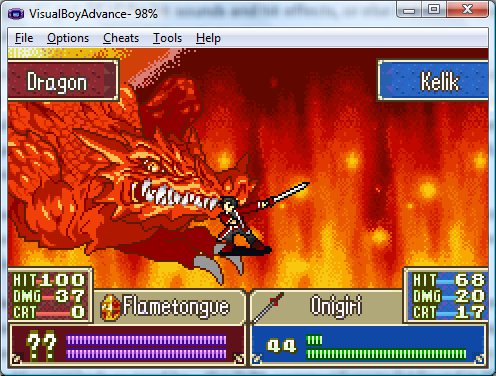
Mine looks pretty nifty. He looks like he’s having a staring contest with the Dragon! D=
Wait! There’s ONE LAST THING!
Your animation needs a disarmed animation. I’ll just tell you how to do it—now that you’ve done the main animation, you already have more than enough skills to code the disarmed. Simply make the disarmed frames based off of the standing frames, and then keep the bear bones to every mode, while replacing all standing frames with the disarmed standing frames, and making sure to remake the dodge frames into the disarmed dodge frames. Since there are no attacks, you’ll save yourself trouble if you just make the attack modes just have one frame of your character standing there disarmed—no one will know, and it saves space and time (since FEditor Adv doesn’t have to process all the attack frames and codes).
That’s all there is to it. I know I say that and you’re like “that’s all? that took forever!” but once again, even a complex animation with 50 frames could only take a few hours once you know how to do it. I’ve probably (I never timed myself) done animations in less than 30 minutes, or even quicker, for short ones that only have a dozen or so frames—so it’s really not that bad, and in the end, it’s worth it, because there’s nothing like enjoying your awesome animation in-game and sharing it with others who play your hack. ^_^