

Information on a Web server. When you start a new session, the
session_start() function generates a unique session ID to iden-
tify the session. If a client’s Web browser is configured to accept
cookies, the session ID is assigned to a temporary cookie named
PHPSESSID.
• You must call the
session_start() function before you send theWeb browser any output, including white space, HTML elements,
or output from the echo or print statements.
• You store session state information in the
$_SESSION[] autoglobal.• To delete a session, you execute the
session_start() function,use the array() construct to reinitialize the $_SESSION[] auto-
global, and then call the session_destroy() function.
539
Comprehension Check
1.
HTTP was originally designed to store data about individual
visits to a Web site. True or False?
Stored information about a previous visit to a Web site is
calledinformation.
a. HTTP
b. client-side
c. state
d. prior
3.
Describe the different types of information about a user that a
Web server might need to store.
Explain how to use form fields to temporarily store user
information.
2.
4.

CHAPTER
9
Managing
State Information
5.
In
what format are items in a query string appended to a
target
URL?
a.
in comma-delimited format
b.
as predefined values
540
c.
as name/value pairs
d.
in name, value, length format
6.
Explain
how query string data that is appended to a URL is
retrieved
in PHP.
What
is the correct syntax for creating a temporary cookie
that
contains a value of “blue”?
a.
$Color
= setcookie("blue");
b.
setcookie("color",
"blue");
c.
setcookie("blue",
"color");
d.
setcookie("blue");
8.
You
must manually encode and decode cookie values. True or
False?
By
default, cookies created without the expires
argument
of
the
setcookie()
function
are available for 24 hours. True or
False?
7.
9.
10.
Cookies created without the expires
argument
of the
setcookie()
function
are called.
a.
transient
b.
temporary
c.
permanent
d.
persistent
11.
Which of the following examples specifies that a cookie
should
expire in three days?
a. time()+48h
b. time()+24h*3
c. time()+60*60*24*7
d. time()+60*60*24*3

Comprehension
Check
12.
The availability of a cookie to other Web pages on a server
is
determined by theargument of the
setcookie() function.
a. path
b. directory
c. system
d. server
13. Which argument of the setcookie() function is used for
sharing cookies outside of a domain?
a. domain
b. share
c. secure
d. You cannot share cookies outside of a domain.
14. You use the
a. $_COOKIE[] autoglobal
b. $_COOKIES[] autoglobal
c. cookie() function
d. getcookie() function
15. How do you delete cookies before the time assigned to the
setcookie() function’s expires argument elapses?
a. Assign a NULL value with the setcookie() function.
b. Set the value to an empty string and assign a new expira-
tion value to a time in the past.
c. Execute the deletecookie() function.
d. You cannot delete a cookie before the time assigned to the
setcookie() function’s expires argument elapses.
16. Explain the security risks involved with cookies and how ses-
sions offer a more secure method of maintaining state.
17. Unlike the setcookie() function, you can call the
session_start() function from any location on a Web page.
True or False?
to read cookies in PHP.
541
CHAPTER
9
Managing
State Information
18.
What is the name of the cookie that PHP creates for a session?
a.
SESSION
b.
PHPSESSION
c.
SESSIONID
542
d.
PHPSESSID
19.
Explain how to pass a session ID to other PHP scripts when
cookies
are not available.
20. You use the
PHP.
a. $_SESSION[] autoglobal
b. $_SESSIONS[] autoglobal
c. session() function
d. getsession() function
to access session variables in
Reinforcement Exercises
Exercise 9-1
In this project, you will create a Cancel Selection page for the College
Internship Available Opportunities Web site.
1.
Create a new document in your text editor and type the
<!DOCTYPE> declaration, <html> element, header informa-
tion, and <body> element. Use the strict DTD and “Cancel
Selection” as the content of the <title> element.
Add the following PHP script section before the <!DOCTYPE>
tag to start a session:
<?php
session_start();
?>
2.
3.
Add the following text, elements, and script section to the
document body:
<h1>College Internship</h1>
<h2>Cancel Selection</h2>
<?php
echo $Body;
?>
Reinforcement
Exercises
4.
Add
the following statements to the end of the first script
section,
immediately after the session_start()
function,
to
verify
that the correct information was passed to this page:
$Body
= "";
$errors
= 0;
if
(!isset($_SESSION['internID'])) {
$Body
.= "<p>You have not logged in or
registered. " .
" Please return to the " .
" <a href='InternLogin.
php'>Registration / " .
" Log In page</a>.</p>\n";
++$errors;
}
if ($errors == 0) {
if (isset($_GET['opportunityID']))
$OpportunityID = $_GET['opportunityID'];
else {
$Body .= "<p>You have not selected an
opportunity. " .
" Please return to the " .
" <a href='AvailableOpportunities.
php?" . SID . "'>Available " .
" Opportunities page</a>.</p>\n";
++$errors;
}
}
543
5.
Next, add the following code to connect to the database
server and open the internships database. Be sure to replace
host with the name of the MySQL server, and user and
password with your user name and password.
if ($errors == 0) {
$DBConnect = @mysql_connect("host", "user",
"password");
if ($DBConnect === FALSE) {
$Body .= "<p>Unable to connect to the
database " .
" server. Error code " . mysql_
errno() . ": " .
mysql_error() . "</p>\n";
++$errors;
}
else {
$DBName = "internships";
$result = @mysql_select_db($DBName,
$DBConnect);
CHAPTER
9
Managing
State Information
if
($result === FALSE) {
$Body
.= "<p>Unable to select the
database. " .
"Error code " . mysql_
errno($DBConnect) .
": " . mysql_error($DBConnect)
. "</p>\n";
++$errors;
}
}
}
544
6.
Next, add the following code to delete the appropri-
ate row from the assigned_opportunities table. Do not
allow the selection to be deleted if it has been approved.
(Approved selections have a date in the date_approved
column, while selections that have not been approved have
a NULL value in the date_approved column.) Use the
mysql_affected_rows() function to indicate whether any
rows were deleted.
if ($errors == 0) {
$TableName = "assigned_opportunities";
$SQLstring = "DELETE FROM $TableName" .
" WHERE opportunityID=$OpportunityID " .
" AND internID=" . $_
SESSION['internID'] .
" AND date_approved IS NULL";
$QueryResult = @mysql_query($SQLstring,
$DBConnect) ;
if ($QueryResult === FALSE) {
$Body .= "<p>Unable to execute the query. " .
" Error code " . mysql_
errno($DBConnect) .
": " . mysql_error($DBConnect) .
"</p>\n";
++$errors;
}
else {
$AffectedRows = mysql_affected_
rows($DBConnect);
if ($AffectedRows == 0)
$Body .= "<p>You had not previously " .
" selected opportunity # " .
$OpportunityID . ".</p>\n";
else
$Body .= "<p>Your request for
opportunity # " .
" $OpportunityID has been " .
" removed.</p>\p";
}
mysql_close($DBConnect);
}
Reinforcement
Exercises
7.
Add
the following statements to the end of the script section
to
display the appropriate link for the visitor to use:
if
($_SESSION['internID'] > 0)
$Body
.= "<p>Return to the <a href='" .
"AvailableOpportunities.php?" . SID . "'>" .
"Available Opportunities</a> page.</p>\n";
else
$Body .= "<p>Please <a href='InternLogin.
php'>Register " .
" or Log In</a> to use this page.</p>\n";
Because this
Web page
must inter-
act with the
Web pages
in the Chapter directory,
this file must also be
uploaded to the Chapter
directory, not the Projects
directory.
545
8.
9.
Save the document as CancelSelection.php in the Chapter
directory for Chapter 9.
Reopen the AvailableOpportunities.php document.
10. Find the line that displays the word “Selected” in the Status
column. Replace that line with the following code that allows
the intern to cancel his or her selection:
echo "Selected<br />" .
"<a href='CancelSelection.php?" .
SID . "&opportunityID=" .
$Opportunity['opportunityID'] .
"'>Cancel Selection</a>";
11. Save the AvailableOpportunities.php document. Upload it
and CancelSelection.php to the Web server.
12. Open the InternLogin.php file in your Web browser by
entering the following URL: http://<yourserver>/PHP_
Projects/Chapter.09/Chapter/InternLogin.php. Enter the
e-mail address and password for a registered user and click
the Log In button. You should see the Login Successful
page. Click the Available Opportunities link to open the
Available Opportunities page. Locate an opportunity that you
have selected, or select a new opportunity. Click the Cancel
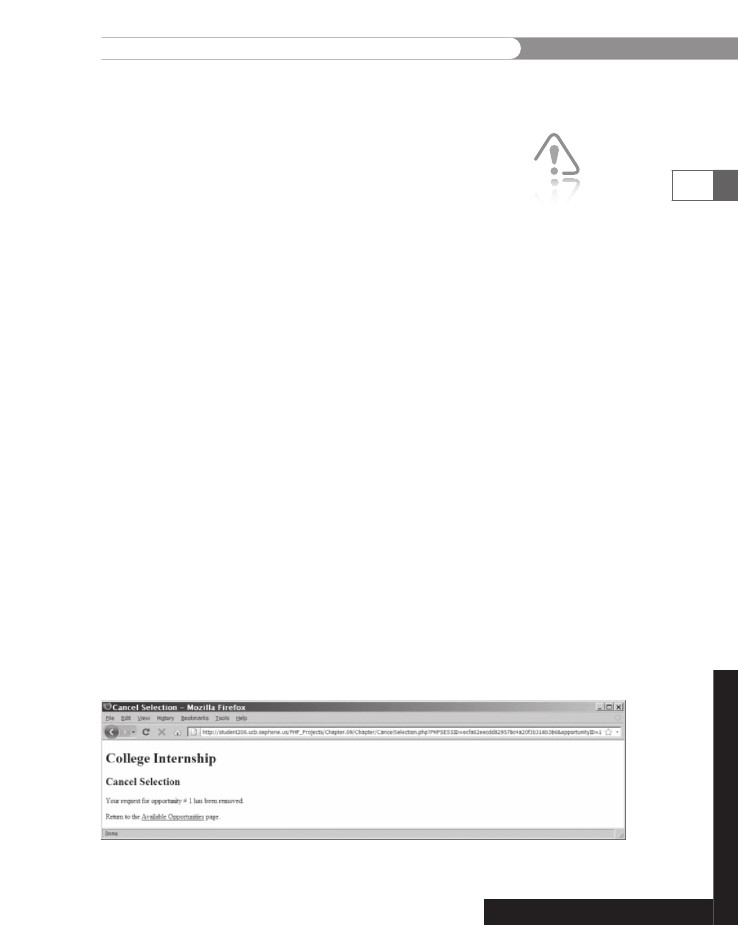
Selection link to open the Request Internship Web page,
which is shown in Figure 9-10.
Figure 9-10
Cancel Selection Web page of the College Internship Web site

CHAPTER
9
Managing
State Information
13.
Click the Available Opportunities link to return to the
Available
Opportunities page. The opportunity for which you
cancelled the selection should be listed as available.
14. Close your Web browser window.
546
Exercise 9-2
In this project, you will create a cookies program that stores the date
and time of a user’s last visit.
1.
Create a new document in your text editor and type the
<!DOCTYPE> declaration, <html> element, header information,
and <body> element. Use the strict DTD and “Last Visit” as
the content of the <title> element.
Add the following script section above the <!DOCTYPE>
declaration:
<?php
?>
2.
3.
Add the following if...else statement to the script sec-
tion to assign a value to the $LastVisit variable. If the
$_COOKIE['lastVisit'] variable is set, the date and time of
the last visit is assigned to the $LastVisit variable. Otherwise,
the variable is assigned a value of “This is your first visit!”
if (isset($_COOKIE['lastVisit']))
$LastVisit = "<p>Your last visit was on "
. $_COOKIE['lastVisit'];
else
$LastVisit = "<p>This is your first visit!</p>\n";
4.
Add the following statement to the end of the script sec-
tion. The statement uses the date() function with the
setcookie() function to assign the date to the $LastVisit
variable. Notice that the cookie is set to expire in one year.
setcookie("lastVisit", date("F j, Y, g:i a"),
time()+60*60*24*365);
5.
To the document body, add the following output directive,
which displays the value of the $LastVisit variable:
<?php echo $LastVisit; ?>
6.
Save the document as LastVisit.php in the Projects direc-
tory for Chapter 9, and then close the document in your text
editor.
Reinforcement
Exercises
7.
Open
the LastVisit.php file in your Web browser by enter-
ing
the following URL: http://<yourserver>/PHP_Projects/
Chapter.09/Projects/LastVisit.php.
The first time you open the
page,
you should see “This is your first visit!” in the browser
window.
Reload the Web page; you should see the date and
time
in the browser window.
Close
your Web browser window.
547
8.
Exercise
9-3
Create
a document with a “nag” counter that reminds users to reg-
ister.
Save the counter in a cookie and display a message reminding
users
to register every fifth time they visit your site. Create a form in
the
body of the document that includes text boxes for a user’s name
and
e-mail address along with a Registration button. Normally, reg-
istration
information would be stored in a database. For simplicity,
this
step will be omitted from this exercise. After a user fills in the
text
boxes and clicks the Registration button, delete the nag counter
cookie
and replace it with cookies containing the user’s name and
e-mail
address. After registering, display the name and e-mail address
cookies
whenever the user revisits the site.
Exercise
9-4
You
can use PHP’s rand()
function
to generate a random integer. The
rand()
function
accepts two arguments that specify the minimum
and
maximum integer to generate, respectively. For example, the
statement
$RandNum
= rand(10, 20) generates
a random integer
between
10 and 20 and assigns the number to the $RandNum
vari-
able.
Create a guessing game that uses sessions to store a random
number
between 0 and 100, along with the number of guesses
the
user has attempted. Each time the user guesses wrong, dis-
play
the number of times the user has guessed. Include a Give Up
link
that displays the generated number for the current game. Also
include
a Start Over link that deletes the user session and uses the
header("location:URL")
function
to navigate to the main page.
Exercise
9-5
Create
a set of Web pages that registers users for a professional con-
ference.
Use a session to track users as they navigate through the Web
pages.
Include three separate Web pages that contain forms: the first
form
gathers the user’s name and contact information, the second
CHAPTER
9
Managing
State Information
548
form
gathers the user’s company information, and the third form
prompts
users to select the seminars they want to attend at the con-
ference.
Include a fourth page that displays the submitted informa-
tion.
The fourth page should include links that allow users to edit the
submitted
data, along with a Submit button that saves the informa-
tion
to a database. A fifth page should display a confirmation that the
information
was successfully saved. Include code based on reading
e-mail
addresses that prevents the same user from registering twice.
Discovery
Projects
The
Chinese Zodiac site is a comprehensive project that will be
updated
in the Discovery Projects in each chapter. All files for the
Chinese
Zodiac site will be saved in a folder named ChineseZodiac
in
the root Web folder on the server, and all database tables will be
stored
in the chinese_zodiac
database.
Discovery
Project 9-1
In
this project, you will create a basic site counter to track the num-
ber
of visitors to your site. Referring back to Discovery Project 8-2,
connect
to the server and the chinese_zodiac
database.
In
the chinese_zodiac
database,
create a new table named
visit_counter.
The table should contain two fields: id
and
counter.
The
id
field
will be an auto-incrementing primary key with an INT
data
type and the counter
field
will be an INT
data
type. Insert a new
record
in the table with an id
of
NULL
and
a counter
of
0.
The id
field
should
be automatically set to 1.
Open
a blank document in the text editor. Within PHP delimiters,
include
inc_connect.php and then insert the following script that sets
a
cookie with an expiration of one day, so that visitors are not
counted
each
time they return to the Web page that has the counter.
<?php
//
include the inc_connect.php file with database
//
connection data
...
/*
set a cookie if this is the first visit – the expires
argument
is 1 day to prevent visits from incrementing each
time
the user returns to the page that contains the site
counter
*/
if
(empty($_COOKIE["visits"])) {
//
increment the counter in the database
mysql_query("UPDATE visit_counter " .
" SET counter = counter + 1 " .
" WHERE id = 1 ");

Discovery
Projects
//
query the visit_counter table and assign the counter
//
value to the $visitors variable
$queryResult
= mysql_query("SELECT counter " .
"
FROM visit_counter WHERE id = 1");
if (($row = mysql_fetch_assoc($queryResult)) !== FALSE)
$visitors = $row['counter'];
else
$visitors = 1;
// Set the cookie value
setcookie("visits", $visitors, time()+(60*60*24));
}
else // Otherwise, assign the cookie value to the $visitor
// variable
$visitors = $_COOKIE["visits"];
?>
549
Save the file as inc_site_counter.php and upload the file to the
Includes folder in the ChineseZodiac directory on the server.
Open index.php, which you last modified in Discovery Project 4-4,
from the ChineseZodiac directory. As the first line of code, within the
PHP delimiters, include the inc_site_counter.php script. Save the
file and upload it to the ChineseZodiac directory on the server.
Open inc_footer.php from the Includes folder in the ChineseZodiac
directory on the server. You last modified inc_footer.php in Discovery
Project 8-5. At the location in the script that you would like to display
your counter, add the following script:
<p>Total visitors to this site: <?php echo $visitors; ?></p>
You can use
CSS or tables
to format the
counter to
appear in any
style.
Save the inc_footer.php file and upload it to the Includes folder in
the ChineseZodiac directory on the server.
Open index.php in the browser. The display should read “Total visi-
tors to this site: 1”. Refresh the browser. The display should remain the
same. Delete cookies in your browser and open index.php again. The
display should now read “Total visitors to this site: 2”.
Discovery Project 9-2
In this project, the Chinese zodiac site will have sponsors. Each spon-
sor needs to have a banner ad. Each time a visitor returns to the site, a
different banner should appear.
For this project, you will need at least five banners that advertise
products or services of interest to a visitor to the Chinese zodiac
site. (These products might include fortune cookies and origami, for
example.) In any graphics program, design five banners (125px by
125px), and then save them respectively as banner1, banner2, ban-
ner3, banner4, and banner5 with a valid graphic extension. Upload
CHAPTER
9
Managing
State Information
these
files to the Images folder in the ChineseZodiac directory on the
server.
To
add banner ad images to the Chinese zodiac site:
1.
550
Open
a blank document in the text editor.
Within
PHP delimiters, insert the following code, which cre-
ates
an array named $banner_array
that
stores the five ban-
ner
images you created. Replace the .ext file extension with
the
appropriate extension for each image file type. The script
then
uses the count()
function
to store the total number of
elements
in the array to a variable called $banner_count.
$banner_array
= array(
"Images/banner1.ext",
"Images/banner2.ext",
"Images/banner3.ext",
"Images/banner4.ext",
"Images/banner5.ext");
$banner_count = count($banner_array);
2.
3.
Immediately after the preceding code, but within the PHP
script section, add the following code that sets or updates a
cookie with an expiration date of one week. If the visitor has
not returned within a week, the banner ads will start fresh. To
ensure that the first banner ad does not always appear when a
visitor first opens the page, you will use the rand() function
to select a random starting point.
if (empty($_COOKIE["lastbanner"])) {
// generate a random index greater than or equal
// to 0, and less than the number of elements in
// the $banner_array array
$banner_index = rand(0, $banner_count-1);
}
else {
// assign the cookie value to the $banner_index
// variable
$banner_index = $_COOKIE["lastbanner"];
// increment the banner index, and use the modulus
// operator to ensure that the index is greater
// than or equal to 0, and less than the number
// of elements in the $banner_array array
$banner_index = (++$banner_index) % $banner_count;
}
// Set or update the cookie value
setcookie("lastbanner", $banner_index,
time()+(60*60*24*7));
4.
Save the file as inc_banner_display.php and upload it to the
Includes folder in the ChineseZodiac directory on the server.
Discovery
Projects
5.
Open
index.php, which you modified in the previous project.
At
the top of the document, but after the existing include()
statement,
write the code to include inc_banner_display.php.
Open
inc_button_nav.php from the Includes folder. You last
modified
inc_button_nav.php in Discovery Project 4-2. Above
the
code for the navigation buttons, include the following
PHP
code block, which uses the $banner_index
variable
to
display
the corresponding image element in the array:
<?php
include("Includes/inc_banner_display.php");
//
statement to determine which banner image to display
$image
= $banner_array[$banner_index];
?>
6.
551
7.
Immediately
after the PHP code block, add the following
statement
that displays the appropriate image saved in the
$image
variable.
<img
class="btn" src="<?php echo $image; ?>"
alt="[Banner
Ad]" title="Banner Ad"
style = "border:0" />
8.
Save inc_button_nav.php and upload it to the server. Open
index.php in the browser to verify that a banner ad appears
above the button navigation. Refresh the browser. Each time
the browser is refreshed, the next banner image in the array
should appear. When the last banner in the array appears, the
cycle should begin again with banner1.
Discovery Project 9-3
In this project, you will create a simple Web site survey with five
questions that will use sessions to track the user responses.
To create the Web site survey:
1.
Create a new document in the text editor and create a PHP
code block at the top of the document that includes the
session_start() function:
<?php
session_start();
?>
During the
development
stage, you
may want to
insert echo
"<p>PHP Session ID
is " . session_
id() . "</p>\n"; in
the PHP code block to
display the assigned
session ID.
2.
Before the end of the PHP code block, insert the following
array of five questions and the code to save the number of
questions into the $question_count variable:
CHAPTER
9
Managing
State Information
$survey_questions
= array(
1
=> "Was the navigation straightforward and " .
" did all the links work?",
2 => " Was the selection of background color, " .
" font color, and font size appropriate?",
3 => " Were the images appropriate and did they " .
" complement the Web content?",
4 => " Were the descriptions of the PHP program " .
" complete and easy to understand?",
5 => " Was the PHP code structured properly and " .
" well commented?");
$question_count = count($survey_questions);
552
3.
Immediately after assigning the value to $question_count,
check to see if $_SESSION['CurrentQuestion'] is set
using the following code. If it is set, increment it. If it is
not set, set it to 0. Also, store the previous response if
$_SESSION['CurrentQuestion'] is set and greater than 0 and
the autoglobal element $_POST['response'] is set.
if (isset($_SESSION['CurrentQuestion'])) {
if (($_SESSION['CurrentQuestion'] > 0) &&
(isset($_POST['response']))) {
$_SESSION['Responses'][$_
SESSION['CurrentQuestion']]
= $_POST['response'];
}
++$_SESSION['CurrentQuestion'];
}
else
$_SESSION['CurrentQuestion'] = 0;
4.
After the closing PHP tag, type the <!DOCTYPE> declaration,
<html> element, header information, and <body> element.
Use the strict DTD and “Web Survey” as the content of the
<title> element.
In the body of the Web page, add the following header and
PHP tag:
<h1>Web Survey</h1>
<?php
?>
5.
6.
In the PHP code section, add the following code with
advanced escaping to display different information based on
the value of $_SESSION['CurrentQuestion']:
if ($_SESSION['CurrentQuestion'] == 0) {
?>
<p></p>
<?php
}
else if ($_SESSION['CurrentQuestion'] > $question_
Discovery
Projects
count)
{
?>
<p></p>
<?php
}
else
{
}
553
7.
In
the if
clause
of the if...else
statement,
add a para-
graph
explaining the purpose of the survey, such as “Thank
you
for reviewing the Chinese Zodiac Web site. Your candid
responses
to the following five questions will help improve the
effectiveness
of our PHP demonstration site.” This explanatory
paragraph
should go within the opening and closing <p>
tags.
In
the else
if clause
of the if...else
statement,
add a
statement
within the opening and closing <p>
tags
that thanks
the
user for completing the survey. After the opening PHP
tag,
add code to use the standard e-mail headers to e-mail the
survey
results to your e-mail address. Build the body of the
message
using the $_SESSION['Responses']
array.
Display
the
survey results on the page so that the visitor can see the
five
questions and the selected responses.
In
the final else
clause
of the if...else
statement,
add the
following
code to display the current question:
echo
"<p>Question " . $_SESSION['CurrentQuestion'] .
":
" . $survey_questions[$_
SESSION['CurrentQuestion']]
. "</p>\n";
8.
9.
10. Add the following code to insert a form with a
method of
post and an action of "web_survey.php" if$_SESSION['CurrentQuestion'] is less than or equal to the
number of questions. Insert a hidden form field to pass the
session ID from page to page. Use a nested if...else state-
ment to display the appropriate text on the Submit button and
to include radio buttons for the visitor to select an answer if a
question is being displayed.
if ($_SESSION['CurrentQuestion'] <= $question_count)
{
echo "<form method='post' action='web_survey.
php'>\n";
echo "<input type='hidden' name='PHPSESSID'
value=' " .
session_id() . "' />\n";
if ($_SESSION['CurrentQuestion'] > 0) {
echo "<p><input type='radio'
name='response' " .
" value='Exceeds Expectations' /> " .
" Exceeds Expectations<br />\n";

CHAPTER
9
Managing
State Information
echo
"<input type='radio' name='response' " .
"
value='Meets Expectations'" .
" checked='checked' /> " .
" Meets Expectations<br />\n";
echo "<input type='radio' name='response' " .
" value='Below Expectations'> " .
" Below Expectations</p>\n";
}
echo "<input type='submit' name='submit' value='";
if ($_SESSION['CurrentQuestion'] == 0)
echo "Start the survey";
else if ($_SESSION['CurrentQuestion'] ==
$question_count)
echo "Finished";
else
echo "Next Question";
echo "' />\n";
echo "</form>\n";
}
554
11. Save the file as web_survey.php and upload the file to the
ChineseZodiac directory on the server.
12. Reopen inc_state_information.php (last modified in
Discovery Project 4-1) in your text editor and add a descrip-
tion of the Web survey program. Include a [Test the Script]
link that opens web_survey.php and a [View the Source
Code] link that displays the PHP source code for the survey
page. Save the file and upload it to the Includes folder in the
ChineseZodiac directory on the server.
13. Open the Chinese zodiac Web site, then click the State
Information button and text links to verify that the program
runs properly. Click the [Test the Script] link for the Web sur-
vey to open web_survey.php. Select a response for each ques-
tion. The final page should display the “thank you” message,
the results of the survey, and a link back to the Chinese zodiac
site if the survey was opened in a new window rather than the
dynamic content section. The results should also be sent to
your e-mail address.
Discovery Project 9-4
In this project, you will design the gateway portal for a Chinese
zodiac social networking site that will create a login system to allow
users to register, log in, create and update user profiles, display pho-
tos, and view all user profiles.
The gateway page should contain a welcome screen (with header and
footer) and two sections:
Discovery
Projects
1.
2.
Registered
User Login [Insert placeholder text here]
New
User Registration [Insert placeholder text here]
Insert
a header, footer, and welcome content on the page and save it
as
index.php in a ZodiacProfiles subdirectory in the ChineseZodiac
directory
on the server.
In
the browser, open index.php from the ZodiacProfiles subdirectory
to
verify that the gateway portal appears correctly.
555
Discovery
Project 9-5
In
this project, you will create the database tables required to store
the
profile information.
Referring
back to Discovery Project 8-2, connect to the server and the
Chinese
zodiac database. Create two tables named zodiac_profiles
and
profile_pictures
using
the properties in Tables 9-1 and 9-2:
Field
Name
profile_id
first_name
last_name
user_email
user_name
user_password
user_sign
user_profile
Field
Properties
UNSIGNED
INT NOT NULL AUTOINCREMENT PRIMARY KEY
VARCHAR(25)
NOT NULL
VARCHAR(25)
NOT NULL
VARCHAR(255)
NOT NULL
VARCHAR(25)
NOT NULL
VARCHAR(25)
NOT NULL
VARCHAR(25)
NOT NULL
TEXT
NOT NULL
Table
9-1
Field
Name
profile_id
The
zodiac_profiles
table
Field
Properties
INT
NOT NULL
VARCHAR(100)
NOT NULL
VARCHAR(200)
NOT NULL
profile_title
picture_
link
Table
9-2
The
profile_pictures
table
View
the structure of the two tables in either MySQL Monitor
or
PHPMyAdmin, capture an image of each display, and save the
images
as DP9-5a.ext and DP9-5b.ext, respectively (replacing
the
.ext with the appropriate extension for the image type). Upload
the
files to an Images folder in the ZodiacProfiles subdirectory of
the
ChineseZodiac
directory on the server.
CHAPTER
Developing
Object-
Oriented
PHP
In
this chapter, you will:
Study
object-oriented programming concepts
Use
objects in PHP scripts
Declare
data members in classes
Work
with class member functions
10