

Manipulating
MySQL Databases with PHP
One
of PHP’s greatest strengths is its ability to access and
manipulate
databases.
With its strong support for Open Database Connectivity
(ODBC),
you can use PHP to gain direct access to any database that
is
ODBC compliant, including Oracle, Informix, PostgreSQL, and
MySQL.
PHP also allows you to work directly with different types of
databases
without going through ODBC.
PHP
also supports other methods of accessing data sources, including
SQLite,
database abstraction layer functions, and PEAR DB. SQLite
and
database abstraction layer functions work with file-based data-
bases
instead of server-based databases such as MySQL. The PHP
Extension
and Application Repository (PEAR) is a library of open
source
PHP code. One of the most popular PEAR code modules
is
PEAR DB, which simplifies access between PHP and a database
server
by providing a generic interface that works with various types
of
database systems, similar to how ODBC works. Although PEAR
DB
and ODBC perform similar functions, PEAR DB is designed spe-
cifically
to work with PHP, whereas ODBC is a more generic protocol
used
by many programming languages and database management
systems.
With
so many database connectivity options, how do you decide
which
method to use for accessing databases with PHP? First, you
need
to select a database management system. If you are new to data-
base
development, you should probably start with an open source
database
such as PostgreSQL or MySQL, because they are free and
fairly
easy to learn. After you select a database, you need to determine
whether
PHP can access it directly or whether it must go through a
layer
such as ODBC or PEAR DB. Using ODBC or PEAR DB makes
databases.
However, your PHP script will be faster if it can access a
database
directly, without going through a PEAR DB or ODBC layer.
Therefore,
if you think your PHP script will need to access more than
one
type of database, you should use PEAR DB or ODBC. To be more
precise,
you should use PEAR DB over ODBC because PEAR DB is
designed
specifically for the PHP language. Yet, ODBC is sometimes
preferable,
especially when you need to access Microsoft data source
products
such as Access or Excel. However, if you plan to work with
a
single database, such as MySQL, and you are more concerned with
your
Web application’s performance than its compatibility with mul-
tiple
database systems, use PHP’s direct database access if it’s
available
for
your database management system.
In
this chapter, you will study how to use PHP to directly access
MySQL.
447It easier for you to write php code that can be used with a variety of

CHAPTER
8
Manipulating
MySQL Databases with PHP
Connecting
to MySQL with PHP
As
you work through this chapter, keep in mind that almost every-
thing
you learned about MySQL in the preceding chapter is applica-
ble
to this chapter. Although you need to learn a few new functions to
access
MySQL with PHP, you will execute the same SQL statements
that
you used with MySQL Monitor. The great benefit of using PHP
or
some other server-side scripting language to read from and write
to
a database server is that you can create a Web-based interface,
which
makes it much easier for visitors to interact with your database.
Before
you can use PHP to read from and write to MySQL databases,
you
need to enable MySQL support in PHP and learn how to connect
to
the MySQL database server.
448
Determining
which MySQL Package to Use
There
are
mysqli_*
equivalents
for each of
the
mysql_* functions used
in this chapter. The code
will be different because
of the object-oriented
nature of the mysqli_*
functions.
You can
use the
phpinfo()
function you
learned in
Chapter 1 to determine
which MySQL libraries are
installed on your Web
server.
In PHP versions earlier than PHP 5, support for MySQL was installed
by default. However, starting with PHP 5, you must enable MySQL
support in PHP by configuring your PHP installation to use the
mysqli or mysql package.
The mysqli (MySQL Improved) package became available with PHP
5, and is designed to work with MySQL version 4.1.3 and later. If you
use earlier versions of PHP or MySQL, you must use the mysql pack-
age. With newer versions of PHP and MySQL, you can use either
mysql or mysqli. Because the mysqli package is the object-oriented
equivalent of the mysql package, and object-oriented PHP is not cov-
ered until Chapter 10, this chapter concentrates on the mysql package.
Opening and Closing a MySQL Connection
Before you can use PHP to access the records in a database, you
must first use the mysql_connect() function to open a connection
to a MySQL database server. Opening a connection to a database
is similar to opening a handle to a text file, as you did in Chapter 5.
However, instead of returning a file handle, the mysql_connect()
function returns a link identifier as an integer if it connects success-
fully to the database or a Boolean FALSE if it doesn’t. You assign the
return value from the mysql_connect() function to a variable that
you can use to access the database in your script. The basic syntax for
the mysql_connect() function is as follows:
$connection = mysql_connect("host" [, "user", "password"])
In the preceding example, the host argument allows you to specify
the host name where your MySQL database server is installed. If you
are connecting to an instance of the MySQL database server that is

Connecting
to MySQL with PHP
running
on the same server as the PHP scripting engine, use a value of
“localhost”
or “127.0.0.1” for the
working with a MySQL database server that is running on a different
(remote) server than the PHP scripting engine, you need to enter the
name or IP address of the MySQL server. The user and password argu-
ments allow you to specify a MySQL account name and password. For
example, the following command connects the user name “dongosselin”
with a password of “rosebud” to a local instance of the MySQL database
server. The database connection is assigned to the $DBConnect variable.
$DBConnect = mysql_connect("localhost", "dongosselin",
"rosebud");
To change
users after
connecting
to a data-
base, use
the mysql_change_
user() function.
449
When your PHP script ends, any open database connections close
automatically. However, you should get into the habit of explicitly
closing database connections with the mysql_close() function when
you finish using them. This ensures that the connection doesn’t keep
taking up space in your Web server’s memory while the script finishes
processing. You close a database connection by passing the database
connection variable to the mysql_close() function. The following
statement closes the $DBConnect database connection variable that
was opened in the preceding statement:
mysql_close($DBConnect);
After you connect to a database with the mysql_connect() function,
you can use the functions listed in Table 8-1 to return information
about your installation of the MySQL server.
Function
mysql_get_client_info()
mysql_get_client_version()
mysql_get_host_info(connection)
mysql_get_proto_info(connection)
mysql_get_server_info(connection)
The mysql_
get_
client_
info() and
mysql_
get_client_
version() functions do
not accept any argu-
ments. These functions
do not actually require a
database connection, as
they return information
about your local client,
not the MySQL server.
However, you must pass
the variable representing
the database connection
to the rest of the func-
tions listed in Table 8-1.
Description
Returns the MySQL client version
Returns the MySQL client version as an integer
Returns the MySQL database server
connection information
Returns the MySQL protocol version
Returns the MySQL database server version
Table 8-1
MySQL server information functions
The terms client and server require some explanation. Because the
client and server are defined in relation to MySQL, the Web server
where the PHP script is running is the client when communicat-
ing with the MySQL server. The mysql_get_client_info() and
mysql_get_client_version() functions return information about
the mysql package that PHP is using. The remainder of the functions
return information about the database server and the MySQL appli-
cation running on it.
CHAPTER
8
Manipulating
MySQL Databases with PHP
To
create a PHP script that connects to MySQL and uses the func-
tions
listed in Table 8-1 to display information about your installation
of
MySQL:
1.
450
2.
Create
a new document in your text editor.
Type
the <!DOCTYPE>
declaration,
<html>
element,
header infor-
mation,
and <body>
element.
Use the strict DTD and “MySQL
Server
Information” as the content of the <title>
element.
Add
the following heading element to the document body:
<h1>MySQL
Database Server Information</h1>
3.
4.
Add
the following script section to the end of the document body:
<?php
?>
5.
Add
the following mysql_connect()
statement
to the script sec-
tion.
Replace host,
user,
and password
with
the MySQL host
name,
user name, and password assigned by your instructor.
$DBConnect
= mysql_connect("host", "user", "password");
6.
At
the end of the script section, add the following statements,
which
display information about your installation of MySQL server:
echo
"<p>MySQL client version: "
.
mysql_get_client_info() . "</p>\n";
if ($DBConnect===FALSE)
echo "<p>Connection failed.</p>\n";
else {
echo "<p>MySQL connection: "
. mysql_get_host_info($DBConnect) . "</p>\n";
echo "<p>MySQL protocol version: "
. mysql_get_proto_info($DBConnect) . "</p>\n";
echo "<p>MySQL server version: "
. mysql_get_server_info($DBConnect) . "</p>\n";
7.
Finally, add the following statement to the end of the script sec-
tion to close the database connection. Note that you only close
the connection if the mysql_connect function successfully
established a connection with the MySQL server:
mysql_close($DBConnect);
}
8.
Save the document as MySQLInfo.php in the Chapter direc-
tory for Chapter 8, and then upload the document to the server.
Open the MySQLInfo.php file in your Web browser by enter-
ing the following URL: http://<yourserver>/PHP_Projects/
Chapter.08/Chapter/MySQLInfo.php. Your Web browser should
look like Figure 8-1, although the information displayed from
each function might be different for your MySQL installation.
9.

Connecting
to MySQL with PHP
10.
Close
your Web browser window.
451
Figure
8-1
MySQLInfo.php
in a Web browser
Reporting
MySQL Errors
If
an error prevents the connection from being created, it is useful to
know
why the mysql_connect()
function
failed. The mysql_error()
function
returns a text string describing the error, and the
mysql_errno()
function
returns the numeric code of the error. You
can
use these functions when debugging your code, as they provide
specific
details about the cause of the error.
When
debugging MySQL functions, it is often convenient to use the
following
abbreviated syntax to handle errors:
$DBConnection
= (mysql_connect(...) ||
die(mysql_error());
If you
receive a
warning that
PHP cannot
load a
dynamic library or an
error message such as
“Call to undefined function
mysql_connect()”,
MySQL support is not
correctly enabled for your
PHP installation.
This syntax is a short way of writing code that displays the MySQL
error message and exits the script if the mysql_connect() func-
tion fails (and returns FALSE). Otherwise, the return value of the
mysql_connect() function is assigned to $DBConnection and the
script continues processing on the next line. Because the die() func-
tion exits the script immediately, any further script output, such as
navigation buttons or a Web form, is not displayed. For this reason,
do not use the die() function when it will prevent the Web page
from displaying properly.
To obtain error information for any other functions that access a
MySQL database, such as the ones discussed in this section, you use
the same two error functions. After you connect to a MySQL server,
you can pass to the mysql_errno() and mysql_error() functions the
variable representing the database connection. This is useful if you
The exit()
function
works the
same as
the die()
function, and exits the
script immediately.

CHAPTER
8
In
the
mysqli
package,
connection
errors are
reported using the
mysqli_connect_
error() and mysqli_
connect_errno()
functions, which do not
accept any parameters.
For all other database
errors, the mysqli_
error() and mysqli_
errno() functions are
used, and are called in
the same manner as
mysql_error() and
mysql_errno().
Manipulating MySQL Databases with PHP
have multiple connections open, and need to report on an error for a
specific connection.
The mysql_error() and mysql_errno() functions only return the
results of the previous mysql_*() function (excluding mysql_error()
and mysql_errno() themselves). It is important to call these func-
tions before calling another function in the mysql package; otherwise,
the error information will be lost.
452
Suppressing Errors with the Error
Control Operator
Although standard error messages generated by programming lan-
guages such as PHP are helpful to programmers, they represent a
potential security risk, as mentioned earlier. Also, they may confuse
less technical users, who might think they somehow caused the error.
Errors can and will occur, but you should never let your users think
that they did something wrong.
Functions in PHP, including those in the mysql package, normally dis-
play errors and warnings as they occur. You can suppress those mes-
sages by using the error control operator (@). You can place the error
control operator before any expression, although it is most commonly
used with built-in PHP functions, especially functions that access
external data sources such as files and databases. Using the error
control operator to suppress error messages does not mean you can
ignore errors. Instead, it provides a more graceful way of handling an
error that does not reveal information about the underlying system.
In the following example, which contains a modified version of inc_
db_catalog.php, both the mysql_connect() and mysql_select_db()
functions are preceded by error control operators to suppress any
error messages that may occur:
<?php
$DBName = "catalog";
$DBConnect = @mysql_connect("php_db", "dongosselin", "rosebud");
if ($DBConnect === FALSE)
echo "<p>Connection error: "
. mysql_error() . "</p>\n";
else {
if (@mysql_select_db($DBName, $DBConnect) === FALSE) {
echo "<p>Could not select the \"$DBName\" " .
"database: " . mysql_error($DBConnect) .
"</p>\n";
mysql_close($DBConnect);
$DBConnect = FALSE;
}
}
?>
You should
never dis-
play the
actual error
message or
error number returned by
the mysql_error()
and mysql_errno()
functions in a production
PHP script. Information
returned by these func-
tions could expose vulner-
abilities of the server,
providing a means of
attacking it. In a produc-
tion environment, these
scripts should be rewrit-
ten to display a custom
error message that does
not reveal information
about the PHP scripting
engine or the MySQL
database, and to write
the error code and mes-
sage to a log file.
Working
with MySQL Databases
In
this chap-
ter, you will
use the
mysql_
error()
function to return the
actual error messages
from the MySQL data-
base. This function helps
you locate and correct
errors in your code.
Using the
error control
operator
does not
disable error
checking. It only sup-
presses the error mes-
sages from being
displayed.
Short Quiz
1.
Explain why you need to save the return value of the
mysql_connect() function to a variable.
When is it valid to use the value of “localhost” as the host
argument in the mysql_connect() function?
Explain why you should always use the mysql_close() func-
tion to close the database connection when you are finished
accessing the database.
Contrast the return value of the mysql_error() function and
the mysql_errno() function.
Describe how the error control operator is used to handle
errors.
2.
453
3.
4.
5.
Working with MySQL Databases
Although you will usually use MySQL Monitor, phpMyAdmin, or
similar tools to perform database structural changes, you can use
PHP to perform these tasks. The mysql package provides the neces-
sary functions for creating, selecting, and deleting databases.
Creating a Database
As you saw in Chapter 7, you must create a database to hold
the tables that store data. In MySQL Monitor, you used the
CREATE DATABASE statement. In PHP, you use the mysql_create_db()
function. Its basic syntax is:
$result = mysql_create_db( "dbname" [, connection]);
You may notice that the connection value is optional. If the link con-
nection is not specified, PHP uses the last connection opened using
mysql_connect(). This simplifies the code if you only have one link
connection open at a time. The mysql_create_db() function returns
a Boolean TRUE value if successful, or FALSE if an error occurred.
You may
not have
privileges
to create
databases
for the MySQL server to
which you are connect-
ing. If so, you may
receive one of two error
messages: an “insuffi-
cient privileges” message
from the MySQL server
or an “undefined function”
message for the
mysql_create_db()
function.
CHAPTER
8
Manipulating
MySQL Databases with PHP
The
following code uses a mysql_create_db()
statement
to create a
database
named catalog
from
the $DBConnect
database
connection:
$DBName
= "catalog";
$DBConnect
= mysql_connect("php_db", "dongosselin",
"rosebud");
if
($DBConnect === FALSE)
echo
"<p>Connection error: "
. mysql_error() . "</p>\n";
else {
if (mysql_create_db("$DBName", $DBConnect) === FALSE)
echo "<p>Could not create the \"$DBName\" " .
"database: " . mysql_error($DBConnect) .
"</p>\n";
else
echo "<p>Successfully created the " .
"\"$DBName\" database.</p>\n";
mysql_close($DBConnect);
}
454
To create a PHP script that creates a database named newsletter:
1.
2.
Create a new document in your text editor.
Type the <!DOCTYPE> declaration, <html> element, header infor-
mation, and <body> element. Use the strict DTD and “Creating
Database” as the content of the <title> element.
Add the following script section to the end of the document
body:
<?php
?>
3.
4.
Add the following statements to the script section to connect to
the MySQL server. Replace host with the MySQL server name
provided by your instructor, and replace user and password
with the MySQL user name and password you created in
Chapter 7.
$DBName = "newsletter";
$DBConnect = mysql_connect("host", "user", "password ");
if ($DBConnect === FALSE)
echo "<p>Connection error: "
. mysql_error() . "</p>\n";
else {
}
5.
In the else clause of the if...else statement, add the follow-
ing statements to create the newsletter database:

Working
with MySQL Databases
if
(mysql_create_db($DBName, $DBConnect) === FALSE)
echo
"<p>Could not create the \"$DBName\" " .
"database: " . mysql_error($DBConnect) .
"</p>\n";
else
echo "<p>Successfully created the " .
"\"$DBName\" database.</p>\n";
455
6.
Add the following statement to the end of the else clause to
close the database connection:
mysql_close($DBConnect);
7.
Save the document as CreateNewsletterDB.php in the
Chapter directory for Chapter 8, and then upload the document
to the server.
Open CreateNewsletterDB.php in your Web browser by enter-
ing the following URL: http://<yourserver>/PHP_Projects/
Chapter.08/Chapter/CreateNewsletterDB.php. The Web page
should inform you that the newsletter database was created or
provide an error message that explains why the database was not
created.
Close your Web browser window.
8.
If you do not
have “Create
Database”
privileges on
your MySQL
server, you may see an
error like the one shown
in Figure 8-2.
9.
Figure 8-2 Error message when the mysql_create_db() function is unavailable because
of insufficient privileges
Selecting a Database
As you saw in Chapter 7, you must first select a database with the
USE database statement when you log on to MySQL Monitor.
You select a database or change to a different database with the
mysql_select_db() function. The syntax for the function is
mysql_select_db(database [, connection]). The function returns
a Boolean value of TRUE if it successfully selects a database or FALSE if
it doesn’t. For example, the following code uses a mysql_select_db()
statement to open the catalog database from the $DBConnect
CHAPTER
8
Manipulating
MySQL Databases with PHP
database
connection, and displays a simple “Selected the “Catalog”
Database”
message if successful:
$DBName
= "catalog";
$DBConnect
= mysql_connect("php_db", "dongosselin",
"rosebud");
if
($DBConnect === FALSE)
echo
"<p>Connection error: "
. mysql_error() . "</p>\n";
else {
if (mysql_select_db($DBName, $DBConnect) === FALSE)
echo "<p>Could not select the \"$DBName\" " .
"database: " . mysql_error($DBConnect) . "</p>\n";
else {
// Use the else portion of the if statement for
// additional statements that access or manipulate
// the database
echo "<p>Selected the \"$DBName\" database</p>\n";
}
mysql_close($DBConnect);
}
456
Usually, you have several pages that all use the same database. Also,
it is a security risk to have passwords in files that are directly acces-
sible from the Web. For these reasons, you can use an include file to
connect to the MySQL server and select a database. For example, the
inc_db_catalog.php file contains the following script:
<?php
$DBName = "catalog";
$DBConnect = mysql_connect("php_db", "dongosselin", "rosebud");
if ($DBConnect === FALSE)
echo "<p>Connection error: "
. mysql_error() . "</p>\n";
else {
if (mysql_select_db($DBName, $DBConnect) === FALSE) {
echo "<p>Could not select the \"$DBName\" " .
"database: " . mysql_error($DBConnect) .
"</p>\n";
mysql_close($DBConnect);
$DBConnect = FALSE;
}
}
?>
The primary difference between the code in an include file and the
code embedded in a PHP script itself is that the code in the include
file closes the connection and sets the connection variable to FALSE if
the database named in $DBName could not be selected. The following
PHP script uses the inc_db_catalog.php include file to produce the
same output as the previous example:
Working
with MySQL Databases
include("inc_db_catalog.php");
if
($DBConnect !== FALSE) {
//
Use the if statement for additional statements
// that access or manipulate the database
echo "<p>Selected the \"$DBName\" database</p>\n";
mysql_close($DBConnect);
}
457
The PHP script only needs to verify that $DBConnect is not FALSE
before using any database functions. Also, the script only calls the
mysql_close() function if $DBConnect is not FALSE, because the
connection was already closed or was never successfully opened if
$DBConnect is FALSE.
To create a PHP script that uses an include file to select the
newsletter database:
1.
2.
Create a new document in your text editor.
Add the following script section:
<?php
?>
3.
Add the following statements to the script section to connect to
the MySQL server. Replace host with the MySQL server name
provided by your instructor, and replace user and password
with the MySQL user name and password you created in
Chapter 7. If you could not create the newsletter database ear-
lier, change “newsletter” to the name of the default database pro-
vided for your user account. Note that the error control operator
is used to suppress MySQL connection error messages.
$DBName = "newsletter";
$DBConnect = @mysql_connect("host", "user", "password");
if ($DBConnect === FALSE)
echo "<p>Connection error: "
. mysql_error() . "</p>\n";
else {
}
4.
In the else clause of the if...else statement, add the follow-
ing statements to select the newsletter database and close the
connection on failure. Again, the error control operator is used
to suppress error messages.
if (@mysql_select_db($DBName, $DBConnect)
=== FALSE) {
echo "<p>Could not select the \"$DBName\" " .
"database: " . mysql_error($DBConnect) .
"</p>\n";
mysql_close($DBConnect);
$DBConnect = FALSE;
}

CHAPTER
8
Manipulating
MySQL Databases with PHP
5.
6.
7.
Save
the document as inc_db_newsletter.php.
Create
another new document in your text editor.
Type
the <!DOCTYPE>
declaration,
<html>
element,
header infor-
mation,
and <body>
element.
Use the strict DTD and “Select
Test”
as the content of the <title>
element.
Add
the following script section to the end of the document body:
<?php
?>
458
8.
9.
Add
the following include()
statement
to the script section:
include("inc_db_newsletter.php");
10.
After
the include()
statement,
add the following statements
to
handle a successful selection of the newsletter
database:
if
($DBConnect !== FALSE) {
echo
"<p>Selected the \"$DBName\" database</p>\n";
mysql_close($DBConnect);
}
11.
Save the document as SelectTest.php in the Chapter direc-
tory for Chapter 8, and then upload inc_db_newsletter.php
and SelectTest.php to the Web server.
Open SelectTest.php in your Web browser by entering the fol-
lowing URL: http://<yourserver>/PHP_Projects/Chapter.08/
Chapter/SelectTest.php. The Web page should inform you
that the newsletter database was selected or should provide
an error message.
Close your Web browser window.
12.
13.
Deleting a Database
As with the
mysql_
create_db()
function, you
may not have
privileges to delete a
database. If so, $Result
will be FALSE.
To delete a database, you use the mysql_drop_db() function. The
syntax is:
$Result = mysql_drop_db("dbname" [, connection]);
The mysql_drop_db() function returns TRUE if the database was suc-
cessfully dropped, or FALSE if an error occurred. If a value of FALSE
is returned, you use the mysql_error() function to display the error
message.

Working
with Tables
Short
Quiz
1.
2.
What
PHP function is used to create a new database?
Name
the equivalent MySQL command for the USE
database
statement
used in MySQL Monitor to change to a different
database.
You
use which PHP function to delete an existing database?
459
For
informa-
tion that you
want to
store perma-
nently, you
should use MySQL
Monitor instead of PHP to
create and delete tables.
Creating and deleting
tables with PHP is most
useful when you only
need to store information
temporarily for the cur-
rent Web browser
session.
3.
Working with Tables
In this section, you will learn how to use PHP to work with MySQL
and tables. More specifically, you will learn how to create and delete
tables. As you will see, the SQL statements in this section are identi-
cal to the SQL statements you saw in Chapter 7. The only difference is
that they are executed with PHP instead of MySQL Monitor.
Using mysql_query()
In PHP, you use the mysql_query() function to send SQL statements
to MySQL. The mysql_query() function is the workhorse of PHP
connectivity with MySQL; almost every SQL command you send to
MySQL from PHP is executed with this function. Its basic syntax is
mysql_query(query [, connection]). The mysql_query() function
returns one of three values, depending on the type of query executed.
For SQL statements that do not return information from the data-
base, such as the CREATE TABLE statements, the mysql_query() func-
tion returns a value of TRUE if the statement executes successfully.
For SQL statements that return information from the database, such
as SELECT and SHOW statements, the mysql_query() function returns
a result pointer that represents the query results. A result pointer is
a special type of variable that refers to the currently selected row in
the list of records returned by MySQL, called a resultset. The result
pointer is a way of keeping track of where you are in a resultset. You
assign the result pointer to a variable, which you can use to access
the resultset in PHP. The mysql_query() function returns a value of
FALSE for any SQL statements that fail, regardless of whether they
return information from the database. As an example, the following
code selects the vehicle_fleet database you saw in Chapter 7. The
code then executes the mysql_query() function to select information
from the company_cars table and assigns the result pointer to a vari-
able named $QueryResult.
CHAPTER
8
When
mysql_
query()
returns a
resultset,
you use the mysql_
num_rows() function to
determine the number of
records in the resultset.
The mysql_num_
rows() function takes a
single parameter, which
is the resultset variable. If
the parameter is not a
valid resultset, mysql_
num_rows() returns
FALSE.
Manipulating MySQL Databases with PHP
$Result = @mysql_select_db("vehicle_fleet", $DBConnect);
if ($Result===FALSE)
echo "<p>Unable to select the database.</p>"
. "<p>Error code " . mysql_errno($DBConnect)
. ": " . mysql_error($DBConnect) . "</p>";
else {
echo "<p>Successfully opened the database.</p>";
$SQLstring = "SELECT model_year, make, model FROM
company_cars";
$QueryResult = mysql_query($SQLstring, $DBConnect)
mysql_close($DBConnect);
}
460
Creating and Deleting Tables
To create a table, you use the CREATE TABLE statement with
the mysql_query() function. Be sure you have executed the
mysql_select_db() function before executing the CREATE TABLE
statement, or you might create your new table in the wrong database.
Assuming that you have a link connection established and stored in
$DBConnect and used the mysql_select_db() function to select the
vehicle_fleet database, the following code creates a table named
drivers in the vehicle_fleet database:
$SQLstring = "CREATE TABLE drivers (name VARCHAR(100), "
. "emp_no SMALLINT, hire_date DATE, "
. "stop_date DATE)";
$QueryResult = @mysql_query($SQLstring, $DBConnect);
if ($QueryResult===FALSE)
echo "<p>Unable to execute the query.</p>"
. "<p>Error code " . mysql_errno($DBConnect)
. ": " . mysql_error($DBConnect) . "</p>";
else
echo "<p>Successfully created the table.</p>";
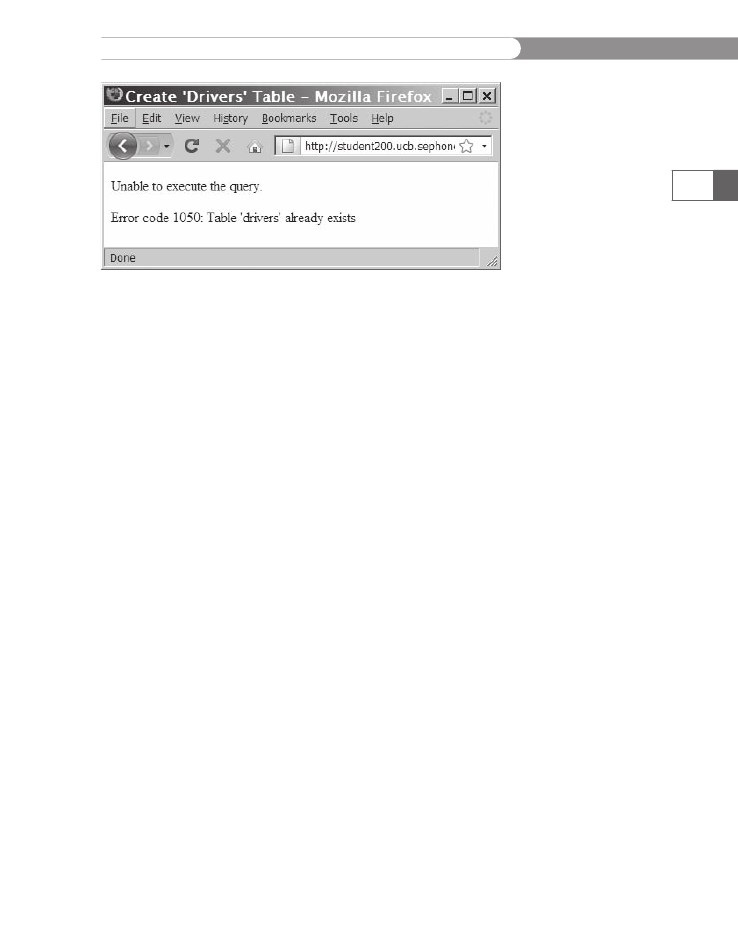
If the table already exists in the selected database, the preceding code
would produce the error code and message shown in Figure 8-3.
Working
with Tables
461
Figure
8-3 Error code and message that appear when you attempt to
create
a table that already exists
To
prevent your code from trying to create a table that already exists,
use
a mysql_query()
function
that checks for the table using the
SHOW
TABLES LIKE command.
If the function executes successfully
and
does not return 0 rows, the table already exists. You determine
the
number of rows in the resultset with the mysql_num_rows()
func-
tion.
The following code demonstrates how to check whether a table
exists
before attempting to create it:
$TableName
= "drivers";
$SQLstring
= "SHOW TABLES LIKE '$TableName'";
$QueryResult
= @mysql_query($SQLstring, $DBConnect);
if
(mysql_num_rows($QueryResult) > 0) {
echo
"<p>The $TableName table already exists!</p>";
}
else {
$SQLstring = "CREATE TABLE drivers (name VARCHAR(100), "
. "emp_no SMALLINT, hire_date DATE, "
. "stop_date DATE)";
$QueryResult = @mysql_query($SQLstring, $DBConnect);
if ($QueryResult===FALSE)
echo "<p>Unable to execute the query.</p>"
. "<p>Error code " . mysql_errno
($DBConnect)
. ": " . mysql_error($DBConnect) . "</p>";
else
echo "<p>Successfully created the table.</p>";
}
One common practice in MySQL, and databases in general, is to cre-
ate a numeric index that is used as a primary key identifier for each
record. To identify a field as a primary key in MySQL, you include
the PRIMARY KEY keywords when you first define a field with the
CREATE TABLE statement. The AUTO_INCREMENT keyword is often used
with a primary key to generate a unique ID for each new row in a
table. For the first row inserted into a table, a field created with the

CHAPTER
8
You
will be
introduced
to the
AUTO_
INCREMENT
keyword later in this
chapter.
Manipulating MySQL Databases with PHP
AUTO_INCREMENT keyword is assigned a value of 1. The value of the
462
field for each subsequently added row is incremented by 1 from the
preceding row. Another keyword that is often used with primary keys
is NOT NULL, which requires a field to include a value. As an example,
the following SQL statement defines a primary key named id for the
company_cars table using the SMALLINT data type. The id field defini-
tion also includes the NOT NULL and AUTO_INCREMENT keywords.
CREATE TABLE company_cars (id SMALLINT NOT NULL AUTO_
INCREMENT PRIMARY KEY, license VARCHAR(10), model_year
SMALLINT, make VARCHAR(25), model VARCHAR(50), mileage
FLOAT);
To create a script that creates the subscribers table in the
newsletter database the first time the script is called:
1.
2.
Create a new document in your text editor.
Type the <!DOCTYPE> declaration, <html> element, header infor-
mation, and <body> element. Use the strict DTD and “Create
‘subscribers’ Table” as the content of the
<title> element.Add the following script section to the end of the document
body:
<?php
?>
3.
4.
Add the following include() statement to the script section:
include("inc_db_newsletter.php");
5.
After the include() statement, add the following statements to
handle a successful selection of the newsletter database:
if ($DBConnect !== FALSE) {
mysql_close($DBConnect);
}
6.
Add the following variable declarations and mysql_query()
statement immediately before the mysql_close() function. The
mysql_query() statement checks the database for a table named
subscribers.
$TableName = "subscribers";
$SQLstring = "SHOW TABLES LIKE '$TableName'";
$QueryResult = @mysql_query($SQLstring, $DBConnect);
7.
Add the following variable declarations and mysql_query()
statement immediately before the mysql_close() function. The
statements in the if statement only execute if the $QueryResult
contains 0 rows, which means that the table does not yet
exist. Notice that the CREATE TABLE statement creates the
subscriberID field as an auto-incrementing primary key.
Working
with Tables
if
(mysql_num_rows($QueryResult) == 0) {
$SQLstring
= "CREATE TABLE subscribers (subscriberID
SMALLINT NOT NULL AUTO_INCREMENT PRIMARY KEY,
name VARCHAR(80), email VARCHAR(100),
subscribe_date DATE,
confirmed_date DATE)";
$QueryResult = @mysql_query($SQLstring, $DBConnect);
if ($QueryResult === FALSE)
echo "<p>Unable to create the subscribers
table.</p>"
. "<p>Error code " . mysql_errno($DBConnect)
. ": " . mysql_error($DBConnect) . "</p>";
else
echo "<p>Successfully created the "
. "subscribers table.</p>";
}
else
echo "<p>The subscribers table already
exists.</p>";
463
8.
Save the document as CreateSubscribersTable.php in the
Chapter directory for Chapter 8, and then upload the document
to the Web server.
Open CreateSubscribersTable.php in your Web browser by
entering the following URL: http://<yourserver>/PHP_Projects/
Chapter.08/Chapter/CreateSubscribersTable.php. The Web page
should inform you that the subscribers table was created or
should provide an error message.
9.
10.
Close your Web browser window.
To delete a table, you use the DROP TABLE statement with the
mysql_query() function. The following code demonstrates how to
delete the drivers table using similar error handling as the code that
created the table:
$TableName = "drivers";
$SQLstring = "SHOW TABLES LIKE '$TableName'";
$QueryResult = @mysql_query($SQLstring, $DBConnect);
if (mysql_num_rows($QueryResult) == 0)
echo "<p>The $TableName table does not exist!</p>";
else {
$SQLstring = "DROP TABLE $TableName";
$QueryResult = @mysql_query($SQLstring, $DBConnect);
if ($QueryResult === FALSE)
echo "<p>Unable to execute the query.</p>"
. "<p>Error code " . mysql_errno($DBConnect)
. ": " . mysql_error($DBConnect) . "</p>";
else
echo "<p>Successfully deleted the table.</p>";
}
mysql_close($DBConnect);

CHAPTER
8
Manipulating
MySQL Databases with PHP
Short
Quiz
1.
464
What
function is used to send SQL statements to MySQL?
Describe
the role of the result pointer in database querying.
Write
a short script that demonstrates how to check whether
a
table exists before attempting to create it.
Which
function returns the number of records in a resultset?
What
MySQL statement is used with the mysql_query()
function
to delete a table?
2.
3.
4.
5.
Manipulating
Records
In
this section, you will learn how to use PHP to add, update, and
delete
database records. As you work through the rest of this chapter,
you
should recognize the SQL statements because you worked with
them
in Chapter 7. The primary difference is that, instead of manually
executing
SQL statements by typing them in MySQL Monitor as you
did
in Chapter 7, you will use PHP statements to access MySQL and
execute
SQL statements for you.
Adding,
Deleting, and Updating Records
To
add records to a table, you use the INSERT
and
VALUES
keywords
with
the mysql_query()
function.
Remember that you should
specify
the columns that you are populating, and that the values
in
the VALUES
list
must be in the same order. For example, the fol-
lowing
statements add a new row to the company_cars
table
in the
vehicle_fleet
database:
$SQLstring
= "INSERT INTO company_cars " .
"
(license, model_year, make, model, mileage) " .
" VALUES('CPQ-893', 2011, 'Honda', 'Insight', " .
" 49.2)";
$QueryResult = @mysql_query($SQLstring, $DBConnect);
if ($QueryResult === FALSE)
echo "<p>Unable to execute the query.</p>"
. "<p>Error code " . mysql_errno($DBConnect)
. ": " . mysql_error($DBConnect) . "</p>";
else
echo "<p>Successfully added the record.</p>";

Manipulating
Records
Also
remember that you can specify NULL
in
any fields for which you
do
not have a value. For example, if you do not know the mileage for
the
Honda Insight, you can enter NULL
as
the last item in the VALUES
list,
as follows:
$SQLstring
= "INSERT INTO company_cars " .
"
(license, model_year, make, model, mileage) " .
" VALUES('CPQ-893', 2011, 'Honda', 'Insight', " .
" NULL)";
465
When you add records to a table that includes an AUTO_INCREMENT
field, you omit the column name and value from the lists. The follow-
ing SQL statement inserts a new record into the company_cars table
of the vehicle_fleet database. If it is the first record added to the
table, its primary key will be assigned a value of 1.
INSERT INTO company_cars (license, model_year, make, model,
mileage) VALUES('AK 4321', 2012, 'Toyota', 'Prius', 23);
As you
learned in
Chapter 7,
you can
insert mul-
tiple value sets with a
single command, using
multiple value lists sepa-
rated by commas.
Alternatively, you can include the column name in the list and specify
NULL for the field value. The following SQL statement inserts the same
new record as the previous example:
INSERT INTO company_cars (id, license, model_year, make, model,
mileage) VALUES(NULL, 'AK 4321', 2012, 'Toyota', 'Prius', 23);
To add multiple records to a database from an external file, you use
the LOAD DATA statement with the name of the local text file that
contains the records you want to add. The following statement loads
a file named company_cars.txt into the company_cars table in the
vehicle_fleet database:
$SQLstring = "LOAD DATA INFILE 'company_cars.txt' " .
" INTO TABLE company_cars";
To update records in a table, you use the UPDATE statement with the
same syntax you learned in Chapter 7. The UPDATE keyword specifies
the name of the table to update and the SET keyword specifies the
value to assign to the fields in the records that match the condition in
the WHERE keyword. For example, the following statements modify the
mileage of the 2007 Honda Civic to 50112.3 miles:
$SQLstring = "UPDATE company_cars SET mileage=50112.3
WHERE license='AK-1234'";
$QueryResult = @mysql_query($SQLstring, $DBConnect);
if ($QueryResult === FALSE)
echo "<p>Unable to execute the query.</p>"
. "<p>Error code " . mysql_errno($DBConnect)
. ": " . mysql_error($DBConnect) . "</p>";
else
echo "<p>Successfully modified the record.</p>";
To delete records from a table, you use the DELETE statement with
the mysql_query() function. Remember that the WHERE keyword
CHAPTER
8
Manipulating
MySQL Databases with PHP
determines
which records to delete in the table. For example, the fol-
lowing
statement deletes the record for the 2007 Chevrolet Malibu
from
the company_cars
table
in the vehicle_fleet
database:
$SQLstring
= "DELETE FROM company_cars WHERE make='Chevrolet'
AND
model='Malibu' AND model_year=2007";
$QueryResult = @mysql_query($SQLstring, $DBConnect);
if ($QueryResult === FALSE)
echo "<p>Unable to execute the query.</p>"
. "<p>Error code " . mysql_errno($DBConnect)
. ": " . mysql_error($DBConnect) . "</p>";
else
echo "<p>Successfully deleted the record.</p>";
466
To delete all the records in a table, omit the WHERE clause. For
example, the following statement deletes all the records in the
company_cars table:
$SQLstring = "DELETE FROM company_cars";
In the next exercise, you will create an All-in-One Web form that
adds a new subscriber record to the subscribers table in the
newsletter database. You also use the mysql_insert_id() func-
tion, which returns the ID created with AUTO_INCREMENT in the last
INSERT operation. You pass to the mysql_insert_id() function the
variable to which you assigned the database connection with the
mysql_connect() function. The mysql_insert_id() function is use-
ful when you need to find the primary key created for new records
you add to a database table.
To create the All-in-One Web form that adds a new subscriber record
to the subscribers table in the newsletter database:
1.
2.
Create a new document in your text editor.
Type the <!DOCTYPE> declaration, <html> element, header infor-
mation, and <body> element. Use the strict DTD and “Subscribe
to our Newsletter” as the content of the <title> element.
Add the following header and script section to the end of the
document body:
<h1>Subscribe to our Newsletter</h1>
<?php
?>
3.
4.
Add the following if statement to the script section to deter-
mine whether the form has been submitted, and initialize the
form if it has not been submitted:
if (isset($_POST['Submit'])) {
}
else {
Manipulating
Records
$ShowForm
= TRUE;
$SubscriberName
= "";
$SubscriberEmail
= "";
}
5.
In
the code block for the if
clause
in the script section, add the
following
code to validate the submitted form data:
$FormErrorCount
= 0;
if
(isset($_POST['SubName'])) {
$SubscriberName
= stripslashes($_POST
['SubName']);
$SubscriberName = trim($SubscriberName);
if (strlen($SubscriberName) == 0) {
echo "<p>You must include your
name!</p>\n";
++$FormErrorCount;
}
}
else {
echo "<p>Form submittal error (No
'SubName' field)!</p>\n";
++$FormErrorCount;
}
if (isset($_POST['SubEmail'])) {
$SubscriberEmail = stripslashes($_
POST['SubEmail']);
$SubscriberEmail = trim($SubscriberEmail);
if (strlen($SubscriberEmail) == 0) {
echo "<p>You must include your
email address!</p>\n";
++$FormErrorCount;
}
}
else {
echo "<p>Form submittal error (No
'SubEmail' field)!</p>\n";
++$FormErrorCount;
}
467
6.
Immediately after validating the submitted form data, add the
following if...else statement to determine whether the form
will be processed:
if ($FormErrorCount == 0) {
}
else
$ShowForm = TRUE;
7.
In the if clause of the if...else statement that determines
whether the form will be processed, add the following variable
assignment and include statement:
$ShowForm = FALSE;
include("inc_db_newsletter.php");

CHAPTER
8
Manipulating
MySQL Databases with PHP
8.
Immediately
after the include
statement,
add the following if
statement
that determines if the database connection is valid:
if
($DBConnect !== FALSE) {
}
9.
468
In
the code block for the previous if
statement,
set the follow-
ing
variables to the values shown. Note that the date()
function
now
takes the string “Y-m-d” as a parameter, which ensures that
the
date string is in the “YYYY-MM-DD” format that MySQL
recognizes.
Also note that the id
and
confirmed_date
fields
are
omitted
from the column list for the INSERT
statement.
The id
field
will be assigned automatically because it is defined with the
AUTO_INCREMENT
keyword.
The confirmed_date
field
will be
inserted
as NULL.
$TableName
= "subscribers";
$SubscriberDate
= date("Y-m-d");
$SQLstring
= "INSERT INTO $TableName " .
"(name,
email, subscribe_date) VALUES " .
"('$SubscriberName', '$SubscriberEmail',
'$SubscriberDate')";
10.
Next, add the following code to use the mysql_query() func-
tion to execute the query, report any errors, and close the
database connection:
$QueryResult = @mysql_query($SQLstring, $DBConnect);
if ($QueryResult === FALSE)
echo "<p>Unable to insert the values into
the subscriber table.</p>"
. "<p>Error code " . mysql_errno($DBConnect)
. ": " . mysql_error($DBConnect) . "</p>";
else {
$SubscriberID = mysql_insert_id($DBConnect);
echo "<p>" . htmlentities($SubscriberName) .
", you are now subscribed to our
newsletter.<br />";
echo "Your subscriber ID is
$SubscriberID.<br />";
echo "Your email address is " .
htmlentities($SubscriberEmail)
. ".</p>";
}
mysql_close($DBConnect);
In a produc-
tion environ-
ment, you
would nor-
mally have
separate fields for a
user ID and the table’s
primary key.
11.
Finally, add the following code immediately before the closing
PHP script tag. This code uses advanced escaping to display
the Web form if appropriate.
Manipulating
Records
if
($ShowForm) {
?>
<form action="NewsletterSubscribe.php" method="POST">
<p><strong>Your Name: </strong>
<input type="text" name="SubName" value="<?php echo
$SubName; ?>" /></p>
<p><strong>Your Email Address: </strong>
<input type="text" name="SubEmail" value="<?php echo
$SubEmail; ?>" /></p>
<p><input type="Submit" name="Submit" value="Submit"
/></p>
</form>
<?php
}
469
12.
Save the file as NewsletterSubscribe.php in the Chapter
directory for Chapter 8 and upload the file to the Web server.
Open the NewsletterSubscribe.php file in your Web browser
by entering the following URL: http://<yourserver>/PHP_
Projects/Chapter.08/Chapter/NewsletterSubscribe.php. Enter
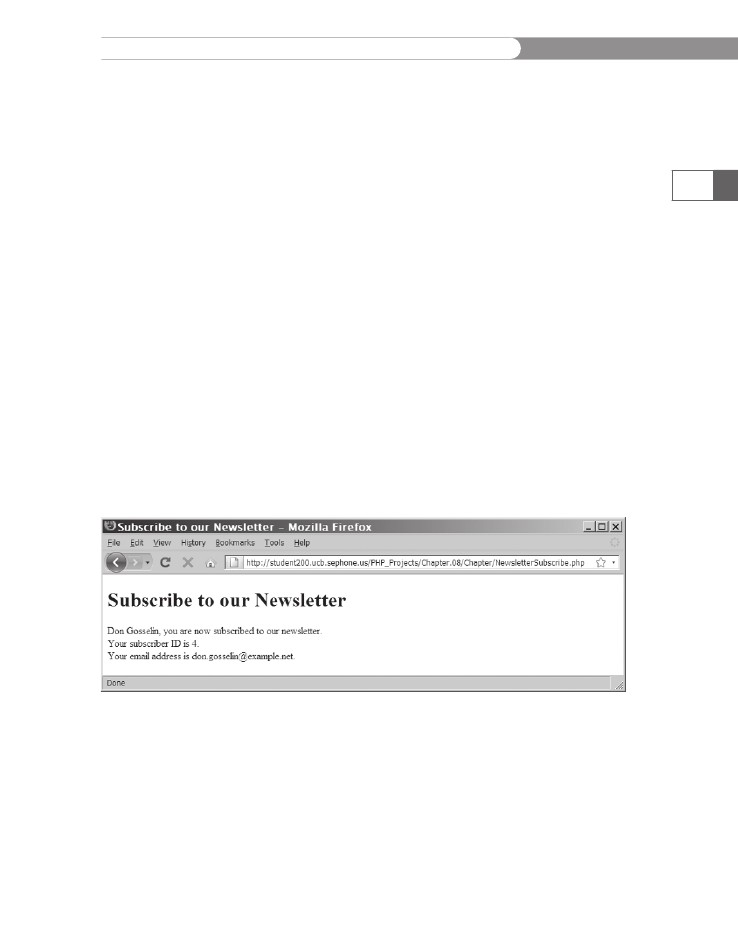
values into the New Subscriber Registration form and click
the Submit button. You should be assigned a new subscriber
ID of 1 the first time you submit a valid name and address, a
2 the second time, and so forth. You should see a Web page
similar to the one in Figure 8-4, depending on which sub-
scriber you are.
13.
Figure 8-4
Newsletter Subscriber Web form results
Returning Information on Affected Records
The functions mysql_affected_rows() and mysql_info() return
information on the records that were affected by an INSERT,
UPDATE, or DELETE query. First, you will learn how to use the
mysql_affected_rows() function.

CHAPTER
8
Manipulating
MySQL Databases with PHP
Using
the mysql_affected_rows() Function
As
discussed earlier, with queries that return results, such as SELECT
queries,
you can use the mysql_num_rows()
function
to find the
number
of records returned from the query. However, with queries
that
modify tables but do not return results, such as INSERT,
UPDATE,
and
DELETE
queries,
you can use the mysql_affected_rows()
func-
tion
to determine the number of affected rows. You pass to the
mysql_affected_rows()
function
the variable that contains the data-
base
connection returned from the mysql_connect()
function—not
the
variable containing the result pointer from the mysql_query()
function.
For example, the following statements display the number
of
rows affected by an UPDATE
query.
Figure 8-5 shows the output in a
Web
browser.
$SQLstring
= "UPDATE company_cars SET mileage=50112.3
WHERE
license='AK-1234'";
$QueryResult = @mysql_query($SQLstring, $DBConnect);
if ($QueryResult === FALSE)
echo "<p>Unable to execute the query.</p>"
. "<p>Error code " . mysql_errno($DBConnect)
. ": " . mysql_error($DBConnect) . "</p>";
else
echo "<p>Successfully updated "
. mysql_affected_rows($DBConnect) . "
record(s).</p>";
470
Figure 8-5 Output of the mysql_affected_rows() function for an
UPDATE query
The following code contains another example of the
mysql_affected_rows() function, this time with a DELETE query:
$SQLstring = "DELETE FROM company_cars WHERE license='AK-1234'";
$QueryResult = @mysql_query($SQLstring, $DBConnect);
if ($QueryResult === FALSE)
echo "<p>Unable to execute the query.</p>"
. "<p>Error code " . mysql_errno($DBConnect)
. ": " . mysql_error($DBConnect) . "</p>";
Manipulating
Records
else
echo
"<p>Successfully deleted "
.
mysql_affected_rows($DBConnect) . " record(s).</p>";
Using the mysql_info() Function