

mysql> ALTER TABLE vehicles ADD COLUMN (model_year
Int);[enter ]
Modifying Column Types
To change the data type of an existing field in a table with the
ALTER TABLE statement, use the following syntax:
ALTER TABLE table_name MODIFY [COLUMN] column_name
column_type;

Defining
Database Tables
Because
the model_year
field
will hold only four-digit years, it can
fit
in a two-byte SMALLINT
rather
than a four-byte INT.
The following
statement
changes the column type of the model_year
field
from INT
to
SMALLINT
in
the vehicles
table
in the vehicle_fleet
database:
mysql>
ALTER TABLE vehicles MODIFY COLUMN model_year
SMALLINT;[ENTER
]
Unlike
the ADD
COLUMN clause,
the MODIFY
COLUMN clause
applies to
only
a single field.
Renaming
Columns
To
change the name of an existing field in a table with the
ALTER
TABLE statement,
use the following syntax:
ALTER
TABLE table_name CHANGE [COLUMN] column_name
new_name
column_type;
Be
careful
when chang-
ing the data
type of a
column. If
the data stored in the
field cannot be converted
to the new data type, the
data will be lost. In the
previous example, any
data values for the
model_year column
that are not in the range
–32,758 to 32,757 will
be set to NULL.
407
The following statement changes the name of the miles field to
mileage in the vehicles table in the vehicle_fleet database:
mysql> ALTER TABLE vehicles CHANGE COLUMN miles mileage
FLOAT;[ENTER ]
Like the MODIFY COLUMN clause, the CHANGE COLUMN clause applies to
only a single field. The column_type must always be specified, even
if it doesn’t change. To change the data type of the field at the same
time, you specify the new column type for column_type. As when
using the MODIFY COLUMN clause, make sure that any existing data can
be converted to the new data type.
Renaming Tables
To change the name of an existing table with the ALTER TABLE
statement, use the following syntax:
ALTER TABLE table_name RENAME [TO] new_name;
The following statement changes the name of the vehicles table to
company_cars in the vehicle_fleet database:
mysql> ALTER TABLE vehicles RENAME TO company_cars;[ENTER ]
Removing Columns
To remove an existing field from a table with the ALTER TABLE state-
ment, use the following syntax:
ALTER TABLE table_name DROP [COLUMN] column_name;
The following statement removes the assigned_to column from the
company_cars table in the vehicle_fleet database:
mysql> ALTER TABLE company_cars DROP COLUMN assigned_to;[ENTER ]

CHAPTER
7
You
must be
logged in as
the root
user or have
DROP privi-
leges to delete a table.
Working with Databases and MySQL
Deleting Tables
To delete a table, you execute the DROP TABLE statement, which
removes all data and the table definition. The syntax for the
DROP TABLE statement is as follows:
DROP TABLE table;
408
Although the
company_
cars table is
deleted with
this com-
mand, it will be re-created
for use with examples
later in this chapter.
The following statement deletes the company_cars table from the
vehicle_fleet database:
mysql> DROP TABLE company_cars;[ENTER ]
Short Quiz
1.
Explain the importance of selecting the most appropriate data
type for table fields.
Illustrate the SQL syntax to create a table.
What six columns are shown in the output of the
DESCRIBE table statement?
What SQL keywords are used with the ALTER TABLE statement
to add columns, modify columns, rename columns, or
remove columns for an existing table?
2.
3.
4.
Modifying User Privileges
MySQL assigns privileges to specify which actions and operations
a user can perform with a table or database. By default, only admin-
istrator accounts such as the root account have full permissions on
every database object. Regular users normally cannot create or drop
databases. Within a database, the database owner and the root user
are the only users who can create, alter, and drop tables, unless other
users are expressly granted these permissions. Users can also be
restricted in their ability to insert, update, delete, and select records
from tables.
For security purposes, user accounts should only be assigned the
minimum necessary privileges to perform given tasks. For example,
if a user should only be able to view records from a table, you should
only assign the SELECT privilege to the user’s account. This helps
secure your database by preventing the user from unintentionally (or
maliciously) changing or tampering with database records.

Modifying
User Privileges
This
section provides an overview of how to manage user privileges.
Table
7-4 lists common MySQL database privileges.
Privilege
ALL
ALTER
CREATE
DELETE
DROP
INDEX
INSERT
SELECT
UPDATE
USAGE
Description
Assigns
all privileges to the user
Allows
the user to modify the table structure
Allows
the user to create databases, tables, and indexes
Allows
the user to delete records
Allows
the user to delete databases and tables
Allows
the user to create and delete indexes
Allows
the user to add records
Allows
the user to select records
Allows
the user to modify records
Creates
a user with no privileges
Common
MySQL database privileges
For
informa-
tion on addi-
tional
privileges,
including
administrator privileges,
refer to the MySQL
Reference Manual at
http://dev.mysql.com/
doc/mysql/en/index.
html.
409
Table 7-4
Granting Privileges
You use a GRANT statement to create user accounts and assign privi-
leges. The basic syntax for the GRANT statement is as follows:
GRANT privilege [(column)] [, privilege [(columns)] ...]
ON {table | * | *.* | database.*}
TO user [IDENTIFIED BY 'password'];
Privileges can be granted at the following levels: column, table, data-
base, and global. The first line in the GRANT statement syntax allows
you to specify individual columns to apply privileges. The ON por-
tion of the GRANT statement determines the level to which privileges
apply at the table, database, and global levels. You can specify the
name of an individual table in the current database or an asterisk,
which applies privileges to all the tables in the current database. If you
specify “*.*”, privileges are applied at a global level to all databases in
your MySQL installation. You can also indicate a specific table within
another database by appending the table name to the database name
with a period.
The GRANT statement creates the user account if it does not exist and
assigns the specified privileges. If the user account already exists, the
GRANT statement just updates the privileges. As an example, the fol-
lowing statement creates a new user named dongosselin and assigns
SELECT, INSERT, and UPDATE privileges to the user for all tables in the
currently selected database. The statement also assigns a password of
'rosebud' to the dongosselin account.

CHAPTER
7
After
you
create a
user
account, you
do not need
to specify a password
when updating privileges.
However, if you specify a
password other than the
current password for an
existing user account, the
password is reset.
Working with Databases and MySQL
mysql> GRANT SELECT, INSERT, UPDATE[ENTER ]
-> ON *[ENTER ]
-> TO dongosselin IDENTIFIED BY 'rosebud';[ENTER ]
The following statement assigns privileges to the user dongosselin to
a table named students in the currently selected database:
mysql> GRANT SELECT, INSERT, UPDATE[ENTER ]
-> ON students[ENTER ]
-> TO dongosselin;[ENTER ]
410
The following statement assigns privileges to the user dongosselin at
the global level to all databases in a MySQL installation:
mysql> GRANT SELECT, INSERT, UPDATE[ENTER ]
-> ON *.*[ENTER ]
-> TO dongosselin;[ENTER ]
The following statement assigns privileges to the user dongosselin to
the company_cars table in the vehicle_fleet database:
mysql> GRANT SELECT, INSERT, UPDATE[ENTER ]
-> ON vehicle_fleet.company_cars[ENTER ]
-> TO dongosselin;[ENTER ]
If you are
working with
a hosted
instance of
MySQL, you
might not have been
assigned privileges to
create user accounts.
Finally, the following statement uses a wildcard (*) to assign privileges
to the user dongosselin to all tables in the vehicle_fleet database:
mysql> GRANT SELECT, INSERT, UPDATE[ENTER ]
-> ON vehicle_fleet.*[ENTER ]
-> TO dongosselin;[ENTER ]
All of the preceding examples specified the user dongosselin. MySQL
does not support wildcards for the user.
To create a new user account with privileges to the sitevisitors
database:
1.
2.
Return to MySQL Monitor.
Enter the following statement to create a new user account
with CREATE, DROP, ALTER, DELETE, INDEX, INSERT, SELECT, and
UPDATE privileges assigned to all the tables in the sitevisi-
tors database. The statement also assigns a password to the
account. Enter your own name (as one word) and a password
you will remember.
mysql> GRANT CREATE, DROP, ALTER, DELETE, INDEX,
INSERT, SELECT, UPDATE[ENTER ]
-> ON sitevisitors.*[ENTER ]
-> TO yourname IDENTIFIED BY 'password';[ENTER ]
3.
Type exit or quit and press Enter to log out of MySQL.

Modifying
User Privileges
4.
Enter
the following command to log back in to MySQL with
the
user account and password you just created:
mysql
-u yourname –p
5.
When
prompted, enter the new password you assigned to the
user
account.
411
Revoking
Privileges
You
use the REVOKE
statement
to take away privileges from an exist-
ing
user account for a specified table or database. The syntax for the
REVOKE
statement
is as follows:
REVOKE
privilege [(column)] [, privilege [(columns)]] ...
ON
{table | * | *.* | database.*}
FROM user;
The following example revokes INSERT and UPDATE privileges from
the dongosselin user account for the company_cars table in the
vehicle_fleet database:
mysql> REVOKE INSERT, UPDATE[ENTER ]
-> ON vehicle_fleet.company_cars[ENTER ]
-> FROM dongosselin;[ENTER ]
The REVOKE ALL PRIVILEGES statement removes all privileges from a
user account for a specified table or database. The following example
takes away all privileges from the dongosselin user account for the
company_cars table in the vehicle_fleet database:
mysql> REVOKE ALL PRIVILEGES[ENTER ]
-> ON vehicle_fleet.company_cars[ENTER ]
-> FROM dongosselin;[ENTER ]
You must be
logged in
with the
root
account or
have sufficient privileges
to revoke privileges from
another user account.
In this chapter, the user account you created does not need the INDEX
privilege, so you revoke it in the next exercise.
To revoke privileges:
1.
2.
3.
4.
Return to MySQL Monitor.
Type exit or quit and press Enter to log out of MySQL.
Log back in to MySQL with the root account.
When prompted, enter the password you assigned to the root
account.
Enter the following command to revoke the INDEX privilege to
the tables in the sitevisitors database from your user account:
mysql> REVOKE INDEX[ENTER ]
-> ON sitevisitors.*[ENTER ]
-> FROM yourname;[ENTER ]
5.

CHAPTER
7
Working
with Databases and MySQL
6.
7.
8.
Type
exit
or
quit
and
press Enter to log out of MySQL.
Log
back in to MySQL with your user account.
Enter
the following command to select the sitevisitors
database:
mysql>
use sitevisitors;[ENTER ]
412
Short
Quiz
1.
2.
3.
Explain
the term “user privileges.”
What
are the four levels for which privileges may be granted?
What
statement is used to take away privileges from an exist-
ing
user account for a specified table in the database?
Working
with Database Records
As
described earlier, a record is a set of related field data stored
as
a
single row in a table. A table can store an unlimited number of
records,
each with its own set of data. In this section, you will learn
how
to add records to a table and how to update and delete existing
records.
Adding
Records
You
add individual records to a table with the INSERT
statement.
The
basic
syntax for the INSERT
statement
is as follows:
INSERT
INTO table_name (column1, column2, ...)
VALUES(value1,
value2, ...);
The
values you enter into the VALUES
list
will be stored, in order, in
the
columns specified after the table name. Any values that you want
left
NULL can be omitted from the column list, or you can put the
name
in the column list and the keyword NULL in the corresponding
position
in the VALUES
list.
For example, the following statement adds
a
new row to the company_cars
table
in the vehicle_fleet
database:
mysql>
INSERT INTO company_cars (license, model_year,
make,
model, mileage)[ENTER ]
->
VALUES('CK-2987', 2009, 'Toyota', 'Corolla',
3508.4);[ENTER ]

Working
with Database Records
You
can also omit the column list, as follows:
INSERT
INTO table_name VALUES(value1, value2, ...);
When
you omit the column list, the values you enter in the VALUES
list
must
be in the same order in which you defined the table fields, and
each
field in the table must have a specified value, even if the value
specified
is NULL.
For example, the following statement adds a new row
(record)
to the company_cars
table
in the vehicle_fleet
database:
mysql>
INSERT INTO company_cars VALUES('CK-2987', 2009,[ENTER ]
->
'Toyota', 'Corolla', 3508.4);[ENTER ]
413
Specify NULL in any fields for which you do not have a value. For
example, if you do not know the mileage of the vehicle, you can enter
NULL as the last item in the VALUES list, as follows:
mysql> INSERT INTO company_cars VALUES('CK-2987', 2009,[ENTER ]
-> 'Toyota', 'Corolla', NULL);[ENTER ]
Although it is permissible to omit the column list from the INSERT
statement, it is generally considered a poor programming practice. If
the structure of the table changes, values will not be assigned to the
appropriate columns.
To add two records to the pagevisits table in the sitevisitors
database:
1.
2.
Return to MySQL Monitor.
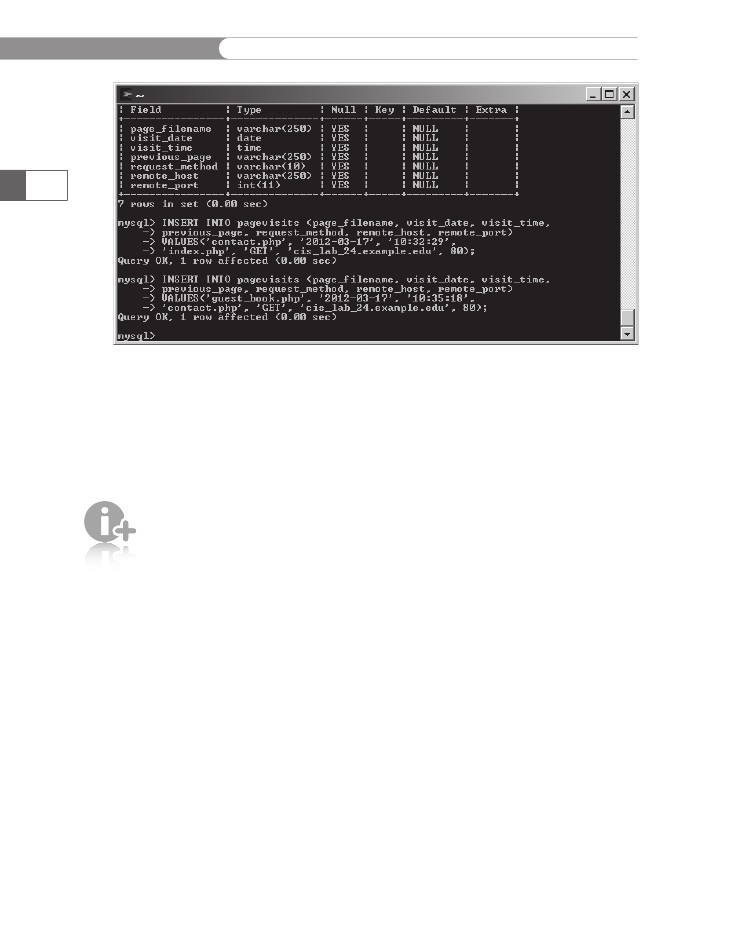
Enter the following command to add a record to the
pagevisits table:
mysql> INSERT INTO pagevisits (page_filename, visit_
date, visit_time,[ENTER ]
-> previous_page, request_method, remote_host,
remote_port)[ENTER ]
-> VALUES('contact.php', '2012-03-17',
'10:32:29',[ENTER ]
-> 'index.php', 'GET', 'cis_lab_24.example.edu',
80);[ENTER ]
3.
After you see the “Query OK” message, add another record, as
follows:
mysql> INSERT INTO pagevisits (page_filename, visit_
date, visit_time,[ENTER ]
-> previous_page, request_method, remote_host,
remote_port)[ENTER ]
-> VALUES('guest_book.php', '2012-03-17',
'10:35:18',[ENTER ]
-> 'contact.php', 'GET', 'cis_lab_24.example.
edu', 80);[ENTER ]
Your screen should look like Figure 7-10.
CHAPTER
7
Working
with Databases and MySQL
414
Figure
7-10
MySQL
Monitor after adding two records to the pagevisits
table
Sometimes
you need to insert more than one row of data. You can
use
multiple INSERT
statements,
but you also can insert multiple
records
with a single INSERT
statement,
using the following syntax:
INSERT
INTO table_name (column1, column2, ...)
VALUES(value1,
value2, ...), (value1, value2, ...), ...;
In
order to
use the
LOAD DATA
statement,
your account
needs to be given FILE
privileges, which allows
the MySQL user account
to access any files on the
server that are available
to the MySQL server
account (not the user’s
server account).
As shown above, multiple VALUE lists are separated by commas. Each
value list is inserted as a separate record into the table. As with the
single-record INSERT statement shown previously, the column list is
optional, but should be included for good form.
For large data sets stored in external files, it is much more efficient to
use the LOAD DATA statement to add multiple records to a database
table. You use the LOAD DATA statement with the full path and name
of a local text file that contains the records you want to add. The syn-
tax for the LOAD DATA statement is as follows:
LOAD DATA INFILE 'file_path' INTO TABLE table_name
(column1, column2, ...);
Place each record in the text file on a separate line and place tabs
between each field. The fields will be stored into the columns speci-
fied in the column list in the order specified. As with the INSERT
statement, the column list is optional, but should always be used.
If the column list is omitted, the values on each line must be in the
same order in which you defined the table fields. For missing field val-
ues, do not use the keyword NULL, because it will be interpreted as the
Working
with Database Records
text
value “NULL”, not as a NULL value. Simply use consecutive tabs
with
nothing between them.
The
following statement loads a file named company_cars.txt into the
company_cars
table
in the vehicle_fleet
database:
mysql>
LOAD DATA INFILE 'company_cars.txt' INTO TABLE
company_cars;[ENTER
]
To
add new records to the pagevisits
table
in the sitevisitors
database:
1.
2.
The
optional
FIELDS
TERMINATED
BY clause of
the LOAD
DATA statement allows
you to change the field
separator to something
other than a tab.
If your MySQL
account does
not have
FILE privi-
leges, skip the
following exercise.
Use the
MySQL serv-
er’s direc-
tory path,
not the Web
URL path.
The path
names in the
preceding
examples
are broken
into multiple lines due to
space limitations and
would generate errors if
used as shown. On UNIX/
Linux and Windows plat-
forms, you need to enter
the path name on a single
line or you will receive an
error. Also, on Windows
platforms, be sure to
escape the backward
slashes in your path, or
use forward slashes, as
shown in the preceding
example.
415
Return to MySQL Monitor.
Enter a LOAD DATA statement that inserts records from the
page_visits.txt file in your Chapter directory for Chap-
ter 7. Be certain to enter the full path for the location of
your data files. Enter the following command, replac-
ing path_to_PHP_folders with the full path for your
PHP_Projects directory:
mysql> LOAD DATA INFILE 'path_to_PHP_folders/
Chapter.07/Chapter/page_visits.txt'[ENTER ]
-> INTO TABLE pagevisits [ENTER ]
-> FIELDS TERMINATED BY ',';[ENTER ]
3.
You should see a result similar to the following:
Query OK, 12 rows affected (0.01 sec)
Records: 12 Deleted: 0 Skipped: 0 Warnings: 0
mysql>
Retrieving Records
You use the SELECT statement to retrieve records from a table. The
basic syntax for a SELECT statement is as follows:
SELECT criteria FROM table_name;
You use the asterisk (*) wildcard with the SELECT statement to
retrieve all fields from a table. You can also specify individual fields to
return by separating field names with a comma. The following state-
ment returns the model and mileage fields from the company_cars
table in the vehicle_fleet database:

CHAPTER
7
Working
with Databases and MySQL
mysql>
SELECT model, mileage FROM company_cars;[ENTER ]
+---------+---------+
|
model| mileage |
+---------+---------+
|
Corolla | 3508.4 |
|
Cobalt | 24829.4 |
|
Focus| 24829.4 |
|
Civic| 48891.1 |
|
Sentra | 28336.7 |
|
Accord | 77484.4 |
|
Camry|855.5 |
|
Fusion |95.9 |
|
Malibu | 57024.2 |
|
Sonata | 62993.6 |
|
Altima | 17398.3 |
+---------+---------+
11
rows in set (0.00 sec)
416
To
enter SELECT
statements
that return records from the pagevisits
table
in the sitevisitors
database:
1.
2.
Return
to MySQL Monitor.
Enter
the following SELECT
statement,
which returns all
records
from the pagevisits
table.
Your output should look
like
Figure 7-11, although the lines might wrap, depending on
your
screen resolution.
mysql>
SELECT * FROM pagevisits;[ENTER ]
Working
with Database Records
417
Figure
7-11
3.
SELECT
statement
that returns all records from the pagevisits
table
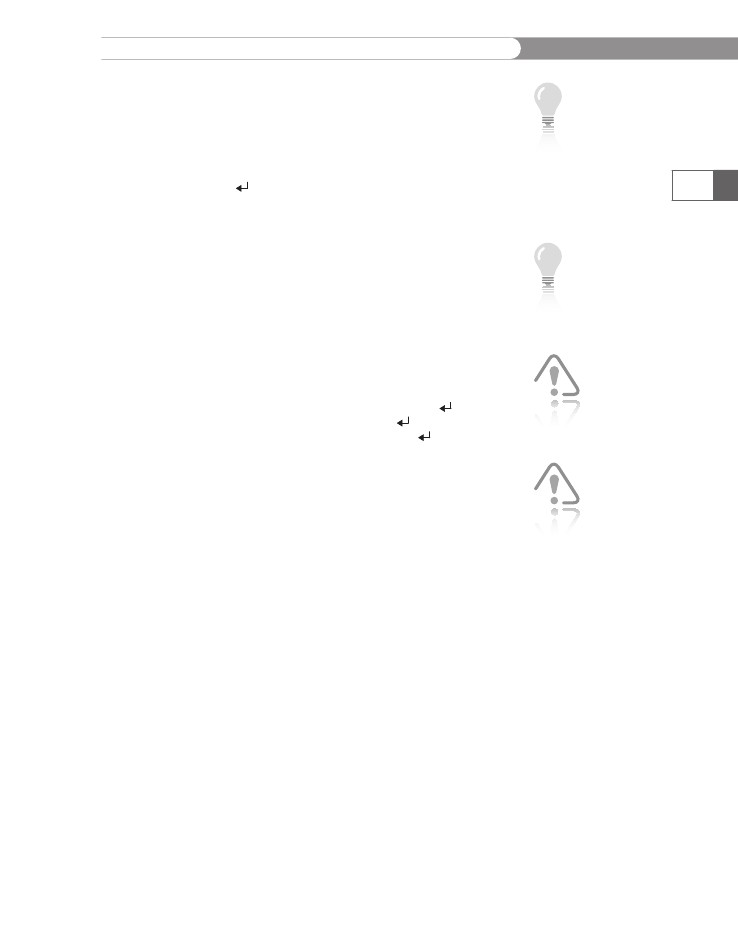
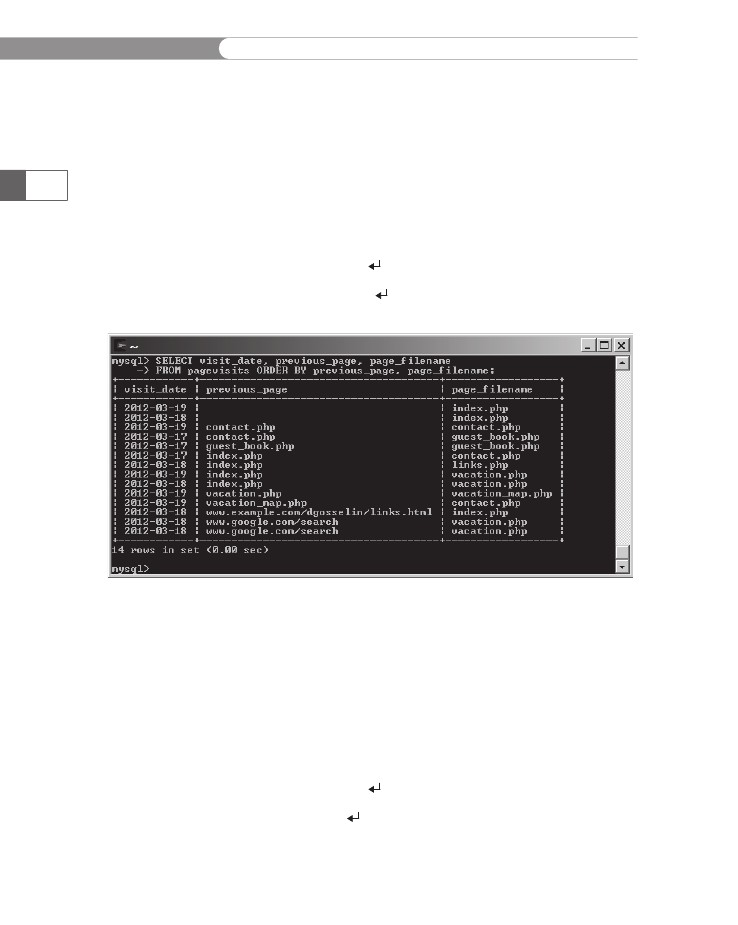
Enter
the following SELECT
statement,
which returns the
visit_date,
previous_page,
and page_filename
fields
from
the pagevisits
table.
Your output should look like
Figure
7-12.
mysql>
SELECT visit_date, previous_page, page_
filename
FROM pagevisits;[ENTER ]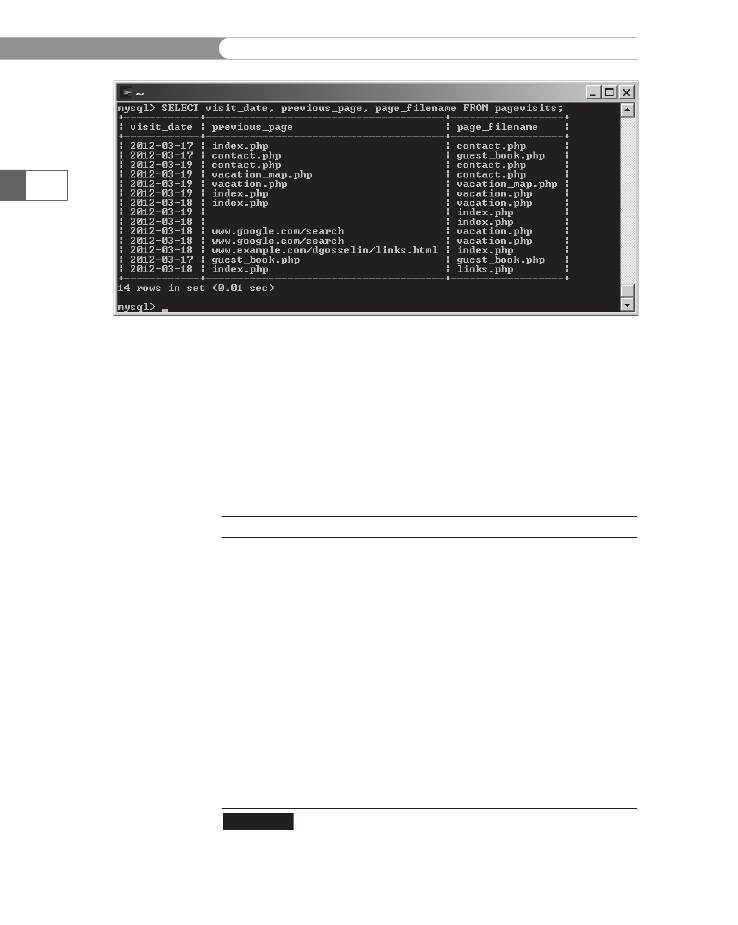
CHAPTER
7
Working
with Databases and MySQL
418
Figure
7-12
SELECT
statement
that returns the visit_date,
previous_page,
and
page_filename
fields
from the pagevisits
table
Using
Aggregate Functions
You
often need to summarize data in a set of records, rather than
view
the individual records. SQL offers various functions that you
can
include in queries to retrieve this aggregate data. Table 7-5 shows
these
functions.
Function
AVG()
COUNT()
GROUP_CONCAT()
MAX()
MIN()
STD()
STDDEV_POP()
STDDEV_SAMP()
STDDEV()
SUM()
VAR_POP()
VAR_SAMP()
VARIANCE()
Description
Return
the average value of the argument
Return
a count of the number of rows returned
Return
a concatenated string
Return
the maximum value
Return
the minimum value
Return
the population standard deviation
Return
the population standard deviation
Return
the sample standard deviation
Return
the population standard deviation
Return
the sum
Return
the population standard variance
Return
the sample variance
Return
the population standard variance
SQL
aggregate functions
Table
7-5
Working
with Database Records
The
GROUP_CONCAT()
and
VARIANCE()
functions
were added
in
Version 4.1 of MySQL. The STDDEV_POP(),
STDDEV_SAMP(),
VAR_POP(),
and VAR_SAMP()
functions
were added in Version 5.0.3
of
MySQL.
The
COUNT()
function
has two unique features when compared to
the
other aggregate functions. First, you can use the wildcard (*)
instead
of a field name as the function argument. Second, the key-
word
DISTINCT
can
be used after the opening parenthesis. When the
DISTINCT
keyword
is used, each unique value is counted as 1, no mat-
ter
how many records contain that value.
There
are two ways to use the aggregate functions. If only aggregate
functions
are used in the SELECT
statement,
the aggregate values
include
all records returned based on the WHERE
clause.
The following
query
will return 31476.991042397, the average of the mileage
col-
umn
for all records in the company_cars
table:
mysql>
SELECT AVG(mileage) FROM company_cars;[ENTER ]
419
To
retrieve aggregate values for groups of records, you use the
GROUP
BY clause
and include the fields that you use to group the
records
as part of the query. The following query will return the aver-
age
mileage for each model year:
mysql>
SELECT model_year, AVG(mileage)[ENTER ]
->
FROM company_cars[ENTER ]
-> GROUP BY model_year;[ENTER ]
+------------+-----------------+
| model_year | AVG(mileage)|
+------------+-----------------+
|2006 |77484.3984375 |
|2007 | 56302.967447917 |
|2008 |25998.5 |
|2009 | 10453.350341797 |
|2010 | 475.70000076294 |
+------------+-----------------+
5 rows in set (0.00 sec)
To determine the number of pages visited from each remote_host:
1.
2.
Return to MySQL Monitor.
Enter the following SELECT statement, which returns each
remote_host from the pagevisits table with the number of
pages visited from that remote_host. Your output should look
like Figure 7-13.
mysql> SELECT remote_host, COUNT(*)[ENTER ]
-> FROM pagevisits[ENTER ]
-> GROUP BY remote_host;[ENTER ]
CHAPTER
7
Working
with Databases and MySQL
420
Figure
7-13
SELECT
statement
that returns the total number of visits from each
remote_host
in
the pagevisits
table
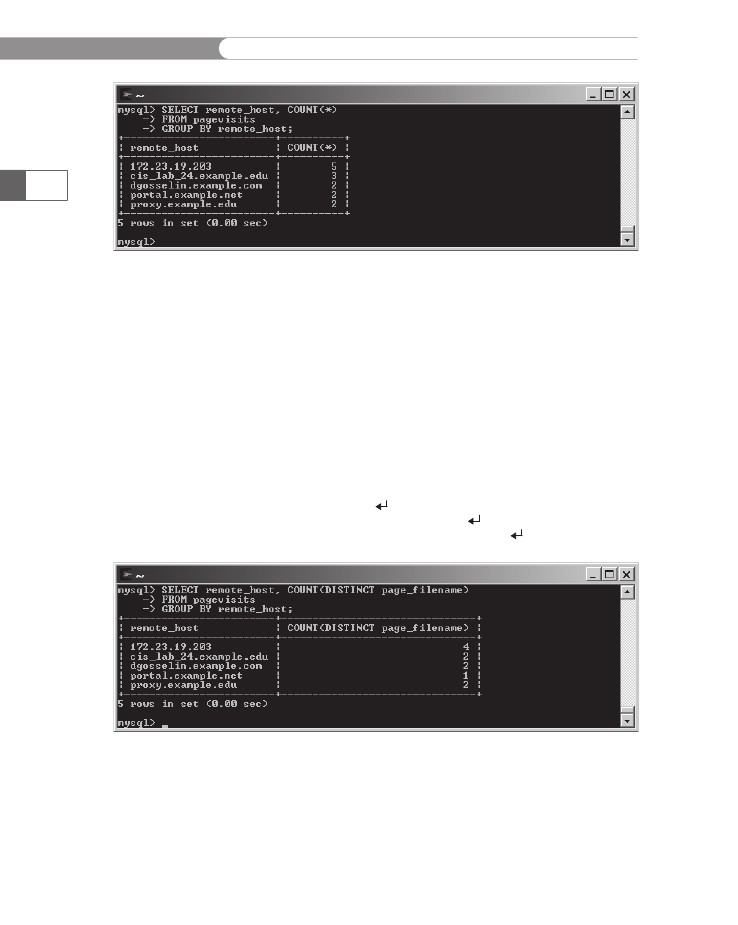
3.
Enter
the following SELECT
statement,
which returns each
remote_host
from
the pagevisits
table
with the number of
distinct
pages visited from that remote_host.
Note that the
wildcard
was replaced by the name of the field that contains
the
names of the pages visited. Your output should look like
Figure
7-14. Because three of the remote_host
values
had
multiple
records with the same value in the page_filename
field,
those three values had fewer distinct records than they
had
records.
mysql>
SELECT remote_host, COUNT(DISTINCT page_
filename)[ENTER
]
->
FROM pagevisits[ENTER ]
-> GROUP BY remote_host;[ENTER ]
Figure 7-14 SELECT statement that returns the number of different pages visited from
each remote_host in the pagevisits table

Working
with Database Records
Sorting
Query Results
You
use the ORDER
BY keyword
with the SELECT
statement
to per-
form
an alphanumeric sort of the results returned from a query.
The
following statement returns the make
and
model
fields
from the
company_cars
table
in the vehicle_fleet
database
and sorts the
results
by the make
field.
The statement also performs a secondary
sort
on the model
field:
mysql>
SELECT make, model FROM company_cars ORDER BY make,
model;[ENTER
]
+-----------+---------+
|
make| model|
+-----------+---------+
|
Chevrolet | Cobalt |
|
Chevrolet | Malibu |
|
Ford| Focus|
|
Ford| Fusion |
|
Honda| Accord |
|
Honda| Civic|
|
Hyundai| Sonata |
|
Nissan| Altima |
|
Nissan| Sentra |
|
Toyota| Camry|
|
Toyota| Corolla |
+-----------+---------+
11
rows in set (0.01 sec)
421
To
perform a reverse sort, add the DESC
keyword
after the name of
the
field by which you want to perform the sort. (DESC
stands
for
“descending.”)
The following statement returns the
fields from the company_cars table in the vehicle_fleet database
and reverse sorts the results by the make field:
mysql> SELECT make, model FROM company_cars ORDER BY make
DESC, model;[ENTER ]
+-----------+---------+
| make| model|
+-----------+---------+
| Toyota| Camry|
| Toyota| Corolla |
| Nissan| Altima |
| Nissan| Sentra |
| Hyundai| Sonata |
| Honda| Accord |
| Honda| Civic|
| Ford| Focus|
| Ford| Fusion |
| Chevrolet | Cobalt |
| Chevrolet | Malibu |
+-----------+---------+
11 rows in set (0.00 sec)
CHAPTER
7
Working
with Databases and MySQL
To
enter several SELECT
statements
that sort records from the
pagevisits
table
in the sitevisitors
database:
1.
2.
422
Return
to MySQL Monitor.
Enter
the following SELECT
statement,
which returns the
visit_date,
previous_page,
and page_filename
fields
from
the
pagevisits
table,
and sorts the returned records by
previous_page
and
page_filename.
Your output should look
like
Figure 7-15.
mysql>
SELECT visit_date, previous_page, page_
filename[ENTER
]
->
FROM pagevisits ORDER BY previous_page, page_
filename;[ENTER ]
Figure 7-15
SELECT statement that returns the visit_date, previous_page, and
page_filename fields from the pagevisits table, and sorts the returned records by
previous_page and page_filename
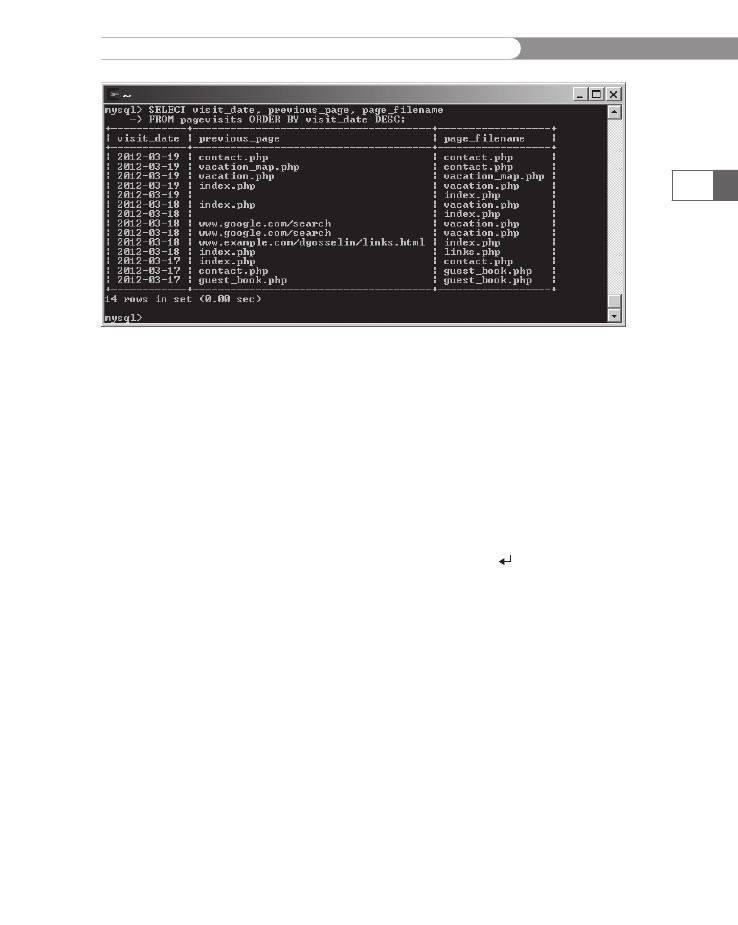
3.
Enter the following SELECT statement, which returns the
visit_date, previous_page, and page_filename fields from
the pagevisits table, and performs a descending sort of the
returned records by visit_date. Your output should look like
Figure 7-16.
mysql> SELECT visit_date, previous_page, page_
filename[ENTER ]
-> FROM pagevisits ORDER BY visit_date
DESC;[ENTER ]
Working
with Database Records
423
Figure
7-16
SELECT
statement
that returns the visit_date,
previous_page,
and
page_filename
fields
from the pagevisits
table,
and performs a descending sort of the
returned
records by visit_date
Filtering
Query Results
The
criteria
portion
of the SELECT
statement
determines which
fields
to retrieve from a table. You can also specify which records
to
return by using the WHERE
keyword.
For example, the following
statement
returns all records from the company_cars
table
in the
vehicle_fleet
database
in which the make
field
is equal to “Toyota”:
mysql>
SELECT * FROM company_cars WHERE make='Toyota';[ENTER ]
+---------+--------+---------+---------+------------+
|
license | make| model| mileage | model_year |
+---------+--------+---------+---------+------------+
|
CK-2987 | Toyota | Corolla | 3508.4 |2009 |
|
8331-RT | Toyota | Camry|855.5 |2010 |
+---------+--------+---------+---------+------------+
2
rows in set (0.00 sec)
SQL
includes the keywords AND
and
OR
that
you can use to specify
more
detailed conditions about the records you want to return.
For
example, the following statement returns all records from the
company_cars
table
in the vehicle_fleet
database
in which the
model_year
field
is equal to 2007 and the mileage is less than 60000:
CHAPTER
7
Working
with Databases and MySQL
mysql>
SELECT * FROM company_cars WHERE model_
year=2007[ENTER
]
->
AND mileage<60000;[ENTER ]
+---------+-----------+--------+---------+------------+
| license | make| model | mileage | model_year |
+---------+-----------+--------+---------+------------+
| AK-1234 | Honda| Civic | 48891.1 |2007 |
| MN-304 | Chevrolet | Malibu | 57024.2 |2007 |
+---------+-----------+--------+---------+------------+
2 rows in set (0.00 sec)
424
The following statement shows an example of how to use the OR key-
word by returning all records from the company_cars table in the
vehicle_fleet database in which the make field is equal to “Toyota”
or “Honda”. The statement also sorts the returned records by mileage.
mysql> SELECT * FROM company_cars WHERE
make='Toyota'[ENTER ]
-> OR make='Honda' ORDER BY mileage;[ENTER ]
+---------+--------+---------+---------+------------+
| license | make| model| mileage | model_year |
+---------+--------+---------+---------+------------+
| 8331-RT | Toyota | Camry|855.5 |2010 |
| CK-2987 | Toyota | Corolla | 3508.4 |2009 |
| AK-1234 | Honda | Civic| 48891.1 |2007 |
| C9L-2Y2 | Honda | Accord | 77484.4 |2006 |
+---------+--------+---------+---------+------------+
4 rows in set (0.00 sec)
To enter several SELECT statements that use the WHERE keyword to fil-
ter records from the pagevisits table in the sitevisitors database:
1.
2.
Return to MySQL Monitor.
Enter the following SELECT statement, which returns
all records from the pagevisits table in which the
previous_page field is equal to “index.php”. Your output
should look like Figure 7-17.
mysql> SELECT * FROM pagevisits WHERE
previous_page='index.php';[ENTER ]

Working
with Database Records
425
Figure
7-17 SELECT
statement
that returns all records from the pagevisits
table
in
which the previous_page
field
is equal to “index.php”
3.
Enter
the following SELECT
statement,
which returns all
records
from the pagevisits
table
in which the remote_port
field
is greater than 80. Your output should look like
Figure
7-18.
mysql>
SELECT * FROM pagevisits WHERE remote_
port>80;[ENTER
]
Figure
7-18 SELECT
statement
that returns all records from the pagevisits
table
in
which the remote_port
field
is greater than 80
Updating
Records
If
you need to update records in a table, you use the UPDATE
state-
ment.
The basic syntax for the UPDATE
statement
is as follows:
UPDATE
table_name
SET
column_name=value
WHERE
condition;
CHAPTER
7
Working
with Databases and MySQL
The
UPDATE
keyword
specifies the name of the table to update, and the
SET
keyword
specifies the value to assign to the fields in the records
that
match the condition in the WHERE
keyword.
For example, the fol-
lowing
statement modifies the mileage of the Ford Fusion to 368.2:
426
mysql>
UPDATE company_cars SET mileage=368.2[ENTER ]
->
WHERE make='Ford'[ENTER ]
-> AND model='Fusion';[ENTER ]
Query OK, 1 row affected (0.27 sec)
Rows matched: 1 Changed: 1 Warnings: 0
Notice that the preceding statement uses the WHERE keyword to spec-
ify that the make field should be equal to “Ford” and the model field
should be equal to “Fusion”. This ensures that only the correct record
is updated. If the statement only specified that the make field should
be equal to “Ford”, the mileage field would have been updated to
368.2 for all other records in the table that included a make field with
a value of “Ford”.
Next, you enter several UPDATE statements to modify records from
the pagevisits table in the sitevisitors database. The table
contains one record that includes a value of “contact.php” in the
previous_page field and another record that includes “contact.php”
in the page_filename field. Assume that the page name has been
changed to “contact_us.php.”
To enter several UPDATE statements to modify records from the
pagevisits table in the sitevisitors database:
1.
2.
Return to MySQL Monitor.
Enter the following UPDATE statement to modify the
previous_page field in records in the pagevisits table from
“contact.php” to “contact_us.php” (two rows will be changed):
mysql> UPDATE pagevisits[ENTER ]
-> SET previous_page='contact_us.php'[ENTER ]
-> WHERE previous_page='contact.php';[ENTER ]
3.
Enter the following UPDATE statement to modify the
page_filename field in records in the pagevisits table
from “contact.php” to “contact_us.php” (three rows will be
changed):
mysql> UPDATE pagevisits[ENTER ]
-> SET page_filename='contact_us.php'[ENTER ]
-> WHERE page_filename='contact.php';[ENTER ]
4.
Enter the following SELECT statement to view all the records
in the table. The "contact.php" values should now be
"contact_us.php."
mysql> SELECT * FROM pagevisits;[ENTER ]

Working
with Database Records
Deleting
Records
To
delete records from a table, you use the DELETE
statement.
The
basic
syntax for the DELETE
statement
is as follows:
DELETE
FROM table_name
WHERE
condition;
427
Be
careful when you use the DELETE
statement
because it deletes all
records
that match the condition. Therefore, carefully construct the
conditions
assigned to the WHERE
keyword.
For example, the follow-
ing
statement deletes the record for the 2006 Honda Accord from the
company_cars
table
in the vehicle_fleet
database:
mysql>
DELETE FROM company_cars WHERE model_
year=2006[ENTER
]
->
AND make='Honda'[ENTER ]
-> AND model='Accord';[ENTER ]
Query OK, 1 row affected (0.28 sec)
A bug in some
versions of
MySQL
causes the
message to
show “0 rows affected”
for a DELETE FROM
statement without a
WHERE clause, even if
rows were deleted.
To delete all the records from a table, omit the WHERE clause. The fol-
lowing statement deletes all the records from the company_cars table:
mysql> DELETE FROM company_cars;[ENTER ]
Query OK, 10 rows affected (0.28 sec)
To delete several records from the pagevisits table in the
sitevisitors database:
1.
2.
Return to MySQL Monitor.
Enter the following statement to delete the first record in the
table:
mysql> DELETE FROM pagevisits WHERE
visit_date='2012-03-17'[ENTER ]
-> AND visit_time='10:32:29';[ENTER ]
3.
Enter the following statement to delete the next record in the
table:
mysql> DELETE FROM pagevisits WHERE
visit_date='2012-03-17'[ENTER ]
-> AND visit_time='10:35:18';[ENTER ]
4.
Enter the following SELECT statement to view all the records
in the table. The table should now only consist of 12 records.
mysql> SELECT * FROM pagevisits;[ENTER ]
Short Quiz
1.
When the column names are omitted from the INSERT INTO
statement, what two important considerations must be
followed?

CHAPTER
7
Working
with Databases and MySQL
2.
What
SQL command is used to add records from an external
text
file?
What
value should be entered in a text field as a placeholder
for
missing values?
What
clause can specify the delimiter in a text file that is used
as
a data source for a MySQL table?
What
keyword is used to specify a reverse or descending sort
order
for selected records in a table?
3.
428
4.
5.
Working
with phpMyAdmin
You
must learn the proper SQL syntax to store, manipulate, and
retrieve
data in a MySQL database from PHP, but SQL can be cum-
bersome
for database administration and maintenance. Normally, you
create
the table structure in MySQL using a graphical interface and
maintain
the data with PHP.
Be
sure that
phpMyAdmin
has been
installed on
the MySQL
server before continuing
with this section.
The phpMyAdmin application is an open source tool written in PHP
to handle the administration of MySQL databases. The phpMyAdmin
tool can perform all of the administrative tasks that you’ve already
studied in this chapter, plus many others you haven’t learned yet. The
full functionality of phpMyAdmin is beyond the scope of this section,
but you will learn the basics of the interface and be exposed to some
common activities.
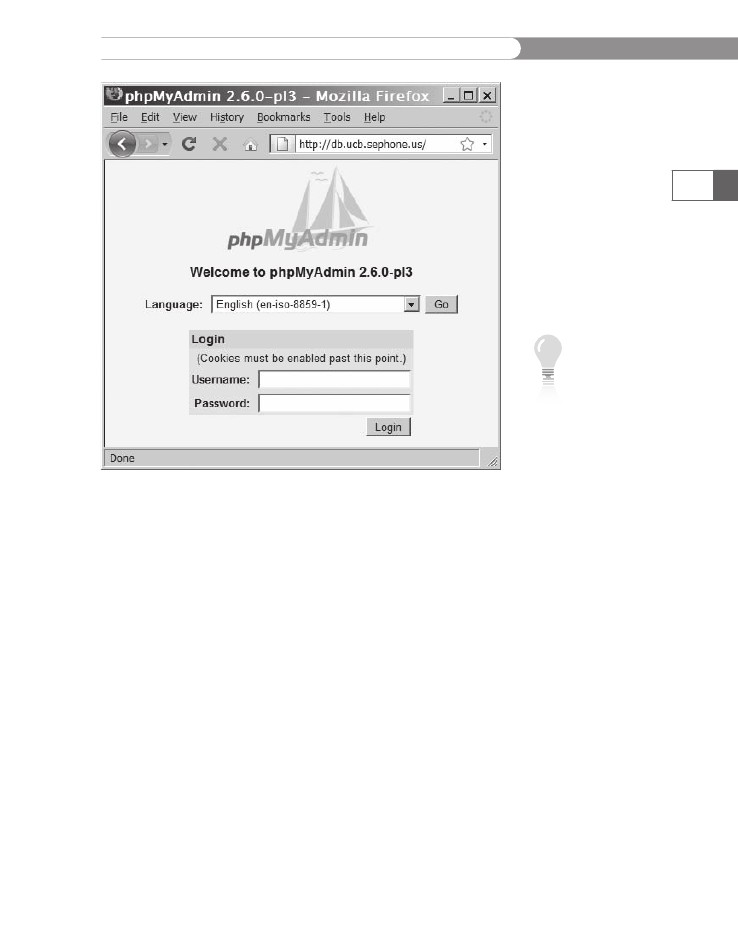
Logging in to phpMyAdmin
Your instructor should have provided you with a link to a Web page
for logging in to phpMyAdmin. When you visit the Web page, you
should see a page like the one shown in Figure 7-19. Enter the user
name and password provided by your instructor in the appropriate
fields, and then click the Login button.
Working
with phpMyAdmin
429
Figure
7-19
The
phpMyAdmin login page
Different
ver-
sions of php-
MyAdmin will
have a slightly
different lay-
out. Although the location
on the screen may
change, the features
described in this section
will be available some-
where on the screen.
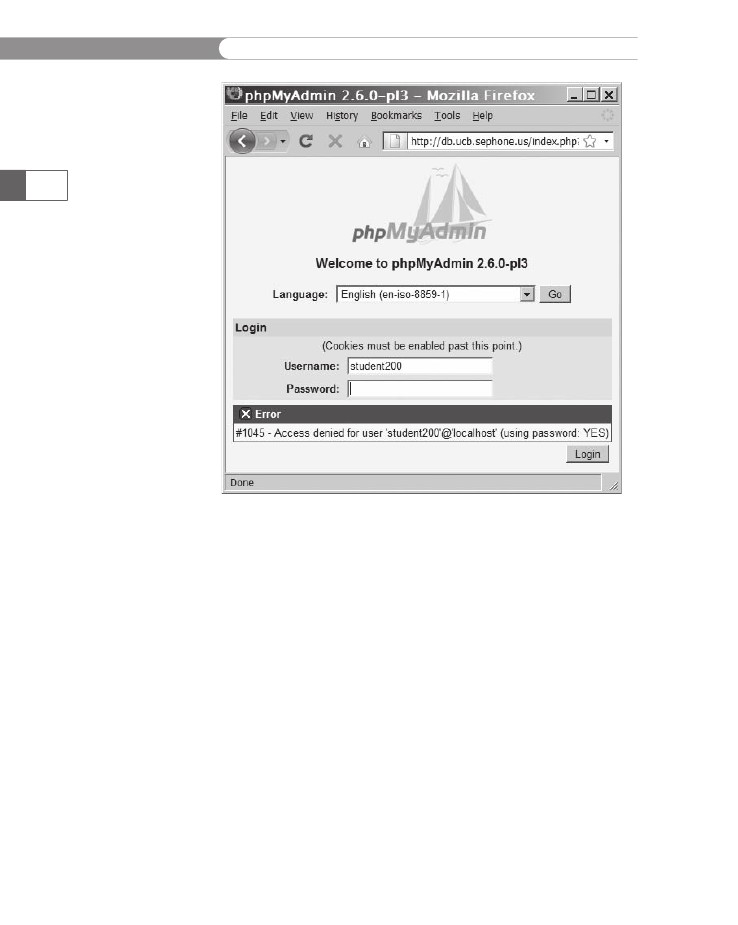
If you enter an incorrect user name or password, you will see a page
like the one shown in Figure 7-20, with an error message above the
Login button. The error message will be something like “#1045 -
Access denied for user ‘username’@‘ host’ (using password: YES)”,
where username is the user name that you entered, and host is the
name of the computer you are using. The user name and password
fields are still available, so you can attempt to log in again.
CHAPTER
7
Working
with Databases and MySQL
430
Figure
7-20
The
phpMyAdmin invalid login message
Once
you have successfully entered your user name and pass-
word,
you should see the phpMyAdmin main screen, as shown in
Figure
7-21. Whenever you need to return to the main screen, click
the
small house icon in the upper-left corner.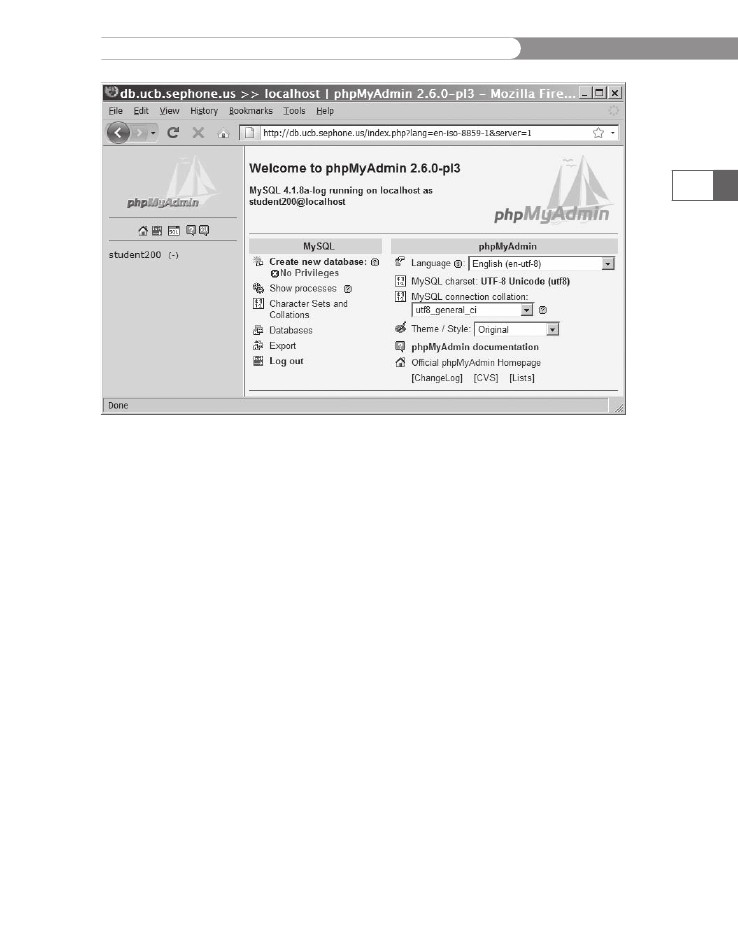
Working
with phpMyAdmin
431
Figure
7-21
The
phpMyAdmin main screen
If
you have access to more than one database, the left side of the
screen
will display a drop-down list of databases to which you have
access,
with the number of tables in each database listed in parenthe-
ses
after the name. When you select the database, the phpMyAdmin
main
screen appears. The name of the selected database and its tables
will
be listed on the left side of the screen below the drop-down list.
Figure
7-21 shows a database (student200) with no tables defined.
Working
with Databases
If
you do not have access to more than one database, and you do not
have
privileges to create databases, you can skip this section.
The
right side of the main screen has two columns, one for MySQL
and
one for phpMyAdmin. The first option under the MySQL col-
umn
header is “Create new database”. If you do not have privileges
to
create a new database, you cannot select this option, and the mes-
sage
“No Privileges” will appear beneath it, as shown in Figure 7-21.
If
you have privileges, a text box appears beneath the “Create new
database”
option with a Create button beside it. Enter the name of
the
new database and click the Create button. The database will be
created
and selected as the active database, much like entering the
USE
database command
in MySQL Monitor.