

The subject field is a text string that will appear as the subject field of
the e-mail message. The subject string should be plain text with no
Xhtml tags or character entities. The message field is a text string
that will appear as the body of the message. Unless special syntax
(called MIME format) is used, the message field should also be plain
text with no XHTML tags or character entities.
A fourth optional additional_headers argument can include addi-
tional headers that are typically found in e-mail messages, such as
From, Cc, Bcc, and Date headers. For the From, Cc, and Bcc headers,
the same address specifier syntax is used as in the recipient(s) field.
The additional_headers argument needs to be formatted to con-
form to the syntax of headers in the Internet Message Format docu-
mentation. Each header needs to be on its own line. The line must
start with the header name, followed by a colon, a space, and the
Value of the header element. For example:
Date: Fri, 03 Apr 2009 16:05:50 -0400
From: Linda M. Jones <linda@jones.example.com>
CC: Mary R. Jones <mary@jones.example.com>
Any valid e-mail header may be added using the additional_headers
argument. However, depending on the configuration of PHP and the
mail program on the Web server, some headers may be excluded and
others may be overwritten with values defined by the server.

Handling
Submitted Form Data
The
mail()
function
returns a value of TRUE
if
a message was sent
successfully
or FALSE
if
it was not. The return value comes in handy
when
displaying a status message for the user, which will be discussed
next.
The following example demonstrates how to send the results of
the
scholarship form as a simple e-mail message:
$To
= "webmaster@example.edu";
$Subject
= "Message from the Web Form";
$Message
= $formMessage;
$Headers="From:
$fname $lName <$emailAddress>";
mail
($To, $Subject, $Message, $Headers);
Displaying
a Status Message for the User
Once
all required fields on the form have been filled in and validated,
and
any action such as sending an e-mail message has been com-
pleted,
the user should receive a status message in the browser. A
standard
practice as part of the status message is to thank the user for
completing
the form. You can also display the results of any actions
initiated
while processing the form data. For example, the status mes-
sage
could display “Your message has been sent” if the mail()
func-
tion
returned TRUE,
or “Your message could not be sent at this time” if
the
mail()
function
returned FALSE.
To
send e-mail from the scholarship form:
1.
Electronic
mail is not
encrypted,
and any
information
contained in an e-mail
message should be con-
sidered insecure. You
should not e-mail per-
sonal or financial informa-
tion entered through a
Web form. Unless the
Web form is a simple
“Contact Us” page, you
should consider storing
the information in a file or
database, and using the
mail() function only as
a notification tool.
207
Reopen the process_Scholarship.php script in your text
editor.
Replace the else portion of the final if...else statement
with the following code block:
{ // Send an e-mail
// replace the "recipient@example.edu" with your
// e-mail address
$To = "recipient@mail.edu";
$Subject = "Scholarship Form Results";
$Message = "Student Name: " . $firstName. " " .
$lastName;
$result = mail($To, $Subject, $Message);
if ($result)
$resultMsg = "Your message was
successfully sent.";
else
$resultMsg = "There was a problem sending
your message.";
}
2.
3.
Add the following code immediately before the end of the
final code block of the PHP script section. Using advanced
escaping and coding the message in XHTML rather than in
CHAPTER
4
Handling
User Input
the
PHP script section allows you to more easily format the
data
using CSS.
?>
<h2
style = "text-align:center">Scholarship
Form</h2>
<p
style = "line-height:200%">Thank you for filling
out
the scholarship form<?php
if
(!empty($firstName))
echo ", $firstName"
?>. <?php echo $resultMsg; ?>
<?php
208
4.
5.
Save the file and upload it the server.
Open the Scholarship.html page in the Web browser by enter-
ing the following URL: http://<yourserver>/PHP_Projects/
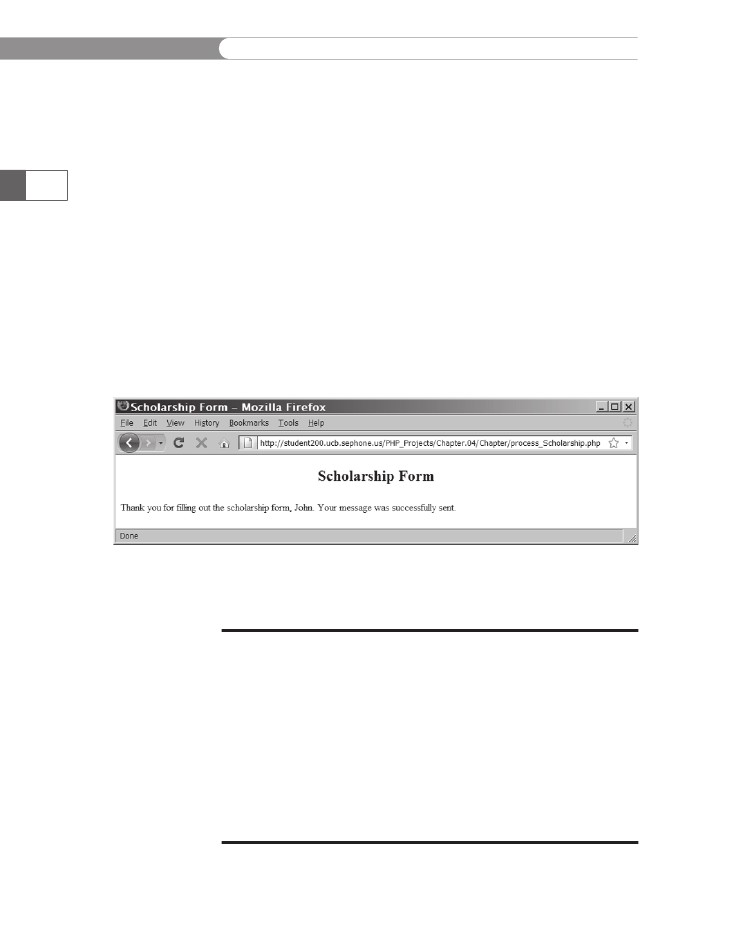
Chapter.04/Chapter/Scholarship.html. Figure 4-9 shows the
status message displayed in the browser window after the
form has been successfully submitted.
Figure 4-9
Sending e-mail for the scholarship form
6.
Close your Web browser window.
Short Quiz
1.
Under which conditions does the empty() function return
TRUE?
Explain the process of efficiently handling multiple errors.
Define the term “advanced escaping from XHTML”.
What are the three required arguments of the mail()
function?
2.
3.
4.

Creating
an All-in-One Form
Creating
an All-in-One Form
If
you have a large form with many fields, or if your form requires
intensive
processing, it would be more efficient to use separate docu-
ments
for the Web form and the form handler, as you have done so far
in
this chapter with the XHTML Web form (Scholarship.html) and
the
PHP script that processed the form (process_Scholarship.php).
This
is known as a two-part
form,
because you have one page that dis-
plays
the form and one page that processes the form data. However,
for
simple forms that require only minimal processing, it’s often
easier
to use an All-in-One
form—a
single script used to display a
Web
form and process its data. When the user clicks the submit but-
ton,
the script submits the form data to the current script. You then
use
validation code to determine if data exists when the page is first
displayed,
and to ensure that the user has completed all the required
form
fields and has entered valid responses.
The
PHP script for an All-in-One form can be organized using two
conditionals.
The first conditional determines if the data has been
submitted
and needs to be validated. The second conditional deter-
mines
if the form needs to be redisplayed, either because of a valida-
tion
error or because the user is opening the page for the first time,
or
if
the form data should be processed.
209
Validating
an All-in-One Form
The
All-in-One form uses an if
conditional
to determine if data has
been
submitted from the Web form or if the Web page is being viewed
for
the first time. The isset()
function
can
be used to determine if
the
$_POST['Submit']
variable
has been set (in other words, if the
Submit
button has been pressed). The argument that is passed to the
isset()
function
is the value that was assigned to the control’s name
attribute
(name='Submit')
in the Web form. The isset()
function
is
not
the inverse of the empty()
function,
in that a variable can be set to
an
“empty” value, such as the empty string (""),
0, NULL,
or FALSE.
All
of
these values will cause the empty()
function
to return TRUE,
because
the
variable is set to an empty value, and will also cause the isset()
function
to return TRUE,
because the variable has been initialized.
If
the $_POST['Submit']
variable
is set (declared and initialized),
the
script will check to see if all required fields are completed and
all
responses
are valid. If the $_POST['Submit']
variable
has not been
declared
and initialized, the Web form will be displayed.
if
(isset($_POST['Submit'])) {
//
Validate the data
}
The only way
that an initial-
ized variable
can become
uninitialized,
causing the isset()
function to return FALSE,
is to call the unset()
function with the variable
name as the parameter.
CHAPTER
4
Handling
User Input
Processing
the Web Form
Once
the data submitted by the user has been validated, the second
conditional
checks to see if the submitted data passed the validation
process.
If all of the validation checks succeeded for the submitted
data
(all required data has been entered and in the correct format),
then
the data is processed and the user receives a status message.
210
Redisplaying
the Web Form
If
the submitted data did not pass all of the validation checks, or if
the
data
has not yet been entered, the All-in-One form will display the
Web
form, allowing the user to enter data for the first time or
re-enter
data
that did not pass validation. As with the two-part form, you
should
make the redisplayed form a sticky form, using the else
clause
of
the second conditional.
if
(isset ($_POST['Submit'])) {
//
Process the data
}
else {
// Display the Web form
}
To create a simple All-in-One form:
1.
Create a new document in your text editor. Type the
!DOCTYPE declaration, <html> element, header information,
and <body> element. Use the strict DTD and “Number Form”
as the content of the <title> element.
Add the opening and closing tags for the PHP script section
in the body of the document:
<?php
?>
2.
3.
Create and initialize a Boolean variable called $DisplayForm,
which will be used to determine if the Web form should be
redisplayed, and a string variable called $Number:
$DisplayForm = TRUE;
$Number = "";
4.
Add the following code to check whether the form data has
been entered. If it has, the data will be validated:
if (isset($_POST['Submit'])) {
$Number = $_POST['Number'];
if (is_numeric($Number)) {
$DisplayForm = FALSE;
} else {

Creating
an All-in-One Form
echo
"<p>You need to enter a numeric
value.</p>\n";
$DisplayForm = TRUE;
}
}
5.
Add the following code to display the form, including the
entered value for the number field. Note the use of advanced
embedding of XHTML.
if ($DisplayForm) {
?>
<form name="NumberForm" action="NumberForm.php"
method="post">
<p>Enter a number: <input type="text" name="Number"
value="<?php echo $Number; ?>" /></p>
<p><input type="reset" value="Clear Form" />
<input type="submit" name="Submit" value="Send
Form" /></p>
</form>
<?php
}
You could also
use action=
"<?php
echo
$_SERVER
["SCRIPT_NAME"];
?>" in the preceding
<form> tag. The
$_SERVER["SCRIPT_
NAME"] element con-
tains the name of the
current script.
211
6.
Add an else clause to use the form data once it is entered
correctly, as follows:
else {
echo "<p>Thank you for entering a number.</p>\n";
echo "<p>Your number, $Number, squared is " .
($Number*$Number) . ".</p>\n ";
echo "<p><a href=\"NumberForm.php\">Try
again?</a></p>\n";
}
7.
Save the document as NumberForm.php in the Chapter
directory for Chapter 4 and upload the document to the
server.
Open the Number Form page in the Web browser by enter-
ing the following URL: http://<yourserver>/PHP_Projects/
Chapter.04/Chapter/NumberForm.php. You should see the
form shown in Figure 4-10.
8.
Figure 4-10
The NumberForm.php form when first opened

CHAPTER
4
Handling
User Input
9.
Enter
a non-numeric value and click the submit button. The
form
should reopen with an error message and the value
you
entered in the text control. When you try again with a
numeric
value, you should see the “Thank you” message.
10.
Close
your Web browser window.
212
Short
Quiz
1.
2.
Describe
the structure of an All-in-One form.
How
would a form handler determine if the Submit button
has
been pressed?
What
family of functions can check whether a user entered a
number
in a field on a Web form?
3.
Displaying
Dynamic Content Based
on
a URL Token
Unlike
the post method, which is ideal for working with forms, the
get
method is ideal for embedding options in a hyperlink. By passing
URL
tokens to a PHP script, many different types of information can
be
displayed from the same script. By using a Web page template with
static
sections and a dynamic content section, a single PHP script
can
produce the same content as multiple static XHTML pages. Web
page
templates have an additional advantage of giving all of the pages
a
consistent user interface.
Using
a Web Page Template
The
structure of a PHP-powered Web site is often developed using
a
template—a single Web page that is divided into sections. As an
example,
Figure 4-11 shows the layout of a Web page template with
the
following sections: Header, Button Navigation, Dynamic Content,
and
Footer.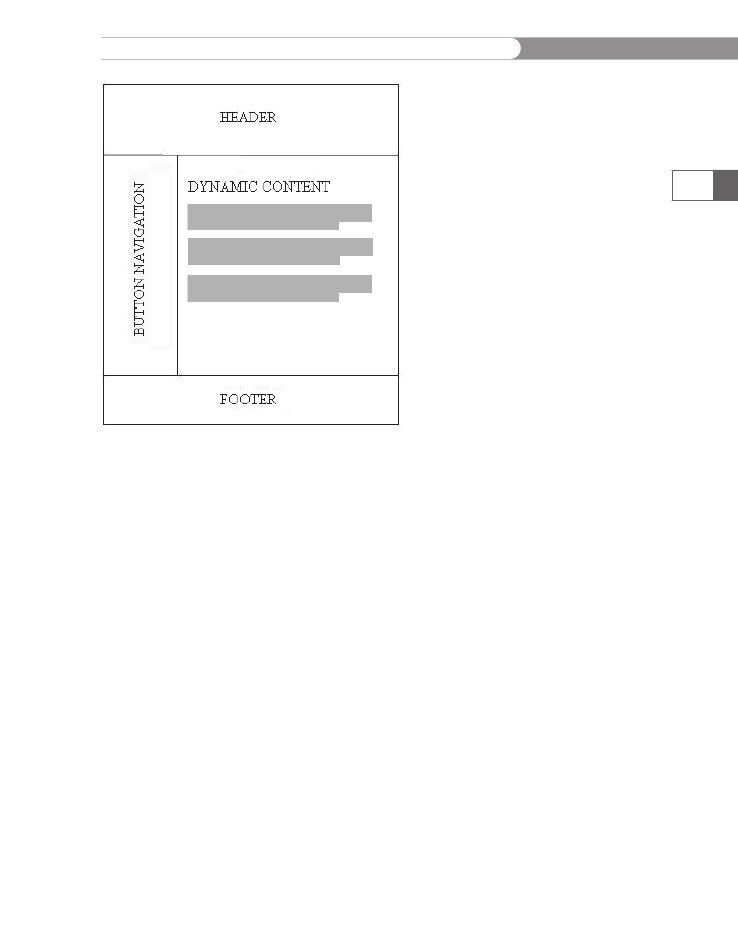
Displaying
Dynamic Content Based on a URL Token
213
Figure
4-11
A
sample Web page template page layout
You
learned in Chapter 2 that when you insert the contents of an
include
file in a PHP script, the content of the XHTML document is
displayed
in the browser. The following code would insert the con-
tents
of the inc_header.php file in the header section:
<?php
include("inc_header.php") ?>
If
you had 50 individual pages in your Web site and the same header,
button
navigation, and footer on each page, and you needed to add
another
e-mail address to the header content on each page, you would
have
to make the addition on all 50 pages. Using a Web page template,
you
could make the change only once—in the inc_header.php file
for
the previous example. The header, button navigation, and footer
sections
are static because the content does not change unless you
modify
the include file. When a user navigates within a Web site that
uses
static XHTML pages, a new page with a new header, footer, and
button
navigation is opened each time. With Web page templates, the
content
of the dynamic section will change but the content and layout
of
the static sections will not.
CHAPTER
4
Handling
User Input
Navigating
within a Web Page Template
You
can navigate within a Web page template using hyperlinks and
buttons,
just as you can within the pages of a static XHTML Web site.
There
are some minor differences, which are explained in this section.
214
Form
image
buttons do
not pass a
value.
Instead, the
x- and y-coordinates are
sent in the form
“Button.x” and “Button.y”,
where “Button” is the
value of the name attri-
bute. In PHP, the periods
are replaced by under-
scores (_) for the $_GET
and $_POST array
indexes. For example, the
corresponding array
index for Button.x is
Button_x in the $_GET or
$_POST arrays, and the
corresponding array
index for Button.y is
Button_y.
There are
security
risks to
using the
$_REQUEST
autoglobal. It includes the
contents of the
$_COOKIE autoglobal as
well as the $_GET and
$_POST autoglobals, so
hackers could use cook-
ies to pass invalid and
potentially harmful con-
tent to a form handler.
Because of the risk, you
should avoid using the
$_REQUEST autoglobal
whenever possible.
Appendix E covers this
topic and other security
risks.
Using Text Hyperlinks for Navigation
When using text hyperlinks to navigate within a Web page tem-
plate, the values that specify which dynamic content to show must
be appended to the filename in the “href ” attribute of the anchor
tag. You use the notation for the get method discussed earlier in this
chapter, with a question mark between the URL and the name/value
pairs, an ampersand between name/value pairs, and an equal sign
between the name and the value.
The following XHTML code creates a text hyperlink that replaces
the current include file that displays in the dynamic data section. In
this example, only one name/value pair is being passed, so there is
no need for the ampersand. The name being passed in the example is
“page”, and the value of “page” is “home_page”. The index.php script
will check the value of the $_GET['page'] array element to determine
which page to show in the dynamic data section.
<a href="index.php?page=home_page">Home</a>
Using Form Image Buttons for Navigation
The following XHTML code is inserted between an opening and clos-
ing <form> tag in the section in which you want the buttons to dis-
play. Each button requires a unique value for the name attribute.
<input type="image" src="home.jpg" name="home"
style="border:0" alt="Home" />
In the preceding example, the $_GET or $_POST array would have two
elements for this button: “home_x” and “home_y”.
Displaying the Dynamic Content
Code inserted in the dynamic data section of the index.php file deter-
mines which include file to display in the dynamic data section when
a user clicks a button or activates a hyperlink. Throughout this chap-
ter, you have used the $_GET and $_POST autoglobals, which store the
submitted form values in an array. The $_REQUEST autoglobal can be
used to access the result from form data sent with either the get or post
methods. The following code, keyed in the dynamic data section of the
index.php file, processes the information submitted with either method:
$displayContents = $_REQUEST["page"];
Displaying
Dynamic Content Based on a URL Token
To
create a simple Web page template:
1.
Create
a new file in your editor as follows and save it as
inc_header.html
in the Chapter directory for Chapter 4:
<h1
style="text-align: center">Sample Web Template</h1>
2.
Create
a new file in your editor as follows and save it as
inc_footer.php
in the Chapter directory for Chapter 4:
<p>Today's
Date: <?php echo date('r'); ?></p>
215
3.
Create
a new file in your editor as follows and save it as
inc_home.html
in the Chapter directory for Chapter 4:
<h2>Home
Page</h2>
<p>This
is the default home page that displays
whenever
a new visitor comes to the site</p>
4.
Create
a new file in your editor as follows and save it as
inc_about.html
in the Chapter directory for Chapter 4:
<h2>About
Me</h2>
<p>This
is the page that tells about me and my Web
site.</p>
5.
Create
a new file in your editor as follows and save it as
inc_contact.html
in the Chapter directory for Chapter 4:
<h2>Contact
Me</h2>
<p>This
is the page where people can use a Web form
to
send me an e-mail.</p>
6.
Create
a new file in your editor as follows and save it as
inc_buttonnav.html
in the Chapter directory for Chapter 4:
<form
action="WebTemplate.php" method="get">
<input
type="submit" name="content" value="Home"
/><br />
<input
type="submit" name="content" value="About
Me"
/><br
/>
<input
type="submit" name="content" value="Contact
Me"
/><br />
</form>
7.
Create
a new document in your text editor. Type the
!DOCTYPE
declaration,
<html>
element,
header information,
and
<body>
element.
Use the strict DTD and “Web Template”
as
the content of the <title>
element.
CHAPTER
4
Handling
User Input
8.
Add
the following code to the body of the document:
<?php
include ("inc_header.html"); ?>
<div
style = "width:20%; text-align:center; float:left">
<?php
include ("inc_buttonnav.html"); ?>
</div>
<!--
Start of Dynamic Content section -->
<?php
?>
<!--
End of Dynamic Content section -->
<?php
include ("inc_footer.php"); ?>
216
9.
Locate
the PHP script section within the “Dynamic Content”
section,
which is where the button input will be processed to
determine
which content page to display. Add the following
PHP
code within the block:
if
(isset($_GET['content'])) {
switch
($_GET['content']) {
case 'About Me':
include('inc_about.html');
break;
case 'Contact Me':
include('inc_contact.html');
break;
case 'Home': // A value of 'Home' means to
// display the default page
default:
include('inc_home.html');
break;
}
}
else // No button has been selected
include('inc_home.html');
10. Save the file as WebTemplate.php in the Chapter folder for
Chapter 4 and upload the file to the Web server.
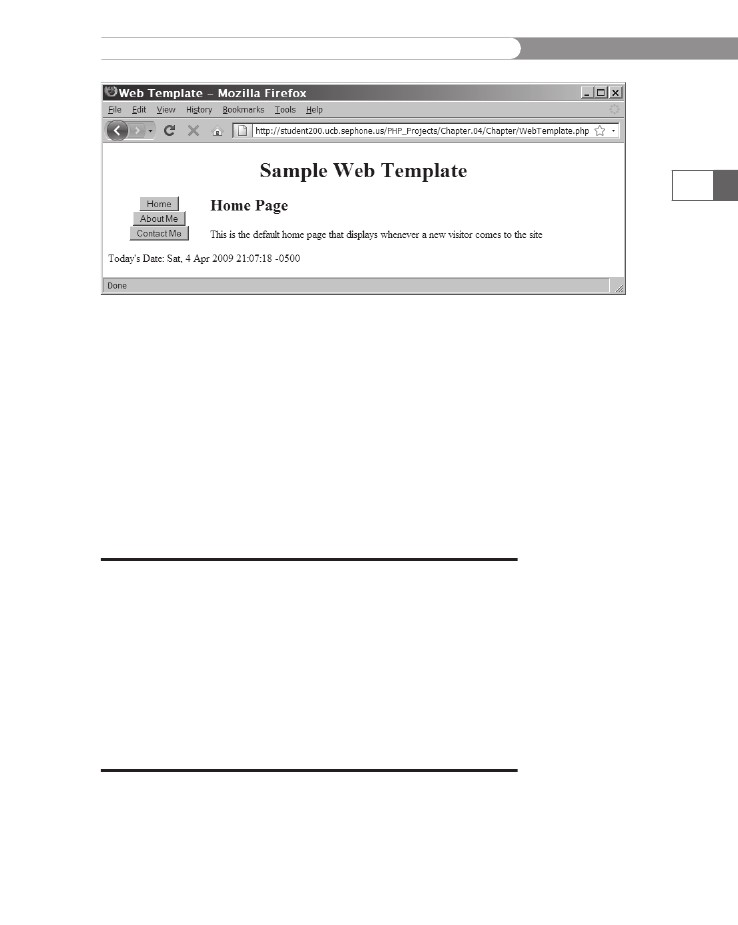
11. Open WebTemplate.php in a Web browser by entering
the following URL: http://<yourserver>/PHP_Projects/
Chapter.04/Chapter/WebTemplate.php. It should appear as
shown in Figure 4-12.
Displaying
Dynamic Content Based on a URL Token
217
Figure
4-12
The
Web page template script output
12.
Click
the buttons in the button navigation bar. The content in
the
dynamic content section changes to reflect the selected
button.
13.
Close
your Web browser window.
In
the preceding example, the buttons were all named “content”. If
text
hyperlinks are added, the same name can be used as the name in
the
name/value pair, and the same code can process both. If you need
more
buttons or text hyperlinks, simply use the name “content” and a
different
value, and add that value as a case in the switch statement.
<a
href="WebTemplate.php?content=Home">Home Page</a>
Short
Quiz
1.
Explain
the purpose of using a Web page template for Web
site
development.
Describe
the notation for the get method used with a text
hyperlink
to target dynamic content to a section of a Web
page
template.
What
autoglobal can be used to access the values of both the
get
and the post methods?
2.
3.
CHAPTER
4
Handling
User Input
Summing
Up
218
•
PHP
includes various predefined global arrays, called autoglobals
or superglobals, which contain client, server, and environment
information that you can use in your scripts.
• Web forms are standard XHTML Web pages with interactive
controls that allow users to enter data.
• The
<form> tag requires an action attribute to identify the scriptthat will process the submitted data and a method attribute to iden-
tify whether the data will be sent using the get or post method.
• The
$_POST autoglobal contains data submitted from a form usingthe post method; the $_GET autoglobal contains data submitted
from a form using the get method or through a hyperlink.
• Web forms may have two components: the data entry form page
and the data processing script.
• Magic quotes may be enabled for a PHP server. If enabled, the
PHP scripting engine inserts an escape character before a single
quotation mark, double quotation mark, or NULL character in any
submitted form data.
• The
addslashes() function inserts an escape character before asingle quotation mark, double quotation mark, or NULL charac-
ter in a string. The stripslashes() function removes the escape
character before a single quotation mark, double quotation mark,
or NULL character in a string.
• The first step in processing form data is to validate the input.
• The
empty() function determines if the entered value has anempty or zero value.
• The
is_*() family of functions determines if the entered value isof the required data type.
• Regular expressions determine if an entered string value is format-
ted correctly for the required type of entry.
• The user should be notified at the same time of all errors in the val-
ues entered into the form.
• Sticky forms are forms that are redisplayed if any errors are found
during the validation process. The fields in a sticky form are popu-
lated with the values the user entered previously.
• Advanced escaping from XHTML is a convenient way to display