

2.2 Example of tables creation for database “Product realization of Holding company “Group nord”
In the Database window, click Tables under Objects, and then click New.
In the New Table dialog box, double-click Design View.
Run database management system Access. Create a new, blank database.
In the task pane choose Blank database… (fig. 1.6).
Enter a file name for a new database and specify drive and folder when you want to save you database.
A new database has to correspond to the next structure (fig. 2.6):
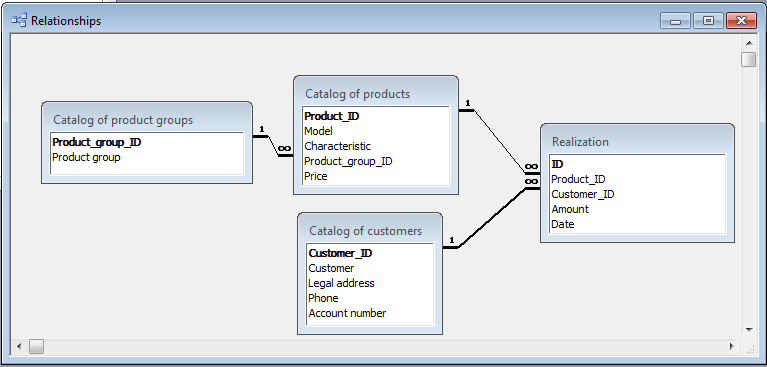
Figure 2.6 – Relationships of database “Product realization of Holding company “Group NORD”
2.2.1 Creating a new table «Catalog of product groups»
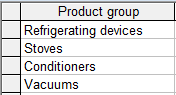
Choose «Create table by entering data». Rename column of table Field1 to Product_group (by double-click on field name). Fill the spreadsheet by data:
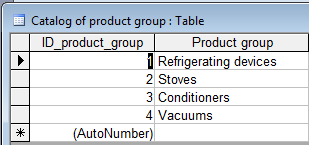
Save table with name «Catalog of product groups». Access asks if you want to create a primary key now. Click Yes and then open the current table and rename field ID into Product_groups_ID. We get:
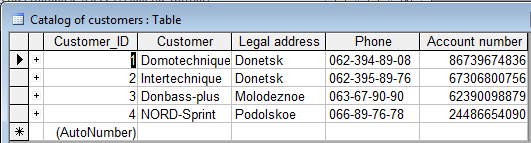
2.2.2 Creating a table «Catalog of customers».
Double-click “Create table by entering data”. Rename columns of table Field1, Field2, Field3, Field4 to «Customer», «Legal address», «Phone», «Account number» respectively (by double-click on field names). Sequentially fill the spreadsheet by data:
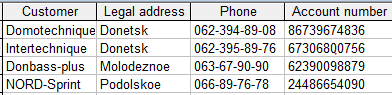
Save table with name «Catalog of customers». Access asks if you want to create a primary key now. Click Yes and then open the current table and rename field ID into Customer_ID.
2.2.3 Creating a table «Catalog of products».
Creating a table from scratch in Design view. The most straightforward way to build a table is in Design view, where adding fields to a table and specifying their data types is not much different than basic data entry.
Click the Tables icon in the Objects bar if it isn't already selected, then double-click Create table in Design view. The new blank table appears in Design view. Now all you have to do is add the fields you want included in the table. Let's add the fields and specify the data types.

Restricting the data type for each column is very important and helps maintain data integrity. For example, it can prevent us from accidentally entering an email address into a field for storing the current date.
A
field Product_ID has to be declared as primary key. So select the
field you want to use for the primary key. Select Edit, then Primary
Key, or click the Primary Key icon
![]() on
the toolbar.
on
the toolbar.
For a field Characteristic set in General Field Properties Field Size 100.
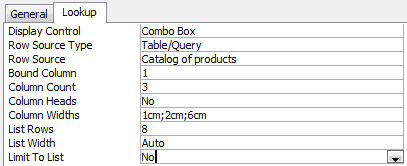
As we want to create lookup column Product_group_ID to look up the values in a table or query go to «Lookup» tab. Set next parameters:
Save
table with name «Catalog of products» and fill it with data. To
start filling tables, switch to table view by clicking the small
button
![]() on the bottom-left of the window. You will see the columns created in
design view and constraints applied.
on the bottom-left of the window. You will see the columns created in
design view and constraints applied.

Now the basic table has been created and added in the database, you can save it for later use.
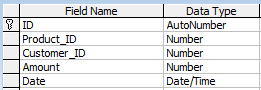
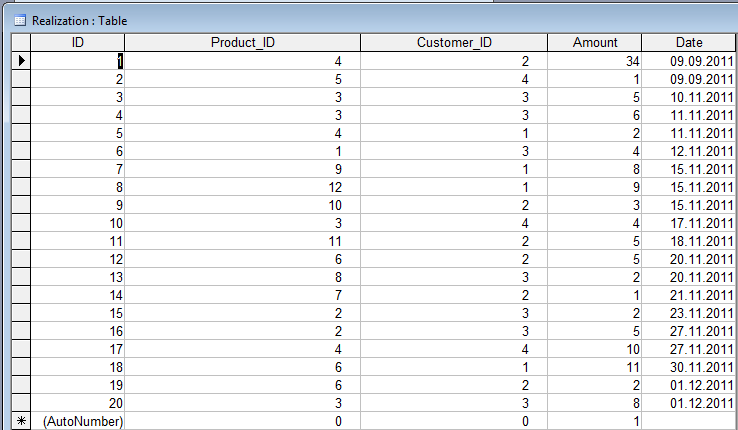
2.2.4 Creating a table «Realization»
Choose a way of table creation in Design view. In the top pane of open window add the fields you want included in this table and specify the data types.
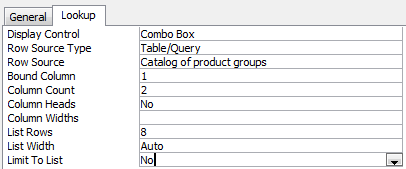
Make field Product_ID as a lookup column:
Make field Customer_ID as a lookup column:

For a field Amount set in General tab next properties:
![]()
For a field Date set in General tab next properties:

Save table with name «Realization» and fill it with data.
2.2.5 Relations between tables
Click the Relationships icon on the toolbar:
From the Show Table window double click on the names of the tables you would like to include in the relationships (all tables). When you have finished adding tables, click Close.
To link fields in two different tables, click and drag a field from one table to the corresponding field on the other table and release the mouse button. In the Edit Relationships window select an option from Enforce Referential Integrity, Cascade Update Related Fields, Cascade Delete Related Records. Click Create to create the link.
Close the window and save relationships.