

Adding a dialog: Part I
September 8th, 2005
In this multi-part article, we will be adding a dialog in a modification of our TextUtils feature. The dialog will permit the user - via radio buttons - to choose which of our functions UpperC, LowerC, orProperC will be applied to the selected cells.
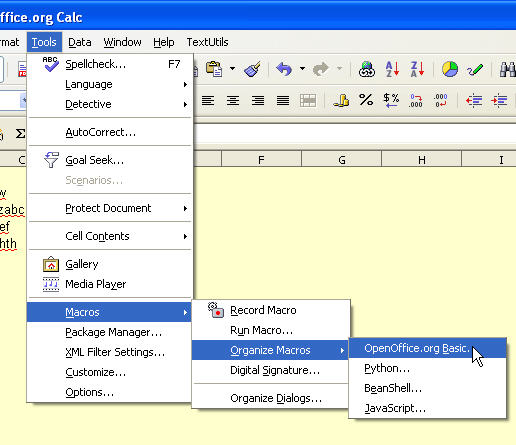
The dialog editor is invoked through the Macro Organizer. First, selectTools - Macros - Organize Macros - OpenOffice.org Basic as shown below
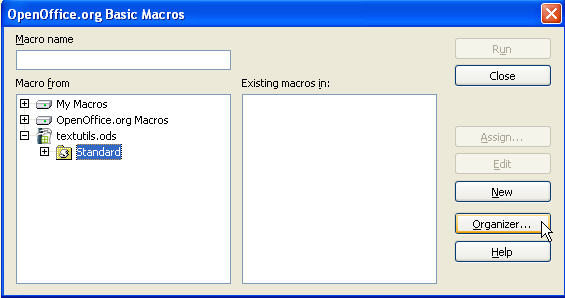
This opens the OpenOffice.org Basic Macros dialog - below. Now open the OpenOffice.org Basic Macro Organizer dialog as shown below.
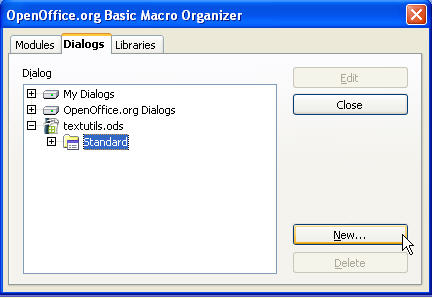
Now select the Dialogs tab and with the Standard LIbrary of the open document selected, create a new dialog by clicking New
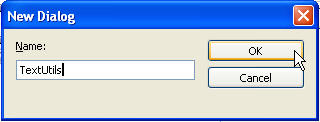
We rename the new dialog from the default to TextUtils - below.
We now go into the Dialog editor by clicking Edit as shown below.

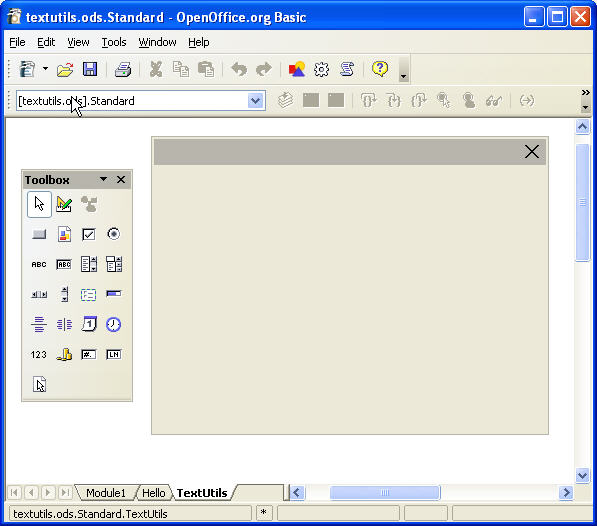
The initial view of the Dialog Editor with the toolbox on the left and a ‘blank’ dialog on the right.
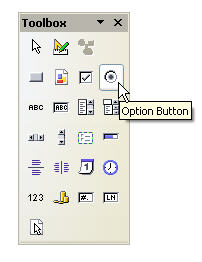
The dialog components (or controls) are added by first selecting the desired component type from the floating toolbox. As you move the cursor over the toolbox, each component identifies itself. For our particular example, we want to add some option buttons (or radio buttons) as we only want to have one selected at a time. Left-click to activate a component as shown below. Not the white border around the selected component.
Moving the cursor into the dialog, you should see crosshairs (below)

Left-click and drag to define the outline of the new control.

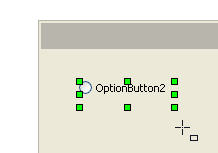
Releaing the mouse, a new default instantiation of the control appears. The green boxes indicate the component is selected and ready for editing
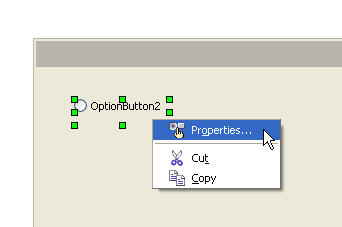
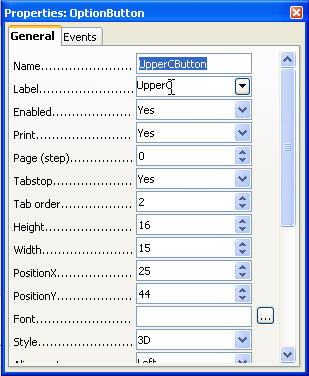
With the cursor inside the boundary of the new component, right-click and select Properties as shown below.
The Properties dialog for each component has two tabs. We first focus on the position and appearance of the control while assigning it a meaningful identifier. We do this in the General tab. In the next part of the tutorial, we will be integrating the dialog and it’s controls with the macros we have created. This will involve the Events tab.
Here is the partially completed dialog - with three radio buttons and two command buttons. It may look complete - but it is not yet integrated into the document.

To be continued….
-----------------------------------------------------------------------------------------------------------
Adding a dialog: Part II
September 9th, 2005
In the first part of this series of articles, we developed some macros for basic string manipulation on a selected range of cells. We also created a new menu item for easy invocation of these macros.
In the second part, we developed a dialog to allow the user to select from a list of functions.
We will now integrate the enhanced menu, the new dialog and our new functions.
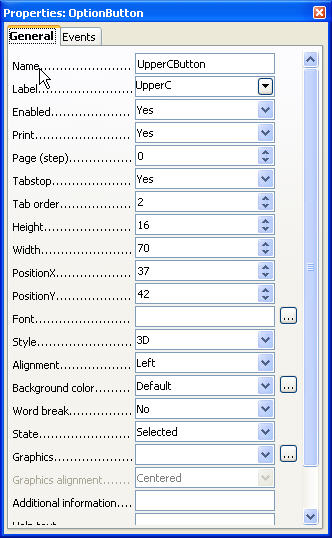
Each radio button in our dialog was given a name. They wereUpperCButton, LowerCButton and ProperCButton. Another key property associated with radio buttons is the Stateproperty which has a value of 1 if the button is checked, 0 otherwise. The default state value is 0. In our dialog, we would like to have theProperC button selected on startup - so we set the state value as shown below..
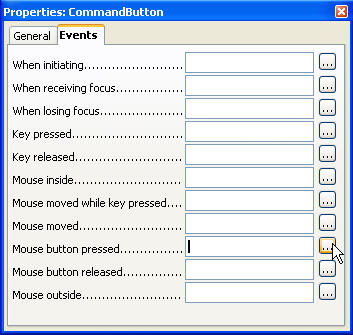
There are no Events associated with the radio buttons. The other components/controls of the dialog will be able to query the state of each button as we shall see in the code. The subroutines listed below - RunTextUtilsDlg and ExitTextUtilsDlg will be associated with theRun and Exit command buttons. We link the macros and command buttons via the events dialog of each component as shown below. Be careful to choose the correct event type when doing the mapping.
In the dialog editor, select the button to which we wish to assign a macro. Select the Events tab. For a button control, we want to map the macro to the Mouse button pressed event. Invoke the Assign Macro dialog as shown below.
Making sure the corrct event is selected, invoke the Macro Selector as shown below.

With the macro selected,click OK to complete the macro assignment/mapping.

Here is the additonal macro code required to complete the integration. Note the mechanism by which we query the state of each radio button.
Dim oTextUtilsDlg
Sub RunTextUtilsDlg Dim oLib Dim oLibDlg
DialogLibraries.loadLibrary(”Standard”)
oLib = DialogLibraries.getByName(”Standard”)
oLibDlg = oLib.getByName(”TextUtils”)
oTextUtilsDlg = CreateUnoDialog(oLibDlg)
oTextUtilsDlg.execute
End Sub
Sub ExitTextUtilsDlg oTextUtilsDlg.endExecute() End Sub
Sub TextUtils ‘Print oTextUtilsDlg.getModel().getByName(”UpperCButton”).State If oTextUtilsDlg.getModel().getByName(”UpperCButton”).State = 1 Then Call UpperC ElseIf oTextUtilsDlg.getModel().getByName(”LowerCButton”).State = 1 Then Call LowerC ElseIf oTextUtilsDlg.getModel().getByName(”ProperCButton”).State = 1 Then Call ProperC End If End Sub
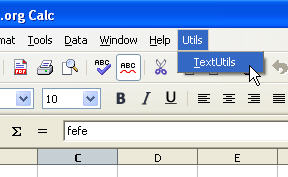
Asa final step, we customize our menu to provide a single point of entry to the TextUtils dialog via the RunTextUtilsDlg macro.
Please note that this is just one possible way of implementing the new Calc functionality we have introduced in this series of tips.
Here is the example we have just worked through for you to download.
Posted in OpenOffice Basic | No Comments »