
- •Practical Unit Testing with JUnit and Mockito
- •Table of Contents
- •About the Author
- •Acknowledgments
- •Preface
- •Preface - JUnit
- •Part I. Developers' Tests
- •Chapter 1. On Tests and Tools
- •1.1. An Object-Oriented System
- •1.2. Types of Developers' Tests
- •1.2.1. Unit Tests
- •1.2.2. Integration Tests
- •1.2.3. End-to-End Tests
- •1.2.4. Examples
- •1.2.5. Conclusions
- •1.3. Verification and Design
- •1.5. Tools Introduction
- •Chapter 2. Unit Tests
- •2.1. What is a Unit Test?
- •2.2. Interactions in Unit Tests
- •2.2.1. State vs. Interaction Testing
- •2.2.2. Why Worry about Indirect Interactions?
- •Part II. Writing Unit Tests
- •3.2. Class To Test
- •3.3. Your First JUnit Test
- •3.3.1. Test Results
- •3.4. JUnit Assertions
- •3.5. Failing Test
- •3.6. Parameterized Tests
- •3.6.1. The Problem
- •3.6.2. The Solution
- •3.6.3. Conclusions
- •3.7. Checking Expected Exceptions
- •3.8. Test Fixture Setting
- •3.8.1. Test Fixture Examples
- •3.8.2. Test Fixture in Every Test Method
- •3.8.3. JUnit Execution Model
- •3.8.4. Annotations for Test Fixture Creation
- •3.9. Phases of a Unit Test
- •3.10. Conclusions
- •3.11. Exercises
- •3.11.1. JUnit Run
- •3.11.2. String Reverse
- •3.11.3. HashMap
- •3.11.4. Fahrenheits to Celcius with Parameterized Tests
- •3.11.5. Master Your IDE
- •Templates
- •Quick Navigation
- •Chapter 4. Test Driven Development
- •4.1. When to Write Tests?
- •4.1.1. Test Last (AKA Code First) Development
- •4.1.2. Test First Development
- •4.1.3. Always after a Bug is Found
- •4.2. TDD Rhythm
- •4.2.1. RED - Write a Test that Fails
- •How To Choose the Next Test To Write
- •Readable Assertion Message
- •4.2.2. GREEN - Write the Simplest Thing that Works
- •4.2.3. REFACTOR - Improve the Code
- •Refactoring the Tests
- •Adding Javadocs
- •4.2.4. Here We Go Again
- •4.3. Benefits
- •4.4. TDD is Not Only about Unit Tests
- •4.5. Test First Example
- •4.5.1. The Problem
- •4.5.2. RED - Write a Failing Test
- •4.5.3. GREEN - Fix the Code
- •4.5.4. REFACTOR - Even If Only a Little Bit
- •4.5.5. First Cycle Finished
- •‘The Simplest Thing that Works’ Revisited
- •4.5.6. More Test Cases
- •But is It Comparable?
- •Comparison Tests
- •4.6. Conclusions and Comments
- •4.7. How to Start Coding TDD
- •4.8. When not To Use Test-First?
- •4.9. Should I Follow It Blindly?
- •4.9.1. Write Good Assertion Messages from the Beginning
- •4.9.2. If the Test Passes "By Default"
- •4.10. Exercises
- •4.10.1. Password Validator
- •4.10.2. Regex
- •4.10.3. Booking System
- •Chapter 5. Mocks, Stubs, Test Spies
- •5.1. Introducing Mockito
- •5.1.1. Creating Test Doubles
- •5.1.2. Expectations
- •5.1.3. Verification
- •5.1.4. Conclusions
- •5.2. Types of Test Double
- •5.2.1. Code To Be Tested with Test Doubles
- •5.2.2. The Dummy Object
- •5.2.3. Test Stub
- •5.2.4. Test Spy
- •5.2.5. Mock
- •5.3. Putting it All Together
- •5.4. Example: TDD with Test Doubles
- •5.4.2. The Second Test: Send a Message to Multiple Subscribers
- •Refactoring
- •5.4.3. The Third Test: Send Messages to Subscribers Only
- •5.4.4. The Fourth Test: Subscribe More Than Once
- •Mockito: How Many Times?
- •5.4.5. The Fifth Test: Remove a Subscriber
- •5.4.6. TDD and Test Doubles - Conclusions
- •More Test Code than Production Code
- •The Interface is What Really Matters
- •Interactions Can Be Tested
- •Some Test Doubles are More Useful than Others
- •5.5. Always Use Test Doubles… or Maybe Not?
- •5.5.1. No Test Doubles
- •5.5.2. Using Test Doubles
- •No Winner So Far
- •5.5.3. A More Complicated Example
- •5.5.4. Use Test Doubles or Not? - Conclusion
- •5.6. Conclusions (with a Warning)
- •5.7. Exercises
- •5.7.1. User Service Tested
- •5.7.2. Race Results Enhanced
- •5.7.3. Booking System Revisited
- •5.7.4. Read, Read, Read!
- •Part III. Hints and Discussions
- •Chapter 6. Things You Should Know
- •6.1. What Values To Check?
- •6.1.1. Expected Values
- •6.1.2. Boundary Values
- •6.1.3. Strange Values
- •6.1.4. Should You Always Care?
- •6.1.5. Not Only Input Parameters
- •6.2. How to Fail a Test?
- •6.3. How to Ignore a Test?
- •6.4. More about Expected Exceptions
- •6.4.1. The Expected Exception Message
- •6.4.2. Catch-Exception Library
- •6.4.3. Testing Exceptions And Interactions
- •6.4.4. Conclusions
- •6.5. Stubbing Void Methods
- •6.6. Matchers
- •6.6.1. JUnit Support for Matcher Libraries
- •6.6.2. Comparing Matcher with "Standard" Assertions
- •6.6.3. Custom Matchers
- •6.6.4. Advantages of Matchers
- •6.7. Mockito Matchers
- •6.7.1. Hamcrest Matchers Integration
- •6.7.2. Matchers Warning
- •6.8. Rules
- •6.8.1. Using Rules
- •6.8.2. Writing Custom Rules
- •6.9. Unit Testing Asynchronous Code
- •6.9.1. Waiting for the Asynchronous Task to Finish
- •6.9.2. Making Asynchronous Synchronous
- •6.9.3. Conclusions
- •6.10. Testing Thread Safe
- •6.10.1. ID Generator: Requirements
- •6.10.2. ID Generator: First Implementation
- •6.10.3. ID Generator: Second Implementation
- •6.10.4. Conclusions
- •6.11. Time is not on Your Side
- •6.11.1. Test Every Date (Within Reason)
- •6.11.2. Conclusions
- •6.12. Testing Collections
- •6.12.1. The TDD Approach - Step by Step
- •6.12.2. Using External Assertions
- •Unitils
- •Testing Collections Using Matchers
- •6.12.3. Custom Solution
- •6.12.4. Conclusions
- •6.13. Reading Test Data From Files
- •6.13.1. CSV Files
- •6.13.2. Excel Files
- •6.14. Conclusions
- •6.15. Exercises
- •6.15.1. Design Test Cases: State Testing
- •6.15.2. Design Test Cases: Interactions Testing
- •6.15.3. Test Collections
- •6.15.4. Time Testing
- •6.15.5. Redesign of the TimeProvider class
- •6.15.6. Write a Custom Matcher
- •6.15.7. Preserve System Properties During Tests
- •6.15.8. Enhance the RetryTestRule
- •6.15.9. Make an ID Generator Bulletproof
- •Chapter 7. Points of Controversy
- •7.1. Access Modifiers
- •7.2. Random Values in Tests
- •7.2.1. Random Object Properties
- •7.2.2. Generating Multiple Test Cases
- •7.2.3. Conclusions
- •7.3. Is Set-up the Right Thing for You?
- •7.4. How Many Assertions per Test Method?
- •7.4.1. Code Example
- •7.4.2. Pros and Cons
- •7.4.3. Conclusions
- •7.5. Private Methods Testing
- •7.5.1. Verification vs. Design - Revisited
- •7.5.2. Options We Have
- •7.5.3. Private Methods Testing - Techniques
- •Reflection
- •Access Modifiers
- •7.5.4. Conclusions
- •7.6. New Operator
- •7.6.1. PowerMock to the Rescue
- •7.6.2. Redesign and Inject
- •7.6.3. Refactor and Subclass
- •7.6.4. Partial Mocking
- •7.6.5. Conclusions
- •7.7. Capturing Arguments to Collaborators
- •7.8. Conclusions
- •7.9. Exercises
- •7.9.1. Testing Legacy Code
- •Part IV. Listen and Organize
- •Chapter 8. Getting Feedback
- •8.1. IDE Feedback
- •8.1.1. Eclipse Test Reports
- •8.1.2. IntelliJ IDEA Test Reports
- •8.1.3. Conclusion
- •8.2. JUnit Default Reports
- •8.3. Writing Custom Listeners
- •8.4. Readable Assertion Messages
- •8.4.1. Add a Custom Assertion Message
- •8.4.2. Implement the toString() Method
- •8.4.3. Use the Right Assertion Method
- •8.5. Logging in Tests
- •8.6. Debugging Tests
- •8.7. Notifying The Team
- •8.8. Conclusions
- •8.9. Exercises
- •8.9.1. Study Test Output
- •8.9.2. Enhance the Custom Rule
- •8.9.3. Custom Test Listener
- •8.9.4. Debugging Session
- •Chapter 9. Organization Of Tests
- •9.1. Package for Test Classes
- •9.2. Name Your Tests Consistently
- •9.2.1. Test Class Names
- •Splitting Up Long Test Classes
- •Test Class Per Feature
- •9.2.2. Test Method Names
- •9.2.3. Naming of Test-Double Variables
- •9.3. Comments in Tests
- •9.4. BDD: ‘Given’, ‘When’, ‘Then’
- •9.4.1. Testing BDD-Style
- •9.4.2. Mockito BDD-Style
- •9.5. Reducing Boilerplate Code
- •9.5.1. One-Liner Stubs
- •9.5.2. Mockito Annotations
- •9.6. Creating Complex Objects
- •9.6.1. Mummy Knows Best
- •9.6.2. Test Data Builder
- •9.6.3. Conclusions
- •9.7. Conclusions
- •9.8. Exercises
- •9.8.1. Test Fixture Setting
- •9.8.2. Test Data Builder
- •Part V. Make Them Better
- •Chapter 10. Maintainable Tests
- •10.1. Test Behaviour, not Methods
- •10.2. Complexity Leads to Bugs
- •10.3. Follow the Rules or Suffer
- •10.3.1. Real Life is Object-Oriented
- •10.3.2. The Non-Object-Oriented Approach
- •Do We Need Mocks?
- •10.3.3. The Object-Oriented Approach
- •10.3.4. How To Deal with Procedural Code?
- •10.3.5. Conclusions
- •10.4. Rewriting Tests when the Code Changes
- •10.4.1. Avoid Overspecified Tests
- •10.4.2. Are You Really Coding Test-First?
- •10.4.3. Conclusions
- •10.5. Things Too Simple To Break
- •10.6. Conclusions
- •10.7. Exercises
- •10.7.1. A Car is a Sports Car if …
- •10.7.2. Stack Test
- •Chapter 11. Test Quality
- •11.1. An Overview
- •11.2. Static Analysis Tools
- •11.3. Code Coverage
- •11.3.1. Line and Branch Coverage
- •11.3.2. Code Coverage Reports
- •11.3.3. The Devil is in the Details
- •11.3.4. How Much Code Coverage is Good Enough?
- •11.3.5. Conclusion
- •11.4. Mutation Testing
- •11.4.1. How does it Work?
- •11.4.2. Working with PIT
- •11.4.3. Conclusions
- •11.5. Code Reviews
- •11.5.1. A Three-Minute Test Code Review
- •Size Heuristics
- •But do They Run?
- •Check Code Coverage
- •Conclusions
- •11.5.2. Things to Look For
- •Easy to Understand
- •Documented
- •Are All the Important Scenarios Verified?
- •Run Them
- •Date Testing
- •11.5.3. Conclusions
- •11.6. Refactor Your Tests
- •11.6.1. Use Meaningful Names - Everywhere
- •11.6.2. Make It Understandable at a Glance
- •11.6.3. Make Irrelevant Data Clearly Visible
- •11.6.4. Do not Test Many Things at Once
- •11.6.5. Change Order of Methods
- •11.7. Conclusions
- •11.8. Exercises
- •11.8.1. Clean this Mess
- •Appendix A. Automated Tests
- •A.1. Wasting Your Time by not Writing Tests
- •A.1.1. And what about Human Testers?
- •A.1.2. One More Benefit: A Documentation that is Always Up-To-Date
- •A.2. When and Where Should Tests Run?
- •Appendix B. Running Unit Tests
- •B.1. Running Tests with Eclipse
- •B.1.1. Debugging Tests with Eclipse
- •B.2. Running Tests with IntelliJ IDEA
- •B.2.1. Debugging Tests with IntelliJ IDEA
- •B.3. Running Tests with Gradle
- •B.3.1. Using JUnit Listeners with Gradle
- •B.3.2. Adding JARs to Gradle’s Tests Classpath
- •B.4. Running Tests with Maven
- •B.4.1. Using JUnit Listeners and Reporters with Maven
- •B.4.2. Adding JARs to Maven’s Tests Classpath
- •Appendix C. Test Spy vs. Mock
- •C.1. Different Flow - and Who Asserts?
- •C.2. Stop with the First Error
- •C.3. Stubbing
- •C.4. Forgiveness
- •C.5. Different Threads or Containers
- •C.6. Conclusions
- •Appendix D. Where Should I Go Now?
- •Bibliography
- •Glossary
- •Index
- •Thank You!

Chapter 3. Unit Tests with no Collaborators
Listing 3.6. Breaking the code so the test fails
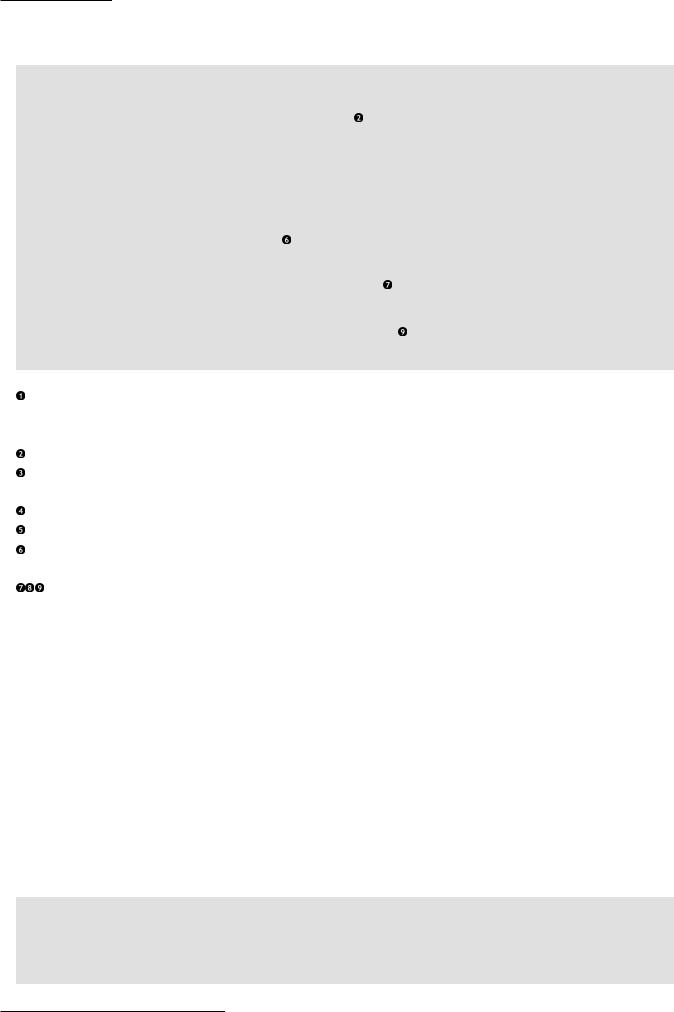
public Money(int amount, String currency) { this.amount = 15;
this.currency = currency;
}
No matter what was passed by argument, amount will be set to 15.
Of course, this change will make one of the assertions in our test (assertEquals(10, money.getAmount());) fail. After rerunning the test, the following message and stacktrace will appear:
Listing 3.7. Failing test output
java.lang.AssertionError: Expected :10
Actual :15
at org.junit.Assert.fail(Assert.java:93)
at org.junit.Assert.failNotEquals(Assert.java:647) at org.junit.Assert.assertEquals(Assert.java:128) at org.junit.Assert.assertEquals(Assert.java:472) at org.junit.Assert.assertEquals(Assert.java:456) at com.practicalunittesting
.MoneyTest.constructorShouldSetAmountAndCurrency(MoneyTest.java:12)
This line informs us that an assertion has failed.
The values of both parameters of the assertEquals() assertion are printed: 10 was expected, but 15 was returned.
The first line of the stack trace which starts with something other than org.junit points to the offending line in your test code. In this case, it is the line which threw AssertionError:
assertEquals(10, money.getAmount());
One thing we should notice is that the order of assertions' parameters is really important. The printed information about the reason for the test failure is based on the assumption that we kept to the default order (remember: first expected value, then actual value). In any other circumstances, the printed information would have been misleading.
We will discuss the assertions' messages in details in Section 8.4.
3.6. Parameterized Tests
It is often advisable to test the same method with many different input values, expecting various outcomes5. In this section we will learn how JUnit can help us with this task.
3.6.1. The Problem
Let us assume, that apart from testing the Money class constructor with 10 USD, we also want to test it with 20 EUR. That can be done like this:
5We will discuss the problem of what values should be verified in Section 6.1.
24

Chapter 3. Unit Tests with no Collaborators
Listing 3.8. Testing the Money class with 10 USD and 20 EUR
public void constructorShouldSetAmountAndCurrency() { Money money = new Money(10, "USD");
assertEquals(10, money.getAmount()); assertEquals("USD", money.getCurrency());
money = new Money(20, "EUR");
assertEquals(20, money.getAmount()); assertEquals("EUR", money.getCurrency());
}
This approach will work, but its drawbacks are clearly visible. First of all, there is a lot of repetition and a clear violation of the DRY6 principle. Secondly, such code is usually created using the "copy&paste" technique, which is a sure recipe for getting into trouble by copying the whole section while only changing a part of it. Thirdly, the test class will grow with every new set of arguments. Enough! There must be a better way!
You can use various techniques to avoid repetitions such as those presented above. For example, you could introduce a for loop. That would make it better, but at the same time would result in the introduction of logic into your test (albeit of a very basic kind), which is not advisable (see Section 10.2). You could also divide the constructorShouldSetAmountAndCurrency() method into a number of smaller methods, each checking only one set of parameters. Yes, but that would have similar unwanted features to those of the naive approach discussed previously.
3.6.2. The Solution
Fortunately, you do not need to invent your own solution here. This requirement is so common, that testing frameworks offer some support for exactly these sorts of case. It is called "parameterized tests".
No matter which tool for parameterized tests you decide to use, the general idea is always the same. The test method, like the constructorShouldSetAmountAndCurrency() method discussed a moment ago, gets split into two parts. The first part acts as a source of arguments that will be passed to the second part (the actual test method), which, in turn, is responsible for the actual testing.
As mentioned earlier, JUnit’s support for parameterized tests is limited. We will use an additional, much more powerful library for this task: JUnitParams.
JUnitParams gives you choice when it comes to the implementation of the data-providing part. It can take the form of an annotation over the test method, or that of a separate test method. Please read the documentation for JUnitParams to learn about all its features.
Now let us have a look at the test code which uses the JUnitParams. There will be few new things, but we will discuss them one by one. The main thing to notice is that there is a clear separation of concerns:
the getMoney() method provides the data, and the constructorShouldSetAmountAndCurrency() method
provides the testing algorithm. The linking of these two methods is achieved thanks to the @Parameters annotation on the testing method.
6See http://en.wikipedia.org/wiki/Don’t_repeat_yourself.
25

Chapter 3. Unit Tests with no Collaborators
Listing 3.9. Parameterized test
@RunWith(JUnitParamsRunner.class) public class MoneyParameterizedTest {
private static final Object[] getMoney() { return new Object[] {
new Object[] {10, "USD"}, new Object[] {20, "EUR"}
};
}
@Test
@Parameters(method = "getMoney")
public void constructorShouldSetAmountAndCurrency( int amount, String currency) {
Money money = new Money(amount, currency);
assertEquals(amount, money.getAmount()); assertEquals(currency, money.getCurrency());
}
}
The @RunWith(JUnitParamsRunner.class) annotation on the test class informs JUnit that this test must be run with a special Runner provided by JUnitParams library. We do not need to get into details here: all we need to know is that we must have this annotation when using JUnitParams.
Data-providing methods are expected to return an Object[] array.
The constructorShouldSetAmountAndCurrency() method expects two parameters: amount and
currency. Each row of the array returned by the getMoney() method contains them both. The first set of arguments will consists of the number 10 and the currency USD.
The second set of arguments will consists of the number 20 and the currency EUR.
If a method uses a data-providing method, it will have to be annotated with a @Parameters annotation with the method attribute.
Instead of hardcoded values both arguments are used to create an object of the Money class and to verify it.
If you run the test on Listing 3.9, you will notice that JUnit has created two test cases "under the hood", and now it reports that two tests have been executed. What is more important, you will receive detailed information about what happened: i.e. what values were used for each test. With respect to MoneyTest, all you know is that the test passed. As regards MoneyParameterizedTest, you also know what parameters were involved. In the case of a successful test run this might not be a big deal, but in the case of a failure you will instantly know what combination of data caused it.
JUnitParams Dollar Sign Method
JUnitParams provides a useful $() (dollar sign) method which allows to write data-providing methods in a less verbose way.
Let us take this simple data-providing method as an example.
private static final Object[] getMoney() { return new Object[] {
new Object[] {10, "USD"}, new Object[] {20, "EUR"}
};
}
26