

Practical Database Programming With Java
.pdf798 Chapter 9 Developing Java Web Services to Access Databases
Figure 9.30. The modified FacultyFrame form window.
Figure 9.31. The finished New Web Service Client wizard.
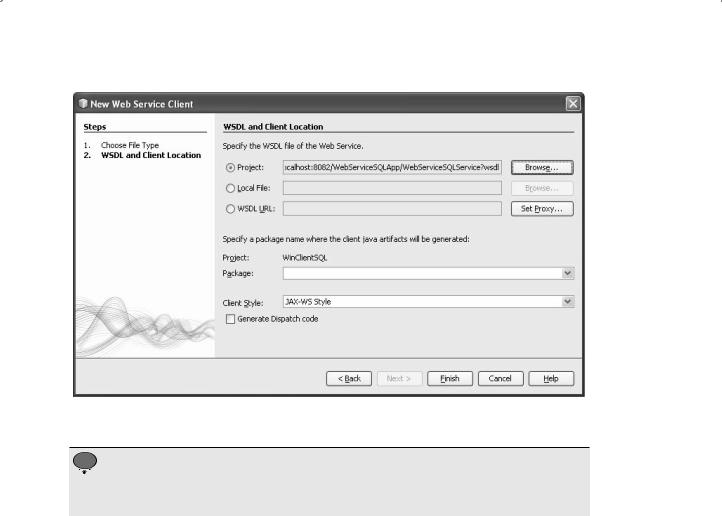
Then click on the OK button to select this Web service. Your finished Web Service Client wizard should match the one that is shown in Figure 9.31.
4. Click on the Finish button to complete this Web service reference set up process.
Immediately, you can find that a new node named Web Service References has been created and added into our client project. Expand this node and you can find the

9.6 Build a Windows-Based Web Client Project to Consume the Web Service 799
associated Web service port and our Web service operation QueryFaculty() under that node.
Now let’s develop the codes for this project to call the Web service to perform the data query from the Faculty table in our sample database.
9.6.3 Develop the Codes to Call Our Web Service Project
The coding process is divided into two parts: the modification to the original codes and creation of new codes. First, let’ do some modifications to the original codes in this FacultyFrame class. Perform the following code modifications to make this project as our
Web consuming project:
1.Double click on our new copied FacultyFrame.java file from our project to open it.
2.Click on the Source button on the top to open the code window.
3.Go to the constructor of this class, and remove all four query methods from the ComboMethod object.
4.Open the cmdSelectActionPerformed() method and remove all codes inside this method except the first coding line and the codes in the last if block.
5.Add two more items, IDField and NameField, into the beginning of the f_field[] JTextField array located at the first coding line. Also, change the order of the rest of items in this array to the order listed below:
OfficeField, PhoneField, CollegeField, TitleField, EmailField
to make them identical with the order of the columns in our Faculty table.
Now, let’s develop some new codes to perform the faculty data query by calling our Web service project.
On the Design view of the FacultyFrame form window, double click on the Select button to open its event method cmdSelectActionPerformed(). Then enter the codes that are shown in Figure 9.32 into this method. The newly added and modified codes have been highlighted in bold.
Let’s have a closer look at this piece of codes to see how it works.
A.Two more items, IDField and NameField, have been added into the beginning of the JTextField[] array. The order of the rest of items should also be modified to make them identical with the order of the columns in our Faculty table.
B.A new ArrayList instance al is created to receive and hold the query result.
C.A try catch block is used to call our Web service to perform the faculty data query operation. First, a new Web service instance service is created based on our Web service class
WebServiceSQLService.
D.The getWebServiceSQLPort() method is executed to get the current port used by our Web service. This port is returned and assigned to a new Port instance port.
E.Before we can call our Web service, make sure that our ArrayList object al is empty by executing the clear() method.
F.The queryFaculty() method defined in our Web service is called to perform this faculty data query. Two points to be noted are: (1) the argument of this method is a selected

800 Chapter 9 Developing Java Web Services to Access Databases
private void cmdSelectActionPerformed(java.awt.event.ActionEvent evt) { // TODO add your handling code here:
Ajavax.swing.JTextField[] f_field = {IDField, NameField, OfficeField, PhoneField, CollegeField, TitleField, EmailField};
BArrayList al = new ArrayList(); try {
Corg.ws.sql.WebServiceSQLService service = new org.ws.sql.WebServiceSQLService();
Dorg.ws.sql.WebServiceSQL port = service.getWebServiceSQLPort();
Eal.clear();
Fal = (ArrayList)port.queryFaculty(ComboName.getSelectedItem().toString());
Gfor (int col = 0; col < al.size(); col++)
f_field[col].setText(al.get(col).toString());
}
H catch (Exception ex){ System.out.println("exception: " + ex);
}
if (!ShowFaculty()){
msgDlg.setMessage("No matched faculty image found!"); msgDlg.setVisible(true);
}
}
Figure 9.32. The modified codes for the cmdSelectActionPerformed() method.
faculty name obtained from the getSelectedItem() method from the Faculty Name combo box ComboName. Since this method returns an object, a toString() method must be attached to convert it to a string. (2) An ArrayList cast must be used to make sure that the returned query result is in this ArrayList type, since an ArrayList<String> type is used in our Web service project. The query result is assigned to our ArrayList instance al.
G.A for loop is used to pick up each column from the query result using the get() method. Two points to be noted are: (1) the argument of the get() method indicates the index of each column in the returned query result that is a single row, and that the data type of this method is an object. Therefore, a toString() method must be attached to convert it to a string. (2) To assign each column to each item in the f_field array, the setText() method must be used.
H.The catch block is used to track and display any possible exception during this Web service calling process.
During the coding process, you may encounter some real-time compiling errors. Most of these errors are introduced by missing some packages that contain classes or components used in this file. To fix these errors, just right click on this code window and select the Fix Imports item to load and import those missed packages to the top of this code window.
Now we have finished all coding process for this faculty data query action. Before we can build and run our project to test its function, we need to copy and save all images used in this project, including both faculty and students’ image files, to our current project folder. Perform the following actions to finish this image files processing:
1.Open the Images folder that is located at the Wiley ftp site (refer to Figure 1.2 in Chapter 1), copy all image files from that folder.
9.7 Build a Web-Based Client Project to Consume the Web Service 801
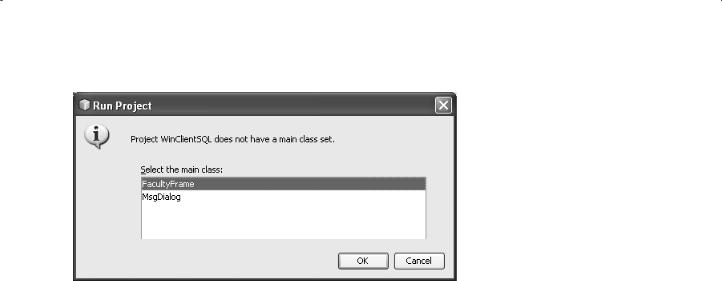
Figure 9.33. The Run Project dialog.
2.In the NetBeans IDE, open our project WinClientSQL and click on the Files button to open the Files window. Then right click on our project WinClientSQL and select the Paste item to paste all image files into our current project node WinClientSQL.
Now we are ready to build and run our client project to test its function to call our Web service to perform the faculty data query.
9.6.4 Build and Run Our Client Project to Query Faculty Data via Web Service
Click on the Clean and Build Main Project button to build our client project. If everything is fine, click on the Run Main Project button to run our client project.
A message box may be pup up to ask the main starting class, which is shown in Figure 9.33. Select our FacultyFrame class as the starting class, and click on the OK button to run the project.
The FacultyFrame form window is displayed, as shown in Figure 9.34.
Select a desired faculty member, such as Ying Bai, from the Faculty Name combo box, and click on the Select button to query the detailed information for this faculty via our Web service WebServiceSQL. The queried result is displayed in this form, as shown in Figure 9.34.
Our Web service and client projects are very successful!
Next, let’s build a Web-based client project to consume our Web service WebServiceSQL to perform the faculty data query action.
9.7 BUILD A WEB-BASED CLIENT PROJECT TO CONSUME THE WEB SERVICE
To save time and space, we can use some components in a Web application project JavaWebDBJSPOracle we developed in Chapter 8 to build our Web-based client

802 Chapter 9 Developing Java Web Services to Access Databases
Figure 9.34. The running result of our client project.
|
Web Server |
SQL Server |
||
|
HTTP |
|
2008 |
|
|
Request |
|
Database |
|
Web-Based |
Java Managed |
Web Services |
Database |
|
Client |
Bean |
Server |
||
|
||||
HTTP
Response
Figure 9.35. The architecture of our Web-based client project.
consuming project WebClientSQL in this section. In fact, we will use the FacultyPage. jsp file and a Java managed bean class in that project to query faculty data from our sample SQL Server database.
The structure of this Web-based client project is shown in Figure 9.35.
9.7.1 Create a Web-Based Client Project WebClientSQL
Perform the following operations to create a new Web application project WebClientSQL:
1. |
Launch NetBeans IDE and go to File > New Project item to open the New Project |
|
|
wizard. Select the Java Web from the Categories list and Web Application from the |
|
|
Projects list, then click on the Next button to go to the next wizard. |
|
2. |
Enter WebClientSQL into the Project |
Name field as this new project’s name. Make |
|
sure that the desired folder in which you want to save this project is included in the |
|
|
Project Location field and the Set |
as Main Project checkbox has been |
|
checked, then click on the Next button. |
|
3.In the opened Server and Settings wizard, make sure that the GlassFish v3 server has been selected as the Web server for this Web application, and the Java EE 6 Web has been selected for this application. Refer to Section 5.3.5.2.2 in Chapter 5 to add this server to the NetBeans IDE if you have not done this. Click on the Next button to continue.

9.7 Build a Web-Based Client Project to Consume the Web Service 803
4.Select the JavaServer Faces as the Framework for this application, and click on the Finish button to complete this new Web application creation process.
Since we need a JavaServer Face as a view to query data from the Faculty table in our sample database, we need to add the FacultyPage.jsp we built in the project JavaWebDBJSPOracle in Chapter 8 into our current project. Perform the following operations to complete this Web page addition process:
1.Open the JSP Files folder that is located at the Wiley ftp site (refer to Figure 1.2 in Chapter 1), and copy the FacultyPage.jsp file from that folder.
2.In the NetBeans IDE, open our project WebClientSQL and click on the Files button to open the Files window. Then right click on the web node under our project WebClientSQL and select the Paste item to paste this JSF page into our current project.
Next, we need to create a Java managed bean class FacultyBean.java and copy the codes from the managed bean FacultyMBean.java we built in the Web application project JavaWebDBJSPOracle, and paste them into our managed bean class FacultyBean.java in our Web-based client project.
9.7.2 Create a Java Managed Bean FacultyMBean and Add the JDialog Class MsgDialog
Perform the following operations to create this Java managed bean and add a MsgDialog class into our current project:
1.Right click our Web-based client project WebClientSQL from the Projects window and select New > Other item to open the New File wizard.
2.On the opened wizard, select JavaServer Faces from the Categories and JSF Managed
Bean from the File Types list, respectively. Then click on the Next button.
3.Name this managed bean as FacultyMBean, enter webclient into the Package field and select the session from the Scope combo box.Then click on the Finish button to complete this JSF managed bean creation process.
4.Double click on our newly created managed bean FacultyMBean.java to open its code window.
5.Now open the Web application project JavaWebDBJSPOracle we built in Chapter 8. You can find and download this project from the folder DBProjects\Chapter 8 at the Wiley ftp site (refer to Figure 1.2 in Chapter 1).
6.Expand the package JavaWebDBJSPOracle and copy all codes inside the managed bean class FacultyMBean (exclude the imported packages at the top of this file).
7.In our opened managed bean FacultyMBean.java, paste all copied codes inside this class.
Perform the following operations to add the MsgDialog class into our current project:
1.Launch the NetBeans IDE and open the Web application project JavaWebDBJSPSQL. You can find and download this project from the folder DBProjects\Chapter 8 at the Wiley ftp site (refer to Figure 1.2 in Chapter 1).

804Chapter 9 Developing Java Web Services to Access Databases
2.Expand the package JavaWebDBJSPSQL and copy the file MsgDialog.java.
3.Open our Web-based client project WebClientSQL and right click on the webclient node, and select the Paste item to paste this class into our project.
Next, let’s do some modifications to the Java managed bean class to make it our bean class. Perform the following modifications to this class:
1.Remove the first EJB injection line @EJB from this file.
2.Remove the second line, which is the session bean declaration statement private FacultySessionBean facultySessionBean; from the class file.
3.Remove all codes inside the following methods except the last line return null:
A.Select()
B.Insert()
C.Update()
D.Delete()
4.Add an import statement, import java.util.List;, to the top of this file.
5.Remove the default constructor public FacultyMBean() {}.
6.Click on the Clean and Build Main Project button to compile the project.
Before we can develop the codes for the Java managed bean to perform faculty data query, we need first to add a Web reference to our current Web-based client project to enable our client to recognize our Web service and its operations.
9.7.3 Create a Web Service Reference for Our Web-Based Client Project
Perform the following operations to set up a Web service reference for our client project:
1.Right click on our client project WebClientSQL from the Projects window, and select the New > Other item to open the New File wizard.
2. On the opened New File wizard, and select Web Services from the Categories and Web Service Client from the File Types list, respectively. Click on the Next button to continue.
3.Click the Browse button for the Project field and expand our Web application project WebServiceSQLApp, and click on our Web service project WebServiceSQL to select it. Then click the OK button to select this Web service.Your finished Web Service Client wizard should match the one that is shown in Figure 9.36.
4.Click the Finish button to complete this Web service reference setup process.
Immediately, you can find that a new node named Web Service References has been created and added into our client project. Expand this node and you can find the associated Web service port and our Web service operation QueryFaculty() under that node.
9.7 Build a Web-Based Client Project to Consume the Web Service 805
Figure 9.36. The finished New Web Service Client wizard.
 A point to be noted is that you must deploy our Web service project first before you can add this Web Reference to any client project.
Now let’s develop the codes to the different methods defined in the Java managed bean FacultyMBean one by one to perform data actions against the Faculty table in our sample database by calling the associated operations defined in our Web service project.
9.7.4 Build the Codes to Call the Web Service to Perform Data Query
First, let’s concentrate on the Select() method. The function of this method is to:
1.Call our Web service operation QueryFaculty() to pick up a matched faculty record from the Faculty table in our sample database.
2.Assign each queried column to the associated property defined in our Java managed bean class FacultyMBean.java.
Each queried column will be reflected and displayed in the associated text field in our JSF page FacultyPage.jsp since they have been bound together.
There are two ways available to develop the codes inside the Select() method to call our Web service operation QueryFaculty() to perform the faculty data query: (1) drag the Web service operation node from the Projects window, and drop it to inside the

806 Chapter 9 Developing Java Web Services to Access Databases
public String Select() {
try { // Call Web Service Operation
Aorg.ws.sql.WebServiceSQLService service = new org.ws.sql.WebServiceSQLService();
Borg.ws.sql.WebServiceSQL port = service.getWebServiceSQLPort();
//TODO initialize WS operation arguments here
Cjava.lang.String fname = "";
//TODO process result here
Djava.util.List<java.lang.Object> result = port.queryFaculty(fname); System.out.println("Result = "+result);
E} catch (Exception ex) {
//TODO handle custom exceptions here
}
return null;
}
Figure 9.37. The automatically added codes by dragging the operation node.
Select() method, and (2) right click on any place inside the Select() method, and select the Insert Code item and choose the Call Web Service Operation item from the pop-up menu.
Let’s use the first method as an example to add the codes to call our Web service operation.
1.Expand the Web Service References node under our Web-based client project WebClientSQL, and continue to expand the subservice port until our operation
QueryFaculty node.
2.Open the code window of our Java managed bean class FacultyMBean.java, and browse to the Select() method.
3.Drag our Web service operation QueryFaculty node and place it inside the Select() method in our managed bean.
A piece of codes is automatically created and added into this method, which has been highlighted in bold and shown in Figure 9.37.
It is unnecessary to explain the function of this piece of codes line by line since all of coding lines have been illustrated by the built-in comments.
Now let’s do some modifications to this piece of codes and add some codes to meet our data query requirements. Perform the following operations to make this piece of codes to perform our desired faculty data query:
A.An ArrayList instance al and a MsgDialog instance msgDlg are created first.The first local variable al is used to hold the returned query, and the second is used to display some debug information during the project runs.
B.Remove the code line java.lang.String fname = “”;.
C.Replace the rest of the codes with a piece of codes that are shown in steps C, D, E, and F in Figure 9.38. First, the queryFaculty() operation in our Web service is executed to perform the faculty data query, and the result is returned and assigned to the local variable al. One point to be noted is that this returned result must be casted with ArrayList class, since the ArrayList<String> data type is used for this query result in our Web service operation.

|
9.7 Build a Web-Based Client Project to Consume the Web Service 807 |
|
|
|
public String Select() { |
A |
ArrayList al = new ArrayList(); |
|
MsgDialog msgDlg = new MsgDialog(new javax.swing.JFrame(), true); |
try { // Call Web Service Operation
org.ws.sql.WebServiceSQLService service = new org.ws.sql.WebServiceSQLService(); org.ws.sql.WebServiceSQL port = service.getWebServiceSQLPort();
B// TODO process result here
Cal = (ArrayList)port.queryFaculty(facultyName);
DfacultyID = al.get(0).toString(); name = al.get(1).toString(); office = al.get(2).toString(); phone = al.get(3).toString(); college = al.get(4).toString(); title = al.get(5).toString(); email = al.get(6).toString();
EfacultyImage = getFacultyImage();
F} catch (Exception ex) {
//TODO handle custom exceptions here msgDlg.setMessage("Exception in Query Faculty Table: " + ex); msgDlg.setVisible(true);
}
return null;
}
Figure 9.38. The modified codes for the method Select().
D.Seven returned columns are assigned to the associated properties defined in this managed bean FacultyMBean.java class, and will be displayed in the associated text field in our JSF page FacultyPage.jsp, since each of those tags has been bound to each associated property. The get() method is used to pick up each column from the returned query result, and a toString() method is used to convert each column to a String and assigned each of them to the associated property.
E.The getter method getFacultyImage() is executed to pick up a matched faculty image and display it in the faculty image box in our JSF page FacultyPage.jsp. Refer to that getter method to get the detailed codes for this method defined in this Java managed bean.
F.The catch block is used to track and display any possible exception during this Web service operation calling process.
During the coding process, you may encounter some real-time compiling errors. Most of these errors are introduced by missing some packages that contain classes or components used in this file. To fix these errors, just right click on this code window and select the Fix Imports item to load and import those missed packages to the top of this code window.
Now we have finished all coding process for this faculty data query action. Before we can build and run our project to test its function, we need to copy and save all images used in this project, including both faculty and students’ image files, to our current project folder. Perform the following actions to finish this image files processing:
1.Open the Images folder that is located at the Wiley ftp site (refer to Figure 1.2 in Chapter 1), copy all image files from that folder.