

2.7.1: Skills Integration Challenge-Examining Packets
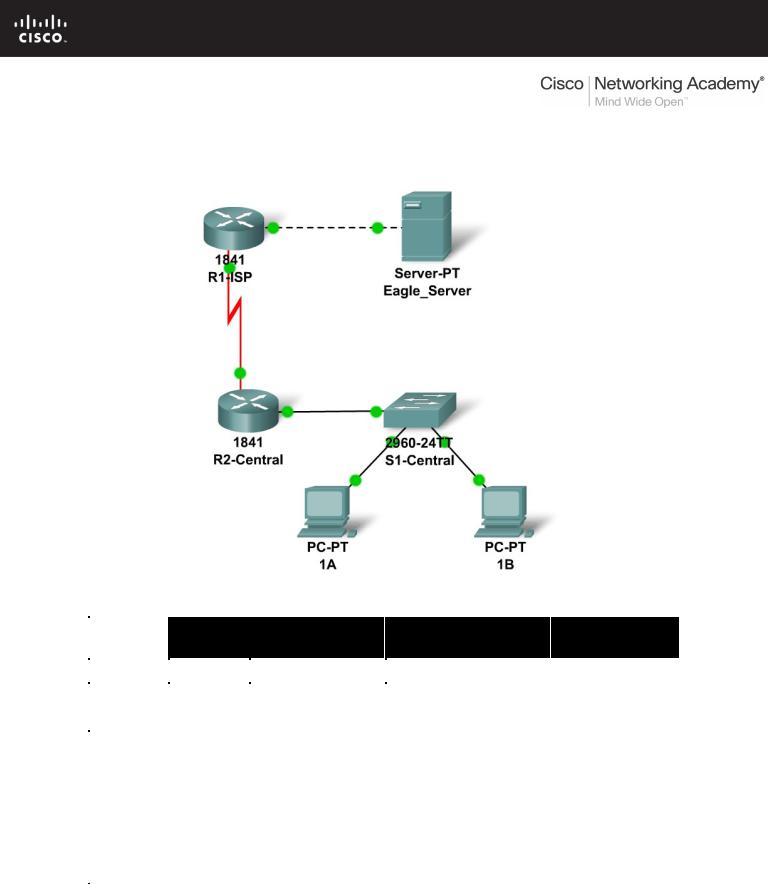
Topology Diagram
Addressing Table
|
Device |
|
Interface |
IP Address |
Subnet Mask |
Default |
|
|
Gateway |
||||
|
|
|
|
|
|
|
|
|
|
|
|
|
|
|
R1-ISP |
Fa0/0 |
192.168.254.253 |
255.255.255.0 |
N/A |
|
|
|
|
|
|
||
|
S0/0/0 |
10.10.10.6 |
255.255.255.252 |
N/A |
||
|
|
|
||||
|
|
|
|
|
|
|
|
R2- |
Fa0/0 |
172.16.255.254 |
255.255.0.0 |
10.10.10.6 |
|
|
|
|
|
|
||
|
Central |
S0/0/0 |
10.10.10.5 |
255.255.255.252 |
10.10.10.6 |
|
|
|
|
||||
|
|
|
|
|
|
|
|
S1- |
VLAN 1 |
172.16.254.1 |
255.255.0.0 |
172.16.255.254 |
|
|
Central |
|||||
|
|
|
|
|
||
|
|
|
|
|
|
|
|
PC 1A |
NIC |
172.16.1.1 |
255.255.0.0 |
172.16.255.254 |
|
|
|
|
||||
|
|
|
|
|
|
|
|
PC 1B |
NIC |
172.16.1.2 |
255.255.0.0 |
172.16.255.254 |
|
|
|
|
||||
|
|
|
|
|
|
|
|
Eagle |
|
|
|
|
|
|
Server |
NIC |
192.168.254.254 |
255.255.255.0 |
192.168.254.253 |
|
|
|
|
|
|
|
|
All contents are Copyright © 1992–2007 Cisco Systems, Inc. All rights reserved. This document is Cisco Public Information. |
Page 1 of 3 |
CCNA Exploration |
|
Network Fundamentals: |
|
Communicating over the Network |
2.7.1: Skills Integration Challenge-Examining Packets |
Learning Objectives
•Complete the Topology
•Add Simple PDUs in Realtime Mode
•Analyze PDUs in Simulation Mode
•Experiment with the model of the standard lab setup
Background
Throughout the course you will be using a standard lab setup created from actual PCs, servers, routers, and switches to learn networking concepts. In this activity you will continue learning how to build and analyze this standard lab topology. If you have not done so already, you are encouraged to examine the Help files available from the Help Pull-down menu at the top of the Packet Tracer GUI. Resources include an "My First PT Lab" to help you learn the basic operation of Packet Tracer, tutorials to guide you through various tasks, and information on the strengths and limitations of using Packet Tracer to model networks.
This activity will provide an opportunity to explore the standard lab setup using Packet Tracer simulator. Packet Tracer has two file formats it can create: .pkt files (network simulation model files) and .pka files (activity files for practice). When you create your own networks in Packet Tracer, or modify existing files from your instructor or your peers, you will often use the .pkt file format. When you launched this activity from the curriculum, these instructions appeared. They are the result of the .pka, Packet Tracer activity file format. At the bottom of these instructions are two buttons: Check Results (which gives you feedback on how much of the activity you have completed) and Reset Activity (which starts the activity over, if you want to clear your work or gain more practice).
Task 1: Complete the Topology.
Add a PC to the workspace. Configure it the following parameters: IP Address 172.16.1.2, Subnet Mask 255.255.0.0, Default Gateway 172.16.255.254, DNS Server 192.168.254.254, Display Name "1B" (do not include the quotation marks). Connect PC 1B to the Fa0/2 port of the S1Central Switch and check your work with the Check Results button to see that the topology is complete.
Task 2: Add Simple PDUs in Realtime Mode.
Using the Add Simple PDU, send a test message: one between PC 1B and Eagle Server. Note that this packet will appear in the event list as something that was "detected" or "sniffed" on the network, and in the lower right as a user created PDU that can be manipulated for testing purposes.
Task 3: Analyze PDUs in Simulation Mode (Packet Tracing).
Switch to simulation mode. Double click on the red "Fire" button in the User Created PDU window. Use the Capture / Forward button to move the packet through the network. Click on the packet envelope, or on the colored square in the Info column of the Event List, to examine the packet at each step in its journey.
All contents are Copyright © 1992–2007 Cisco Systems, Inc. All rights reserved. This document is Cisco Public Information. |
Page 2 of 3 |

CCNA Exploration |
|
Network Fundamentals: |
|
Communicating over the Network |
2.7.1: Skills Integration Challenge-Examining Packets |
Task 4: Experiment with the Model of the Standard Lab Setup.
The standard lab setup will consist of two routers, one switch, one server, and two PCs. Each of these devices are pre-configured. Try creating different combinations of test packets and analyzing their journey through the network.
Reflection
If you have not already done so, you are encouraged to obtain Packet Tracer from your instructor and complete My First PT Lab (available by using the HELP Pulldown Menu and choosing CONTENTS).
All contents are Copyright © 1992–2007 Cisco Systems, Inc. All rights reserved. This document is Cisco Public Information. |
Page 3 of 3 |
Activity 3.4.1: Data Stream Capture
Learning Objectives
Upon completion of this activity, you will be able to:
•Capture or download an audio stream
•Record the characteristics of the file
•Examine data transfer rates associated with the file
Background
When an application creates a file, the data that comprises that file must be stored somewhere. The data can be stored on the end device where it was created, or it can be transferred for storage on another device.
In this activity, you will use a microphone and Microsoft Sound Recorder to capture an audio stream. Microsoft Sound Recorder is a Windows accessory that can be found in Windows XP at Start > Programs >Accessories > Entertainment > Sound Recorder. If a microphone and Microsoft Sound Recorder are not available, you can download an audio file to use in this activity from http://newsroom.cisco.com/dlls/podcasts/audio_feeds.html.
Scenario
This activity is to be performed on a computer that has a microphone and Microsoft Sound Recorder or Internet access so that an audio file can be downloaded.
Estimated completion time, depending on network speed, is 30 minutes.
Task 1: Create a Sound File
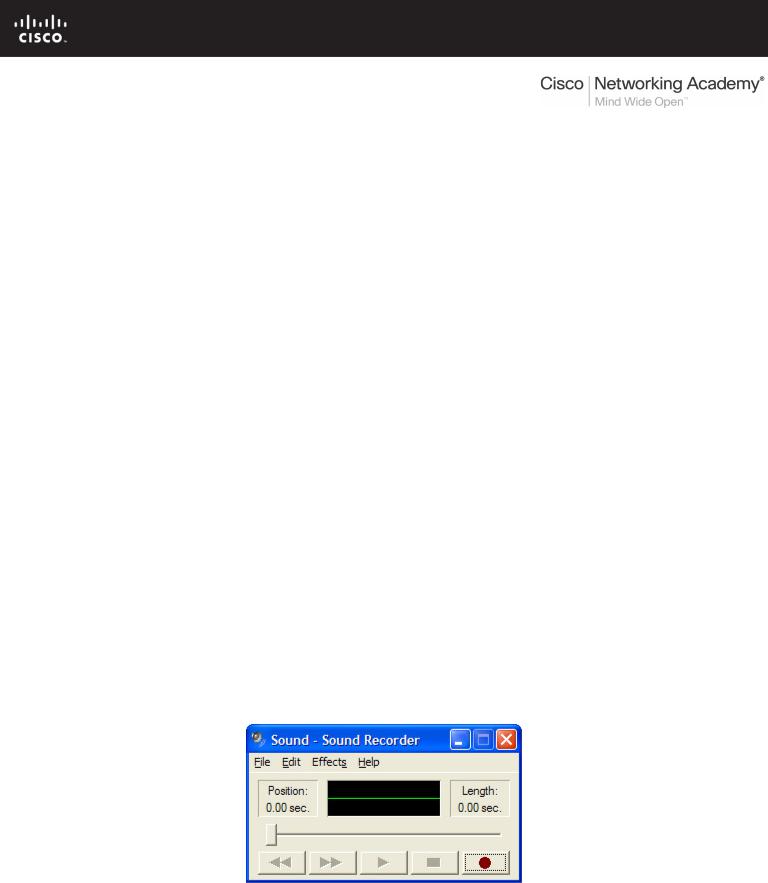
Step 1: Open the Windows Sound Recorder application.
The application can be found in Windows XP at Start > Programs >Accessories > Entertainment > Sound Recorder. The Sound Recorder interface is shown in Figure 1.
Figure 1. The Sound Recorder Interface
All contents are Copyright © 1992–2007 Cisco Systems, Inc. All rights reserved. This document is Cisco Public Information. |
Page 1 of 3 |
CCNA Exploration |
|
Network Fundamentals: |
|
Application Layer Functionality and Protocols |
Activity 3.4.1: Data Stream Capture |
Step 2: Record an audio file.
1.To begin recording, click the Record button on the Sound Recorder interface.
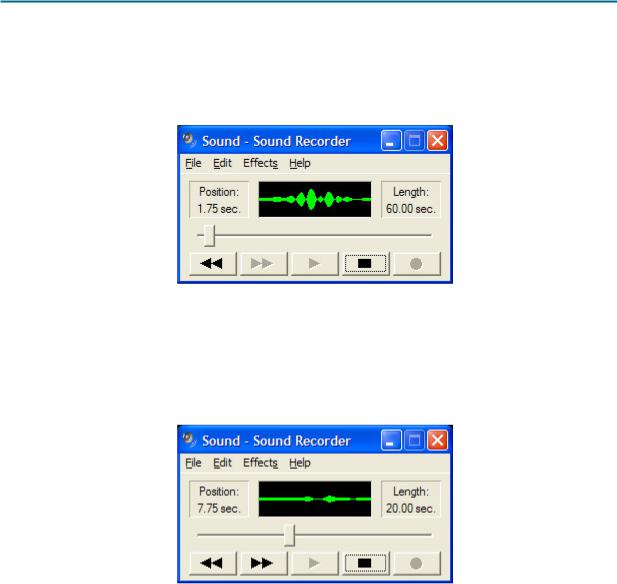
2.Speak into the microphone, or create sounds that can be picked up by the microphone. As the audio is recorded, the waveform of the sound should appear on the Sound Recorder interface, as shown in Figure 2.
Figure 2. Recording in Progress
3. Click the Stop button when you are finished.
Step 3: Check the audio file that was recorded.
1.Press the Play button to listen to the recording. The recording that you have made should be played back, as shown in Figure 3.
Figure 3. Playback
If you are unable to hear the recording, check the configuration of the microphone, speakers, and volume settings, and attempt to create the recording again.
If you are unable to create a recording, download an audio file from News@Cisco at the following URL: http://newsroom.cisco.com/dlls/podcasts/audio_feeds.html
2. Save the audio file to the desktop and proceed to Task 2.
Step 4: Save the audio file.
1.Save the audio file that you have created to the desktop. Name the file myaudio.wav.
2.After the file is saved, close the Sound Recorder application.
All contents are Copyright © 1992–2007 Cisco Systems, Inc. All rights reserved. This document is Cisco Public Information. |
Page 2 of 3 |

CCNA Exploration |
|
Network Fundamentals: |
|
Application Layer Functionality and Protocols |
Activity 3.4.1: Data Stream Capture |
Task 2: Observe the Properties of the Audio File
Step 1: View audio file properties.
Right-click the audio file that you saved to the desktop and click Properties from the popup menu. What is the file size in kilobytes? _______________
What is the file size in bytes? _______________
What is the file size in bits? _______________
Step 2: Open the audio file in Windows Media Player.
1.Right-click the audio file and select Open With > Windows Media Player.
2.When the file is open, right-click at the top of the Media Player interface and select File > Properties from the popup menu.
What is the length of the audio file in seconds? _______________
Calculate the amount of data per second in the audio file and record the result. _______________
Task 3: Reflection
Data files do not have to remain on the end devices where they are created. For example, you may want to copy the audio file that you created to another computer or a portable audio device.
If the audio file that you saved to the desktop were to be transferred at a rate of 100 megabits per second (Mbps), how long would it take for the file transfer to be completed?
__________________________________________________________________________________
Even with an Ethernet connection operating at 100 Mbps, the data that makes up a file is not transferred at this speed. All Ethernet frames contain other information, such as source and destination addresses, that is necessary for the delivery of the frame.
If 5% of the available 100 Mbps bandwidth is used up by the Ethernet overhead, and 95% of the bandwidth is left for the data payload, how long would it take for the file transfer to be completed?
___________________________________________________________________________________
Task 4: Clean Up
You may be required to remove the audio file that you have saved from the computer. If so, delete the file from the desktop.
Unless instructed otherwise, turn off the computer.
All contents are Copyright © 1992–2007 Cisco Systems, Inc. All rights reserved. This document is Cisco Public Information. |
Page 3 of 3 |