
6 - 4 MANUAL TRANSAXLE CLUTCH
WARNING:BEFORE PERFORMING STEP THREE BE SURE THAT THE AREA IN FRONT OF THE VEHICLE IS CLEAR OF OBSTRUCTIONS AND PEOPLE. VEHICLE MAY MOVE WHEN PERFORMING THIS TEST.
(3) Slowly depress the clutch pedal and feel for any vehicle motion when the starter is energized. If there is no motion the switch is properly adjusted. If motion is felt, repeat the adjustment procedure.
CLUTCH DISC REPLACEMENT
REMOVAL
(1)Remove transaxle. See Group 21, Manual Transaxle, for procedure.
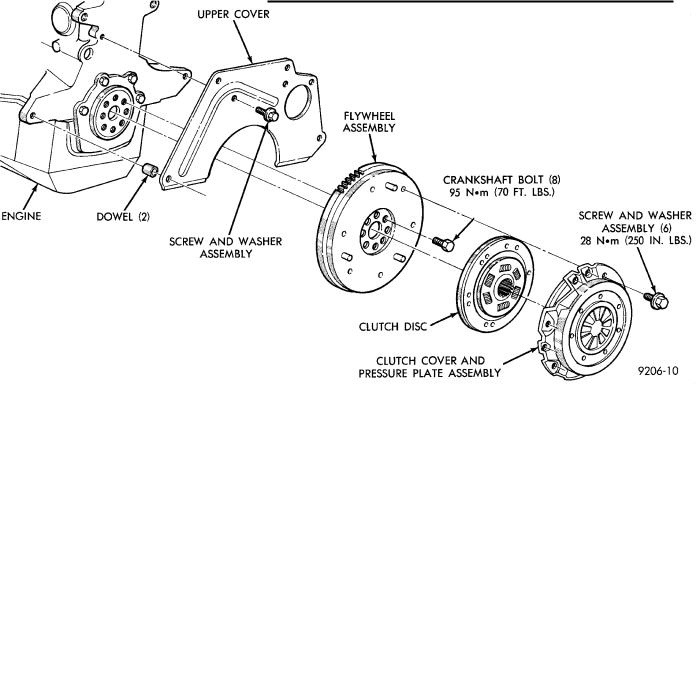
(2)Mark clutch cover and flywheel, to maintain their same relative positions when installing clutch assembly (Fig. 3).
Ä
(5) Remove the clutch pressure plate and cover assembly and disc from flywheel. Handle carefully to avoid contaminating the friction surfaces.
INSPECTION
(1)Inspect for oil leakage through engine rear main bearing oil seal and transaxle drive pinion seal. If leakage is noted, it should be corrected at this time.
(2)The friction faces of the flywheel and pressure plate should not have excessive discoloration, burned areas, small cracks, deep grooves, or ridges. Replace parts as required.
(3)Clean the flywheel face with crocus cloth or fine sandpaper (400-600 grade), then wipe the surface with mineral spirits. If the surface is severely scored, heat checked, or warped, replace the flywheel.
Fig. 3 Manual Transaxle Clutch
(3)Insert Clutch Disc Aligning Tool C-4676 through the clutch disc hub to prevent the clutch disc from falling and damaging the facings (Fig. 4).
(4)Loosen clutch cover attaching bolts, one or two turns at a time, in a crisscross pattern, to release spring pressure evenly and avoid cover damage.
CAUTION: Do not touch the clutch disc facing with oily or dirty hands. Oil or dirt transferred from your hands onto the clutch disc facing may cause clutch chatter.
CAUTION: Do not flat-machine the flywheel face. The surface profile is tapered.
(4) The heavy side of the flywheel is indicated by a daub of white paint near the outside diameter. To minimize the effects of flywheel unbalance, perform the following installation procedure:
(a) Loose assemble the flywheel to the crankshaft. Use new flywheel attaching bolts which have sealant on the threads. If new bolts are not available, apply Loctite sealant to the threads of the original bolts. This sealant is required to prevent engine oil leakage.
