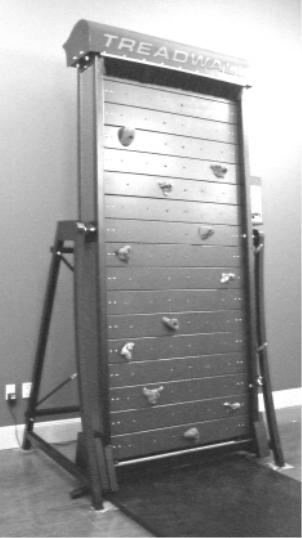

Purging the Hydraulic System:
Sometimes when the Treadwall is first assembled, the control system runs a bit rough and noisy - almost a grinding sound - and the wall doesn't descend smoothly. This is due to air in the system that foams into the oil and causes cavitation in the pump. To purge the air, put the wall at the steepest angle, set the cardio dial at the fastest setting, and pull the wall around steadily for about 15 seconds. Let the wall sit for about 5 - 10 minutes, and do it again. If you do this about 3 times, the air will percolate up into the reservoir where it belongs, and the wall will run smoothly.
Mat:
The mat has four loops that attach it to the bottoms of the support frame. To place the mat, pry up each corner with a length of 2x4.
Test climb:
Test the finished Treadwall by climbing for at least 200 feet at various angles. Newly installed Treadwalls will usually run a bit rough because of air in the hydraulic system. When this air has left the oil
– usually after a few climbing sessions – the resistance is much smoother. Other than this normal breaking-in, the wall should operate quietly without any binding or other impediments. Test the angle adjuster while climbing - it should work smoothly with little or no “bounce” in the cylinder.
The drive chain should be checked one more time (it stretches at first), and should be re-checked after a couple of weeks of service. Make sure someone on-site knows how to adjust this chain.
Check holds for tightness and retighten. Adjust any holds that seem awkward or out-of-place.
(15)
Pro body M4 install 090809.doc
The last word:
NOBODY LIKES GOING BACK!
Treadwalls get installed in the strangest places, sometimes hundreds of miles from where installers call home. Making that long trip across the panhandle and down through the wastelands to fix some little problem is a project best avoided.
It’s the little things that count - at least that is what we have found. Those little tiresome details have a tendency to sneak around to your backside and take a big bite. Here are some things that have shown up on the whack-your-head-and- say-“duh” film clips (and which we have all done at one time…):
Master link or Monster link?
Every master link has three parts. What if you leave off the plate with two holes? What if the spring clip isn’t put on right? It can get pretty ugly!
What the heck is our display showing?
Time? Distance? Dow Jones average? Whatever. It isn’t gonna work if the sensor and magnets aren’t adjusted right. And treat that reed-switch sensor with respect! And make sure the wire is out of harm’s way.
“Bolts and nuts are falling down falling down , falling down …”
And for some reason the shroud only has one bolt on the right side! Yes – it’s actually happened. Loss of concentration is my guess.
Check everything before putting on the last panels. Take your time.
“Chain-chain-chain chains that fool …”
Drive Chain too tight? Works great for Ralph but Alice can’t budge it. Too loose? Could be worse. Take out all the slack, but don’t over-tighten. Check it one last time before leaving, and make sure someone knows how to adjust it!
“Setscrews and turnbuckles-- --lockwashers, jam nuts-- …these are a few of my least favorite things!”
Especially when they aren’t set, turned, locked and jammed. Just take a couple of minutes to go over those little details and save yourself a big headache.
Call us Brewer’s Ledge if you have any questions. We can often answer a question in minutes that will save you much more time trying to understand. Please let us know any comments or suggestions you might have: we are always upgrading the materials as we learn more.
Hours: 9-5 E.S.T
Telephone: 800-707-9616
Email: sale@treadwall.com
(16)
Pro body M4 install 090809.doc
