

19. SURFACE AREA CALCULATION
You can calculate the area of land enclosed by three or more known points on a line by inputting the coordinates of the points.
Input |
Output |
Coordinates: P1 (N1, E1) |
Surface area: S |
P2 (N1, E2) |
|
P3 (N3, E3) |
|
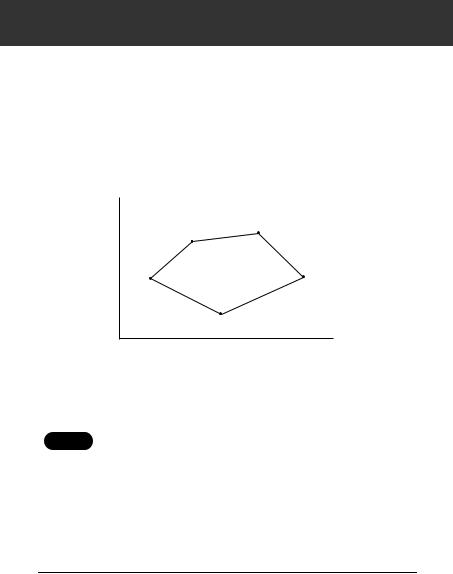
N
|
P3 |
|
P2 |
P1 |
S |
P4 |
|
|
P5 |
E
0
•Number of specified coordinate points: 3 or more, 30 or less
•Surface area is calculated by observing the points on a line enclosing an area in order or reading in the previously registered coordinates the points in order.
• If two or less points are used to measure an area, an error will
Caution
occur.
•Be sure to observe (or recall) points on an enclosed area in a clockwise or anticlockwise direction. For example, the area specified by entering (or recalling) point numbers 1, 2, 3, 4, 5 or 5, 4, 3, 2, 1 implies the same shape. However, if points are not entered in numerical order, the surface area will not be calculated correctly.
PROCEDURE Surface area calculation by observing points
1.Allocate the  softkey to the Meas mode screen.
“24.2 Allocating Key Functions”
80
19. SURFACE AREA CALCULATION
2.Press  to begin surface area calculation.
3.Sight the first point on the line enclosing the area, and press
 .
.
Press  again to begin observation.
The measured values are displayed.
•When  is pressed, registered coordinates can be
recalled and used in subsequent measurements.
“PROCEDURE Surface area calculation by reading in the points’ coordinates”
•The  function allows all registered data to be calculated
together.
•The  function requires each point to be observed individually
before area calculation is performed.
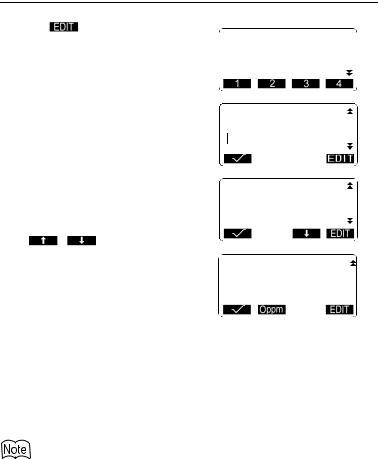
4.Press  to enter the value of point 1 in "Pt.01".
5.Repeat steps 3 to 4 until all points have been measured. Points on an enclosed area are observed in a clockwise or anticlockwise direction.
For example, the area specified by entering point numbers 1, 2, 3, 4, 5 or 5, 4, 3, 2, 1 implies the same shape.
After all known points necessary to calculate the surface area have been observed,  is displayed.
N |
12.345 |
E |
137.186 |
Z |
1.234 |
ZA |
90°01'25" |
HAR |
109°32'00" |
01:Pt_01 02:
03:
04:
05:
81
19. SURFACE AREA CALCULATION
6.Press  to display the calculated area.
7.Press  to quit area calculation and return to Meas
Mode.
Area calculation Pt.3
Area 468.064m2 0.00468ha
PROCEDURE Surface area calculation by reading in the points' coordinates
1.“PROCEDURE Surface area calculation by observing points” steps 1 to 2
2.Press  to display the list of coordinate data.
Known: Coordinate date stored in the Known Data Memory.
Crd./Stn: Coordinate data saved in the JOB selected in the "Coordinate Search JOB".
3.Select the first point in the list and press {  }.
}.
The coordinates of the first point is set as "Pt.01".
4.Repeat steps 2 to 4 until all points have been read in.
Points on an enclosed area are read in a clockwise or anticlockwise direction.
After all known points necessary to calculate the surface area have
been observed,  is displayed.
Pt. Pt.001
Pt. Pt.002
Pt. Pt.004
Pt. Pt.101
Pt. Pt.102
01:Pt.004 02:
03:
04:
05:
82
19. SURFACE AREA CALCULATION
5.Press  to display the calculated area.
6.Press  to quit area calculation and return to Meas
Mode.
Area calculation Pt.3
Area 468.064m2 0.00468ha
•It is also possible to perform area measurement when  on page 2 of the Meas mode screen is pressed, then "Area calc" is selected without allocating
the function key.
83
20. RECORDING DATA - RECORD MENU
In Record menu, you can store the measurement data (distance, angle, coordinates), station point data and note in the current JOB.
“21. SELECTING / DELETING A JOB”
•A total of 10000 data can be stored inside the instrument.
•If the same point number is input, the following screen is displayed.
N |
5.554 |
E |
-0.739 |
Z |
0.245 |
Pt. PNT-001
Overwrite?
•Press  to overwrite the present point.
•Press  to input a new name.
•Press  to record the point as another record with the same name
20.1Recording Instrument Station Data
Instrument station data can be stored in the current JOB.
•The items that can be recorded are the instrument station coordinates, point number, instrument height, codes, operator, date, time, weather, wind, temperature, air pressure and atmospheric correction factor.
•If instrument station data is not stored for the current JOB, the previously stored instrument data settings will be used.
PROCEDURE
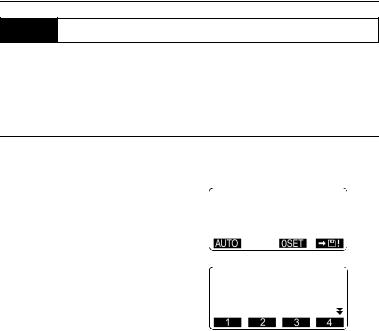
1.Press  in the third page of Meas mode to display <REC>.
•Current JOB name is displayed
2.Select "Stn data".
•Select  to recall and use the registered coordinates.
“12.1 Entering Instrument
Station Data”, “PROCEDURE
Reading in Registered
Coordinate Data”
84
20.RECORDING DATA - RECORD MENU
3.Press and set the following
data items. |
|
N0: |
|
|
56.789 |
|
|
|
|||||
|
E0: |
-1234567.789 |
|
|
|
||||||||
(1) |
Instrument station coordinates |
|
|
|
|||||||||
Z0: |
|
|
|
1.234 |
|
|
|
||||||
(2) |
Point number |
|
Pt.:Pt.003 |
|
|||||||||
|
Inst.h: |
|
|
1.234m |
|
||||||||
|
|
|
|
||||||||||
(3) |
Instrument height |
|
|
|
|||||||||
|
|
|
|
|
|
|
|
|
|
|
|||
(4) |
Codes |
|
|
|
|
|
|
|
|
|
|
|
|
(5) |
Operator |
|
Code |
|
|
|
|
|
|
|
|
||
|
|
|
|
|
|
|
|
|
|||||
(6) |
Date |
|
:pole |
|
|
|
|
|
|
|
|
||
(7) |
Time |
|
Operator: |
|
|||||||||
|
|
|
|
|
|
|
|
|
|
|
|
||
|
: |
SOKKIA |
|
|
|
|
|
|
|||||
(8) |
Weather |
|
|
|
|
|
|
|
|||||
|
|
|
|
|
|
|
|
|
|
|
|
||
(9) |
Wind |
|
|
|
|
|
|
|
|
|
|
|
|
(10) Temperature |
Date |
:Sep/28/1998 |
|
||||||||||
(11) Air pressure |
|
|
|||||||||||
(12) Atmospheric correction factor |
Time |
:00:00:00 |
|
|
|
||||||||
Weath: |
Fine |
|
|
|
|
||||||||
|
|
|
Wind |
|
:Calm |
|
|
|
|
||||
• When inputting code, press |
|
|
|
|
|
|
|
|
|
|
|
||
|
/ |
to use the |
|
|
|
|
|
|
|
|
|
|
|
registered codes. Align the cursor |
|
|
|
|
|
|
|
|
|
|
|
||
where you want to input the |
Temp. : |
12 |
°C |
|
|||||||||
Press |
|
:1013hpa |
|
||||||||||
registred code. |
|
|
|
||||||||||
|
ppm |
: |
-3 |
|
|
|
|||||||
• To set the atmospheric correction factor to 0ppm, press  . The temperature and air pressure are set to the default setting.
4.Check the input data, then press
 .
.
5.Press {ESC} to quit measurement and restore <REC>.
•SET automatically increments the last input number by 1.
•Maximum point number size: 14 (alphanumeric)
•Input range of target height: -9999.999 to 9999.999 (m)
•Maximum code size: 16 (alphanumeric)
•Weather selection: clear, cloudy, light rain, heavy rain, snow
•Wind selection: calm, gentle, light, strong, very strong
•Temperature range: -30 to 60 (°C)
•Air pressure range: 500 to 1400 (hPa), 375 to 1050 (mmHg)
•Atmospheric correction factor range (ppm): -499 to 499
85
20.RECORDING DATA - RECORD MENU
20.2Recording Angle Measurement Data
Angle measurement data can be stored in the current JOB.
•It is convenient to use  to perform automatic operation from angle measurement to recording.
PROCEDURE
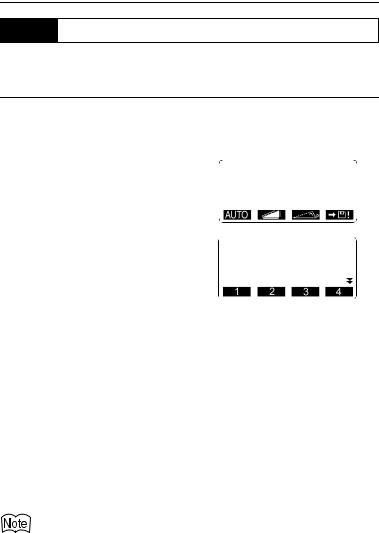
1.Press  in the third page of Meas mode to display <REC>.
2.Select "Angle data" and sight the point to be recorded.
Angle measurement values are displayed in real time.
3.Press  , then press
  . Set the following items.
(1)Point number
(2)Target height
(3)Code
4.Check the input data, then press
 .
.
5.To continue measurement, sight the next point, then perform steps 3 and 4 above.
• Press  to perform angle measurement and automatically
record the results.  is convenient for recording
measurement data when point number, code, and target height are not set.
6.Press {ESC} to quit measurement and restore <REC>.
REC/Angle |
rec 2922 |
||||
ZA |
60°15'40" |
|
|
||
HAR |
110°30'45" |
|
|
||
Pt.:Pt.002 |
|
|
|
|
|
ZA |
60°15'40" |
|
|
||
HAR |
110°30'45" |
|
|
||
Pt.: |
Pt.002 |
|
|
|
|
Tgt.h: |
|
1.234m |
|
|
|
86
20.RECORDING DATA - RECORD MENU
20.3Recording Distance Measurement Data
Distance measurement data can be stored in the current JOB.
PROCEDURE
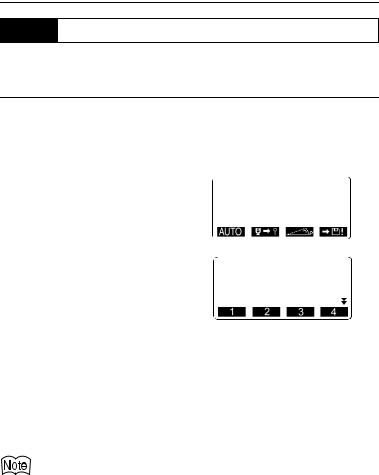
1.Press  in the first page of Meas mode to perform distance
measurement.
2.Press  in the third page of Meas mode. <REC> is displayed.
Select "Dist data" to display the measurement results.
3.Press  , then press
  . Set the following items.
(1)Point number
(2)Code
(3)Target height
4.Check the input data, then press
 .
.
5.To continue measurement, sight
the next point, press  , then perform steps 3 and 4 above.
• Press  to offset measurement in Record Mode.
REC/Dist |
rec |
2923 |
||||||
S |
|
123.456m |
|
|
|
|
||
ZA |
80°30'15" |
|
|
|
|
|||
HAR |
120°10'00" |
|
|
|
|
|||
Pt. |
:Pt.001 |
|
|
|
|
|||
S |
|
123.456m |
|
|
|
|
||
ZA |
80°30'15" |
|
|
|
|
|||
|
A |
|||||||
HAR |
120°10'00" |
|
|
|
|
|||
Pt: |
|
Pt.001 |
|
|
|
|
|
|
Tgt.h: |
|
1.234m |
|
|
|
|
||
6.Press {ESC} to quit measurement and restore <REC>.
•When the same point number data is overwritten, the overwritten data is deleted.
Once the data has been recorded,  is not displayed in order to prevent double recording.
87
20.RECORDING DATA - RECORD MENU
20.4Recording Coordinate Data
Coordinate data can be stored in the current JOB
PROCEDURE
1.Perform coordinates measurement in the Meas mode screen.
““12. COORDINATE MEASUREMENT””
2.Press  in the third page of Meas mode to display <REC>.
Select "Coord data" to display the measurement results.
3.Press  , then press
  . Set the following items.
(1)Point number
(2)Code
(3)Target height
4.Check the input data, then press
 .
.
5.To continue measurement, sight
the next point, press  , then perform steps 3 and 4 above.
6.Press {ESC} to quit measurement and restore <REC>.
REC/Coord |
rec 2923 |
||||
N |
344.284 |
|
|
||
E |
125.891 |
|
|
||
Z |
15.564 |
|
|
||
Pt. :Pt.003 |
|||||
N |
344.284 |
|
|
||
E |
125.891 |
|
|
||
Z |
15.564 |
|
|
||
Pt.: |
Pt.003 |
|
|
|
|
Tgt.h: |
|
2.000m |
|
|
|
•Once the data has been recorded,  is not displayed in order to prevent double recording..
88

20.RECORDING DATA - RECORD MENU
20.5Recording Distance and Coordinate Data
Distance measurement data and coordinate data can be stored in the current JOB at the same time.
•Both distance measurement data and coordinate data are recorded as the same point number.
•Distance measurement data is recorded first, then coordinate data is recorded.
PROCEDURE
1.Press  in the third page of Meas mode to display <REC>.
2.Select “Dist + Coord data” to display <REC/DIST + C>.
3.Sight the point and press  to begin the measurement.
The measurement results are displayed.
4.Press  , then press
  . Set the following items.
(1)Point number
(2)Target height
(3)Code
5.Check the input data, then press
 .
.
6.Press {ESC} to quit measurement and restore <REC>.
REC/DIST+C rec 3970
N |
0.051 |
E |
-0.004 |
Z |
1.486 |
Pt. |
:PNT-1234 |
89

20.RECORDING DATA - RECORD MENU
20.6Recording Notes
This procedure prepares notes data and records it in the JOB which is selected.
PROCEDURE
1.Press  in the third page of Meas mode to display <REC>.
Select "Note".
2. Press |
and enter the note |
rec 2823 |
data. |
REC/Note |
|
Data is |
tak |
3.After inputting the note data, press
 to return to <REC>.
Maximum note length: 60 characters (alphanumeric)
20.7Reviewing JOB Data
It is possible to display the data within the JOB that is selected.
•It is possible to search for data within the JOB to be displayed by point number. But the note data cannot be searched.
•Known point data that are entered from an external instrument are not reviewed.
PROCEDURE Reviewing JOB data
1.Press  in the third page of Meas mode to display <REC>.
Select "View" to display the list of recorded points.
Stn Pt.1
Dist 1
Crd. 2
Dist 3
Ang. 4
90
20. RECORDING DATA - RECORD MENU
2.Select the point number to be displayed in detail and press {  }. Details of the data is displayed. This screen contains distance measurement data.
•To display previous data item, press  .
.
•To display next data, press
 .
.
•Press  and press {▲} / {▼} to move from page to page.
•Press  to display first data.
•Press  to display last data.
•Press  to search for point number. Input the point number
after "Pt. No."
The search may take time if many data are registered.
3.Press {ESC} to conclude detailed display and restore the list of points.
4.Press {ESC} again to restore <REC>.
S |
123.4567m |
|
ZA |
20°31'21" |
|
HAR |
117°32'21" |
|
Pt.1 |
|
|
Tgt. |
12.345m |
|
|
•If more than two points with the same point name exist in the current JOB, SET finds the newer data only.
91