ATV500/ATV600/ATV650
SERVICE MANUAL
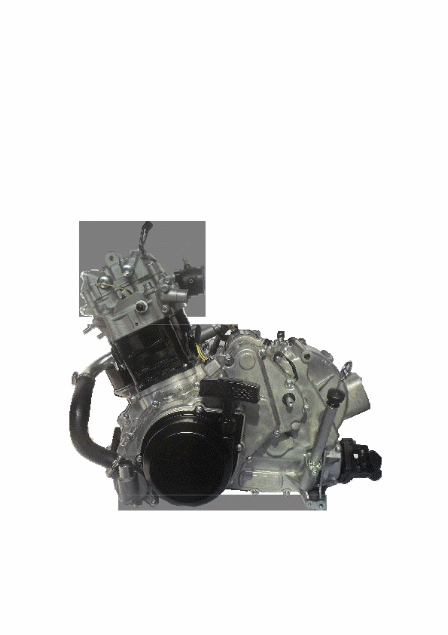
ENGINE
1
-------------------------------------------------CONTENTS-----------------------------------------------
ENGINE
COMPONENTS REMOVABLE WITH ENGINE IN PLACE...2
ENGINE
LEFT SIDE...2
ENGINE
RIGHT SIDE....2
ENGINE
CENTER...2
ENGINE
DISASSEMBLY.3
ENGINE
TOP SIDE.3
ENGINE
BOTTOM SIDE6
ENGINE
COMPONENTS INSPECTION AND SERVICING...15
CYLINDER
HEAD COVER15
CYLINDER
HEAD15
CAMSHAFT..26
CAM
CHAIN TENSION ADJUSTER28
CYLINDER28
PISTON.29
CONROD
/ CRANKSHAFT31
CLUTCH32
MOVABLE
DRIVE FACE AND DRIVEN FACE..34
DRIVE
BELT41
OIL
PUMP.41
TRANSFER..42
SHIFT
FORK44
GEARSHIFT
CAM...45
CRANKSHAFT..........46
DRIVE
TRAIN (INBOARD SIDE)..47
SHIM
ADJUSTMENT..56
CRANKCASE...60
DRIVE
BELT COVER .66
GENERATOR
COVER68
ENGINE
REASSEMBLY..70
ENGINE
BOTTOM SIDE70
ENGINE
TOP SIDE.82

ENGINE
2
ENGINE
COMPONENTS REMOVABLE WITH ENGINE IN PLACE
The
parts listed below can be removed and installed without removing the
engine from the frame.
Refer
to the page listed in each section for removal and installation
instructions.
ENGINE
LEFTSIDE
PARTS
Water
pump
Starter
cup
Starter
driven gear
Starter
idle gear
Gearshift
Generator
Water
pump drive/driven gear
REMOVAL
7
7
7
7
7
8
8
82
81
81
81
80
79
78
ENGINE
RIGHT SIDE
PARTS
Clutch
cover
Movable
drive/driven face
Fixed
drive face
Neutral
switch
Clutch
shoe
Cam
chain
Oil
pump
ENGINE
CENTER
PARTS
Starter
motor
Cam
chain tension adjuster
Cylinder
head cover
Camshaft
Cylinder
head
Cylinder
Piston
Oil
filter
Oil
sump filter
Gearshift
cam stopper
REMOVAL
9
9
10
10
11
11
12
77
76
76
75
74
74
73
REMOVAL
12
12
13
13
14
14
15
15
61
66
90
89
87
85
84
84
82
82
62
66

Installation
Installation
Installation
ENGINE
3
ENGINE
DISASSEMBLY
ENGINE
TOP SIDE
SPARK
PLUG
• Remove
the spark plug.
TOOL
Spark plug wrench set
STARTER
MOTOR
• Remove
the starter motor.
CAM
CHAIN TENSION ADJUSTER
• Remove
the cap bolt
○
1
and
insert the ─
○
screwdriver
into the sloted end of the cam chain
tension
adjuster and turn it clockwise to lock the
spring
tension.
• Remove
the cam chain tension adjuster.

ENGINE
4
○
A
• Remove
the valve timing inspection plug
○1
.
• Turn
the crankshaft and align the "TDC" line
○A
on
the
generator rotor with the index mark
○B
on the
crankcase.
○
1
B
○
CYLINDER
HEAD COVER
• Remove
the valve inspection caps.
• Remove
the cylinder head cover.
CAMSHAFT
• Flatten
the lock washer.
• Remove
the cam chain sprocket bolts and lock
washer.
• Remove
the C-ring
○1
.
• Remove
the camshaft and sprocket.
○
1
ENGINE
5
• Remove
the cam chain tensioner by removing the
bolt.
CYLINDER
HEAD
• Remove
the cylinder head bolts and nuts.
• Remove
the cylinder head bolts diagonally.
• Remove
the cylinder head.
CYLINDER
• Remove
the dowel pins and gasket.
• Remove
the cam chain guide 1
○
○
1

ENGINE
6
• Remove
the water hose/pipe.
• Remove
the cylinder nuts.
• Remove
the cylinder.
NOTE:
Be
careful not to drop the dowel pins into the
crankcase.
• Remove
the dowel pins and gasket.
PISTON
• Remove
the piston by removing the piston pin
circlip
○1
.
NOTE:
Place
a rag under the piston so as not to drop the
piiston
pin circ-lip into the crankcase.
○
1
ENGINE
BOTTOM SIDE
OIL
FILTER
• Remove
the oil filter with the special tool.
TOOL
Oil filter wrench
TOOL

ENGINE
7
WATER
PUMP
• Remove
the water pump.
RECOIL
HAND-OPERATED
• Remove
the RECOIL HAND-OPERATED。
STARTUP
DISK
• Remove
the startup disk nut with tool.
• Remove
the startup disk
STARTER
CUP
• Remove
the magneto cover.

ENGINE
8
STARTER
DRIVEN GEAR/IDLE GEAR
• Remove
the starter driven gear and idle gear.
GEARSHIFT
• Remove
the gearshift shaft
○
gear
○2
.
1
○
2
and
cam driven
○
1
GENERATOR
• Remove
the generator rotor bolt with a offset
wrench.
• Remove
the generator rotor with the special tool.
TOOL
Rotor remover
• Remove
the key
○1
.
• Remove
the starter driven gear
○2
.
WATER
PUMP DRIVE/DRIVEN GEAR
• Remove
the water pump drive/driven gears by
removing
the snap rings.
• Remove
the pin
○3
and pin
○4
.
TOOL
Snap ring pliers

ENGINE
9
CLUTCH
OUTER COVER
• Remove
the clutch outer cover.
MOVABLE
DRIVE FACE
• Remove
the movable drive face nut with the tool.
• Remove
the movable driven face nut with the tool.
• Remove
the movable drive face
• Remove
the movable drive space .

ENGINE
10
• Remove
the movable drive .
○
1
FIXED
DRIVE FACE
• Remove
the fixed drive face
○1
.
CLUTCH
SPACER
• Remove
the clutch spacer
• Remove
the clutch housing case
○2
together with
the
clutch housing/shaft
○3
.
•
NEUTRAL
SWITCH
• Remove
the neutral switch.
• Remove
the springs and pins.

ENGINE
11
• Remove
the breather pipe.
• Remove
the output shaft housing.
• Remove
the one way clutch
○1
.
○
1
CLUTCH
SHOE
• Remove
the clutch shoe nut with the special tool.
• Remove
the clutch shoe.
CAUTION
The
clutch shoe nut has left-hand threads.
TOOL
Rotor holder
CAM
CHAIN
• Remove
the cam chain.

ENGINE
12
• Remove
the oil pump drive gear bolt by engaging
a
rag between the gears as shown.
• Remove
the washer and oil pump drive gear.
1
○
○
2
• Remove
the pin
○1
and spacer
○2
.
OIL
PUMP
• Remove
the oil pump driven gear by removing the
snap
ring
○1
.
• Remove
the pin
○2
and washer.
• Remove
the oil pump.
TOOL
Snap ring pliers
2
○
○
1
• Remove
the left crankcase bolts.
• Remove
the right crankcase bolts.

ENGINE
13
○
1
TRANSFER/DRIVE
TRAIN/GEARSHIFT
• Remove
the reverse idle gear
○1
.
• Remove
the transfer input shaft 2
○
• Remove
the gearshift related parts.
• Remove
the transfer output shaft assembly
○3
.
○
2
○
3
• Remove
the front output shaft
output
shaft
○5
.
○
4
and
rear
○
5
○
4
• Remove
the C-ring.

ENGINE
14
○
1
BALANCER
• Remove
the balancer shaft driven gear
○1
.
• Remove
the key
○2
.
○
2
• Remove
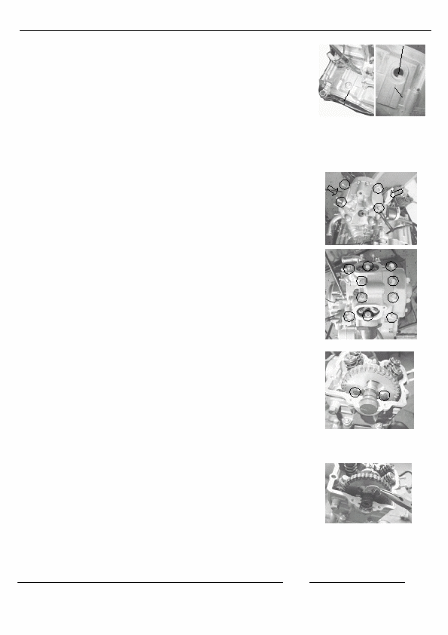
the balancer shaft with the special tool.
TOOL
Sliding shaft
TOOL
Attachment
• Remove
the crankshaft with the special tool.
TOOL
Crankcase separator

ENGINE
15
ENGINE
COMPONENTS INSPECTION AND SERVICING
CYLINDER
HEAD COVER
DISASSEMBLY
CAUTION
Be
sure to identify each removed part as to its location, and
lay
the parts out in groups designated as "Exhaust",
"Intake",
so that each will be restored to the original
location
during assembly.
○
B
○
A
• Remove
the rocker arm shaft bolts A
○
• Remove
the rocker arm shaft by using 6 mm bolts
○B
.
CYLINDER
HEAD COVER DISTORTION
After
removing sealant from the fitting surface of the cylinder head
cover,
place the cylinder head cover on a surface plate and check
for
distortion with a thickness gauge.
DATA
Cylinder head cover distortion
Service
Limit: 0.05 mm (0.002 in)
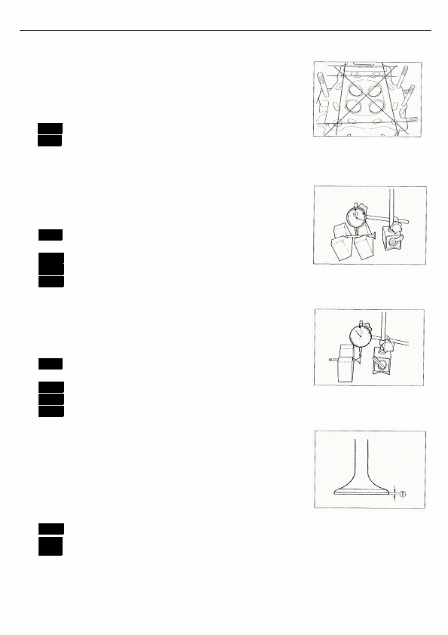
TOOL
Thickness gauge
If
the distortion exceeds the limit, replace the cylinder head cover.
ROCKER
ARM SHAFT O.D.
Measure
diameter of rocker arm shaft.
DATA
Rocker arm shaft O.D. (IN & EX)
Standard:
11.977 -11.995 mm
TOOL
Micrometer(0-25mm)
○
A

ENGINE
16
ROCKER
ARM I.D.
When
checking the valve rocker arm, the inside
diameter
of the valve rocker arm and wear of the
camshaft
contacting surface should be checked.
DATA
Rocker arm I.D.
Standard:
12.000 - 12.016mm
TOOL
Dial calipers
REASSEMBLY
NOTE:
Intake
rocker arm shaft
○A
has the oil holes.
A
○
• Apply
engine oil to the rocker arms and their shafts.
• Install
the rocker arms and tighten the rocker arm
shaft
bolts to the specified torque.
Rocker
arm shaft bolt: 28 N m (2.8 kgf-m, 20.0 Ib-ft)
OIL
OIL
CYLINDER
HEAD
DISASSEMBLY
• Remove
the intake pipe.
• Remove
the engine coolant temperature switch 1
○
and
thermostat cover
○2
.
○
1
○
2

ENGINE
17
• Remove
the thermostat.
• Compress
the valve spring and remove the valve
cotters
from the valve stem with the special tools.
TOOL
Valve spring compressor
TOOL
Attachment
TOOL
Tweezers
• Remove
the valve spring retainer and valve spring.
• Remove
the valve from the other side.
• Remove
the oil seal with long-nose pliers.
• Remove
the valve spring seat.
NOTE:
Removal
of valves completes ordinary disassembling
work.
If valve guides have to be removed for
replacement
after inspecting the related parts, carry
out
the steps shown in the valve guide servicing.

ENGINE
18
CYLINDER
HEAD DISTORTION
• Decarbonize
the combustion chamber.
Check
the gasket surface of the cylinder head for distortion using a
straightedge
and thickness gauge. Take clearance readings at
several
places. If any clearance reading exceeds the service limit,
replace
the cylinder head with a new one.
TOOL
Thickness gauge
DATA
Cylinder head distortion
Service
Limit: 0.05 mm (0.002 in)
VALVE
STEM RUNOUT
Support
the valve with "V" blocks, as shown, and check its runout
with
a dial gauge.
The
valve must be replaced if the runout exceeds the limit.
DATA
Valve
stem runout
Service
Limit: 0.05 mm (0.002 in)
TOOL
Magnetic stand
TOOL
Dial gauge(1/100 mm)
TOOL
V-block
VALVE
HEAD RADIAL RUNOUT
Place
the dial gauge at right angles to the valve head face, and
measure
the valve head radial runout.
If
it exceeds limit, replace the valve.
DATA
Valve head radial runout
Service
Limit: 0.03 mm (0.001 in)
TOOL
Magnetic stand
TOOL
Dial gauge(1/100 mm)
TOOL
V-block
VALVE
FACE WEAR
Visually
inspect each valve face for wear or damage. If any
abnormal
wear is found, replace the respective valve with a new
one.
Measure the valve head thickness
○T
. If the valve head
thickness
is not within the specified value, replace the value with a
new
one。
TOOL
Vernier calipers
DATA
Valve
head thickness T
○
Service
Limit: 0.5 mm (0.02 in)