

Using the Software on the Macintosh Platform – Advanced Techniques |
59 |
|
|
Editing Movies
You can create and edit movies: link movies and stills that have been downloaded to your computer, add background music, superimpose titles and other text, and apply various effects to the movies.
1 Select the image(s) to edit in ImageBrowser’s Browser Area (movies or stills).
You can select multiple movies or stills.
2 Click the [Edit] menu and select [Movie Edit].
3 Follow the steps displayed in the middle of the window to edit the movie and save it.
Follow these steps to proceed.
Instructions
Click this button to play the movie being edited.
Click this button for detailed operational instructions.
Storyboard Area |
Transition Effect Box |
Displays thumbnails of the |
Appears between adjacent |
selected images. |
images and displays the |
Links images in order from |
symbols of the transition |
left to right. |
effects linking images. |
Macintosh
Using the Software on the Macintosh Platform – Advanced Techniques |
60 |
|
|
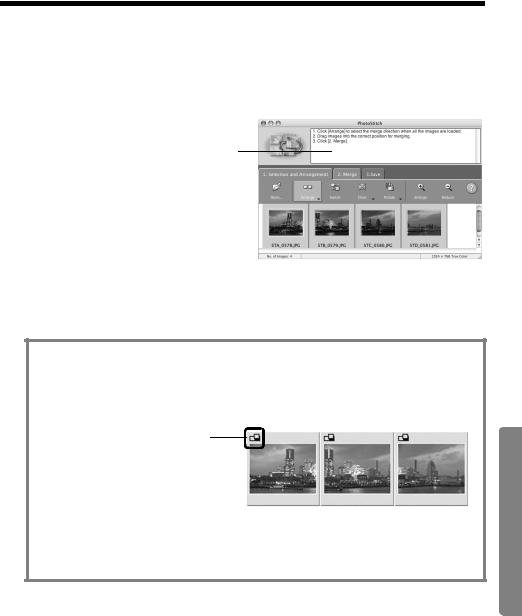
Merging Panoramic Images - PhotoStitch
You can create a wide panoramic image by merging images of a scene shot separately. PhotoStitch automatically detects the overlapping areas of adjacent images and corrects for the size and orientation. You can also manually specify the overlapping areas.
1 Select a series of images in the ImageBrowser’s Browser Area.
2 Click the [Edit] menu and select [PhotoStitch].
Instructions
3 Merge the images following the instructions in the guidance panel at the top of the PhotoStitch window.
Images Shot in Stitch Assist Mode
It is easy to merge images if they are shot with the camera's Stitch Assist mode because PhotoStitch can automatically detect the image order and orientation. The series of images are saved together in a single folder when they are downloaded from the camera.
Symbol displayed by images shot in Stitch Assist mode.
•Some camera models may not support Stitch Assist mode.
•See the Camera User Guide for information about shooting in Stitch Assist mode. •Images shot in Stitch Assist mode with a wide converter, teleconverter or close-up
lens cannot be merged accurately.
Macintosh
Using the Software on the Macintosh Platform – Advanced Techniques |
61 |
|
|
Enjoy Customizing Your Camera with the My Camera Settings
My Camera functions can are only available with camera models listed as compatible with My Camera functions in the Specifications section of the
Camera User Guide.
The start-up image, start-up sound, shutter sound, operation sound, and self-timer sound are called the My Camera settings. You can add your favorite images and sounds from your computer to the My Camera settings. This topic explains how to upload the My Camera settings saved onto your computer to the camera and vice versa.
To register the My Camera settings with the camera, ensure that you install the software that came with the camera.
Displaying the My Camera Window
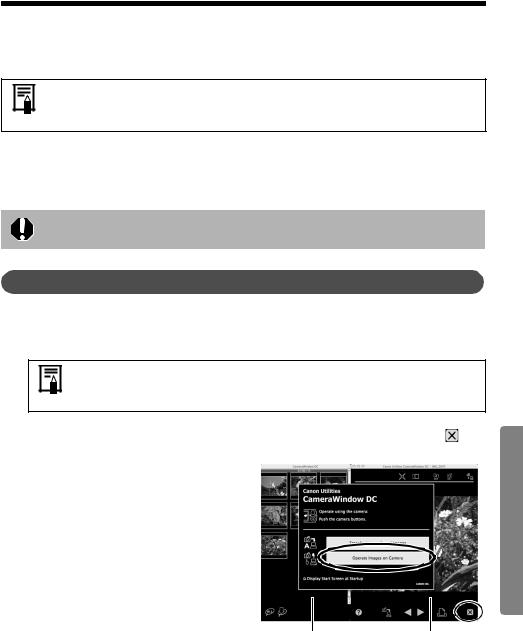
1 After connecting the supplied interface cable to the computer’s USB port and the camera’s DIGITAL terminal, turn on the camera power, set it to playback mode and prepare it to communicate with the computer
Procedures for attaching the camera to the computer and placing the camera in the correct mode for connecting vary between camera models. See the Camera User Guide.
2 If CameraWindow appears, click [Operate Images on Camera] followed by |
in |
the View Window. |
|
CameraWindow |
|
Macintosh
Thumbnail Window |
View Window |
3 Double-click the [Applications] folder, followed by the [Canon Utilities] folder, [CameraWindow] folder and the [MyCamera DC] icon.
The My Camera window will display.
Using the Software on the Macintosh Platform – Advanced Techniques |
62 |
|
|
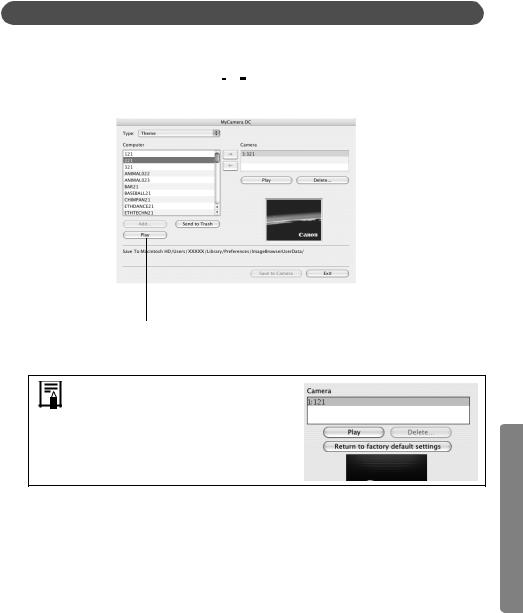
The My Camera Window
ImageBrowser already contains several pre-recorded My Camera settings. You can check these items with the My Camera window.
|
|
|
|
Save to Camera |
|
|
Save to Computer |
|||||||
|
|
|||||||||||||
|
|
|
|
|
|
|
|
|
|
|
|
|
|
Play Button |
|
|
|
|
|
|
|
|
|
|
|
|
|
||
|
|
|
|
|
|
|
|
|
|
|
|
|
|
Plays the audio |
Type |
|
|
|
|
|
|
|
|
|
|
|
|
|
from the settings |
|
|
|
|
|
|
|
|
|
|
file in the camera. |
||||
|
|
|
|
|
|
|
|
|
||||||
Select the |
|
|
|
|
|
|
|
|
||||||
|
|
|
|
|
|
|
|
|
||||||
settings type. |
|
|
|
|
|
|
|
|
Camera |
|||||
|
|
|
|
|
|
|
|
|||||||
|
|
|
|
|
|
|
|
|
|
|
|
|
|
|
|
|
|
|
|
|
|
|
|
|
|
|
|
||
Computer |
|
|
|
|
|
|
|
|
|
|
|
|
Displays the settings |
|
|
|
|
|
|
|
|
|
|||||||
|
|
|
|
|
|
|
|
|
|
|
in the camera. |
|||
Displays the list |
|
|
|
|
|
|
|
|
||||||
|
|
|
|
|
|
|
|
|
||||||
of settings files |
|
|
|
|
|
|
|
|
Delete Button |
|||||
|
|
|
|
|
|
|
|
|||||||
saved onto the |
|
|
|
|
|
|
|
|
Deletes a settings |
|||||
computer. |
|
|
|
|
|
|
|
|
|
file from the |
||||
|
|
|
|
|
|
|
|
|
|
|
|
|
|
camera. |
|
|
|
|
|
|
|
|
|
|
|
|
|
|
|
|
|
|
|
|
|
|
|
|
|
|
|
|
|
|
Play Button |
|
Send to Trash Button |
Save to Camera Button |
|
|
Deletes a settings file |
Click here to save the |
||
Plays the audio from the |
||||
from the computer. |
settings onto the |
|||
selected settings file. |
||||
|
camera. |
|||
|
|
|
||
Depending on the camera, the [Return to factory default settings] button will display. Clicking this button will return the My Camera setting to the factory default setting.
Macintosh
Using the Software on the Macintosh Platform – Advanced Techniques |
63 |
|
|
Saving the My Camera Settings to the Camera
• My Camera settings can be selected and saved in either of two ways to the camera: individually or in theme sets.
•The “Animal” theme, for example, features an animal in the start-up image and animal calls in each of the sound files. The names of the prepared files for the various My Camera settings themes all begin with the same root name. The start-up image and sound files in the "Animal" theme, for example, all begin with “Animal~”.
Do not detach the interface cable, turn the camera power off or do anything else that could disconnect the camera from the computer while the My Camera settings are being saved to the camera or the settings from the camera are being saved to the computer.
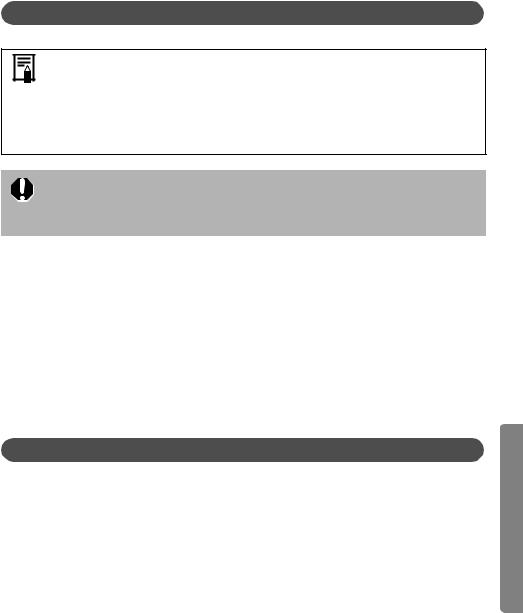
1 Select the type of setting in the Type list box that you wish to save to the camera. 2 Select the setting from the Computer list that you would like to add.
3 Select the setting in the Camera list that you would like to change and click the
 button.
If a setting for this category has previously been saved to the camera, press [OK] and it will be overwritten.
Repeat steps 1-3 as required.
4 Click the [Save to Camera] button.
Click [OK] to conclude the process of saving the My Camera settings to the camera. To use this data on the camera, change the start-up image and sound settings on the camera itself. Please see the Camera User Guide for these instructions.
Saving the Camera’s My Camera Settings to the Computer
1 Select the type of setting you wish to save to the computer from the Type list box. 2 Select the setting in the Camera list that you wish to save to the computer.
3 Click the  button.
4 Input a file name to the selected setting and click the [OK] button.
This concludes the process of saving the My Camera settings to the computer. Repeat steps 1-4 as required.
Macintosh
Using the Software on the Macintosh Platform – Advanced Techniques |
64 |
|
|
Adding New Data to the My Camera Window
Create a new image or sound file and add it to the My Camera window.
• Adding Image and Sound Files After Creating Them
Create an Original Start-up Image File and then Add It
Start by using an image editing program to create the image file that will become the start-up image and save it to the computer.
1 Double-click the [Applications] folder, followed by the [Canon Utilities] folder, [CameraWindow] folder and the [MyCamera DC] icon.
The My Camera window will display.
2
3
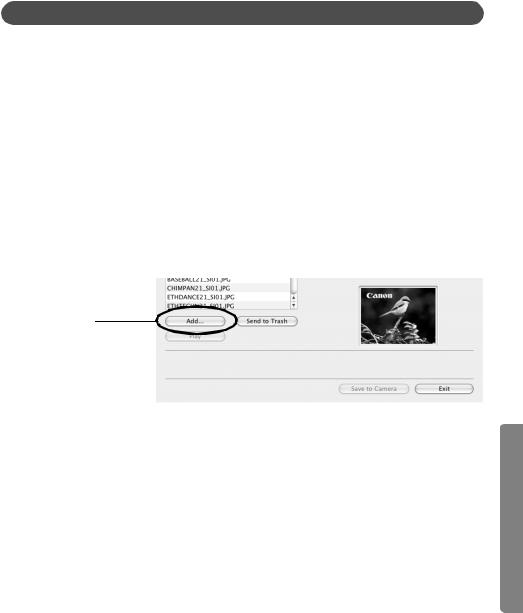
Select the [Start-up Image] in Type.
Click [Add].
Add Button
Adds images and sound files for use as settings files. Added files display in the list.
4 Select the file you created and click [Open].
This concludes the process for adding new data.
You can add the settings files you just added to the computer to the camera using the same procedures as in Saving the My Camera Settings to the Camera (p. 63).
Macintosh
Using the Software on the Macintosh Platform – Advanced Techniques |
65 |
|
|
Add an Original Sound File
Change the file to a WAV sound file after you have copied the sound file to the computer. Then proceed with the steps as described in Create an Original Start-up Image File and then Add It.
• Use settings like those below when creating an image file for the startup image with an image editing program.
Compression Method |
: JPEG (Baseline JPEG) |
Data Sampling |
: 4:2:0 or 4:2:2 |
Pixels (w x h) |
: 320 x 240 pixels |
•Use settings like those below when creating a sound file with a sound recording program.
Compression Method |
: WAV (Monaural) |
Quantifying Bits |
: 8 bit |
Sampling Frequency |
: 11.025 kHz or 8.000 kHz |
Use the following lengths as guidelines for the length of sound file that can be saved to the camera.
Type |
Duration in Seconds |
||
|
|
||
11.025 kHz |
8.000 kHz |
||
|
|||
|
|
|
|
Start-Up Sound |
1.0 sec. or less |
1.3 sec. or less |
|
|
|
|
|
Shutter Sound |
0.3 sec. or less |
0.4 sec. or less |
|
|
|
|
|
Operation Sound |
0.3 sec. or less |
0.4 sec. or less |
|
|
|
|
|
Self-Timer Sound |
2.0 sec. or less |
2.0 sec. or less |
|
|
|
|
|
Macintosh