
- •Table of Contents
- •Please Read
- •Getting Started
- •Preparations
- •Shooting Still Images
- •Viewing Still Images
- •Erasing
- •Printing
- •Embedding the Date in the Image Data
- •Shooting Movies
- •Viewing Movies
- •Downloading Images to a Computer
- •System Map
- •Learning More
- •Components Guide
- •Indicators
- •Basic Operations
- •Menus and Settings
- •Information Displayed on the LCD Monitor and Menus
- •Using the LCD Monitor
- •Commonly Used Shooting Functions
- •Using the Optical Zoom
- •Using the Flash
- •Shooting Close-ups (Macro)
- •Using the Self-Timer
- •Changing the Compression (Still Images)
- •Setting the Image Stabilizer Function
- •Adjusting the ISO Speed
- •Shooting Using the Mode Dial
- •Mode Dial
- •Shooting Modes for Specific Scenes
- •Program AE
- •Setting the Shutter Speed
- •Setting the Aperture
- •Movie Shooting
- •Advanced Shooting Functions
- •Continuous Shooting
- •Setting the Flash
- •Selecting an AF Frame Mode
- •Selecting a Subject to Focus On (Face Select and Track)
- •Adjusting the Exposure Compensation
- •Switching between Metering Modes
- •Adjusting the Tone (White Balance)
- •Shooting in a My Colors Mode
- •Setting the Display Overlays
- •Registering Settings to the Button
- •Playback/Erasing
- •Viewing Magnified Images
- •Check the Focus and Facial Expressions of Subjects (Focus Check Display)
- •Jumping to Images
- •Organizing Images by Category (My Category)
- •Viewing Movies
- •Rotating Images in the Display
- •Playback with Transition Effects
- •Automated Playback (Slide Shows)
- •Red-Eye Correction Function
- •Changing the Recording Pixel (Resize)
- •Attaching Sound Memos to Images
- •Protecting Images
- •Erasing All Images
- •Print Settings/Transfer Settings
- •Setting the DPOF Print Settings
- •Setting the DPOF Transfer Settings
- •Configuring the Camera
- •Power Saving Function
- •Formatting Memory Cards
- •Resetting the File Number
- •Creating an Image Destination (Folder)
- •Setting the Auto Rotate Function
- •Resetting Settings to Their Default Values
- •Connecting to a TV
- •Shooting/Playback Using a TV
- •Troubleshooting
- •List of Messages
- •Appendix
- •Safety Precautions
- •Preventing Malfunctions
- •Using the Power Kits (Sold Separately)
- •Using the Lenses (Sold Separately)
- •Using an Externally Mounted Flash (Sold Separately)
- •Replacing the Date Battery
- •Camera Care and Maintenance
- •Specifications
- •Index
- •Functions Available in Each Shooting Mode
73

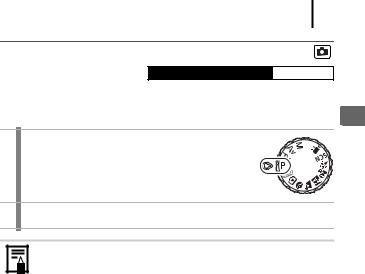
 Program AE
Available Shooting Modes  p. 201
The camera automatically sets the shutter speed and aperture value to match the brightness of the scene. You can set the ISO speed, exposure compensation and white balance.
1 Set the mode dial to  .
.
2 Shoot.
z When a correct exposure cannot be obtained, the shutter speed and aperture values are shown in red on the LCD monitor when the button is pressed halfway. Use the following shooting methods to obtain the correct exposure and make them show in white.
-Use the flash (p. 60)
-Adjust the ISO Speed (p. 68)
-Change the metering method (p. 100)
Dial Mode the Using Shooting
74
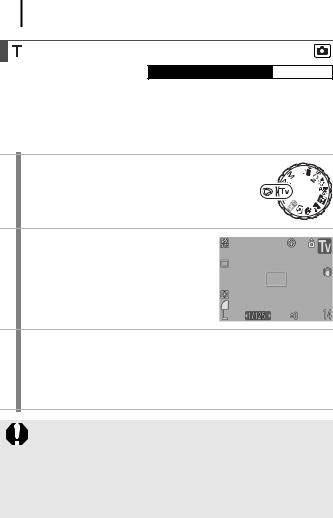
 Setting the Shutter Speed
Available Shooting Modes  p. 201
When you set the shutter speed, the camera automatically selects an aperture value to match the brightness.
Faster shutter speeds allow you to catch an instantaneous image of a moving subject, while slower speeds create a flowing effect and allow you to shoot without a flash in dark areas.
1 Set the mode dial to  .
.
2 Set the shutter speed.
1.Use the  or
or  button to change the shutter speed.
3 Shoot.
•If you press the shutter button halfway and the aperture value is shown in red, the image is underexposed (insufficient light) or
overexposed (too much light). Use the  or
or  button to adjust the shutter speed until the aperture value shows in white.
The nature of CCDs is such that noise in the recorded image increases at slow shutter speeds. This camera, however, applies special processing to images shot at shutter speeds slower than 1.3 seconds to eliminate the noise, thereby producing high-quality images (Nevertheless, a certain amount of processing time may be required before the next image can be shot).

75
z The aperture value and shutter speed change according to the zoom state as follows.
|
Aperture Value |
Shutter Speed (seconds) |
|
Maximum Wide Angle |
f/2.6 – 3.5 |
15 to 1/1250 |
|
f/4.0 – 8.0 |
15 to 1/2000 |
||
Maximum Telephoto |
f/5.5 – 7.1 |
15 to 1/1250 |
|
f/8.0 |
15 to 1/2000 |
||
|
z The fastest shutter speed for built-in flash synchronization is 1/500 second. The camera automatically resets the shutter speed to 1/500 second or slower, if a faster speed is selected.
Shutter Speed Display
zThe numbers in the table below indicate the shutter speed in seconds. 1/160 indicates 1/160 second. Also, quote marks indicate the decimal place, so that 0"3 indicates 0.3 second and 2" indicates 2 seconds.
15" 13" 10" 8" 6" 5" 4" 3"2 2"5 2" 1"6 1"3 1" 0"8 0"6 0"5 0"4 0"3 1/4 1/5 1/6 1/8 1/10 1/13 1/15 1/20 1/25 1/30 1/40 1/50 1/60 1/80 1/100 1/125 1/160 1/200 1/250 1/320 1/400 1/500 1/640 1/800 1/1000 1/1250 1/1600 1/2000
Dial Mode the Using Shooting
76
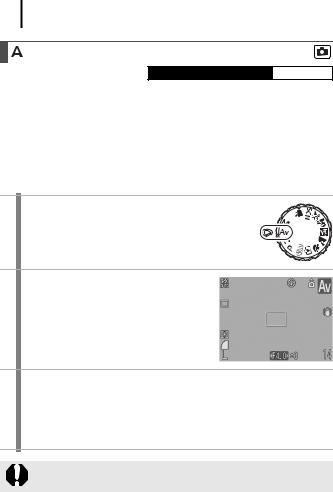
 Setting the Aperture
Available Shooting Modes  p. 201
The aperture adjusts the amount of light entering through the lens. When you set the aperture, the camera automatically selects a shutter speed to match the brightness.
Selecting a lower aperture value (opening the aperture) allows you to blur the background and create a beautiful portrait.
A higher aperture value (closing the aperture) brings the entire range from foreground to background into focus. The larger the aperture value, the greater the range of the image brought into clear focus.
1 Set the mode dial to  .
.
2 Set the aperture value.
1.Use the  or
or  button to change the aperture value.
3 Shoot.
•If you press the shutter button halfway and the shutter speed is shown in red, the image is underexposed (insufficient light) or
overexposed (too much light). Use the  or
or  button to adjust the aperture value until the shutter speed shows in white.
Some aperture values cannot be selected depending on the zoom position (p. 75).
77
zThe fastest shutter speed for built-in flash synchronization is 1/500 second. Even if an aperture value was previously set, the camera may automatically change that value to match the synchronized flash shutter speed.
Aperture Value Display
z The larger the aperture value, the smaller the lens aperture.
F2.6 F2.8 F3.2 F3.5 F4.0 F4.5 F5.0 F5.5 F5.6 F6.3 F7.1 F8.0 ShootingUsing
Mode the Dial
78
Manually Setting the Shutter Speed
and Aperture
Available Shooting Modes  p. 201
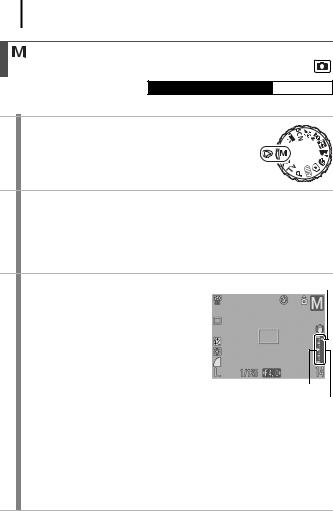
You can manually set the shutter speed and aperture to shoot images.
1 Set the mode dial to  .
.
2 Set the shutter speed and aperture value.
1.Press the  button to select the shutter speed or aperture value.
2.Use the  or
or  button to change the shutter speed or aperture value.
3 Shoot.
•The current exposure level appears on the right side of the exposure level
indicator, while the correct exposure level appears in the center on the left side of the indicator. You can check the difference between the current exposure level and the correct exposure level. If the difference is more than ±2 stops, the current
exposure level appears in red on the LCD monitor.
•When you press the shutter button halfway, the difference between the correct exposure* and the current exposure level appears on the LCD monitor. If the difference is more than 2 stops, “–2” or “+2” appears on the LCD monitor in red.
*The standard exposure is calculated by measuring the brightness according to the selected metering method.
79
z If the zoom is adjusted after these values are set, the aperture value or the shutter speed may change in accordance with the zoom position (p. 75).
z The brightness of the LCD monitor matches the selected shutter speed and aperture value. When you select a fast shutter speed or shoot a subject that appears dark, set the
flash to |
|
(Flash on) to make the LCD monitor display |
bright. |
|
DialModetheUsingShooting |
|
|
