

81
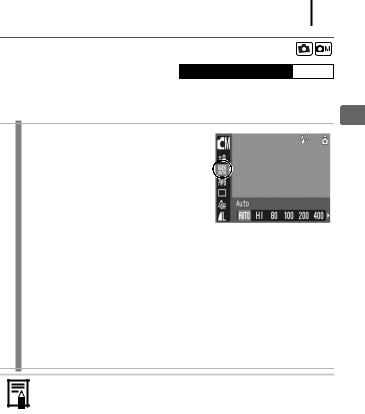
 Adjusting the ISO Speed
Available Shooting Modes  p. 176
Raise the ISO speed to use a fast shutter speed when you wish to reduce the effects of camera shake or avoid blurry subjects, or to turn the flash off when shooting in a dark area.
1 Adjust the ISO Speed
1.Press the FUNC./SET button.
2.Use the S or T button to select 

 and the W or X button to change the setting.
3.Press the FUNC./SET button.
•Selecting 
 (Auto) or
  (High ISO Auto) sets the optimal ISO speed for the light condition when shooting. Since the ISO speed setting will automatically be raised in dark places, the camera will select a faster shutter speed and reduce the chances of camera shake.
•To put priority on image quality, select 
 (Auto).
•Selecting  (High ISO Auto) sets the optimal ISO speed also when the camera detects motion. With some shooting scenes, it may set the ISO speed higher* than the Auto mode, reducing the chances of camera shake.
*Noise may increase in the captured image compared to  .
.
z The camera automatically applies noise reduction processing when you shoot at a high ISO speed.
zIf the camera is set at  or
or  , the ISO speed automatically set by the camera will be displayed when pressing shutter button halfway or in playback information.
Methods Shooting Various

82
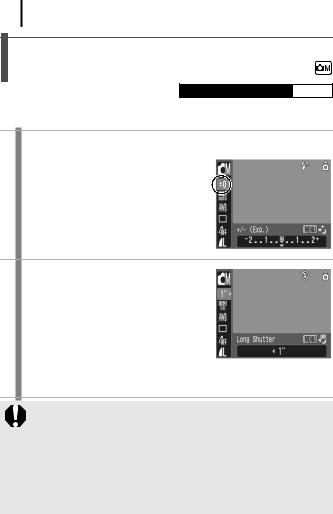
Adjusting the Exposure Compensation
Available Shooting Modes  p. 176
Adjust the exposure compensation to a positive value to avoid making the subject too dark when it is backlit or shot against a bright background. Adjust the exposure compensation to a negative value to avoid making the subject too bright in night shots or when shot against a dark background.
1 Adjust the exposure.
1. Press the FUNC./SET button.
2.Use the S or T button to select  and the W or X button to adjust the setting.
3.Press the FUNC./SET button.
To Cancel the Exposure Compensation
Restore the compensation value to [0].

83
 Switching between Metering Modes
Available Shooting Modes  p. 176
|
|
|
|
Appropriate for standard shooting conditions, |
|
|
|
|
including backlit scenes. The camera divides |
|
|
|
|
images into several zones for metering. It |
|
|
|
Evaluative |
evaluates complex lighting conditions, such as the |
|
|
|
|
position of the subject, the brightness, the direct |
|
|
|
|
light, and the backlighting, and adjusts the settings |
|
|
|
|
to the correct exposure for the main subject. |
|
|
|
Center |
Averages the light metered from the entire frame, |
|
|
|
but gives greater weight to the subject matter at |
|
|
|
|
Weighted Avg. |
|
|
|
|
the center. |
|
|
|
|
|
|
|
|
|
|
|
|
|
|
|
Use when there is a large difference in brightness |
|
|
|
Spot |
between the subject and the surroundings. Sets |
|
|
|
the exposure to suit the subject at the center of the |
|
|
|
|
|
|
|
|
|
|
composition. |
|
|
|
|
|
1 Select [Light Metering].
1. Press the MENU button.
2.In the  menu, use the S or T button to select [Light Metering].
2 Accept the setting.
1.Use the W or X button to select a metering mode.
2.Press the MENU button.
In Long Shutter mode, the metering mode is automatically fixed to [Evaluative].
Methods Shooting Various
84
Setting a Slow Shutter Speed
(Long Shutter Mode)
Available Shooting Modes  p. 176
You can set the shutter speed to a slow setting to make dark subjects appear brighter.
1 Select the Long Shutter mode.
1. Press the FUNC./SET button.
2. Use the S or T button to select  . 3. Press the MENU button.
2 Change the shutter speed.
1.Use the W or X button to adjust the setting.
2.Press the FUNC./SET button.
•The higher the value, the brighter the recorded image becomes.
•If you press the MENU button at this
point, you will return to the Exposure Compensation setting screen.
z The brightness of the image appearing on the LCD monitor and the recorded image may differ.
z The nature of CCD image sensors is such that noise in the recorded image increases at long shutter speeds. This camera, however, applies special processing to images shot at shutter speeds of 1.3 seconds or slower to eliminate the noise, thereby producing high-quality images. A certain amount of processing time, however, may be required before the next image can be shot.

|
|
|
|
|
|
|
|
|
85 |
|
|
|
|
|
|
|
|
|
|
|
|||
|
|
|
|
|
z Use the LCD monitor to confirm that the image was recorded |
|
|||||
|
|
|
|
|
at the desired brightness |
|
|||||
|
|
|
|
|
z Please note that camera shake becomes a factor at low |
|
|||||
|
|
|
|
|
|
||||||
|
|
|
|
|
shutter speeds. Shoot with the camera attached to a tripod. |
|
|||||
|
|
|
|
|
z Use of the flash may result in an over-exposed image. If this |
|
|||||
|
|
|
|
|
occurs, shoot with the flash set to |
|
. |
|
|||
|
|
|
|
|
z The following are not available: |
|
|
|
|||
- |
Exposure Compensation |
Various |
|||||||||
- |
ISO speed: Auto, High ISO Auto |
||||||||||
- |
Metering |
|
|||||||||
- |
Flash: Auto |
MethodsShooting |
|||||||||
- |
Slow Synchro |
||||||||||
|
|||||||||||