

70
 Setting the Flash
Available Shooting Modes  p. 176
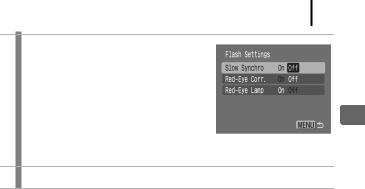
The flash timing is adjusted to slow shutter speeds. This reduces the chance that only the background will appear
Slow Synchro dark when a night scene or an interior shot is taken. When [Slow Synchro] set to [On], camera shake may become a factor. Use of a tripod is recommended.
Red-Eye Corr. Automatically searches for and corrects red eyes in the image when the flash fires.
Red-eye reduction lamp lights orange before the flash Red-Eye Lamp fires. This function reduces the chance of reflected light
making eyes appear red when the flash fires.
Red-Eye Correction
-When [Red-Eye Corr.] is set to [On], only the corrected image is recorded to the memory card.
-If the area around the eyes is red, for example from using red eye shadow, that area may also be corrected. If this happens, set [Red-Eye Corr.] to [Off].
-Red eyes may not be automatically detected or may not be fully corrected on some images. In either case, you can
correct images with the [Red-Eye Correction] in the  menu (p. 105).
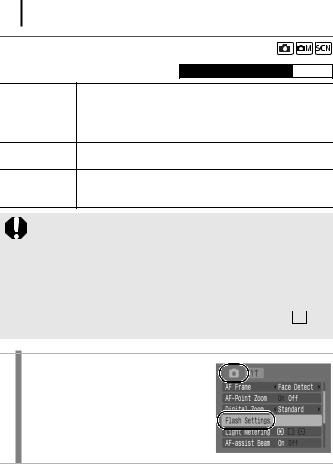
1 Select [Flash Settings].
1. Press the MENU button.
2. In the  menu, use the S or T button to select [Flash Settings].
3. Press the FUNC./SET button.
71
2 Accept the setting.
1.Use the S or T button to select a function.
2.Use the W or X button to select [On] or [Off].
3.Press the MENU button.
•You can also display this menu by
pressing the  button, followed by the MENU button (p. 59).
3 Press the MENU button.
Methods Shooting Various
72
 Movie Shooting
Available Shooting Modes  p. 176
The following movie modes are available.
The recording time will vary according to the capacity of the memory card you use (p. 168).
 Standard
You can select the recording pixels and record until the memory card is full (when a super high-speed memory card is used, such as the recommended SDC-512MSH). The digital zoom can be used while shooting in this mode (p. 55).
 • Maximum Size: 4 GB*/movie
 Compact
Since there are few recording pixels and also the data size is small, this mode is convenient for sending movies as e-mail attachments or when the memory card capacity is low.
•Maximum Clip Length: 3 minutes
*Even if the file size has not reached 4 GB, the recording is stopped when the recording time reaches one hour. Depending on memory card capacity and data write speed, recording may stop before the file size reaches 4 GB or the recording time reaches one hour.
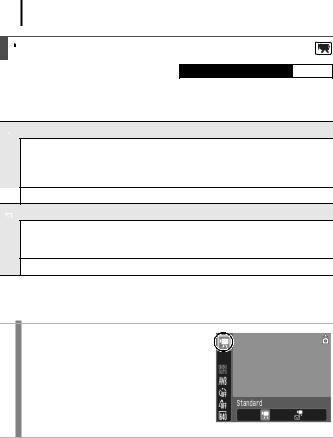
1 Select a shooting mode.
1. Set the mode dial to 
 .
.
2.Press the FUNC./SET button.
3.Use the S or T button to select  and the W or X button to change the option.
4.Press the FUNC./SET button.
73
|
|
|
|
2 |
|
Shoot. |
|
|
|
• Pressing the shutter button halfway automatically sets the |
|
|
|
exposure, focus and white balance settings. |
|
|
|
• Pressing the shutter button fully starts recording video and |
|
|
|
sound simultaneously. |
|
|
|
• During shooting, the recording time and [zRec] appear on the |
|
|
|
LCD monitor. |
Various |
|
|
Recording will stop automatically under the following |
|
|
|
• Pressing the shutter button fully again stops recording. |
|
|
|
circumstances. |
Shooting |
|
|
- When the maximum recording time or maximum size |
|
|
|
elapses |
Methods |
|
|
- When the built-in memory or memory card becomes full |
|
|
|
|
|
|
|
z You are recommended to use a memory card that has been |
|
|
|
formatted in your camera to shoot movies (p. 122). The |
|
|
|
memory card supplied with the camera may be used without |
|
|
|
further formatting. |
|
|
|
z Be careful of the following while recording. |
|
|
|
- Do not touch the microphone (p. 38). |
|
- Do not press any buttons other than the shutter, 
 or
or  button. The sound that buttons make will be recorded in the movie.
-The camera will automatically adjust the exposure and white balance to suit the shooting conditions during recording. Please note, however, that the sounds made by the camera automatically adjusting the exposure may also be recorded.
zThe focus and optical zoom settings remain fixed for subsequent frames at the values selected for the first frame.
zAdjust the zoom before shooting. The factor of the combined optical zoom and digital zoom display on the LCD monitor. When the factor displays in blue, the image will deteriorate.
z Only in  and
and  in the Standard mode, the digital zoom can be used during shooting.
zQuickTime is required to play back movies (Data type: AVI/ Compression method: Motion JPEG) on a computer (Only Windows 2000).

74
Changing Recording Pixels/Frame Rates
You can change the recording pixels when the Movie mode is set to
 (Standard). The frame rate can be set depending on the recording pixels.
1 Select the number of recording pixels.
1.Press the FUNC./SET button.
2.Use the S or T button to select
 and the W or X button to change the option.
3.Press the FUNC./SET button.
Recording Pixels and Frame Rates
Frame rates indicate the number of frames recorded or played back each second. The higher the frame rate, the smoother the appearance of motion.
|
|
|
|
|
|
*1 |
640 x 480 pixels, 20 frames/sec. |
|
|
|
|
|
|
|
|
|
|
|
Standard |
|
|
*2 |
640 x 480 pixels, 20 frames/sec. LP |
|
|
|
|
||||
|
|
|
|
|
|
|
|
|
|
|
|
|
|
|
320 x 240 pixels, 30 frames/sec. |
|
|
|
|
|
|
|
|
|
|
|
|
|
|
|
|
|
|
|
Compact |
|
|
|
160 x 120 pixels, 15 frames/sec. |
|
|
|
|
|
|
||
|
|
|
|
|
|
|
|
*1 |
Default setting. |
|
|
|
|
||
*2 |
To give priority to recording length over quality, select the option displaying [LP] |
||||||
|
|
(Long Play). For the same file size, you can record approximately twice the |
|||||
|
|
length. |
|
|
|
|
|
zSee Memory Cards and Estimated Capacities (p. 167).
zSee Image Data Sizes (Estimated) (p. 169).
75
Checking the Focus and People’s
Expressions
Available Shooting Modes  p. 176
You can zoom the display of the AF frame area to check the focus and people’s expressions as you compose and shoot.
To do this you must first set the [AF Frame] in the  menu to [Face Detect] or [Center].
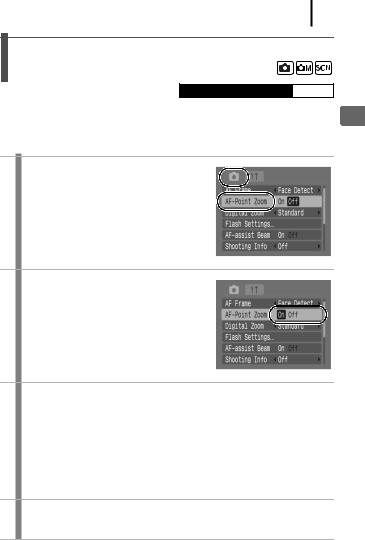
1 Select [AF-Point Zoom].
1. Press the MENU button.
2. In the  menu, use the S or T button to select [AF-Point Zoom].
2 Accept the setting.
1. Use the W or X button to select [On]. 2. Press the MENU button.
3 Press the shutter button halfway.
•Pressing the shutter button halfway zooms a section of the display according to the following AF Frame mode settings (p. 76).
-[Face Detect]: The face detected as the main subject will appear zoomed.
-[Center]: The center of the LCD monitor will appear zoomed.
4 If the subject is in focus, press the shutter button all the way to shoot.
Methods Shooting Various