

54
Commonly Used Shooting Functions


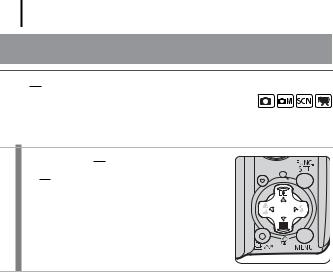
 Shooting with the Optical Zoom
The zoom can be adjusted from 38 mm – 132 mm (focal length) in 35mm film equivalent terms.
1 Press the 
 or
or 
 button.
• 
 Wide Angle: Zooms out from the subject.
• 
 Telephoto: Zooms in on the subject.
55
Using the Digital Zoom/Digital Tele-Converter
Available Shooting Modes  p. 176
You can combine digital zoom with optical zoom when shooting.
The available shooting characteristics and focal lengths (35mm film equivalent) are as follows:
Selection |
Focal Length |
Shooting Characteristics |
|
|
|
Enables shooting at zoom factors of up to |
|
Standard |
38 – 528 mm |
14x with digital and optical zoom |
|
combined. In Movie mode, only the |
|||
|
|
||
|
|
Standard mode can be selected. |
|
Off |
38 – 132 mm |
Enables shooting without digital zoom. |
|
|
|||
|
|
|
|
1.5x |
57 – 198 mm |
Digital zoom is fixed at the selected zoom |
|
factor, and the focal length shifts to |
|||
|
|
||
|
|
maximum telephoto. This enables a faster |
|
|
|
||
1.9x |
72.2 – 251 mm |
shutter speed and less chance of camera |
|
shake than a shot taken at the same angle |
|||
|
|
of view with [Standard] or [Off]. |
zThe digital zoom cannot be used in 
 (Date Stamp), or
  (Widescreen) modes.
zThe [1.5x] and [1.9x] settings cannot be used in  mode.
mode.
Functions Shooting Used Commonly
56
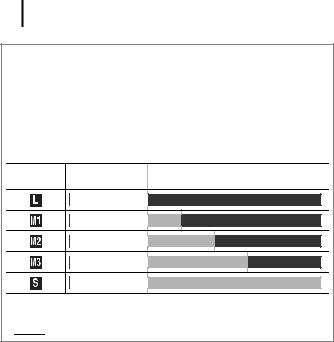
Safety Zoom Zone
Depending on the number of recording pixels set, you can shift from optical zoom to digital zoom without pausing up to a factor where the image quality does not deteriorate (Safety Zoom).
The 
 icon displays at the maximum zoom factor without image deterioration and you can advance the zoom further by pressing the
 button again (not available in
  ).
).
Safety Zoom Factor
Recording |
Optical Zoom |
Digital Zoom |
|
pixels |
|||
|
|
||
|
3.4x Î |
|
|
|
|
4.0x Î |
|
|
|
5.1x Î |
|
|
|
6.5x Î |
|
|
|
14x Î |
•
 Optical Zoom (Zone without deterioration)
• Digital Zoom (Zone without deterioration)
• Digital Zoom (Zoom with deterioration)
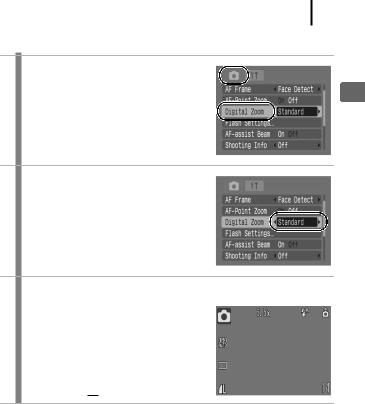
Shooting with the Digital Zoom
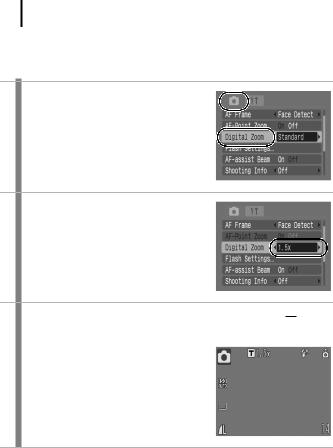
1 Select [Digital Zoom].
1. Press the MENU button.
2.In the  menu, use the S or T button to select [Digital Zoom].
2 Accept the setting.
1.Use the W or X button to select [Standard].
2.Press the MENU button.
3 Press the 
 button and shoot.
•The combined digital and optical zoom factor will display in the LCD monitor.
•The image may appear coarse depending upon the selected recording pixels (the zoom factor appears in blue).
•Press the  button to zoom out.
57
Functions Shooting Used Commonly
58
Shooting with the Digital Tele-Converter
The digital tele-converter feature uses digital zoom to achieve the effects of a tele-converter (a lens used in telephoto shooting).
1 Select [Digital Zoom].
1. Press the MENU button.
2.In the  menu, use the S or T button to select [Digital Zoom].
2 Accept the setting.
1.Use the W or X button to select [1.5x] or [1.9x].
2. Press the MENU button.
3 Adjust the angle of view with the 
 or
or 

 button and shoot.
• will appear on the LCD monitor.
•The image may appear coarse
depending upon the selected
recording pixels (the  icon and the zoom factor appear in blue).