


Rearranging Your Worksheet / 63
Then save this worksheet as a template. To do so:
1.Choose Save As from the File menu.
2.Browse to the Template folder within the Mathcad program folder.
3.In the “Save as type” drop-down list, select “Mathcad XML Template (*.XMCT).”
4.Type a name in the “File name” box.
Your template is added to the list of templates that appears when you choose New from the File menu. If you do not save your template to the Template folder, you can browse to find it.
Modifying a Template
To modify an existing template:
1.Choose Open from the File menu.
2.In the “Files of type” drop-down list, select “Mathcad Templates.”
3.Type the name of the template in the “File name” box or browse to locate it. Worksheet templates are saved by default in the Template folder.
You may now edit the template just like any Mathcad worksheet.
Tip To modify the default template for a blank worksheet, modify the template file Normal.xmct. You may want to save the original Normal.xmct elsewhere in case you need to retrieve it.
Note When you modify a template, your changes affect only new files created from the modified template. The changes do not affect any worksheets created with the template before the template was modified.
Rearranging Your Worksheet
This section describes how to rearrange math, images, and text in your worksheets.
Note You can get an overall view of how your worksheet looks by choosing Zoom from the View
menu or by clicking  on the Standard toolbar and choosing a magnification. Or you can use the File > Print Preview command.
Selecting Regions
To select a single region for editing, simply click it to see a selection rectangle around the region. To select a single region for moving, drag-select it.
To select multiple regions:
1.Press and hold down the mouse.
2.Without letting go of the mouse, move it to enclose everything you want inside the selection rectangle.
3.Release the mouse to see dashed rectangles around the selected regions.

64 / Chapter 7 Mathcad Worksheets
Tip You can select or deselect a single region or disconnected regions anywhere in the worksheet by holding down the [Ctrl] key while clicking on each region. Also, if you click one region and [Shift]-click another, you can select both regions and all regions in between.
Region Properties
The Region Properties dialog box allows you to perform different actions depending on the type of region you’ve selected:
•Highlight the region.
•Display a border around the region.
•Automatically move everything down in the worksheet below a text region when the region expands.
•Disable or enable evaluation of a math region.
•Turn protection on or off for the region.
You can change the properties for a region or multiple regions by selecting the regions and either choosing Properties from the Format menu or by right-clicking on one of the regions and choosing Properties from the menu.
Note When you select multiple regions, you may only change the properties common to the regions selected. If you select both math and text regions, you cannot change text-only or math-only options.
Moving and Copying Regions
Once regions are selected, you can move or copy them.
Moving Regions
You can move regions by dragging them with the mouse, nudging them with the arrow keys, or by using Cut and Paste.
To drag regions with the mouse:
1.Select the regions.
2.Place the pointer on any selected region so that the pointer turns into a small hand.
3.Press and hold down the mouse.
4.Move the mouse. The rectangular outlines of the selected regions follow the cursor.
To move the regions into another worksheet, drag the rectangular outlines into the destination worksheet, then release the mouse button.
Nudging Regions with Arrow Keys
You can use the arrow keys on your keyboard to nudge selected regions in different directions. Press an arrow key once to move the region(s) one grid space. Holding down the arrow key moves the region until the arrow is released.
Note You can layer one region on top of another. To move a particular region to the top or bottom, right-click on it and choose Bring to Front or Send to Back from the menu.
Rearranging Your Worksheet / 65
Tip If regions you want to copy are coming from a locked area (see “Safeguarding an Area of the Worksheet” on page 69) or an E-book, you can copy them simply by dragging them with the mouse into your worksheet.
Deleting Regions
To delete one or more regions:
1.Select the regions.
2.Choose Cut from the Edit menu or press [Ctrl] X.
Choosing Cut removes the selected regions from your worksheet so that you can paste them elsewhere. If you don’t want to paste or save the regions, choose Delete from the Edit menu or press [Ctrl] D instead.
Aligning Regions
Once you’ve inserted regions into your worksheet, you can align them vertically or horizontally using menu commands, nudging with the arrow keys, or by using the worksheet ruler.
Using Menu Commands
To align regions horizontally or vertically:
1.Select the regions.
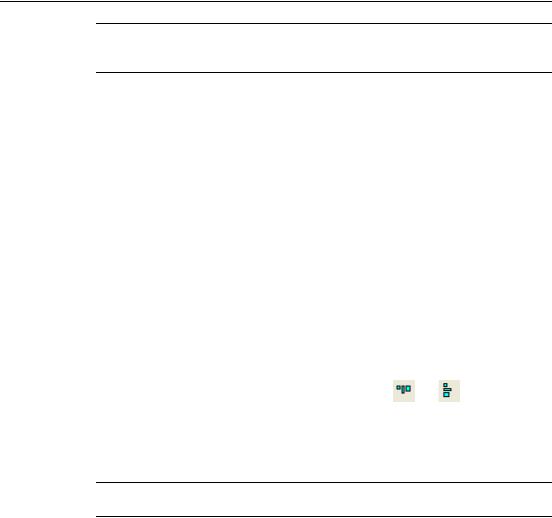
2.Choose Align Regions > Across (to align horizontally) or Align Regions > Down
(to align vertically) from the Format menu. Or click |
|
and |
|
on the Standard |
toolbar. |
|
|
|
|
When you align the regions down, Mathcad moves the regions so that their left edges are aligned vertically. Aligning regions across moves the regions so that their anchor points are aligned horizontally.
Note Aligning regions may inadvertently cause regions to overlap. Mathcad warns you when this will occur. See “Separating Regions” on page 66.
Using the Worksheet Ruler
Choose Ruler from the View menu to open the worksheet ruler at the top of the window. If your cursor is in a text region, the ruler settings apply to that region only, otherwise they apply to the whole worksheet. You can use alignment guidelines on the ruler to align regions at particular measurements.
To set alignment guidelines on the ruler:
1.Click on the ruler for each position where you want an alignment guideline. A tab stop symbol appears.
2.Right-click on a tab stop symbol and choose Show Guideline from the menu. Green guidelines run down the worksheet so that you can align regions vertically.
You can also set tabs and guidelines by selecting Tabs from the Format menu. Type the location, then check the “Show Guidelines” check box. You must be viewing the Ruler for guidelines to show up.

66 / Chapter 7 Mathcad Worksheets
Note The tab stops you insert on the ruler specify where the cursor moves when you press the [TAB] key. To remove a tab stop, click on its symbol and drag it off the ruler.
To move a guideline, click on the tab stop on the ruler and drag it. To remove an alignment guideline, right-click on it and uncheck Show Guideline.
To automatically place the next region you create on a guideline, press the [TAB] key in a blank part of the worksheet. The red crosshair moves to the next tab or guideline.
Tip You can change the measurement system used in the ruler by right-clicking on the ruler and choosing Inches, Centimeters, Points, or Picas from the menu. To change the ruler measurement for all documents, make this change to the template, Normal.xmct.
Inserting or Deleting Blank Space
You can easily insert extra space into your worksheet: 1. Click in a blank spot and press [Enter] repeatedly. To delete extra space from your worksheet:
1.Click in the space you want to delete. Make sure the cursor looks like a red crosshair and that there are no regions to the right or left of the cursor.
2.Press [Delete] to remove blank space below your cursor or [Backspace] to remove blank space above your cursor.
You can not delete any excess space if any region extends into the space you are trying to delete.
Tip To quickly insert or delete a specific number of blank text lines from your worksheet, right-click in a blank part of the worksheet, choose Insert Lines or Delete Lines from the menu, and enter the number of lines in the dialog box. The dialog box default shows you the maximum number of lines you can delete.
Separating Regions
As you move and edit regions in a Mathcad worksheet, they sometimes overlap one another. Overlapping regions don’t interfere with each other’s calculations, but they may make your worksheet hard to read.
A good way to determine whether regions overlap is to choose Regions from the View menu. Mathcad displays blank space in gray and leaves the regions in your default background color. To return to the default view, choose Regions from the View menu again.