
- •User’s Guide
- •Contents
- •About This Guide
- •Other Documentation
- •Other Resources
- •Technical Support
- •Comments
- •Chapter 1
- •Welcome to Mathcad
- •What Is Mathcad?
- •Highlights of the Mathcad 14 Release
- •Internationalization of Mathcad
- •Usability Features
- •New and Improved Functions
- •Math Enhancements
- •New Symbolics
- •PTC integration
- •System Requirements
- •Installation
- •Chapter 2
- •Getting Started with Mathcad
- •The Mathcad Workspace
- •Working with Worksheets
- •Regions
- •A Simple Calculation
- •Definitions and Variables
- •Defining Variables
- •Calculating Results
- •Defining a Function
- •Formatting a Result
- •Graphs
- •Creating a Basic Graph
- •Formatting a Graph
- •Saving, Printing, and Exiting
- •Saving a Worksheet
- •Printing
- •Exiting Mathcad
- •Chapter 3
- •Online Resources
- •Mathcad Resources
- •Resources Window and E-books
- •Finding Information in an E-book
- •Annotating an E-book
- •Web Browsing
- •Help
- •User Forums
- •Logging in
- •Communicating with Other Mathcad Users
- •Other Resources
- •Web Resources
- •Release Notes
- •Technical Support
- •Mathcad Downloads on the PTC Web Site
- •Chapter 4
- •Working with Math
- •Inserting Math
- •Numbers and Complex Numbers
- •Greek Letters
- •Inserting an Operator
- •Building Expressions
- •Typing in Names and Numbers
- •Controlling the Editing Lines
- •Typing in Operators
- •Multiplication
- •An Annotated Example
- •Editing Expressions
- •Changing a Name or Number
- •Inserting an Operator
- •Applying an Operator to an Expression
- •Deleting an Operator
- •Replacing an Operator
- •Inserting a Minus Sign
- •Inserting Parentheses
- •Deleting Parentheses
- •Moving Parts of an Expression
- •Deleting Parts of an Expression
- •Math Styles
- •Editing Math Styles
- •Applying Math Styles
- •Saving Math Styles
- •Chapter 5
- •Range Variables and Arrays
- •Creating Arrays
- •Vectors and Matrices
- •Insert Matrix Command
- •Iterative Calculations
- •Creating a Range Variable
- •Entering a Matrix as a Data Table
- •Accessing Array Elements
- •Subscripts
- •Accessing Rows and Columns
- •Changing the Array Origin
- •Displaying Arrays
- •Changing the Format of Displayed Elements
- •Copying and Pasting Arrays
- •Working with Arrays
- •Performing Calculations in Parallel
- •Graphical Display of Arrays
- •Chapter 6
- •Working with Text
- •Inserting Text
- •Creating a Text Region
- •Selecting Text
- •Greek Letters in Text
- •Changing the Width of a Text Region
- •Text and Paragraph Properties
- •Changing Text Properties
- •Changing Paragraph Properties
- •Text Styles
- •Applying a Text Style to a Paragraph in a Text Region
- •Modifying an Existing Text Style
- •Creating and Deleting Text Styles
- •Equations in Text
- •Inserting an Equation into Text
- •Text Tools
- •Find and Replace
- •Spell-Checking
- •Chapter 7
- •Mathcad Worksheets
- •Worksheets and Templates
- •Creating a New Worksheet
- •Opening a Worksheet
- •Saving Your Worksheet
- •Creating a New Mathcad Template
- •Modifying a Template
- •Rearranging Your Worksheet
- •Selecting Regions
- •Region Properties
- •Moving and Copying Regions
- •Deleting Regions
- •Aligning Regions
- •Inserting or Deleting Blank Space
- •Separating Regions
- •Highlighting Regions
- •Changing the Worksheet Background Color
- •Layout
- •Setting Margins, Paper Size, Source, and Orientation
- •Page Breaks
- •Headers and Footers
- •Safeguarding an Area of the Worksheet
- •Inserting an Area
- •Locking and Collapsing an Area
- •Unlocking and Expanding an Area
- •Deleting an Area
- •Worksheet Protection
- •Worksheet References
- •Hyperlinks
- •Creating Hyperlinks to a Mathcad File
- •Creating Hyperlinks to Other Files
- •Distributing Your Worksheets
- •Printing
- •Printing Wide Worksheets
- •Print Preview
- •Creating PDF Files
- •Creating E-books
- •Creating Web Pages and Sites
- •Saving Your Worksheet to Microsoft Word
- •Mailing
- •Chapter 8
- •Calculating in Mathcad
- •Defining and Evaluating Variables
- •Defining a Variable
- •Names
- •Built-in Variables
- •Evaluating Expressions Numerically
- •How Mathcad Scans a Worksheet
- •Global Definitions
- •Range Variables
- •Built-in Functions
- •Assistance for Using Built-in Functions
- •Applying a Function to an Expression
- •Defining and Evaluating Functions
- •Variables in User-Defined Functions
- •Recursive Function Definitions
- •Units and Dimensions
- •Dimensional Checking
- •Defining Your Own Units
- •Working with Results
- •Formatting Results
- •Displaying Units of Results
- •Copying and Pasting Numerical Results
- •Controlling Calculation
- •Calculating in Manual Mode
- •Interrupting Calculations
- •Disabling Equations
- •Error Messages
- •Finding the Source of an Error
- •Fixing Errors
- •Chapter 9
- •Solving
- •Solving and Optimization Functions
- •Finding Roots
- •Linear/Nonlinear System Solving and Optimization
- •Chapter 10
- •Overview
- •Inserting Pictures
- •Creating Pictures from Matrices
- •Formatting a Image
- •Inserting Objects
- •Inserting an Object into a Worksheet
- •Editing an Embedded Object
- •Editing a Link
- •Inserting Objects Computationally Linked to Your Worksheet
- •Chapter 11
- •2D Plots
- •Overview of 2D Plotting
- •Creating an X-Y Plot
- •Creating a Polar Plot
- •Graphing Functions and Expressions
- •2D QuickPlots
- •Defining an Independent Variable
- •Plotting Multiple 2D Curves
- •Creating a Parametric Plot
- •Plotting Vectors of Data
- •Plotting a Single Vector of Data
- •Plotting One Data Vector Against Another
- •Formatting a 2D Plot
- •Setting Axis Limits
- •Adding Custom Titles, Labels, and Other Annotations
- •Modifying a 2D Plot’s Perspective
- •Zooming in on a Plot
- •Getting a Readout of Plot Coordinates
- •Animations
- •Creating an Animation Clip
- •Playing an Animation Clip
- •Playing a Previously Saved Animation
- •Chapter 12
- •3D Plots
- •Overview of 3D Plotting
- •Inserting a 3D Plot
- •3D Plot Wizard
- •Creating 3D Plots of Functions
- •Creating a Surface, Bar, Contour, or Scatter Plot
- •Creating a Space Curve
- •Creating 3D Plots of Data
- •Creating a Surface, Bar, or Scatter Plot
- •Creating a Parametric Surface Plot
- •Creating a Three-dimensional Parametric Curve
- •Creating a Contour Plot
- •Graphing Multiple 3D Plots
- •Formatting a 3D Plot
- •The 3D Plot Format Dialog Box
- •Changing One 3D Plot to Another
- •Annotations
- •Modifying 3D QuickPlot Data
- •Chapter 13
- •Symbolic Calculation
- •Overview of Symbolic Math
- •Live Symbolic Evaluation
- •Using Keywords
- •Using More Than One Keyword
- •Keyword Modifiers
- •Ignoring Previous Definitions
- •Using the Symbolics Menu
- •Displaying Symbolic Results
- •Examples of Symbolic Calculation
- •Derivatives
- •Integrals
- •Limits
- •Solving an Equation for a Variable
- •Solving a System of Equations Symbolically: “Solve” Keyword
- •Solving a System of Equations Symbolically: Solve Block
- •Symbolic Matrix Manipulation
- •Index

User Forums / 21
You can also get more detailed help on menu commands, toolbars, built-in functions and operators, and error messages. To do so:
1.Click an error message, a built-in function or variable, or an operator.
2.Press [F1] to bring up the relevant Help screen.
To get help on menu commands, dialogs, or on any of the toolbar buttons:
1.Press [Shift] [F1]. Mathcad changes the pointer into a question mark.
2.Click a command from a menu. Mathcad opens the relevant Help screen.
3.Click any toolbar button. Mathcad displays the operator’s name and a keyboard shortcut in the status bar.
To resume editing, press [Esc]. The pointer turns back into an arrow.
User Forums
The Mathcad User Forums allow you to contribute Mathcad or other files and post messages, and to download files and read messages contributed by other Mathcad users. You can search the User Forums for messages containing a key word or phrase, be notified of new messages in specific forums, and view messages posted since your last visit. The User Forums combine some of the best features of an online news group with the convenience of sharing Mathcad worksheets.
Logging in
To open the User Forums, choose User Forums from the Help menu, or you can open an Internet browser and go directly to the User Forums:
http://www.ptc.com/go/mathsoft/collab/.
The User Forums login screen appears in a browser window.
The first time you come to the login screen of the User Forums, click “New User.” This brings you to a form for entering required and optional information.
Note PTC does not use this information for any purposes other than for your participation in the User Forums.
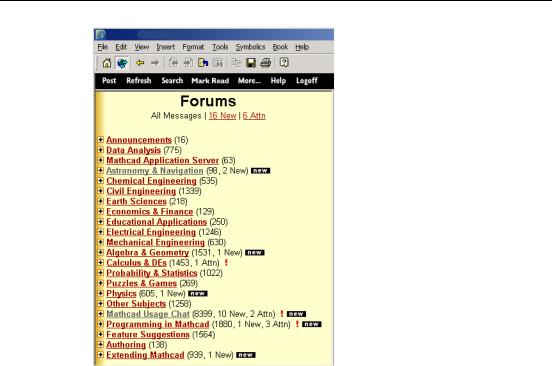
Click “Create” when you are finished filling out the form. Check your email for a message with your login name and password. Go back to the User Forums, enter your login name and password given in the email message and click “Log In” to open the main page of the User Forums. (See Figure 3-2.)
A list of forums and messages appears on the left side of the screen.
Tip After logging in, you may want to change your password. To do so, click “More” on the toolbar at the top of the window, then go to “Edit User Profile.”
Note PTC maintains the User Forums as a free service to all in the Mathcad community. Read the Agreement posted in the top level of the User Forums for important information and disclaimers.

22 / Chapter 3 Online Resources
Figure 3-2: Opening the User Forums from the Resources window.
Communicating with Other Mathcad Users
Reading Messages
When you enter the User Forums, you will see how many messages are new and how many are addressed to your attention. Messages that you have not yet read are shown in italics. You may also see a “new” icon next to these messages.
Posting Messages
After you enter the User Forums, you can post a new message or reply to existing messages. To do so:
1.Choose “Post” from the toolbar to post a new message. To reply to a message, click Reply at the top of the message.
2.Click on the boxes below the title to preview your message, spell check a message, or attach a file.
3.Type your text in the message field.
4.Click “Post” after you finish typing. Depending on the options you selected, the User Forums either posts your message immediately or allows you to preview it.
5.If you chose Attach File, a new page appears. Specify the file type and browse to the file then click “Upload Now.”
To delete a message that you posted, click on it to open it and click “Delete” in the small toolbar just above the message.