
- •Contents at a Glance
- •Contents
- •Foreword
- •About the Authors
- •About the Technical Reviewers
- •Acknowledgments
- •Introduction
- •How Drupal Works
- •What Is Drupal?
- •Technology Stack
- •Core
- •Administrative Interface
- •Modules
- •Hooks
- •Themes
- •Nodes
- •Fields
- •Blocks
- •File Layout
- •Serving a Request
- •The Web Server’s Role
- •The Bootstrap Process
- •Processing a Request
- •Theming the Data
- •Summary
- •Writing a Module
- •Creating the Files
- •Implementing a Hook
- •Adding Module-Specific Settings
- •Defining Your Own Administration Section
- •Presenting a Settings Form to the User
- •Validating User-Submitted Settings
- •Storing Settings
- •Using Drupal’s variables Table
- •Retrieving Stored Values with variable_get()
- •Further Steps
- •Summary
- •Hooks, Actions, and Triggers
- •Understanding Events and Triggers
- •Understanding Actions
- •The Trigger User Interface
- •Your First Action
- •Assigning the Action
- •Changing Which Triggers an Action Supports
- •Actions That Support Any Trigger
- •Advanced Actions
- •Using the Context in Actions
- •How the Trigger Module Prepares the Context
- •Changing Existing Actions with action_info_alter()
- •Establishing the Context
- •How Actions Are Stored
- •The actions Table
- •Action IDs
- •Calling an Action Directly with actions_do()
- •Defining Your Own Triggers with hook_trigger_info()
- •Adding Triggers to Existing Hooks
- •Summary
- •The Menu System
- •Callback Mapping
- •Mapping URLs to Functions
- •Creating a Menu Item
- •Page Callback Arguments
- •Page Callbacks in Other Files
- •Adding a Link to the Navigation Block
- •Menu Nesting
- •Access Control
- •Title Localization and Customization
- •Defining a Title Callback
- •Wildcards in Menu Items
- •Basic Wildcards
- •Wildcards and Page Callback Parameters
- •Using the Value of a Wildcard
- •Wildcards and Parameter Replacement
- •Passing Additional Arguments to the Load Function
- •Special, Predefined Load Arguments: %map and %index
- •Building Paths from Wildcards Using to_arg() Functions
- •Special Cases for Wildcards and to_arg() Functions
- •Altering Menu Items from Other Modules
- •Altering Menu Links from Other Modules
- •Kinds of Menu Items
- •Common Tasks
- •Assigning Callbacks Without Adding a Link to the Menu
- •Displaying Menu Items As Tabs
- •Hiding Existing Menu Items
- •Using menu.module
- •Common Mistakes
- •Summary
- •Working with Databases
- •Defining Database Parameters
- •Understanding the Database Abstraction Layer
- •Connecting to the Database
- •Performing Simple Queries
- •Retrieving Query Results
- •Getting a Single Value
- •Getting Multiple Rows
- •Using the Query Builder and Query Objects
- •Getting a Limited Range of Results
- •Getting Results for Paged Display
- •Other Common Queries
- •Inserts and Updates with drupal_write_record()
- •The Schema API
- •Using Module .install Files
- •Creating Tables
- •Using the Schema Module
- •Field Type Mapping from Schema to Database
- •Textual
- •Varchar
- •Char
- •Text
- •Numerical
- •Integer
- •Serial
- •Float
- •Numeric
- •Date and Time: Datetime
- •Binary: Blob
- •Declaring a Specific Column Type with mysql_type
- •Maintaining Tables
- •Deleting Tables on Uninstall
- •Changing Existing Schemas with hook_schema_alter()
- •Modifying Other Modules’ Queries with hook_query_alter()
- •Connecting to Multiple Databases Within Drupal
- •Using a Temporary Table
- •Writing Your Own Database Driver
- •Summary
- •Working with Users
- •The $user Object
- •Testing If a User Is Logged In
- •Introduction to user hooks
- •Understanding hook_user_view($account, $view_mode)
- •The User Registration Process
- •Using profile.module to Collect User Information
- •The Login Process
- •Adding Data to the $user Object at Load Time
- •Providing User Information Categories
- •External Login
- •Summary
- •Working with Nodes
- •So What Exactly Is a Node?
- •Not Everything Is a Node
- •Creating a Node Module
- •Creating the .install File
- •Creating the .info File
- •Creating the .module File
- •Providing Information About Our Node Type
- •Modifying the Menu Callback
- •Defining Node-Type–Specific Permissions with hook_permission()
- •Limiting Access to a Node Type with hook__node_access()
- •Customizing the Node Form for Our Node Type
- •Validating Fields with hook_validate()
- •Saving Our Data with hook_insert()
- •Keeping Data Current with hook_update()
- •Cleaning Up with hook_delete()
- •Modifying Nodes of Our Type with hook_load()
- •Using hook_view()
- •Manipulating Nodes That Are Not Our Type with hook_node_xxxxx()
- •How Nodes Are Stored
- •Creating a Node Type with Custom Content Types
- •Restricting Access to Nodes
- •Defining Node Grants
- •What Is a Realm?
- •What Is a Grant ID?
- •The Node Access Process
- •Summary
- •Working with Fields
- •Creating Content Types
- •Adding Fields to a Content Type
- •Creating a Custom Field
- •Adding Fields Programmatically
- •Summary
- •The Theme System
- •Themes
- •Installing an Off-the-Shelf Theme
- •Building a Theme
- •The .info File
- •Adding Regions to Your Theme
- •Adding CSS Files to Your Theme
- •Adding JavaScript Files
- •Adding Settings to Your Theme
- •Understanding Template Files
- •The Big Picture
- •The html.php.tpl File
- •The page.tpl.php File
- •The region.tpl.php File
- •The node.tpl.php File
- •The field.tpl.php File
- •The block.tpl.php File
- •Overriding Template Files
- •Other Template Files
- •Introducing the theme() Function
- •An Overview of How theme() Works
- •Overriding Themable Items
- •Overriding with Template Files
- •Adding and Manipulating Template Variables
- •Using the Theme Developer Module
- •Summary
- •Working with Blocks
- •What Is a Block?
- •Block Configuration Options
- •Block Placement
- •Defining a Block
- •Using the Block Hooks
- •Building a Block
- •Enabling a Block When a Module Is Installed
- •Block Visibility Examples
- •Displaying a Block to Logged-In Users Only
- •Displaying a Block to Anonymous Users Only
- •Summary
- •The Form API
- •Understanding Form Processing
- •Initializing the Process
- •Setting a Token
- •Setting an ID
- •Collecting All Possible Form Element Definitions
- •Looking for a Validation Function
- •Looking for a Submit Function
- •Allowing Modules to Alter the Form Before It’s Built
- •Building the Form
- •Allowing Functions to Alter the Form After It’s Built
- •Checking If the Form Has Been Submitted
- •Finding a Theme Function for the Form
- •Allowing Modules to Modify the Form Before It’s Rendered
- •Rendering the Form
- •Validating the Form
- •Token Validation
- •Built-In Validation
- •Element-Specific Validation
- •Validation Callbacks
- •Submitting the Form
- •Redirecting the User
- •Creating Basic Forms
- •Form Properties
- •Form IDs
- •Fieldsets
- •Theming Forms
- •Using #prefix, #suffix, and #markup
- •Using a Theme Function
- •Telling Drupal Which Theme Function to Use
- •Specifying Validation and Submission Functions with hook_forms()
- •Call Order of Theme, Validation, and Submission Functions
- •Writing a Validation Function
- •Form Rebuilding
- •Writing a Submit Function
- •Changing Forms with hook_form_alter()
- •Altering Any Form
- •Altering a Specific Form
- •Submitting Forms Programmatically with drupal_form_submit()
- •Dynamic Forms
- •Form API Properties
- •Properties for the Root of the Form
- •#action
- •#built
- •#method
- •Properties Added to All Elements
- •#description
- •#attributes
- •#required
- •#tree
- •Properties Allowed in All Elements
- •#type
- •#access
- •#after_build
- •#array_parents
- •#attached
- •#default_value
- •#disabled
- •#element_validate
- •#parents
- •#post_render
- •#prefix
- •#pre_render
- •#process
- •#states
- •#suffix
- •#theme
- •#theme_wrappers
- •#title
- •#tree
- •#weight
- •Form Elements
- •Text Field
- •Password
- •Password with Confirmation
- •Textarea
- •Select
- •Radio Buttons
- •Check Boxes
- •Value
- •Hidden
- •Date
- •Weight
- •File Upload
- •Fieldset
- •Submit
- •Button
- •Image Button
- •Markup
- •Item
- •#ajax Property
- •Summary
- •Filters
- •Filters and Text formats
- •Installing a Filter
- •Knowing When to Use Filters
- •Creating a Custom Filter
- •Implementing hook_filter_info()
- •The Process Function
- •Helper Function
- •Summary
- •Searching and Indexing Content
- •Building a Custom Search Page
- •The Default Search Form
- •The Advanced Search Form
- •Adding to the Search Form
- •Introducing the Search Hooks
- •Formatting Search Results with hook_search_page()
- •Making Path Aliases Searchable
- •Using the Search HTML Indexer
- •When to Use the Indexer
- •How the Indexer Works
- •Adding Metadata to Nodes: hook_node_update_index()
- •Indexing Content That Isn’t a Node: hook_update_index()
- •Summary
- •Working with Files
- •How Drupal Serves Files
- •Managed and Unmanaged Drupal APIs
- •Public Files
- •Private Files
- •PHP Settings
- •Media Handling
- •Upload Field
- •Video and Audio
- •File API
- •Database Schema
- •Common Tasks and Functions
- •Finding the Default Files URI
- •Copying and Moving Files
- •Checking Directories
- •Uploading Files
- •Getting the URL for a File
- •Finding Files in a Directory
- •Finding the Temp Directory
- •Neutralizing Dangerous Files
- •Checking Disk Space
- •Authentication Hooks for Downloading
- •Summary
- •Working with Taxonomy
- •The Structure of Taxonomy
- •Creating a Vocabulary
- •Creating Terms
- •Assigning a Vocabulary to a Content Type
- •Kinds of Taxonomy
- •Flat
- •Hierarchical
- •Multiple Hierarchical
- •Viewing Content by Term
- •Using AND and OR in URLs
- •Specifying Depth for Hierarchical Vocabularies
- •Automatic RSS Feeds
- •Storing Taxonomies
- •Module-Based Vocabularies
- •Creating a Module-Based Vocabulary
- •Keeping Informed of Vocabulary Changes with Taxonomy Hooks
- •Common Tasks
- •Displaying Taxonomy Terms Associated with a Node
- •Building Your Own Taxonomy Queries
- •Using taxonomy_select_nodes()
- •Taxonomy Functions
- •Retrieving Information About Vocabularies
- •taxonomy_vocabulary_load($vid)
- •taxonomy_get_vocabularies()
- •Adding, Modifying, and Deleting Vocabularies
- •taxonomy_vocabulary_save($vocabulary)
- •taxonomy_vocabulary_delete($vid)
- •Retrieving Information About Terms
- •taxonomy_load_term($tid)
- •taxonomy_get_term_by_name($name)
- •Adding, Modifying, and Deleting Terms
- •taxonomy_term_save($term)
- •taxonomy_term_delete($tid)
- •Retrieving Information About Term Hierarchy
- •taxonomy_get_parents($tid, $key)
- •taxonomy_get_parents_all($tid)
- •taxonomy_get_children($tid, $vid, $key)
- •taxonomy_get_tree($vid, $parent, $max_depth, $load_entities = FALSE)
- •Finding Nodes with Certain Terms
- •Additional Resources
- •Summary
- •Caching
- •Knowing When to Cache
- •How Caching Works
- •How Caching Is Used Within Drupal Core
- •Menu System
- •Caching Filtered Text
- •Administration Variables and Module Settings
- •Disabling Caching
- •Page Caching
- •Static Page Caching
- •Blocks
- •Using the Cache API
- •Caching Data with cache_set()
- •Retrieving Cached Data with cache_get() and cache_get_multiple()
- •Checking to See If Cache Is Empty with cache_is_empty()
- •Clearing Cache with cache_clear_all()
- •Summary
- •Sessions
- •What Are Sessions?
- •Usage
- •Session-Related Settings
- •In .htaccess
- •In settings.php
- •In bootstrap.inc
- •Requiring Cookies
- •Storage
- •Session Life Cycle
- •Session Conversations
- •First Visit
- •Second Visit
- •User with an Account
- •Common Tasks
- •Changing the Length of Time Before a Cookie Expires
- •Changing the Name of the Session
- •Storing Data in the Session
- •Summary
- •Using jQuery
- •What Is jQuery?
- •How jQuery Works
- •Using a CSS ID Selector
- •Using a CSS Class Selector
- •jQuery Within Drupal
- •Your First jQuery Code
- •Targeting an Element by ID
- •Method Chaining
- •Adding or Removing a Class
- •Wrapping Existing Elements
- •Changing Values of CSS Elements
- •Where to Put JavaScript
- •Adding JavaScript via a Theme .info File
- •A Module That Uses jQuery
- •Overridable JavaScript
- •Building a jQuery Voting Widget
- •Building the Module
- •Using Drupal.behaviors
- •Ways to Extend This Module
- •Compatibility
- •Next Steps
- •Summary
- •Localization and Translation
- •Enabling the Locale Module
- •User Interface Translation
- •Strings
- •Translating Strings with t()
- •Replacing Built-In Strings with Custom Strings
- •String Overrides in settings.php
- •Replacing Strings with the Locale Module
- •Exporting Your Translation
- •Starting a New Translation
- •Generating .pot Files with Translation Template Extractor
- •Creating a .pot File for Your Module
- •Using the Command Line
- •Using the Web-Based Extractor
- •Creating .pot Files for an Entire Site
- •Installing a Language Translation
- •Setting Up a Translation at Install Time
- •Installing a Translation on an Existing Site
- •Right-to-Left Language Support
- •Language Negotiation
- •Default
- •User-Preferred Language
- •The Global $language Object
- •Path Prefix Only
- •Path Prefix with Language Fallback
- •URL Only
- •Content Translation
- •Introducing the Content Translation Module
- •Multilingual Support
- •Multilingual Support with Translation
- •Localizationand Translation-Related Files
- •Additional Resources
- •Summary
- •What Is XML-RPC?
- •Prerequisites for XML-RPC
- •XML-RPC Clients
- •XML-RPC Client Example: Getting the Time
- •XML-RPC Client Example: Getting the Name of a State
- •Handling XML-RPC Client Errors
- •Network Errors
- •HTTP Errors
- •Call Syntax Errors
- •A Simple XML-RPC Server
- •Mapping Your Method with hook_xmlrpc()
- •Automatic Parameter Type Validation with hook_xmlrpc()
- •Built-In XML-RPC Methods
- •system.listMethods
- •system.methodSignature
- •system.methodHelp
- •system.getCapabilities
- •system.multiCall
- •Summary
- •Writing Secure Code
- •Handling User Input
- •Thinking About Data Types
- •Plain Text
- •HTML Text
- •Rich Text
- •Using check_plain() and t() to Sanitize Output
- •Using filter_xss() to Prevent Cross-Site Scripting Attacks
- •Using filter_xss_admin()
- •Handling URLs Securely
- •Making Queries Secure with db_query()
- •Keeping Private Data Private with hook_query_alter()
- •Dynamic Queries
- •Permissions and Page Callbacks
- •Cross-Site Request Forgeries (CSRF)
- •File Security
- •File Permissions
- •Protected Files
- •File Uploads
- •Filenames and Paths
- •Encoding Mail Headers
- •Files for Production Environments
- •SSL Support
- •Stand-Alone PHP
- •AJAX Security, a.k.a. Request Replay Attack
- •Form API Security
- •Protecting the Superuser Account
- •Summary
- •Development Best Practices
- •Coding Standards
- •Line Indention and Whitespace
- •Operators
- •Casting
- •Control Structures
- •Function Calls
- •Function Declarations
- •Function Names
- •Class Constructor Calls
- •Arrays
- •Quotes
- •String Concatenators
- •Comments
- •Documentation Examples
- •Documenting Constants
- •Documenting Functions
- •Documenting Hook Implementations
- •Including Code
- •PHP Code Tags
- •Semicolons
- •Example URLs
- •Naming Conventions
- •Checking Your Coding Style with Coder Module
- •Finding Your Way Around Code with grep
- •Summary
- •Optimizing Drupal
- •Caching Is the Key to Drupal Performance
- •Optimizing PHP
- •Setting PHP Opcode Cache File to /dev/zero
- •PHP Process Pool Settings
- •Tuning Apache
- •mod_expires
- •Moving Directives from .htaccess to httpd.conf
- •MPM Prefork vs. Apache MPM Worker
- •Balancing the Apache Pool Size
- •Decreasing Apache Timeout
- •Disabling Unused Apache Modules
- •Using Nginx Instead of Apache
- •Using Pressflow
- •Varnish
- •Normalizing incoming requests for better Varnish hits
- •Varnish: finding extraneous cookies
- •Boost
- •Boost vs. Varnish
- •Linux System Tuning for High Traffic Servers
- •Using Fast File Systems
- •Dedicated Servers vs. Virtual Servers
- •Avoiding Calling External Web Services
- •Decreasing Server Timeouts
- •Database Optimization
- •Enabling MySQL’s Query Cache
- •MySQL InnoDB Performance on Windows
- •Drupal Performance
- •Eliminating 404 Errors
- •Disabling Modules You’re Not Using
- •Drupal-Specific Optimizations
- •Page Caching
- •Bandwidth Optimization
- •Pruning the Sessions Table
- •Managing the Traffic of Authenticated Users
- •Logging to the Database
- •Logging to Syslog
- •Running cron
- •Architectures
- •Single Server
- •Separate Database Server
- •Separate Database Server and a Web Server Cluster
- •Load Balancing
- •File Uploads and Synchronization
- •Multiple Database Servers
- •Database Replication
- •Database Partitioning
- •Finding the Bottleneck
- •Web Server Running Out of CPU
- •Web Server Running Out of RAM
- •Identifying Expensive Database Queries
- •Identifying Expensive Pages
- •Identifying Expensive Code
- •Optimizing Tables
- •Caching Queries Manually
- •Changing the Table Type from MyISAM to InnoDB
- •Summary
- •Installation Profiles
- •Creating a New Installation Profile
- •The enhanced.info File
- •The enhanced.profile File
- •The enhanced.install File
- •Using hook_install_tasks and hook_install_tasks_alter
- •Summary
- •Testing
- •Setting Up the Test Environment
- •How Tests Are Defined
- •Test Functions
- •Test Assertions
- •Summary
- •Database Table Reference
- •Resources
- •Code
- •The Drupal Source Code Repository on GIT
- •Examples
- •Drupal API Reference
- •Security Advisories
- •Updating Modules
- •Updating Themes
- •Handbooks
- •Forums
- •Mailing Lists
- •Development
- •Themes
- •Translations
- •User Groups and Interest Groups
- •Internet Relay Chat
- •North America
- •Europe
- •Asia
- •Latin America / Caribbean
- •Oceania
- •Africa
- •Videocasts
- •Weblogs
- •Conferences
- •Contribute
- •Index
- •Numbers

CHAPTER 11 ■ THE FORM API
Figure 11-15. The weight element
The #delta property determines the range of weights to choose from and defaults to 10. For example, if you set #delta to 50, the range of weights would be from -50 to 50. Properties commonly used with the weight element are #attributes, #delta (the default is 10), #default_value, #description, #prefix, #required, #suffix, #title, and #weight. The #process property defaults to array('form_ process_weight', 'ajax_process_form').
File Upload
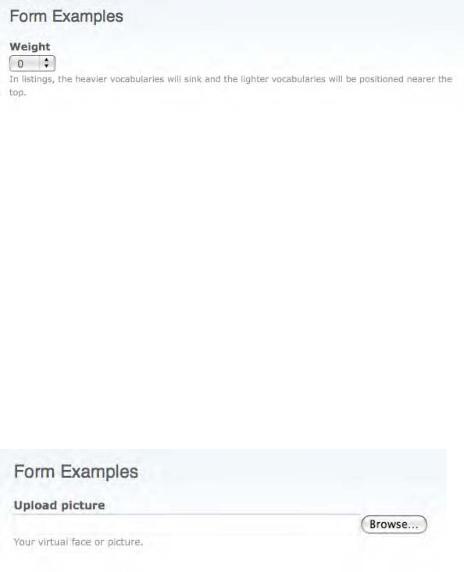
The file element creates a file upload interface. Here’s an example from modules/user/user.module:
$form['picture']['picture_upload'] = array( '#type' => 'file',
'#title' => t('Upload picture'), '#size' => 48,
'#description' => t('Your virtual face or picture.')
);
The way this element is rendered is shown in Figure 11-16.
Figure 11-16. A file upload element
Note that if you use the file element, you’ll need to set the enctype property at the root of your form:
$form['#attributes']['enctype'] = 'multipart/form-data';
285
CHAPTER 11 ■ THE FORM API
Properties commonly used with the file element are #attributes, #default_value, #description,
#prefix, #required, #size (the default is 60), #suffix, #title, and #weight.
Fieldset
A fieldset element is used to group elements together. It can be declared collapsible, which means JavaScript automatically provided by Drupal is used to open and close the fieldset dynamically with a click while a user is viewing the form. Note the use of the #access property in this example to allow or deny access to all fields within the fieldset:
// Node author information for administrators. $form['author'] = array(
'#type' => 'fieldset',
'#access' => user_access('administer nodes'), '#title' => t('Authoring information'), '#collapsible' => TRUE,
'#collapsed' => TRUE, '#weight' => 20,
);
Properties commonly used with the fieldset element are #attributes, #collapsed (the default is
FALSE), #collapsible (the default is FALSE), #description, #prefix, #suffix, #title, #process (the default is array('form_process_fieldset', 'ajax_process_form')), and #weight.
Submit
The submit element is used to submit the form. The word displayed inside the button defaults to “Submit” but can be changed using the #value property:
$form['submit'] = array( '#type' => 'submit', '#value' => t('Continue'),
);
Properties commonly used with the submit element are #attributes, #button_type (the default is
“submit”), #executes_submit_callback (the default is TRUE), #name (the default is “op”), #prefix, #suffix, #value, #process (the default is array('ajax_process_form')), and #weight.
Additionally, the #validate and #submit properties may be assigned directly to the submit element. For example, if #submit is set to array('my_special_form_submit'), the function my_special_form_submit() will be used instead of the form’s defined submit handler(s).
Button
The button element is the same as the submit element except that the #executes_submit_callback property defaults to FALSE. This property tells Drupal whether to process the form (when TRUE) or simply re-render the form (if FALSE). Like the Submit button, specific validation and submit functions can be assigned directly to a button.
286

CHAPTER 11 ■ THE FORM API
Image Button
The image button element is the same as the submit element with two exceptions. First, it has a #src property that has the URL of an image as its value. Secondly, it sets the internal form property #has_garbage_value to TRUE, which prevents #default_value from being used due to a bug in Microsoft Internet Explorer. Do not use #default_value with image buttons. Here is an image button that uses the built-in Powered by Drupal image as the button:
$form['my_image_button'] = array( '#type' => 'image_button',
'#src' => 'misc/powered-blue-80x15.png', '#value' => 'foo',
);
The value of the button can be safely retrieved by looking in $form_state['clicked_button']['#value'].
Markup
The markup element is the default element type if no #type property has been used. It is used to introduce text or HTML into the middle of a form.
$form['disclaimer'] = array( '#prefix' => '<div>',
'#markup' => t('The information below is entirely optional.'), '#suffix' => '</div>',
);
Properties commonly used with the markup element are #attributes, #prefix (the default is the empty string ''), #suffix (the default is the empty string ''), #value, and #weight.
■ Caution If you are outputting text inside a collapsible fieldset, wrap it in <div> or other block HTML element tags, like <p>, so that when the fieldset is collapsed, your text will collapse within it.
Item
The item element is formatted in the same way as other input element types like text element or select element, but it lacks the input field.
$form['removed'] = array( '#title' => t('Shoe size'), '#type' => 'item',
'#description' => t('This question has been removed because the law prohibits us from asking your shoe size.'),
);
287

CHAPTER 11 ■ THE FORM API
The preceding element is rendered as shown in Figure 11-17.
Figure 11-17. An item element
Properties commonly used with the item element are #attributes, #description, #prefix (the default is an empty string, ''), #required, #suffix (the default is an empty string, ''), #title, #value, and
#weight.
#ajax Property
AJAX-enabled forms in Drupal provide the ability to dynamically modify forms as a user interacts with the elements on the form. A common example is to update the list of items in a select list based on some value that the user selected or entered in a previous field – for example, select an automobile manufacturer from a select list changes the list of available models based on the value selected by the user. While you can perform that action without AJAX, its nice to not force the user to sit through a page reload the form populates the values in the second drop down list. AJAX provides the means for performing that update without having to reload the whole page, only the part that needs to be changed. The benefits of using the Form API’s AJAX capbilities include:
•AJAX forms provide dynamic form behavior without forcing the user to sit through one or more page reloads while the form updates an element.
•You as the developer don't have to code Javascript to create an AJAX-enabled form. The Form API does all of the heavy lifting for you.
•AJAX forms are often simpler than multistep forms.
The process for creating an AJAX-enabled form is relatively simple:
Create or update an existing form element and mark it as AJAX-enabled by using the #ajax property. Form elements marked as AJAX-enabled trigger a background AJAX call when the user change it or clicks on it.
The #ajax['wrapper'] property includes the HTML ID of a page section that will be modified when the Ajax call is executed.
The #ajax['callback'] indicates which callback should be executed after the
AJAX call happens and the form is rebuilt.
Second, create a callback function using the name of the callback listed in #ajax['callback']. This function’s primary typically updates the content of the HTML ID identified in the #ajax[‘wrapper’].
288
CHAPTER 11 ■ THE FORM API
The following example demonstrates the use of Ajax by creating a form with two select lists, one for automobile manufacturer and the second for the models offered by that manufacturer. When a user selects a manufacturer from the list, the second select list is automatically updated with the list of models that are offered by the manufacturer that was selected by the user. The second select list is updated through Ajax without having to reload the page. Only that section of the page that contains the model select list is updated.
/**
*A form with a dropdown whose options are dependent on a
*choice made in a previous dropdown.
*
*On changing the first dropdown, the options in the second
*are updated.
*/
function automobile_dependent_dropdown($form, &$form_state) {
//get the list of manufacturers to populate the manuacturer dropdown $options_first = _automobile_get_manufacturer_dropdown_options();
//if we have a value for the manufacturer dropdown from
//$form_state['values'] we use this both as the default value for
//the first dropdown and also as a parameter to pass to the
//function that retrieves the options for the second dropdown.
$selected = isset($form_state['values']['manufacturer_dropdown']) ? $form_state['values']['manufacturer_dropdown'] : key($options_first);
$form['manufacturer_dropdown'] = array( '#type' => 'select',
'#title' => 'Manufacturer', '#options' => $options_first, '#default_value' => $selected,
//bind an ajax callback to the change event (which is the default for the
//select form type) of the manufacturer dropdown. It will replace the
//model dropdown when rebuilt
'#ajax' => array(
'callback' => 'automobile_dependent_dropdown_callback', 'wrapper' => 'dropdown_model_replace',
),
);
$form['model_dropdown'] = array( '#type' => 'select',
'#title' => 'Model',
//The entire enclosing div created here gets replaced when manufacturer_dropdown
//is changed.
'#prefix' => '<div id="dropdown_model_replace">', '#suffix' => '</div>',
//when the form is rebuilt during ajax processing, the $selected variable
//will now have the new value and so the models will change
'#options' => _automobile_get_model_dropdown_options($selected), '#default_value' => isset($form_state['values']['model_dropdown']) ?
289
Download from Wow! eBook <www.wowebook.com>
CHAPTER 11 ■ THE FORM API
$form_state['values']['model_dropdown'] : '', );
$form['submit'] = array( '#type' => 'submit', '#value' => t('Submit'),
);
return $form;
}
/**
*Selects just the model dropdown to be returned for re-rendering
*The version here has been re-loaded with a different set of options and
*is sent back to the page to be updated.
*
* @return renderable array (the second dropdown) */
function automobile_dependent_dropdown_callback($form, $form_state) { return $form['model_dropdown'];
}
/**
*Helper function to populate the manufacturer dropdown. This would normally be
*pulling data from the database.
*
* @return array of options */
function _automobile_get_manufacturer_dropdown_options() {
// drupal_map_assoc() just makes an array('Strings' => 'Strings'...).
return drupal_map_assoc(array(t('Honda'), t('Toyota'), t('Ford'), t('Volkswagen')));
}
/**
*Helper function to populate the model dropdown. This would normally be
*pulling data from the database.
*
*@param key. This will determine which set of options is returned.
*@return array of options
*/
function _automobile_get_model_dropdown_options($key = '') { $options = array(
t('Honda') => drupal_map_assoc(array(t('Accord'), t('Civic'), t('CRX'), t('Pilot'))), t('Toyota') => drupal_map_assoc(array(t('Camry'), t('Yaris'), t('Tundra'),
t('Tacoma'))),
t('Ford') => drupal_map_assoc(array(t('F-150'), t('Explorer'), t('Escape'), t('Edge'))), t('Volkswagen') => drupal_map_assoc(array(t('GTI'), t('Passat'), t('Jeta'), t('Polo'))),
);
290

CHAPTER 11 ■ THE FORM API
if (isset($options[$key])) { return $options[$key];
}
else {
return array();
}
}
The general processing performed by the code above:
1.Presents the form to the user, as any form would be.
2.In the form, a div with an HTML ID of ' dropdown_model_replace ' wraps $form['model_dropdown'] . This is done with $form['model_dropdown'] ['#prefix'] and $form['model_dropdown'] ['#suffix'].
3.When the user changes $form['manufacturer_dropdown'] a background request is made to the server, causing the form to be rebuilt.
4.The form is rebuilt and the values for model are reset based on the value selected in the $form[‘model_dropdown’]
5.The function automobile_dependent_dropdown_callback() is called. It selects the piece of the form which is to be replaced on the page (almost always the same as what's in #ajax['wrapper']).
6.The portion returned is rendered, sent back to the page, and the div with id ‘dropdown_model_replace’ is replaced on the page.
CAUTIONS AND TIPS
You can only make changes to the form in the form builder function (automobile_dependent_dropdown() in the example here), or validation will fail. The callback function must not alter the form or any other state.
You can replace any HTML on the page, not just a form element. This is just a matter of providing a wrapper ID.
You can replace the entire form if like. Just add a #prefix and #suffix to the entire form array, then set that as the #ajax['wrapper']. (This will allow you to change multiple form elements via a single ajax call.) Just be aware that the more information transferred, the slower the process.
Remember that the $form you're dealing with in your callback function has already been sent through all the form processing functions (but hasn't yet been sent to drupal_render()). So while adjusting, say, the markup of an element is straightforward:
<?php
$elements['some_element']['#markup'] = 'New markup.'; return $elements;
?>
291

CHAPTER 11 ■ THE FORM API
Changing a value that has already been converted into the #attributes property means digging deeper into the $form array, as well as also changing that element's corresponding property.
<?php
// You need to do both $elements['some_element']['#disabled'] = TRUE;
$elements['some_element']['#attributes']['disabled'] = 'disabled'; return $elements;
?>
If Javascript is not supported
Best practices call for providing a graceful for degrading behavior when the users browser does not support Javascript. AJAX forms provide the ability to address this, but it may take considerable effort to make a form behave correctly in either a Javascript or non-javascript environment. In most cases you must provide alternative means for navigating, such as a "next" button for the AJAX-enabled element. When it is pressed, the page (and form) are rebuilt emulating the same functionality when the AJAXenabled element is changed, but with a page reload. The Examples module provides several examples of AJAX with graceful degradation in ajax_example_graceful_degradation.inc:
•An add-more button
•A dependent dropdown example
•Dynamic sections
•Wizard (classic multistep form)
Additional AJAX features
The AJAX Framework provides many additional features and options in beyond basic forms behavior.
•AJAX Framework Commands may be used on the server side to generate dynamic behaviors on the page. The #ajax['callback'] function may return an array of commands instead of returning a renderable array or an HTML string. This provides the ablity to create dynamic functions that extend beyond simple Form API operations.
•The #ajax['callback'] does not have to return a portion of the form. It can return any renderable array, or it can return an HTML string.
•The replace method is the default and most common, but it is also possible to do other things with the content returned by the #ajax['callback'], including prepending, appending, etc.
•If you want to replace ajax_form_callback() with your own functions, use ajax_form_callback() would be the model for your replacement. In that case, you would change #ajax['path'] from the default 'system/ajax' and set up a menu entry in hook_menu() to point to your replacement path.
292