
- •Contents at a Glance
- •Contents
- •Foreword
- •About the Authors
- •About the Technical Reviewers
- •Acknowledgments
- •Introduction
- •How Drupal Works
- •What Is Drupal?
- •Technology Stack
- •Core
- •Administrative Interface
- •Modules
- •Hooks
- •Themes
- •Nodes
- •Fields
- •Blocks
- •File Layout
- •Serving a Request
- •The Web Server’s Role
- •The Bootstrap Process
- •Processing a Request
- •Theming the Data
- •Summary
- •Writing a Module
- •Creating the Files
- •Implementing a Hook
- •Adding Module-Specific Settings
- •Defining Your Own Administration Section
- •Presenting a Settings Form to the User
- •Validating User-Submitted Settings
- •Storing Settings
- •Using Drupal’s variables Table
- •Retrieving Stored Values with variable_get()
- •Further Steps
- •Summary
- •Hooks, Actions, and Triggers
- •Understanding Events and Triggers
- •Understanding Actions
- •The Trigger User Interface
- •Your First Action
- •Assigning the Action
- •Changing Which Triggers an Action Supports
- •Actions That Support Any Trigger
- •Advanced Actions
- •Using the Context in Actions
- •How the Trigger Module Prepares the Context
- •Changing Existing Actions with action_info_alter()
- •Establishing the Context
- •How Actions Are Stored
- •The actions Table
- •Action IDs
- •Calling an Action Directly with actions_do()
- •Defining Your Own Triggers with hook_trigger_info()
- •Adding Triggers to Existing Hooks
- •Summary
- •The Menu System
- •Callback Mapping
- •Mapping URLs to Functions
- •Creating a Menu Item
- •Page Callback Arguments
- •Page Callbacks in Other Files
- •Adding a Link to the Navigation Block
- •Menu Nesting
- •Access Control
- •Title Localization and Customization
- •Defining a Title Callback
- •Wildcards in Menu Items
- •Basic Wildcards
- •Wildcards and Page Callback Parameters
- •Using the Value of a Wildcard
- •Wildcards and Parameter Replacement
- •Passing Additional Arguments to the Load Function
- •Special, Predefined Load Arguments: %map and %index
- •Building Paths from Wildcards Using to_arg() Functions
- •Special Cases for Wildcards and to_arg() Functions
- •Altering Menu Items from Other Modules
- •Altering Menu Links from Other Modules
- •Kinds of Menu Items
- •Common Tasks
- •Assigning Callbacks Without Adding a Link to the Menu
- •Displaying Menu Items As Tabs
- •Hiding Existing Menu Items
- •Using menu.module
- •Common Mistakes
- •Summary
- •Working with Databases
- •Defining Database Parameters
- •Understanding the Database Abstraction Layer
- •Connecting to the Database
- •Performing Simple Queries
- •Retrieving Query Results
- •Getting a Single Value
- •Getting Multiple Rows
- •Using the Query Builder and Query Objects
- •Getting a Limited Range of Results
- •Getting Results for Paged Display
- •Other Common Queries
- •Inserts and Updates with drupal_write_record()
- •The Schema API
- •Using Module .install Files
- •Creating Tables
- •Using the Schema Module
- •Field Type Mapping from Schema to Database
- •Textual
- •Varchar
- •Char
- •Text
- •Numerical
- •Integer
- •Serial
- •Float
- •Numeric
- •Date and Time: Datetime
- •Binary: Blob
- •Declaring a Specific Column Type with mysql_type
- •Maintaining Tables
- •Deleting Tables on Uninstall
- •Changing Existing Schemas with hook_schema_alter()
- •Modifying Other Modules’ Queries with hook_query_alter()
- •Connecting to Multiple Databases Within Drupal
- •Using a Temporary Table
- •Writing Your Own Database Driver
- •Summary
- •Working with Users
- •The $user Object
- •Testing If a User Is Logged In
- •Introduction to user hooks
- •Understanding hook_user_view($account, $view_mode)
- •The User Registration Process
- •Using profile.module to Collect User Information
- •The Login Process
- •Adding Data to the $user Object at Load Time
- •Providing User Information Categories
- •External Login
- •Summary
- •Working with Nodes
- •So What Exactly Is a Node?
- •Not Everything Is a Node
- •Creating a Node Module
- •Creating the .install File
- •Creating the .info File
- •Creating the .module File
- •Providing Information About Our Node Type
- •Modifying the Menu Callback
- •Defining Node-Type–Specific Permissions with hook_permission()
- •Limiting Access to a Node Type with hook__node_access()
- •Customizing the Node Form for Our Node Type
- •Validating Fields with hook_validate()
- •Saving Our Data with hook_insert()
- •Keeping Data Current with hook_update()
- •Cleaning Up with hook_delete()
- •Modifying Nodes of Our Type with hook_load()
- •Using hook_view()
- •Manipulating Nodes That Are Not Our Type with hook_node_xxxxx()
- •How Nodes Are Stored
- •Creating a Node Type with Custom Content Types
- •Restricting Access to Nodes
- •Defining Node Grants
- •What Is a Realm?
- •What Is a Grant ID?
- •The Node Access Process
- •Summary
- •Working with Fields
- •Creating Content Types
- •Adding Fields to a Content Type
- •Creating a Custom Field
- •Adding Fields Programmatically
- •Summary
- •The Theme System
- •Themes
- •Installing an Off-the-Shelf Theme
- •Building a Theme
- •The .info File
- •Adding Regions to Your Theme
- •Adding CSS Files to Your Theme
- •Adding JavaScript Files
- •Adding Settings to Your Theme
- •Understanding Template Files
- •The Big Picture
- •The html.php.tpl File
- •The page.tpl.php File
- •The region.tpl.php File
- •The node.tpl.php File
- •The field.tpl.php File
- •The block.tpl.php File
- •Overriding Template Files
- •Other Template Files
- •Introducing the theme() Function
- •An Overview of How theme() Works
- •Overriding Themable Items
- •Overriding with Template Files
- •Adding and Manipulating Template Variables
- •Using the Theme Developer Module
- •Summary
- •Working with Blocks
- •What Is a Block?
- •Block Configuration Options
- •Block Placement
- •Defining a Block
- •Using the Block Hooks
- •Building a Block
- •Enabling a Block When a Module Is Installed
- •Block Visibility Examples
- •Displaying a Block to Logged-In Users Only
- •Displaying a Block to Anonymous Users Only
- •Summary
- •The Form API
- •Understanding Form Processing
- •Initializing the Process
- •Setting a Token
- •Setting an ID
- •Collecting All Possible Form Element Definitions
- •Looking for a Validation Function
- •Looking for a Submit Function
- •Allowing Modules to Alter the Form Before It’s Built
- •Building the Form
- •Allowing Functions to Alter the Form After It’s Built
- •Checking If the Form Has Been Submitted
- •Finding a Theme Function for the Form
- •Allowing Modules to Modify the Form Before It’s Rendered
- •Rendering the Form
- •Validating the Form
- •Token Validation
- •Built-In Validation
- •Element-Specific Validation
- •Validation Callbacks
- •Submitting the Form
- •Redirecting the User
- •Creating Basic Forms
- •Form Properties
- •Form IDs
- •Fieldsets
- •Theming Forms
- •Using #prefix, #suffix, and #markup
- •Using a Theme Function
- •Telling Drupal Which Theme Function to Use
- •Specifying Validation and Submission Functions with hook_forms()
- •Call Order of Theme, Validation, and Submission Functions
- •Writing a Validation Function
- •Form Rebuilding
- •Writing a Submit Function
- •Changing Forms with hook_form_alter()
- •Altering Any Form
- •Altering a Specific Form
- •Submitting Forms Programmatically with drupal_form_submit()
- •Dynamic Forms
- •Form API Properties
- •Properties for the Root of the Form
- •#action
- •#built
- •#method
- •Properties Added to All Elements
- •#description
- •#attributes
- •#required
- •#tree
- •Properties Allowed in All Elements
- •#type
- •#access
- •#after_build
- •#array_parents
- •#attached
- •#default_value
- •#disabled
- •#element_validate
- •#parents
- •#post_render
- •#prefix
- •#pre_render
- •#process
- •#states
- •#suffix
- •#theme
- •#theme_wrappers
- •#title
- •#tree
- •#weight
- •Form Elements
- •Text Field
- •Password
- •Password with Confirmation
- •Textarea
- •Select
- •Radio Buttons
- •Check Boxes
- •Value
- •Hidden
- •Date
- •Weight
- •File Upload
- •Fieldset
- •Submit
- •Button
- •Image Button
- •Markup
- •Item
- •#ajax Property
- •Summary
- •Filters
- •Filters and Text formats
- •Installing a Filter
- •Knowing When to Use Filters
- •Creating a Custom Filter
- •Implementing hook_filter_info()
- •The Process Function
- •Helper Function
- •Summary
- •Searching and Indexing Content
- •Building a Custom Search Page
- •The Default Search Form
- •The Advanced Search Form
- •Adding to the Search Form
- •Introducing the Search Hooks
- •Formatting Search Results with hook_search_page()
- •Making Path Aliases Searchable
- •Using the Search HTML Indexer
- •When to Use the Indexer
- •How the Indexer Works
- •Adding Metadata to Nodes: hook_node_update_index()
- •Indexing Content That Isn’t a Node: hook_update_index()
- •Summary
- •Working with Files
- •How Drupal Serves Files
- •Managed and Unmanaged Drupal APIs
- •Public Files
- •Private Files
- •PHP Settings
- •Media Handling
- •Upload Field
- •Video and Audio
- •File API
- •Database Schema
- •Common Tasks and Functions
- •Finding the Default Files URI
- •Copying and Moving Files
- •Checking Directories
- •Uploading Files
- •Getting the URL for a File
- •Finding Files in a Directory
- •Finding the Temp Directory
- •Neutralizing Dangerous Files
- •Checking Disk Space
- •Authentication Hooks for Downloading
- •Summary
- •Working with Taxonomy
- •The Structure of Taxonomy
- •Creating a Vocabulary
- •Creating Terms
- •Assigning a Vocabulary to a Content Type
- •Kinds of Taxonomy
- •Flat
- •Hierarchical
- •Multiple Hierarchical
- •Viewing Content by Term
- •Using AND and OR in URLs
- •Specifying Depth for Hierarchical Vocabularies
- •Automatic RSS Feeds
- •Storing Taxonomies
- •Module-Based Vocabularies
- •Creating a Module-Based Vocabulary
- •Keeping Informed of Vocabulary Changes with Taxonomy Hooks
- •Common Tasks
- •Displaying Taxonomy Terms Associated with a Node
- •Building Your Own Taxonomy Queries
- •Using taxonomy_select_nodes()
- •Taxonomy Functions
- •Retrieving Information About Vocabularies
- •taxonomy_vocabulary_load($vid)
- •taxonomy_get_vocabularies()
- •Adding, Modifying, and Deleting Vocabularies
- •taxonomy_vocabulary_save($vocabulary)
- •taxonomy_vocabulary_delete($vid)
- •Retrieving Information About Terms
- •taxonomy_load_term($tid)
- •taxonomy_get_term_by_name($name)
- •Adding, Modifying, and Deleting Terms
- •taxonomy_term_save($term)
- •taxonomy_term_delete($tid)
- •Retrieving Information About Term Hierarchy
- •taxonomy_get_parents($tid, $key)
- •taxonomy_get_parents_all($tid)
- •taxonomy_get_children($tid, $vid, $key)
- •taxonomy_get_tree($vid, $parent, $max_depth, $load_entities = FALSE)
- •Finding Nodes with Certain Terms
- •Additional Resources
- •Summary
- •Caching
- •Knowing When to Cache
- •How Caching Works
- •How Caching Is Used Within Drupal Core
- •Menu System
- •Caching Filtered Text
- •Administration Variables and Module Settings
- •Disabling Caching
- •Page Caching
- •Static Page Caching
- •Blocks
- •Using the Cache API
- •Caching Data with cache_set()
- •Retrieving Cached Data with cache_get() and cache_get_multiple()
- •Checking to See If Cache Is Empty with cache_is_empty()
- •Clearing Cache with cache_clear_all()
- •Summary
- •Sessions
- •What Are Sessions?
- •Usage
- •Session-Related Settings
- •In .htaccess
- •In settings.php
- •In bootstrap.inc
- •Requiring Cookies
- •Storage
- •Session Life Cycle
- •Session Conversations
- •First Visit
- •Second Visit
- •User with an Account
- •Common Tasks
- •Changing the Length of Time Before a Cookie Expires
- •Changing the Name of the Session
- •Storing Data in the Session
- •Summary
- •Using jQuery
- •What Is jQuery?
- •How jQuery Works
- •Using a CSS ID Selector
- •Using a CSS Class Selector
- •jQuery Within Drupal
- •Your First jQuery Code
- •Targeting an Element by ID
- •Method Chaining
- •Adding or Removing a Class
- •Wrapping Existing Elements
- •Changing Values of CSS Elements
- •Where to Put JavaScript
- •Adding JavaScript via a Theme .info File
- •A Module That Uses jQuery
- •Overridable JavaScript
- •Building a jQuery Voting Widget
- •Building the Module
- •Using Drupal.behaviors
- •Ways to Extend This Module
- •Compatibility
- •Next Steps
- •Summary
- •Localization and Translation
- •Enabling the Locale Module
- •User Interface Translation
- •Strings
- •Translating Strings with t()
- •Replacing Built-In Strings with Custom Strings
- •String Overrides in settings.php
- •Replacing Strings with the Locale Module
- •Exporting Your Translation
- •Starting a New Translation
- •Generating .pot Files with Translation Template Extractor
- •Creating a .pot File for Your Module
- •Using the Command Line
- •Using the Web-Based Extractor
- •Creating .pot Files for an Entire Site
- •Installing a Language Translation
- •Setting Up a Translation at Install Time
- •Installing a Translation on an Existing Site
- •Right-to-Left Language Support
- •Language Negotiation
- •Default
- •User-Preferred Language
- •The Global $language Object
- •Path Prefix Only
- •Path Prefix with Language Fallback
- •URL Only
- •Content Translation
- •Introducing the Content Translation Module
- •Multilingual Support
- •Multilingual Support with Translation
- •Localizationand Translation-Related Files
- •Additional Resources
- •Summary
- •What Is XML-RPC?
- •Prerequisites for XML-RPC
- •XML-RPC Clients
- •XML-RPC Client Example: Getting the Time
- •XML-RPC Client Example: Getting the Name of a State
- •Handling XML-RPC Client Errors
- •Network Errors
- •HTTP Errors
- •Call Syntax Errors
- •A Simple XML-RPC Server
- •Mapping Your Method with hook_xmlrpc()
- •Automatic Parameter Type Validation with hook_xmlrpc()
- •Built-In XML-RPC Methods
- •system.listMethods
- •system.methodSignature
- •system.methodHelp
- •system.getCapabilities
- •system.multiCall
- •Summary
- •Writing Secure Code
- •Handling User Input
- •Thinking About Data Types
- •Plain Text
- •HTML Text
- •Rich Text
- •Using check_plain() and t() to Sanitize Output
- •Using filter_xss() to Prevent Cross-Site Scripting Attacks
- •Using filter_xss_admin()
- •Handling URLs Securely
- •Making Queries Secure with db_query()
- •Keeping Private Data Private with hook_query_alter()
- •Dynamic Queries
- •Permissions and Page Callbacks
- •Cross-Site Request Forgeries (CSRF)
- •File Security
- •File Permissions
- •Protected Files
- •File Uploads
- •Filenames and Paths
- •Encoding Mail Headers
- •Files for Production Environments
- •SSL Support
- •Stand-Alone PHP
- •AJAX Security, a.k.a. Request Replay Attack
- •Form API Security
- •Protecting the Superuser Account
- •Summary
- •Development Best Practices
- •Coding Standards
- •Line Indention and Whitespace
- •Operators
- •Casting
- •Control Structures
- •Function Calls
- •Function Declarations
- •Function Names
- •Class Constructor Calls
- •Arrays
- •Quotes
- •String Concatenators
- •Comments
- •Documentation Examples
- •Documenting Constants
- •Documenting Functions
- •Documenting Hook Implementations
- •Including Code
- •PHP Code Tags
- •Semicolons
- •Example URLs
- •Naming Conventions
- •Checking Your Coding Style with Coder Module
- •Finding Your Way Around Code with grep
- •Summary
- •Optimizing Drupal
- •Caching Is the Key to Drupal Performance
- •Optimizing PHP
- •Setting PHP Opcode Cache File to /dev/zero
- •PHP Process Pool Settings
- •Tuning Apache
- •mod_expires
- •Moving Directives from .htaccess to httpd.conf
- •MPM Prefork vs. Apache MPM Worker
- •Balancing the Apache Pool Size
- •Decreasing Apache Timeout
- •Disabling Unused Apache Modules
- •Using Nginx Instead of Apache
- •Using Pressflow
- •Varnish
- •Normalizing incoming requests for better Varnish hits
- •Varnish: finding extraneous cookies
- •Boost
- •Boost vs. Varnish
- •Linux System Tuning for High Traffic Servers
- •Using Fast File Systems
- •Dedicated Servers vs. Virtual Servers
- •Avoiding Calling External Web Services
- •Decreasing Server Timeouts
- •Database Optimization
- •Enabling MySQL’s Query Cache
- •MySQL InnoDB Performance on Windows
- •Drupal Performance
- •Eliminating 404 Errors
- •Disabling Modules You’re Not Using
- •Drupal-Specific Optimizations
- •Page Caching
- •Bandwidth Optimization
- •Pruning the Sessions Table
- •Managing the Traffic of Authenticated Users
- •Logging to the Database
- •Logging to Syslog
- •Running cron
- •Architectures
- •Single Server
- •Separate Database Server
- •Separate Database Server and a Web Server Cluster
- •Load Balancing
- •File Uploads and Synchronization
- •Multiple Database Servers
- •Database Replication
- •Database Partitioning
- •Finding the Bottleneck
- •Web Server Running Out of CPU
- •Web Server Running Out of RAM
- •Identifying Expensive Database Queries
- •Identifying Expensive Pages
- •Identifying Expensive Code
- •Optimizing Tables
- •Caching Queries Manually
- •Changing the Table Type from MyISAM to InnoDB
- •Summary
- •Installation Profiles
- •Creating a New Installation Profile
- •The enhanced.info File
- •The enhanced.profile File
- •The enhanced.install File
- •Using hook_install_tasks and hook_install_tasks_alter
- •Summary
- •Testing
- •Setting Up the Test Environment
- •How Tests Are Defined
- •Test Functions
- •Test Assertions
- •Summary
- •Database Table Reference
- •Resources
- •Code
- •The Drupal Source Code Repository on GIT
- •Examples
- •Drupal API Reference
- •Security Advisories
- •Updating Modules
- •Updating Themes
- •Handbooks
- •Forums
- •Mailing Lists
- •Development
- •Themes
- •Translations
- •User Groups and Interest Groups
- •Internet Relay Chat
- •North America
- •Europe
- •Asia
- •Latin America / Caribbean
- •Oceania
- •Africa
- •Videocasts
- •Weblogs
- •Conferences
- •Contribute
- •Index
- •Numbers

CHAPTER 7 ■ WORKING WITH NODES
Customizing the Node Form for Our Node Type
So far, you’ve got the metadata defined for your new node type and the access permissions defined. Next, you need to build the node form so that users can enter a job. You do that by implementing hook_form(). Drupal provides a standard node form that includes the title, body, and any optional fields that you have defined. For the job post content type, the standard form is more than adequate, so I’ll use it to render the add/edit form.
/**
* Implement hook_form() with the standard default form. */
function job_post_form($node, $form_state) { return node_content_form($node, $form_state);
}
■ Note If you are unfamiliar with the form API, see Chapter 11.
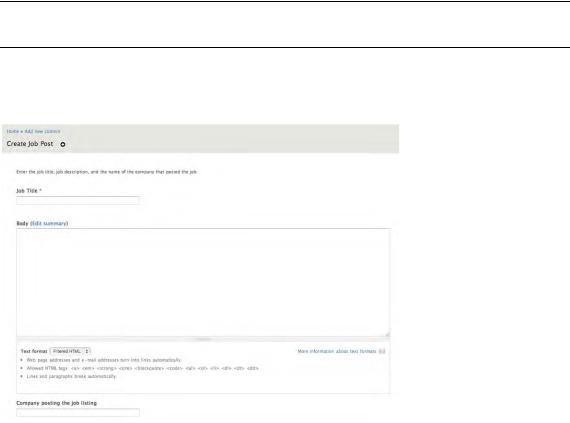
As the site administrator, if you’ve enabled your module, you can now navigate to Add content -> Job Post and view the newly created form (see Figure 7-3).
Figure 7-3. The form for submission of a job post
148

CHAPTER 7 ■ WORKING WITH NODES
When you’re working with a node form and not a generic form, the node module handles validating and storing all the default fields it knows about within the node form (such as the title and body fields) and provides you, the developer, with hooks to validate and store your custom fields. We’ll cover those next.
Validating Fields with hook_validate()
When a node of your node type is submitted, your module will be called via hook_validate(). Thus, when the user submits the form to create or edit a job post, the invocation of hook_validate() will look for the function job_post_validate() so that you can validate the input in your custom field(s). You can make changes to the data after submission—see form_set_value(). Errors should be set with form_set_error(), as follows:
/**
* Implements hook_validate(). */
function job_post_validate($node) {
// Enforce a minimum character count of 2 on company names. if (isset($node->job_post_company) &&
strlen($node->job_post_company['und'][0]['value']) < 2) { form_set_error('job_post_company',
t('The company name is too short. It must be atleast 2
characters.'),
$limit_validation_errors = NULL);
}
}
Notice that you already defined a minimum word count for the body field in hook_node_info(), and Drupal will validate that for you automatically. However, the punchline field is an extra field you added to the node type form, so you are responsible for validating (and loading and saving) it.
Saving Our Data with hook_insert()
When a new node is saved, hook_insert() is called. This is the place to handle any custom processing of the node’s content before the node is saved. This hook is called only for the module that is defined in the node type metadata. This information is defined in the base key of hook_node_info() (see the “Providing Information About Our Node Type” section). For example, if the base key is job_post, then job_post_insert() is called. If you enabled the book module and created a new node of type book, job_post_insert() would not be called; book_insert() would be called instead because book.module defines its node type with a base key of book.
■ Note If you need to do something with a node of a different type when it’s inserted, use a node hook to hook into the general node submittal process. See the “Manipulating Nodes That Are Not Our Type with hook_node_insert()” section.
149
Download from Wow! eBook <www.wowebook.com>
CHAPTER 7 ■ WORKING WITH NODES
Here’s the hook_insert() function for job_post.module. I’ll create a log entry in the watchdog table every time a new job posting node is created.
/**
* Implements hook_insert(). */
function job_post_insert($node) {
// log details of the job posting to watchdog
watchdog('job post', 'A new job post titled: '.$node->title.' for company: '. $node->job_post_company['und'][0]['value'].
' was added by UID: '.$node->uid, $variables = array(), WATCHDOG_NOTICE, $link = 'node/'.$node->nid);
}
Keeping Data Current with hook_update()
The update() hook is called when a node has been edited and the core node data has already been written to the database. This is the place to write database updates for related tables. Like hook_insert(), this hook is called only for the current node type. For example, if the node type’s module key in hook_node_info() is job_post, then job_post_update() is called.
/**
* Implements hook_update(). */
function job_post_update($node) {
// log details of the job posting to watchdog
watchdog('job post', 'A job post titled: '.$node->title.' for company: '. $node->job_post_company['und'][0]['value'].
' was updated by UID: '.$node->uid, $variables = array(), WATCHDOG_NOTICE, $link = 'node/'.$node->nid);
}
Cleaning Up with hook_delete()
Just after a node is deleted from the database, Drupal lets modules know what has happened via hook_delete(). This hook is typically used to delete related information from the database. This hook is called only for the current node type being deleted. If the node type’s base key in hook_node_info() is job_post, then job_post_delete() is called.
/**
* Implements hook_delete(). */
function job_post_delete($node) {
// log details of the job posting to watchdog
watchdog('job post', 'A job post titled: '.$node->title.' for company: '. $node->job_post_company['und'][0]['value'].
' was deleted by UID: '.$node->uid, $variables = array(), WATCHDOG_NOTICE, $link = 'node/'.$node->nid);
}
150
CHAPTER 7 ■ WORKING WITH NODES
Modifying Nodes of Our Type with hook_load()
Another hook you need for your job_post module is the ability to add custom node attributes into the node object as it’s constructed. We need to inject the job post sponsor into the node loading process so it’s available to other modules and the theme layer. For that you use hook_load().
This hook is called just after the core node object has been built and is called only for the current node type being loaded. If the node type’s module key in hook_node_info() is job_post, then job_post_load() is called. In the example, I will insert a node attribute called sponsor and will assign a value that can then be used elsewhere.
/**
* Implements hook_load(). */
function job_post_load($nodes) {
//Add a new element to the node at load time for storing the
//job posting sponsor information
foreach ($nodes as $node) {
$node->sponsor = "ACME Career Services, Your Source for Drupal Jobs";
}
return $node;
}
Using hook_view()
Now you have a complete system to enter and edit job posts. However, your sponsors will be frustrated, because although sponsor information has been added previously through hook_load, you haven’t provided a way for the sponsor information to be displayed when viewing a job post. I’ll do that now with hook_view():
/**
* Implement hook_view(). */
function job_post_view($node, $view_mode) {
// Add and theme the sponsor so it appears when the job post is displayed if ($view_mode == 'full') {
$node->content['sponsor'] = array(
'#markup' => theme('sponsor', array('sponsor' => $node->sponsor, ‘sponsor_id’ => $node_nid)),
'#weight' => 100,
);
}
return $node;
}
I’ve broken the formatting of the sponsor into a separate theme function so that it can be easily overridden. This is a courtesy to the overworked system administrators who will be using your module but who want to customize the look and feel of the output. To enable this capability, I’ll create a hook_theme() function that defines how the module will handle theming the new sponsor field. In the hook_theme function, I’ll define the variables associated with the sponsor field and the template file that will be used to define how the sponsor information will be rendered as part of the node.
151
CHAPTER 7 ■ WORKING WITH NODES
/**
* Implements hook_theme(). */
function job_post_theme() {
//define the variables and template associated with the sponsor field
//The sponsor will contain the name of the sponsor and the sponsor_id
//will be used to create a unique CSS ID
return array( 'sponsor' => array(
'variables' => array('sponsor' => NULL, 'sponsor_id' => NULL), 'template' => 'sponsor',
),
);
}
The last step in the process is to create the template file for displaying sponsor information. In the hook_theme() function, I assigned the value sponsor to the template file attribute—so I’ll need to create a sponsor.tpl.php file in my module directory. The content of that file is as follows:
<?php
/**
*@file
*Default theme implementation for rendering job post sponsor information
*Available variables:
*- $sponsor_id: the node ID asociated with the job posting
* - $sponsor: the name of the job post sponsor */ ?>
<div id="sponsor-<?php print $sponsor_id ?>" class="sponsor"> <div class="sponsor-title">
<h2>Sponsored by</h2> </div>
<div class="sponsored-by-message">
This job posting was sponsored by: <?php print $sponsor; ?> </div>
</div>
You will need to clear the cached theme registry so that Drupal will look at your theme hook. You can clear the cache using devel.module or by simply visiting the Modules page. You should now have a fully functioning job post entry and viewing system. Go ahead and enter some job posts and try things out. You should see your job post in a plain and simple format, as in Figures 7-4 and 7-5.
152