

Force_on_Force
.pdfRUSSIAN HEAVY VEHICLES
NAME |
Class |
Type |
Firepower |
Gun |
MGs |
Front |
Side |
Rear |
Deck |
Crew |
Attributes/Notes |
|
Rating |
Armor |
Armor |
Armor |
Armor |
|
|||||||
|
|
|
|
|
|
|
|
|||||
|
|
|
|
|
|
|
|
|
|
|
|
|
T-55 AM (refit) |
H |
T |
100mm Cannon (Med. Gun, AP: 4/AT:4) |
Medium |
3D |
3D8 |
2D8 |
1D6 |
1D6 |
4 |
Obsolete |
|
|
|
|
|
|
|
|
|
|
|
|
Light for Class |
|
|
|
|
|
|
|
|
|
|
|
|
Up Armored (front only due to "bra armor") |
|
|
|
|
|
|
|
|
|
|
|
|
Death Trap |
|
T-62M1 |
H |
T |
115mm Cannon (AP: 4/AT:4) |
Heavy |
3D |
4D8 |
3D8 |
2D6 |
1D6 |
4 |
Obsolete |
|
|
|
|
Gun Launched ATGM (AP:3/AT:4*) |
Heavy |
|
|
|
|
|
|
Up Armored |
|
|
|
|
*Ignores ERA, -1 Defense Die vs. Advanced |
|
|
|
|
|
|
|
Main Gun and ATGM may not be fired at the same |
|
|
|
|
ERA |
|
|
|
|
|
|
|
time |
|
T-64BV |
H |
T |
125mm Cannon (AP: 4/AT:5) |
Heavy |
3D |
4D10 |
3D10 |
2D8 |
2D6 |
3 |
ERA |
|
|
|
|
Gun Launched ATGM (AP:3/AT:4*) |
Heavy |
|
|
|
|
|
|
Main Gun and ATGM may not be fired |
|
|
|
|
*Ignores ERA, -1 Defense Die vs. Advanced |
|
|
|
|
|
|
|
at the same time |
|
|
|
|
ERA |
|
|
|
|
|
|
|
|
|
T-72BM |
H |
T |
125mm Cannon (Gun, AP: 4/AT:5) |
Heavy |
3D |
4D10 |
3D10 |
2D8 |
2D6 |
3 |
ERA (Kontakt-5) |
|
|
|
|
Gun Launched ATGM (AP:3/AT:4*) |
Heavy |
|
|
|
|
|
|
Death Trap |
|
|
|
|
*Ignores ERA, -1 Defense Die vs. Advanced |
|
|
|
|
|
|
|
Main Gun and ATGM may not be fired at the same |
|
|
|
|
ERA |
|
|
|
|
|
|
|
time |
|
T-80UM |
H |
T |
125mm Cannon (AP: 4/AT:5) |
Heavy |
3D |
4D12 |
3D12 |
2D10 |
2D6 |
3 |
ERA (Kontakt-5) |
|
|
|
|
Gun Launched ATGM (AP:3/AT:4*) |
Heavy |
|
|
|
|
|
|
Death Trap |
|
|
|
|
*Ignores ERA, -1 Defense Die vs. Advanced |
|
|
|
|
|
|
|
Main Gun and ATGM may not be fired at the same |
|
|
|
|
ERA |
|
|
|
|
|
|
|
time |
|
T-90 |
H |
T |
125mm Cannon (AP: 4/AT:5) |
Heavy |
3D |
4D12 |
3D12 |
2D10 |
2D6 |
3 |
ERA (Kontakt-5) |
|
|
|
|
Gun Launched ATGM (AP:3/AT:4*) |
Heavy |
|
|
|
|
|
|
APS 2 (Shfora-1) |
|
|
|
|
*Ignores ERA, -1 Defense Die vs. Advanced |
|
|
|
|
|
|
|
Main Gun and ATGM may not be fired at the same |
|
|
|
|
ERA |
|
|
|
|
|
|
|
time |
|
VEHICLES AND ORGANIZATIONS SAMPLE 4: APPENDIX
SCENARIOS
Since Force on Force doesn’t use point-balanced armies, the typical “let’s beat each other up and whoever has the most toys left standing wins” approach to matches really doesn’t apply.
As stated previously, Force on Force is a scenario driven game. As such, the winner and loser of a match is determined by the victory conditions of the scenario they are playing. Towards this end, each Force on Force scenario includes a list of objectives or accomplishments that will garner one side or the other “victory points.”
At the end of a game, victory points are totaled for both sides and the difference between those totals is used to determine who (if anyone) won and by how wide a margin:
Regular Victory Points
Major Objective Completed: 5pts Minor Objective Completed: 2pts Per Hot Spot Neutralized: 3pts
No Friendly POWs at Game End: 5pts
Per POW Captured: 1pt
Per Enemy Infantry Unit Reduced Below Half Strength: 1pt
Per Enemy Vehicle Disabled/Destroyed: 2pts Per Enemy Tank Disabled/Destroyed: 3pts Per Irregular unit Broken: 1pt
Margin of Victory Table
Difference of 0–4 points: Indecisive
Difference of 5–9 points: Marginal
Difference of 10–14 points: Decisive
Different of 15+ points: Total
SUGGESTED VICTORY POINT VALUES
Victory points are listed for individual scenarios, but the following list can be used as a general guideline for creating victory points for your own scenarios.
These victory point values are only suggestions. Some scenarios may give the same victory conditions completely different point values. You may decide that victory point values should be adjusted up or down based on their relative importance in scenarios you write yourself.
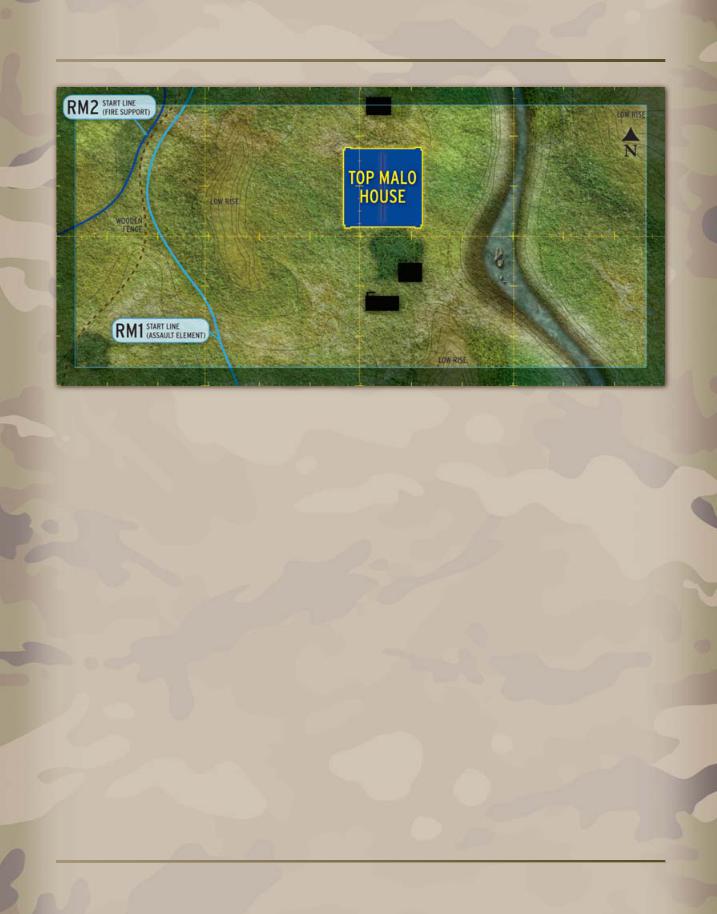
SCENARIO 1: TOP MALO
The Falklands, May 31, 1982
A small element of Argentine Army Special Forces from Commando 602, under the leadership of Captain Verseci, were forced to retreat from their observation post on Mount Simon by the harsh weather to a disused farm known as Top Malo House. Unbeknown to the Argentines, their movement was spotted by a reconnaissance patrol from the Royal Marine
Mountain and Arctic Warfare Cadre (M&AW). Any Argentine OPs in the area would be able to report on the advance of 5 Infantry Brigade and had to be eliminated.
Due to atmospheric conditions affecting communications, the commander of the M&AW Cadre, Captain Boswell, was forced to scratch together an ad hoc force from his HQ element and his sole reserve patrol. The nineteen man force split into an assault and fire support group and advanced toward Top Malo House.
182
SCENARIOS
1 x BTR w/Commander, Driver, and Gunner (Commander, Driver and Gunner do not dismount with squad)
Motorized Rifle Platoon (BTR-80A)
1 x Platoon Leader w/Pistol (rides in 1st Squad’s BTR) 1 x Sniper w/SVD Sniper Rifle (rides in 1st Squad’s BTR)
1 x Assistant Platoon Leader w/AK74 (rides in 2nd Squad’s BTR)
1 x Medic w/AK74 (rides in 3rd Squad’s BTR) 3 x Motorized Rifle Squads
UNITED KINGDOM
British Army
Initiative Level: D8 to D10 Confidence Level: Confident to High
Supply Level: Normal to Abundant
Body Armor: 1D
Troop Quality/Morale: D8 to D10/D8 to D12
183

FORCE ON FORCE
Royal Marine Section
1 x Section Leader w/M16A1
Fire Team One Alpha
1 x Fireteam Leader w/SLR
1 x Grenadier w/M16A1 and M79 (Lt. AP:1/AT:0)
1 x Rifleman w/M16A1
1 x Rifleman w/SLR
Argentine Commando 602 Mission
Hold Top Malo House until the end of Turn 6 whilst inflicting as many casualties on the British as possible. Secondary objective, if holding the house becomes untenable, is to safely withdraw off-board. All Commandos must deploy initially within Top Malo House.
|
Commando 602 Victory Points |
Fire Team One Bravo |
Hold Top Malo until the end of Turn 6: 2pts. |
1 x Fireteam Leader w/SLR |
Withdraw at least 50% of force off-board by end of |
1 x Rifleman w/M16A1 |
Turn 6: 3pts. |
1 x Gunner w/L4A2 SAW (Lt. AP:1/AT:0) |
Per British casualty KIA or with Serious Wounds: |
1 x Rifleman w/SLR |
1pt. |
Fire Support Group |
Commando 602 Force |
Royal Marine Section |
Commando 602 Basic Force Attributes |
1 x Section Leader w/M16A1 and M72 LAW (Med. |
Initiative Level: D8 |
AP:2/AT:1(M) |
Confidence Level: Confident |
|
Supply Level: Normal |
Fire Team One Alpha |
Body Armor: None |
1 x Fireteam Leader w/SLR and M72 LAW (Med. |
Troop Quality/Morale: D8/D8 |
AP:2/AT:1(M) |
|
1 x Grenadier w/M16A1 and M79 (Lt. AP:1/AT:0) |
Comando 602 HQ Element |
1 x Gunner w/L7A2 GPMG (Med. AP:2/AT:0) |
1 x Captain Verseci w/FN-FAL |
Fire Team One Bravo |
Comando 602 Assault Group |
1 x Fireteam Leader w/SLR and M72 LAW (Med. |
1 x Section Leader w/FN-FAL |
AP:2/AT:1(M) |
|
1 x Rifleman w/M16A1 and M72 LAW (Med. |
Fire Team One Alpha |
AP:2/AT:1(M) |
1 x Fireteam Leader w/FN-FAL |
1 x Sniper w/L42A1 |
1 x Grenadier w/FN-FAL and rifle grenades |
|
(Lt. AP:1/AT:0) |
|
3 x Rifleman w/FN-FAL |
184

SCENARIOS
Fire Team One Bravo
1 x Fireteam Leader w/FN-FAL
1 x Grenadier w/FN-FAL and rifle grenades (Lt. AP:1D/AT:0)
3 x Rifleman w/FN-FAL
Comando 602 Support Group
1 x Fireteam Leader w/FN-FAL
1 x Grenadier w/FN-FAL and rifle grenades (Lt. AP:1/AT:0)
1 x Gunner w/MAG58 GPMG (Med. AP:2/AT:0)
1 x Rifleman w/FN-FAL
1 x Sniper w/Weatherby .300 Magnum
Special Rules
Buildings
Top Malo House is considered a flimsy structure as it was built entirely from wood (Weak Structure 3 dice and Shoddy Construction D6 although counts as Solid Cover) and is at risk of fire from LAW and 40mm grenades. Each time the building is struck by a 40mm grenade or LAW, use the Building Destruction rules. The first failed result indicates the building has caught alight and all occupants must exit the building within two turns or be overcome by the smoke and fire. A second failed result indicates the building has collapsed as per the standard Building Destruction results.
Optional Rules
Night Fighting
The original plan for the assault on Top Malo called for the operation to be performed in the pre-dawn darkness but delays in the arrival of a Royal Navy Sea King to insert the Marines meant it occurred in daylight. The scenario can optionally be played using the standard Night Fighting rules. Both sides are equipped with night vision.
Argentine Forward Observer
Add a Forward Observer (FO) with Heavy Mortars on call.
SCENARIO 2: OF BIRDS AND BEES
North of An Khe, December 26, 1966
LZ Bird sat in a crook of the Kim Son River, which flowed along three sides of the firebase. With the river in full flood, the soldiers of “Cavalry” Company felt safe and secure, as only one avenue of assault was available to the enemy. Their complacency was no doubt deepened by the afterglow of Christmas celebration. Unfortunately, their “Silent Night” would be noisily shattered by an 0105 (1:05 AM) mortar attack that preceded an all-out assault by the 22nd Regiment of the NVA.
Thanks more to the firebase’s poor defenses and undermanned garrison than to their own martial prowess, the 22nd NVA quickly overran most of the base. Intermittent rain and darkness kept air support at bay and Bird’s radio was knocked out within moments of the attack, making
Historical Outcome
LZ Bird was a juicy target for the NVA. It was undermanned, over-confident and, by some reports, poorly led. The day would have surely been the NVA’s if not for Bird’s secret weapon: A 155mm howitzer firing newly developed
“bee-hive” rounds. The awful carnage broke the back of the NVA attack. To add insult injury, the-retreating members of the 22nd Regiment were harried by an experimental gunship, one of-the infamous Go-Go Birds!
The US victory was costly, however, with over 130 casualties. Over 300 NVA dead were found in and around LZ Bird after the battle.
You can read more about this engagement in Osprey
Fortress 58: Vietnam Firebases 1965–73.
185
FORCE ON FORCE
calls for coordinated artillery fires difficult. None-the-less, nearby LZ Pony responded to Bird’s hasty call for help with illumination rounds and pre-registered HE fires around the stricken firebase’s perimeter.
As the NVA closed in on LZ Bird’s dwindling defenders, victory seemed certain – but the Vietnamese leaders were not aware that Bird had two remaining cards up their sleeve – and both of them were aces!
Scenario Information
Duration of Game: 6 Turns
Initiative: NVA for first 3 turns. Test for Initiative thereafter
Special Conditions:
NVA Reinforcements: NVA Reinforcements arrive from Hot Spots at the beginning of every turn after the first.
Scenario Timeline:
Turn 4: Beehive rounds have been located and Howitzer is ready to fire, assuming it is crewed with at least three gunners (since Bird is an artillery base, it is assumed that any three figures in cohesion with the undamaged howitzer can act as crew)
Turn 5: Go-Go Bird arrives and may engage ground targets who are not Danger Close to US units
Air Defense Environment: N/A
Fog of War: Normal generation by Reaction Tests, redraw any artillery or air support related cards.
Special Assets:
US: Beehive rounds and Go-Go Bird. See Special Rules section of scenario for details.
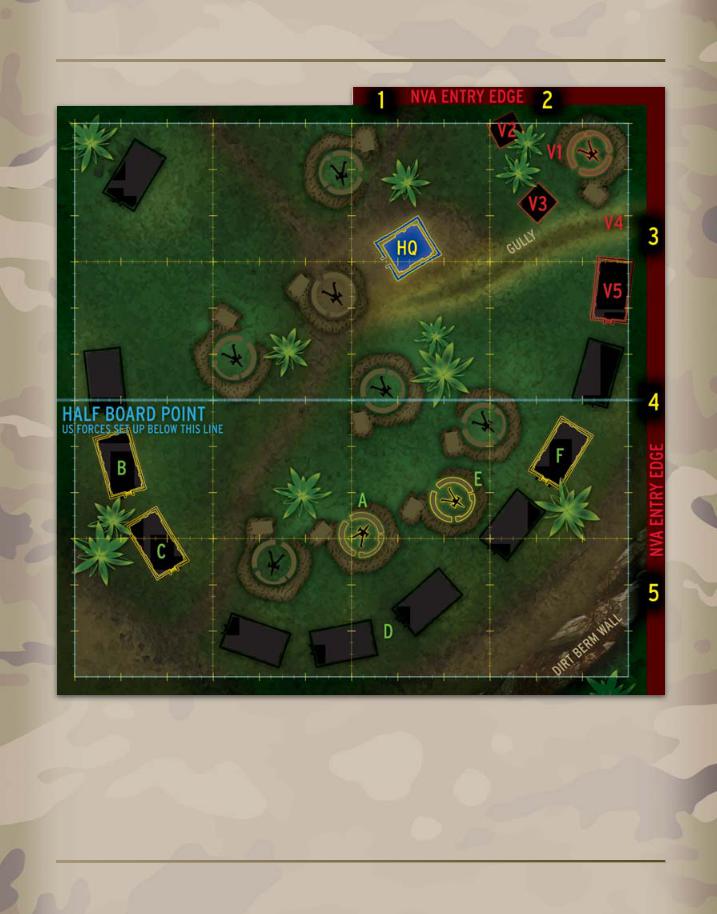
Table Size: 2’ x 2’
A–F: US Fireteams
V1–V5: NVA Assault Teams
1–5: Hot Spot entry points
US Mission
Hold the base, if you don’t want to spend the rest of the war as guests of Uncle Ho! The new bee-hive rounds for the 105s might help turn the tide – they can be direct fired at the enemy. The only problem is, nobody knows if they actually work. Some hope is better than none, though, which is what we’ll have if we can’t hold on until the rain lets up enough to let reinforcements and air support through.
US Victory Points
Hold 105mm Howitzer until Turn 4: 5pts.
Each US soldier alive at the end of Turn 6: 1pt.
Each enemy soldier killed or seriously wounded: 1pt.
US Force
US Basic Force Attributes
Initiative Level: D8
Confidence Level: Confident
Supply Level: Normal
Body Armor: N/A
Troop Quality/Morale:
D8/D8
Fireteam 1
1 x Fireteam leader w/M16
1 x Grenadier w/Blooper (Lt. AP:1D/AT:0)
3 x Riflemen w/M16
Fireteam 2
1 x Fireteam leader w/M16
1 x Grenadier w/Blooper (Lt.AP:1/AT:0)
3 x Riflemen w/M16
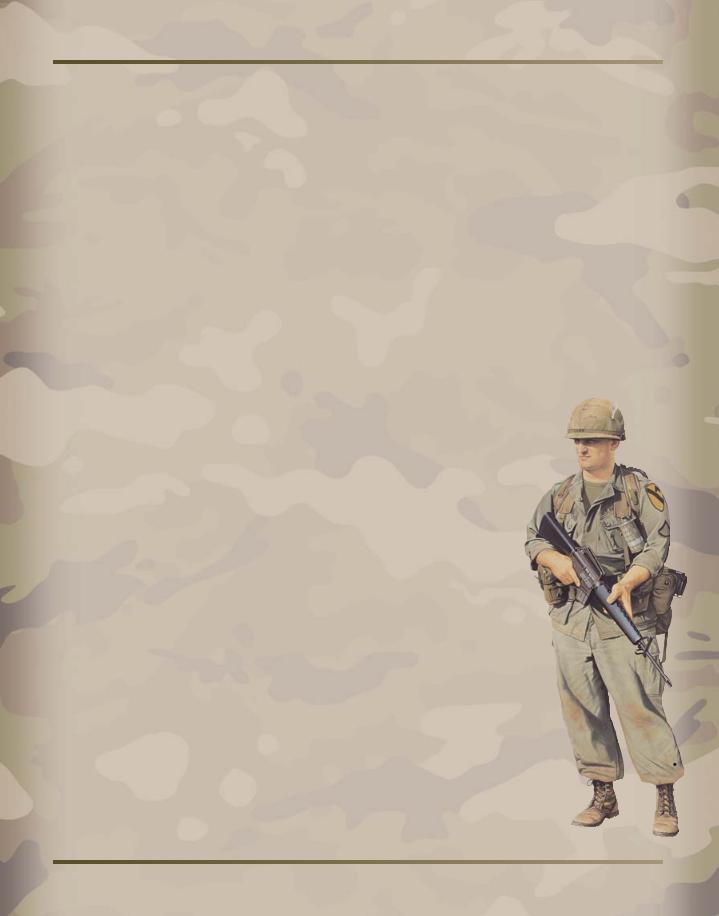
US Infantryman, Vietnam,
1967
186
SCENARIOS
1 x Grenadier w/M203 (Lt. AP:1/AT:0) |
1 x Squad Leader w/M4 (ACOG equipped) |
1 x Gunner w/M249 SAW (Lt. AP:1/AT:0) |
2 x Rifle Fireteams |
1 x Assistant Gunner w/M4 (ACOG equipped) |
*One rifleman per squad is an AT specialist and carries |
|
Javelin AT launcher in addition to his M4. One rifleman |
US Army Rifle Squad* |
per squad is also a Designated Marksman (DMR) armed |
187
FORCE ON FORCE
Fireteam 5 (Weapon Team)
1 x Gunner w/M60 GPMG (Med. AP:2/AT:0)
1 x A-Gunner w/M16
Fireteam 6
1 x Gunner w/M60 GPMG (Med. AP:2/AT:0)
1 x A-Gunner w/M16
NVA Mission
This Yankee base is poorly defended by lazy American soldiers who have no stomach to fight. We would have destroyed them nights ago, under the dark of the moon, if the rain had not delayed our march. Tonight we will overrun their base and kill or capture them
all!
NVA Victory Points
Each enemy soldier killed seriously wounded: 2pts.
Each Enemy solider taken as a POW: 3pts.
Each Friendly Vehicle that exits the table edge indicated on the map by the end of Turn 6: 5pts.
Ransack the Yankee
Command Bunker: 3pts.
Kill or Capture ALL US troops: VICTORY!
NVA Force
NVA Basic Force Attributes
Initiative Level: D8
Confidence Level: High
Supply Level: Normal
Body Armor: None
Troop Quality/Morale: D6/D10
NVA Assault Team 1
1 x Leader w/AK
1 x Gunner w/RPG (Med. AP:2/AT:1(M)
3 x Riflemen w/AKs
NVA Assault Team 2
1 x Leader w/AK
5 x Riflemen w/AKs
NVA Assault Team 3
1 x Leader w/AK
1 x Gunner w/RPK MG (Lt. AP:1/AT:0)
3 x Riflemen w/AKs
Assault Team 4
Leader w/AK
Riflemen w/AKs
NVA Assault Team 5
1 x Leader w/AK
1 x Gunner w/RPG (Med. AP:2/AT:1(M)
3 x Riflemen w/AKs
Special Rules
Ransacking the Yankee HQ
To ransack the US HQ bunker, an NVA unit with a leader must enter it and spend its entire activation in the bunker searching it. They take any other action, including returning fire,
following turn.
Rounds
Rounds are terrifyingly effective direct fire antirounds that can be fired from artillery pieces.
155mm Beehive round used in this scenario attacks unit with 10D8 Firepower and any units within
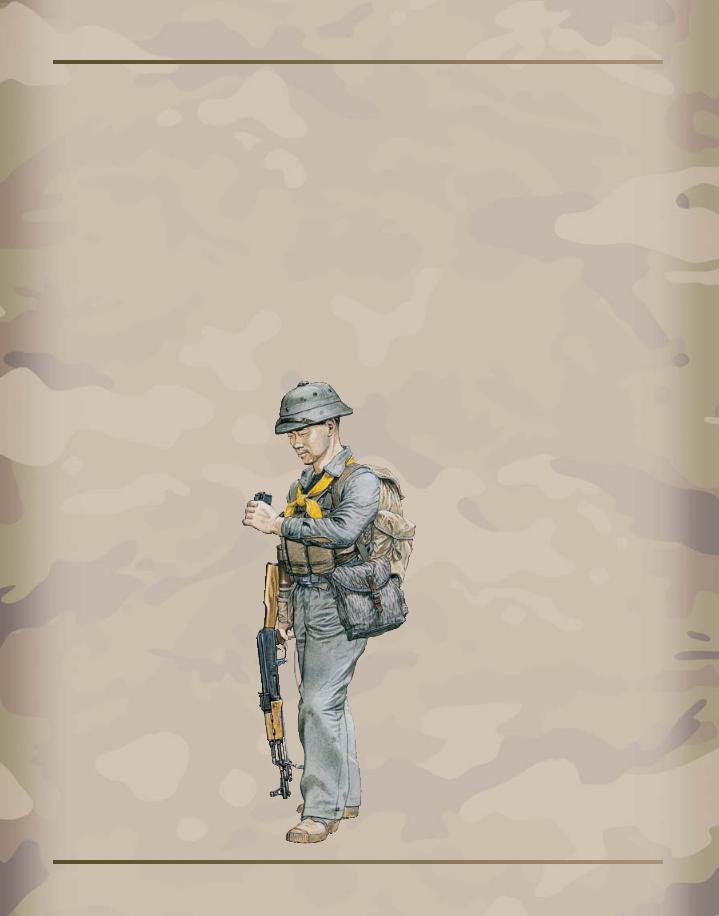
NVA Regular, Vietnam, 1968
188
SCENARIOS
4” of the target unit with a 8D8 Firepower attack. The 155mm Howitzer can only be fired once per turn.
The Go-Go Bird
The ACH-47A was an experimental helicopter gunship, armed with multiple .50 HMGs, a chin mounted 40mm AGL and a selection forward firing 20mm cannons, rocket pods, or 7.62 gatling machineguns. For the purposes of this scenario, treat the Go-Go Bird as a Heavy Helicopter capable of delivering 10D8 Firepower attacks at up to three different targets in the same activation.
SCENARIO 3: WELCOME TO HELL
At around 15:00 hours 31 December 1994, the 131st Motorized Rifle Brigade entered the Chechen capital of Grozny. The attack had so far gone surprisingly well with very light resistance encountered. The Russian objective was the Grozny Central Railroad Station. The 131st was one of four armored columns advancing toward key sites in the city that day. Unbeknown to the conscripts of the 131st due to poor communications and command and control, its sister units were being decimated in a series of set piece ambushes and hit and run raids by the Chechen defenders. The 131st drove unopposed, and unaware, through the North East of the city and arrived
at the Railroad Station. No security cordons or vehicle checkpoints were established, nor even sentries posted, whilst the Russian conscripts relaxed on the decks of their BMPs, some even optimistically buying tickets home from the kiosks at the Railroad Station. It was about this time that the 131st’s commander’s signaler heard the ominous phrase “welcome to hell” spoken in Russian over the radio net. Moments later, all hell did indeed erupt…
Scenario Information
Duration of Game: 8 turns
Initiative: Russians throughout
Special Conditions:
Chechen forces are entirely composed of Irregulars – Use Asymmetric Operations rules.
Air Defense Environment: N/A
Fog of War: Generated normally by Reaction Tests
Table Size: 4’ x 5’
Russian Mission
The 131st must attempt to withdraw from the encircling Chechens before they are overrun. Bad weather precludes air support and poor communications limits artillery indirect fire. The 131st must extricate themselves via several roads leading back toward the northeast of the capital.
Historical Outcome
Caught completely unawares, the 131st were caught in a massive ambush by Chechen irregular forces that had stealthily surrounded the Railroad Station. Small arms fire and volleys of RPGs supported by mortars and the odd ATGM struck the ill-prepared conscripts. Simultaneously, their armored QRF, parked nontactically in nearby narrow alleyways were ambushed by another Chechen force fresh from their victories against the other Russian columns and destroyed
almost to a man. The 131st fought a desperate defense of the Railroad Station which lasted several hours whilst they awaited a relief force that never arrived. Finally the battered and bloody remnants of the 131st managed to break out of the Chechen envelopment but not before losing some 800 of its 1000 soldiers, 20 of its 26 main battle tanks and the majority of its BMP-2s and BRDMs. Approximately 70 Russian soldiers were captured, many to be later executed.
189

FORCE ON FORCE
190