

The AutoContent Wizard and Presentation Design
Perhaps the best place to begin creating a new presentation, particularly if you are new to PowerPoint, is the AutoContent Wizard. This wizard contains a sample presentation with sample text and a selected design. To use the AutoContent Wizard, you follow a series of screens or pages to select a design and sample content that best suits your needs. After you create the sample presentation, you enter and edit text that replaces the sample's text.
To Do: Use the AutoContent Wizard
To use the AutoContent Wizard to create your presentation, follow these steps:
Start PowerPoint.
Click the New Presentation task pane's From AutoContent Wizard option to start the AutoContent Wizard's question-and-answer session. Figure 11.3 shows the first of four wizard screens.
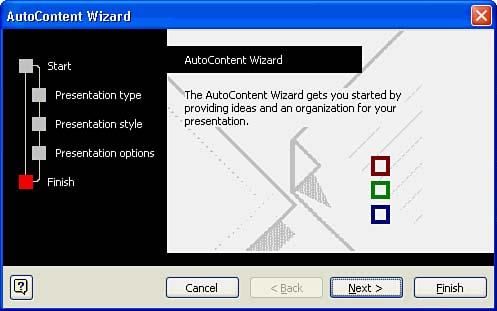
Figure 11.3 The AutoContent Wizard creates an initial presentation.
Answer the AutoContent Wizard's questions to design a presentation that best fits your needs.
The AutoContent Wizard helps you create a presentation with content in place. This presentation's design is intended to match the goals of your presentation. As you follow the AutoContent Wizard, you have to determine the answers to these questions: Who is your audience? What message do you want to convey? Are you selling or offering something? Do you want to display your presentation on a computer screen (as you might do via an overhead projection system), over the Internet (your PowerPoint presentations become Web pages if you want), as overheads that you print first (black-and-white or color), or as 35mm slides?
The best approach now might be to run through the wizard once to see the kinds of questions you are asked.
As you recall from the previous section, PowerPoint comes with several predefined style templates. The AutoContent Wizard uses those templates by selecting the one that best suits the goals you indicated by answering the AutoContent Wizard's questions. After the wizard generates the sample presentation, you can change the sample to include the details of your specific presentation.
Here are some of the template styles and presentation types the AutoContent Wizard chooses from:
Bad news communications
Business plan
Corporate financial overview
Corporate handbook
Corporate home page
Employee orientation
Marketing plan
Project status
Reward certificates
Sales flyers
Team motivation
Technical reporting
Training
All these AutoContent Wizard presentations are available to you even if you don't want the help of the wizard. Instead, you can choose to create a blank presentation directly from a template. PowerPoint supplies two styles for each template: one for an Internet (or company intranet) presentation and one for a standalone PowerPoint presentation.
After you complete the AutoContent Wizard's steps, the wizard generates a sample presentation that matches the style you requested. The wizard generates several slides from that presentation and you can then rearrange, copy, edit, and delete them as needed. Figure 11.4 shows the screen after the AutoContent Wizard was used to generate a sample sales presentation. The left side of the screen shows a list of slide images or a descriptive outline of your presentation, depending on the tab you click. PowerPoint devotes the rest of the screen to whatever slide you select by clicking on a small slide thumbnail to the left.

Figure 11.4 The AutoContent Wizard presents you with sample slides that you can edit.
Note
Although your primary editing area for individual slides resides in the center of the screen, you can rearrange the presentation's slide order, delete slides, copy and paste slides to and from the Clipboard, and see a high-level view of your presentation by clicking the Outline or Slide tabs. When you click on any thumbnail slide image on the Slide tab, that slide appears in the slide pane, where you can make specific edits.
After the AutoContent Wizard creates the presentation outline, you have to fill in the details. The AutoContent fills the slides with sample text and images, but you change that content to match the presentation you want to give. The remaining lessons on PowerPoint in this part of the book describe how to modify individual slides.