

Chapter 7
If we find that there are inadequacies in the GUI for us, then we can edit these files by hand in order to get the functionality we need. There is one major caveat with this, however: we must ensure that we are attentive to the automatic settings produced by the GUI and ensure that any alterations we make are going to be compatible with the GUI, or else we risk breaking the interface entirely; this can be quite a hindrance if our system is to become complicated. This still restricts us—we can't tailor Asterisk@Home to the same degree as we can with Asterisk—and so it isn't always the best option. If we have trouble customizing Asterisk@Home to our need, then creating our own Asterisk build may be a more viable option.
A Simple One-to-One PBX
Now that we have an overview of how the main features of the Asterisk@Home system are customized, we can create a simple PBX for handling a single line and extension for a home user. We can also take the knowledge of call routing gained from previous chapters and apply it to Asterisk@Home: all of the concepts remain the same, we just apply them differently, and the result is virtually indistinguishable.
Extensions
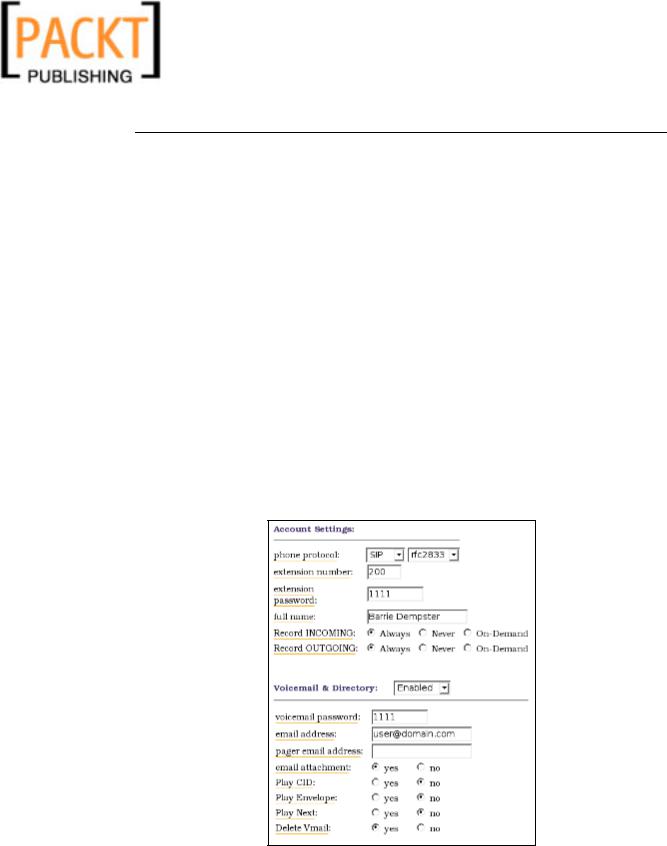
Firstly we will configure our extensions, by opening up the AMP. Click on Setup and find Extensions on the left-hand side. Then configure the extension screen as follows (you may wish to change some settings to fit your own needs):
107
Asterisk@Home
After we have configured the extension, click Add Extension on the bottom right of the screen. This sets up extension 200 for a SIP based phone. We need to click the red bar that appears afterwards to apply the changes to the system.
Trunks
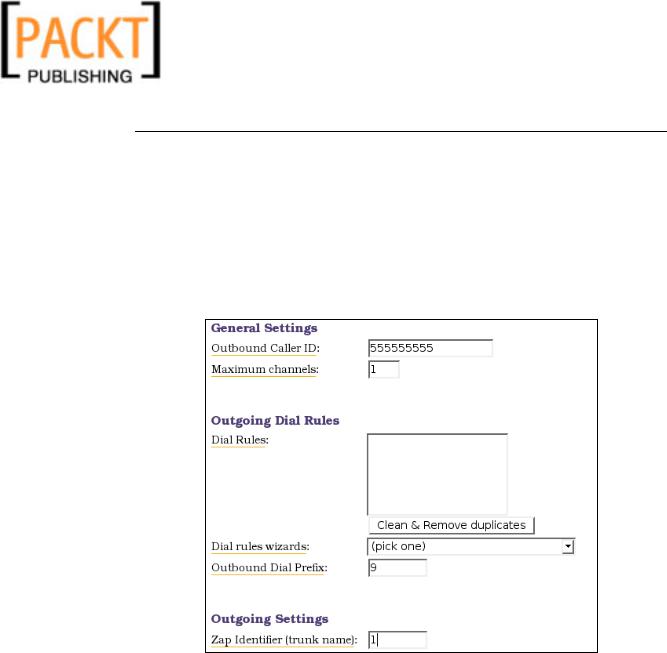
We can now add the trunk for our PSTN interface. We do so by clicking Trunks on the left-hand side, clicking on Add ZAP Trunk (we can add other trunk types as discussed in previous chapters, such as SIP and IAX), and then configuring the trunk as follows (we may also want to delete the default trunk g0 while here):
Obviously we would replace the 555555555 with our own phone number. Again remember to click the red bar afterwards. It's important to note that when we make calls, there is often no check made against the caller ID number we present so we could present anything here. We must verify that it's completely accurate or we may lose the ability for our contacts to recognize us and call us back. This can often be used to an advantage when we want to control the number we present.
Routes
Now that we have extensions and trunks, we require incoming and outgoing calling routes so that calls get to their correct destinations.
108
Chapter 7
Firstly create an incoming route by clicking on Incoming Calls and configuring it as follows:
Then click Submit Changes and our little friend the red bar to confirm.
We also require outgoing routes so that we can route our calls through the trunk that we have set up. Do this by clicking Outbound Routing and then configuring it as shown n the screenshot that follows. You can modify the dial pattern here and can add alternative routes with differing patterns.
109