

Beginning Visual Basic 2005 (2006)
.pdfChapter 7
Reset resets all properties of the Open dialog box to their default values.
ShowDialog shows the dialog box.
The ShowDialog method is straightforward, because it accepts either no parameters or the owner of the dialog box in the form of the Me keyword. So, before calling the ShowDialog method, you must set all the properties that you want to set. After the dialog box returns, you can query the properties to determine which file was selected, the directory, and the type of file selected. An example of the ShowDialog method is shown in the following code fragment:
OpenFileDialog1.ShowDialog()
The OpenFileDialog control returns a DialogResult of OK or Cancel, with OK corresponding to the Open button on the dialog box. This control does not actually open and read a file for you; it is merely a common interface that allows a user to locate and specify the file or files to be opened by the application. You need to query the OpenFileDialog properties that have been set by the control after the user clicks the Open button to determine which file or files should be opened.
Using the OpenFileDialog Control
Now that you have had a look at the OpenFileDialog control, you can put this knowledge to use by writing a program that uses this control.
The program in the next Try It Out uses the OpenFileDialog control to display the Open File dialog box. You use the dialog box to locate and select a text file, and then you’ll read the contents of the file into a text box on your form using the My.Computer.FileSystem namespace.
Try It Out |
Working with OpenFileDialog |
1.Create a new Windows Application project called Dialogs.
2.To give your form a new name, in the Solution Explorer, right-click Form1.vb and choose Rename from the context menu. Then enter a new name of Dialogs.vb. Set the properties of the form as shown in the following list:
Set Size to 456, 304.
Set StartPosition to CenterScreen.
Set Text to Dialogs.
3.Since you are going to read the contents of a file into a text box, you want to add a text box to the form. You also want to add a button to the form so that you can invoke the Open File dialog box at will. Add these two controls to the form and set their properties according to the following list:
Name the text box txtFile and set the following properties: Anchor = Top,Bottom, Left,Right; Location = 8, 8; MultiLine = True; ScrollBars = Vertical; Size = 352, 264.
Name the Button control btnOpen and set the following properties: Anchor = Top, Right; Location = 367, 8; Text = Open.
216

Displaying Dialog Boxes
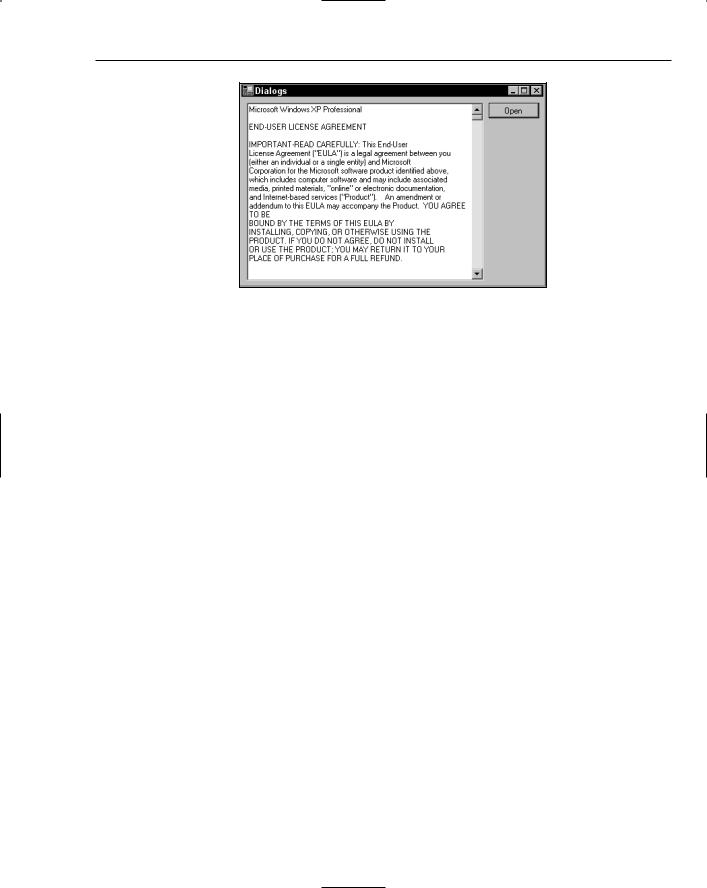
4.When you have finished placing the controls on your form and setting their properties, your form should look similar to Figure 7-7.
Figure 7-7
The reason you anchored your controls in this example is that, when you resize or maximize your form, the text box is resized appropriately to the size of the form, and the button stays in the upper right corner. You can test this at this point by running your project and resizing the form.
5.In the Toolbox, scroll down until you see the OpenFileDialog control and then drag it onto your form and drop it. The control will actually be added to the bottom on the workspace in the IDE.
At this point, you could click the control in the workspace and then set the various properties for this control in the Properties window. However, accept the default name and properties for this control as you’ll set the various properties in code later.
6.Switch to the Code Editor for the form. Then declare a string variable that will contain a filename. You set this variable later in your code to the actual path and filename from the Open File dialog box:
Public Class Dialogs ‘Declare variable
Private strFileName As String
7.Now you need to write some code in the Click event for the btnOpen button. In the Class Name combo box at the top of the Code Editor, select btnOpen, and in the Method Name combo select the Click event. Add the following highlighted code to the Click event handler:
Private Sub btnOpen_Click(ByVal sender As Object, _
ByVal e As System.EventArgs) Handles btnOpen.Click
‘Set the Open dialog properties With OpenFileDialog1
.Filter = “Text files (*.txt)|*.txt|All files (*.*)|*.*”
.FilterIndex = 1
.Title = “Demo Open File Dialog” End With
217

Chapter 7
‘Show the Open dialog and if the user clicks the Open button, ‘load the file
If OpenFileDialog1.ShowDialog = Windows.Forms.DialogResult.OK Then
End If
End Sub
8.Now it’s time to use some of the prebuilt code snippets that come with Visual Studio 2005. Right click in the blank space between the If and End If statements and choose Insert Snippet from the context menu. In the drop-down menu that appears, double-click File System - Processing Drives, Folders, and Files and then scroll down the new list and double-click Read Text from a File. Your code should now look like this, and you’ll notice that the filename test.txt is highlighted, indicating that this code needs to be changed:
If OpenFileDialog1.ShowDialog = Windows.Forms.DialogResult.OK Then
Dim allText As String
Try
allText = My.Computer.FileSystem.ReadAllText(“test.txt”)
Catch fileException As Exception
Throw fileException
End Try
End If
9.Modify the code in the Try block as shown here:
Try
‘Save the file name
strFileName = OpenFileDialog1.FileName ‘Read the contents of the file
allText = My.Computer.FileSystem.ReadAllText(strFileName) ‘Display the file contents in the TextBox
txtFile.Text = allText Catch fileException As Exception
10.Now run your project, and once your form is displayed, click the Open button to have the Open File dialog box displayed. Notice the custom caption in the title bar of the dialog box; you specified this in your code. If you click the Files of type: combo box, you will see two filters. Click the second filter to see all of the files in the current directory.
11.Now locate a text file on your computer and select it. Then click the Open button to have the file opened and the contents of that file placed in the text box on the form as shown in Figure 7-8.
12.For the final test, close your application and then start it again. Click the Open button on the form and notice that the Open File dialog box has opened in the last directory where you selected the last file from.
How It Works
Before displaying the Open File dialog box, you need to set some properties of OpenFileDialog1 so that the dialog box is customized for your application. You can do this with a With . . . End With statement. The With . . . End With statement allows you to make repeated references to a single object without having to specify the object name over and over. You specify the object name once on the line with the With statement and then add all references to the properties of that object before the End With statement.
With OpenFileDialog1
218
Displaying Dialog Boxes
Figure 7-8
The first property that you set is the Filter property. This property enables you to define the filters that are displayed in the Files of type: combo box. When you define a file extension filter, you specify the filter description followed by a vertical bar (|) followed by the file extension. When you want the Filter property to contain multiple file extensions, as shown in the following code, you separate each file filter with a vertical bar as follows:
.Filter = “Text files (*.txt)|*.txt|All files (*.*)|*.*”
The next property that you set is the FilterIndex property. This property determines which filter is shown in the Files of type: combo box. The default value for this property is 1, which is the first filter:
.FilterIndex = 1
Finally, you set the Title property. This is the caption that is displayed in the title bar of the dialog box:
.Title = “Demo Open File Dialog”
To show the Open File dialog box, you use the ShowDialog method. Remember that the ShowDialog method returns a DialogResult value, there are only two possible results, and you can compare the results from the ShowDialog method to Windows.Forms.DialogResult.OK and Windows.Forms
.DialogResult.Cancel. If the user clicks the Open button in the dialog box, the ShowDialog method returns a value of OK, and if the user clicks the Cancel button, the ShowDialog method returns Cancel:
If OpenFileDialog1.ShowDialog = Windows.Forms.DialogResult.OK Then
Next, you use the built-in code snippets provided by Visual Studio 2005 to simplify your programming tasks by using the Read Text from a File code snippet. This code snippet contains the necessary code to read the contents from a text file and to place those contents in a string variable.
You modified the code snippet to retrieve the path and filename that the user has chosen in the Open File dialog box and set it in your strFileName variable. The path and filename are contained in the FileName property of the OpenFileDialog control:
‘Save the file name
strFileName = OpenFileDialog1.FileName
219

Chapter 7
Next, you modify the code from the code snippet supplying the strFileName variable in the highlighted section of code. This code will read the entire contents of the text file into the allText variable:
‘Read the contents of the file
allText = My.Computer.FileSystem.ReadAllText(strFileName)
The final line of code that you wrote takes the contents of the allText variable and sets it in the Text property of the TextBox control, thereby populating the text box with the contents of your text file:
‘Display the file contents in the TextBox txtFile.Text = allText
There are many properties in the OpenFileDialog control that haven’t been covered in this chapter, and you should feel free to experiment on your own to see all of the possibilities that this dialog box has to offer.
The SaveDialog Control
Now that you can open a file with the OpenFileDialog control, take a look at the SaveFileDialog control so that you can save a file. Again, the SaveFileDialog can be used as a control or a class. Once you have mastered the SaveFileDialog as a control, you will not have any problems using SaveFileDialog as a class.
After you open a file, you may need to make some modifications to it and then save it. The SaveFileDialog control provides the same functionality as the OpenFileDialog control, except in reverse. It allows you to choose the location and filename as you save a file. It is important to note that the SaveFileDialog control does not actually save your file; it merely provides a dialog box to allow the user to locate where the file should be saved and to provide a name for the file.
The Properties of SaveFileDialog
The following table lists some of the properties that are available in the SaveFileDialog control. As you can see, this control, or class if you will, contains a wealth of properties that can be used to customize how the dialog box will behave.
Property |
Description |
|
|
AddExtension |
Indicates whether an extension is automatically added to a filename if |
|
the user omits the extension. |
CheckFileExists |
Indicates whether the dialog box displays a warning if the user specifies |
|
a file name that does not exist. This is useful when you want the user to |
|
save a file to an existing name. |
CheckPathExists |
Indicates whether the dialog box displays a warning if the user specifies |
|
a path that does not exist. |
CreatePrompt |
Indicates whether the dialog box prompts the user for permission to cre- |
|
ate a file if the user specifies a file that does not exist. |
|
|
220

|
|
Displaying Dialog Boxes |
|
|
|
|
Property |
Description |
|
|
|
|
DefaultExt |
Indicates the default file extension. |
|
DereferenceLinks |
Indicates whether the dialog box returns the location of the file refer- |
|
|
enced by the shortcut or whether it returns the location of the shortcut |
|
|
itself. |
|
FileName |
Indicates the filename of the selected file in the dialog box. This is a read- |
|
|
only property. |
|
FileNames |
Indicates the filenames of all selected files in the dialog box. This is a |
|
|
read-only property that is returned as a string array. |
|
Filter |
Indicates the current filename filter string, which determines the choices |
|
|
that appear in the Files of type combo box in the dialog box. |
|
FilterIndex |
Indicates the index of the filter currently selected in the dialog box. |
|
InitialDirectory |
Indicates the initial directory displayed in the dialog box. |
|
OverwritePrompt |
Indicates whether the dialog box displays a warning if the user specifies |
|
|
a filename that already exists. |
|
RestoreDirectory |
Indicates whether the dialog box restores the current directory before |
|
|
closing. |
|
ShowHelp |
Indicates whether the Help button is displayed in the dialog box. |
|
Title |
Indicates the title that is displayed in the title bar of the dialog box. |
|
ValidateNames |
Indicates whether the dialog box should accept only valid Win32 |
|
|
filenames. |
|
|
|
The Methods of SaveFileDialog
The SaveFileDialog control exposes the same methods as the OpenFileDialog does. If you want to review these methods, go back to the section “The Methods of OpenFileDialog”. All the examples will use the ShowDialog method to show the Save File dialog.
Using the SaveFileDialog Control
To see how to include the SaveFileDialog control in our project, you begin with the Dialogs project from the last Try It Out as a starting point and build upon it. In this exercise, you want to save the contents of the text box to a file.
You use the SaveFileDialog control to display a Save File dialog box that allows you to specify the location and name of the file. Then you write the contents of the text box on your form to the specified file, again using a built-in code snippet provided by Visual Studio 2005.
221

Chapter 7
Try It Out: |
Working with SaveFileDialog |
1.Open the Dialogs project from the last Try It Out.
2.On the form, add another button from the Toolbox and set its properties as follows:
Set Name to btnSave.
Set Anchor to Top, Right.
Set Location to 367, 38.
Set Text to Save.
3.In the Toolbox, scroll down until you see the SaveFileDialog control and then drag and drop it onto your form. The control will be added to the bottom on the workspace in the IDE.
4.Double-click the Save button to bring up its Click event and add the highlighted code:
Private Sub btnSave_Click(ByVal sender As System.Object, _
ByVal e As System.EventArgs) Handles btnSave.Click
‘Set the Save dialog properties With SaveFileDialog1
.DefaultExt = “txt”
.FileName = strFileName
.Filter = “Text files (*.txt)|*.txt|All files (*.*)|*.*”
.FilterIndex = 1
.OverwritePrompt = True
.Title = “Demo Save File Dialog” End With
‘Show the Save dialog and if the user clicks the Save button, ‘save the file
If SaveFileDialog1.ShowDialog = Windows.Forms.DialogResult.OK Then
End If
End Sub
5.Right click in the blank space between the If and End If statements and choose Insert Snippet... from the context menu. In the drop-down menu that appears, double-click File System - Processing Drives, Folders, and Files and then scroll down the new list and doubleclick Write New Text Files. Your code should now look like this and you’ll notice that the filename test.txt is highlight as well as the string constant “some text”, indicating that this code needs to be changed:
If SaveFileDialog1.ShowDialog = Windows.Forms.DialogResult.OK Then Try
Dim filePath As String
filePath = System.IO.Path.Combine( _ My.Computer.FileSystem.SpecialDirectories.MyDocuments, _
“test.txt”)
My.Computer.FileSystem.WriteAllText(filePath, “some text”, True) Catch fileException As Exception
Throw fileException End Try
End If
222
Displaying Dialog Boxes
6.Modify the code in the Try block as follows:
Try
‘Save the file name
strFileName = SaveFileDialog1.FileName Dim filePath As String
‘Open or Create the file
filePath = System.IO.Path.Combine( _ My.Computer.FileSystem.SpecialDirectories.MyDocuments, _
strFileName)
‘Replace the contents of the file My.Computer.FileSystem.WriteAllText(filePath, txtFile.Text, False)
Catch fileException As Exception
7.At this point, you are ready to test this code so run your project. Start with a simple test by opening an existing text file. Type some text into the text box on the form and then click the Save button. The Save dialog box will be displayed. Notice that the FileName combo box already has a filename in it. This is the filename that was set in the strFileName variable when you declared it in the previous Try It Out.
8.Enter a new filename, but do not put a file extension on it. Then click the Save button and the file will be saved. To verify this, click the Open button on the form to invoke the Open File dialog box. You will see your new file.
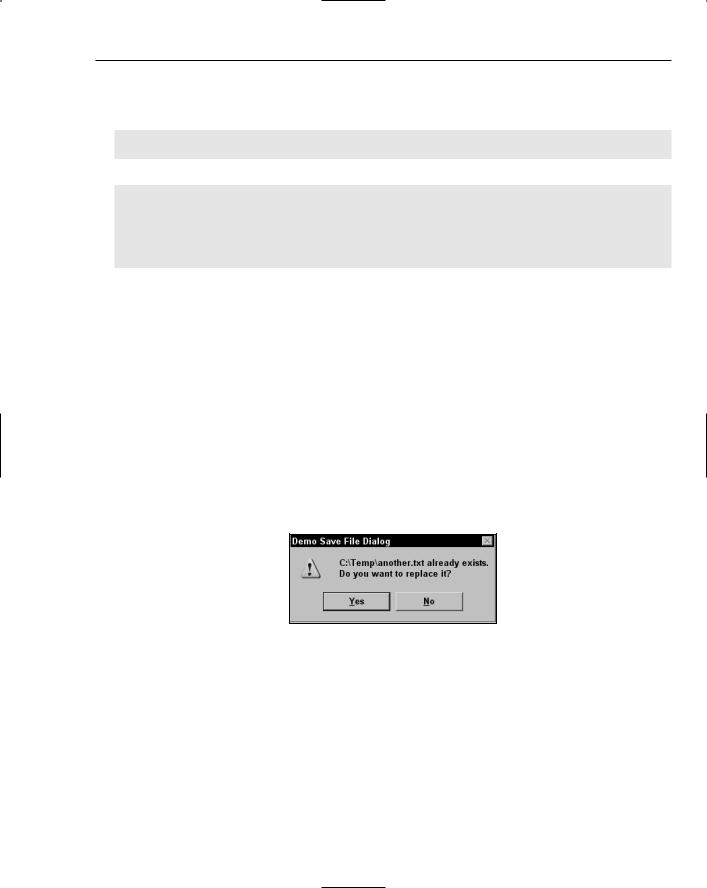
9.To test the OverwritePrompt property of the SaveFileDialog control, enter some more text in the text box on the form and then click the Save button. In the Save File dialog box, choose an existing filename and then click the Save button. You will be prompted to confirm replacement of the existing file as shown in Figure 7-9. If you choose Yes, the dialog box will return a DialogResult of OK, and the code inside your If . . . End If statement will be executed. If you choose No, you will be returned to the Save File dialog box so that you can enter another filename.
Figure 7-9
When the Open File or Save File dialog box is displayed, the context menu is fully functional and you can cut, copy, and paste files, as well as rename and delete them. There are other options in the context menu that vary depending on what software you have installed. For example, if you have WinZip installed, you will see the WinZip options on the context menu.
How It Works
Before displaying the Save File dialog box, you need to set some properties to customize the dialog box to your application. The first property you set is the DefaultExt property. This property automatically
223

Chapter 7
sets the file extension if one has not been specified. For example, if you specify a filename of NewFile with no extension, the dialog box will automatically add .txt to the filename when it returns, so that you end up with a filename of NewFile.txt.
.DefaultExt = “txt”
The FileName property is set to the same path and filename as was returned from the Open File dialog. This allows you to open a file, edit it, and then display the same filename when you show the Save File dialog box. Of course, you can override this filename in the application’s Save File dialog box.
.FileName = strFileName
The next two properties are the same as in the OpenFileDialog control. They set the file extension filters to be displayed in the Save as type: combo box and set the initial filter:
.Filter = “Text files (*.txt)|*.txt|All files (*.*)|*.*”
.FilterIndex = 1
The OverwritePrompt property accepts a Boolean value of True or False. When set to True, this property prompts you with a MessageBox dialog box if you choose an existing filename. If you select Yes, the Save File dialog box returns a DialogResult of OK; if you select No, you are returned to the Save File dialog box to choose another filename. When the OverwritePrompt property is set to False, the Save File dialog box does not prompt you to overwrite an existing file, and your code will overwrite it without asking for the user’s permission.
.OverwritePrompt = True
The Title property sets the caption in the title bar of the Save File dialog box:
.Title = “Demo Save File Dialog”
After you have the properties set, you want to show the dialog box. The ShowDialog method of the SaveFileDialog control also returns a DialogResult, so you can use the SaveFileDialog control in an If . . . End If statement to test the return value.
If the user clicks the Save button in the Save File dialog box, the dialog box returns a DialogResult of OK. If the user clicks the Cancel button in the dialog box, the dialog box returns a DialogResult of
Cancel. The following code tests for Windows.Forms.DialogResult.OK:
If SaveFileDialog1.ShowDialog = Windows.Forms.DialogResult.OK Then
The first thing that you do here is save the path and filename chosen by the user in your strFileName variable. This is done in case the user has chosen a new filename in the dialog box:
Try
‘Save the file name
strFileName = SaveFileDialog1.FileName
Then you modify the code snippet generated by Visual Studio 2005 by replacing the highlighted text with your variables. First you replace the text “test.txt” with your variable, strFileName. This line
224

Displaying Dialog Boxes
of code opens the file for output. Then you replace the text “some text” with the Text property of the text box on your form. This last line of code reads the contents of your text box and writes it to the file. The False parameter at the end of this line of code indicates whether text should be appended to the file. A value of False indicates that the contents of the file should be overwritten.
Dim filePath As String ‘Open or Create the file
filePath = System.IO.Path.Combine( _ My.Computer.FileSystem.SpecialDirectories.MyDocuments, _ strFileName)
‘Replace the contents of the file My.Computer.FileSystem.WriteAllText(filePath, txtFile.Text, False)
The final bit of code in this If . . . End If block merely wraps up the Try . . . Catch block and the If . . .
End If statement.
Catch fileException As Exception
End Try
End If
The FontDialog Control
Sometimes you may need to write an application that allows the user to choose the font in which they want their data to be displayed. Or perhaps you may want to see all available fonts installed on a particular system. This is where the FontDialog control comes in; it displays a list of all available fonts installed on your computer in a standard dialog that your users have become accustomed to.
Like the OpenFileDialog and SaveFileDialog controls, the FontDialog class can be used as a control by dragging it onto a form, or as a class by declaring it in code.
The FontDialog control is really easy to use; you just set some properties, show the dialog box, and then query the properties that you need.
The Properties of FontDialog
The following table lists some of its available properties.
Property |
Description |
|
|
AllowScriptChange |
Indicates whether the user can change the character set specified in |
|
the Script drop-down box to display a character set other than the |
|
one currently displayed. |
Color |
Indicates the selected font color. |
Font |
Indicates the selected font. |
FontMustExist |
Indicates whether the dialog box specifies an error condition if the |
|
user attempts to enter a font or style that does not exist. |
|
|
225