

Beginning Ubuntu Linux - From Novice To Professional (2006)
.pdf458 C H A P T E R 3 1 ■ O P T I M I Z I N G Y O U R S Y S T E M
OPTIMIZING THE KERNEL
You can download the Linux kernel source code and compile your own version of it. This gives you total control over the kernel configuration, so you can leave out parts you don’t want in order to free memory. You can also set certain optimization settings, such as creating a version of the kernel specifically built for your model of CPU.
Although compiling a kernel is a simple procedure, there are many complex questions that you’ll need to answer, and an in-depth knowledge of the way Linux works is necessary.
In addition, compiling your own kernel brings with several issues. The first is that it may not work with any binary modules that you have installed, such as graphics cards or wireless drivers. You can opt to install these yourself from scratch, but this adds to the complexity.
The second problem is that Ubuntu is built around precompiled kernels. Several software packages expect to work with the precompiled kernel and, in addition, Ubuntu may occasionally download an updated prepackaged kernel automatically as part of the system update feature and override the one you’ve created.
If there are any security problems with the kernel version you compiled, you’ll need to recompile a new kernel from scratch (or patch the one you have). This means you’ll have to keep an eye on the security news sites and take action when necessary.
That said, compiling a kernel is an excellent way of learning how Linux works, and the sense of achievement if it all goes well is enormous.
Some people choose to download the kernel source code from the official Linux kernel site, www.kernel. org. However, it makes more sense to download the official Ubuntu release, because this will be tailored for the way your system works. Using the Synaptic Package Manager, simply search for kernel-tree.
You can find several guides to compiling your own kernel online, but I recommend the following posting on the Ubuntu forums web site, which looks at compiling a kernel under Ubuntu: http://ubuntuforums.org/ showthread.php?t=85064.
Freeing Disk Space
After using Ubuntu for some time, you might find that the disk begins to get full. You can keep an eye on disk usage by using the following command in a GNOME Terminal window:
df -h
This will show the free space in terms of megabytes or gigabytes, and also expressed as a percentage figure.
If the disk does start to get full, you can take some steps to make more space available.
Emptying the /tmp Folder
An easy way to regain disk space is to empty the /tmp folder. As with the Windows operating system, this is the folder in which temporary data is stored. Some applications clean up after themselves, but others don’t, leaving behind many megabytes of detritus.
Because the /tmp folder is accessed practically every second the system is up and running, to empty it safely, it’s necessary to switch to run level 1. This ensures few other programs are running and avoids the risk of deleting data that is in use. The following series of commands will switch to run level 1, empty the /tmp folder, and then reboot afterwards:
C H A P T E R 3 1 ■ O P T I M I Z I N G Y O U R S Y S T E M |
459 |
sudo killall gdm
[log in with your username and password] sudo init 1
rm -rf /tmp/* reboot
■Tip On a similar theme, don’t forget to empty the desktop Wastebasket. This can hold many megabytes of old data.
Emptying the Cache of Package Files
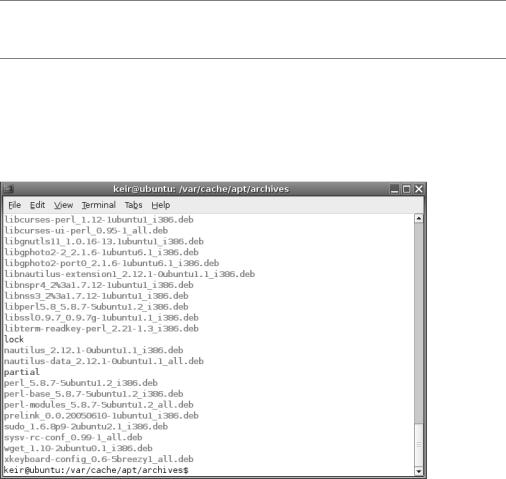
You might also choose to clear out the Advanced Packaging Tool (APT) cache of old .deb package files. On a system that has been very frequently updated, this can free many megabytes (possibly gigabytes) of space, as shown in Figure 31-6.
Figure 31-6. Over time, Ubuntu builds up a library of old package installation files, which you can delete to free some disk space.
You can empty the cache by typing the following command in a GNOME Terminal window:
sudo rm -f /var/cache/apt/archives/*.deb

460 |
C H A P T E R 3 1 ■ O P T I M I Z I N G Y O U R S Y S T E M |
■Caution Be careful to type the command to empty the APT cache exactly as it’s written. Even inserting an additional space can lead to very bad consequences!
If you want to restore any packages later on, simply locate them in the Synaptic Package Manager list, click the check box, and click Mark for Reinstallation. This will cause the package to be downloaded, installed, and configured.
Removing Unused Software
If you still need disk space, consider uninstalling unused programs. As you’ve learned, you manage software through the Synaptic Package Manager (System Administration).
To remove a package, click the check box and select Mark for Removal. However, it’s not a good idea to simply scroll down the list and remove anything that seems dispensable. Because of the way Linux works, many seemingly insignificant packages are actually vital to the running of the system. Instead, it’s a better idea to look for programs on the Applications menu, and then return to the Synaptic Package Manager to remove them by searching for their name.
As always, removing software can create dependency problems, so you might find yourself limited in what software you can actually remove.
■Tip If you want to remove all the desktop games, simply search for gnome-games in the Synaptic Package Manager and mark it for removal.
Adding Another Disk Drive
Another solution to the problem of running out of disk space is to add another hard disk drive, perhaps as a slave on the primary IDE channel. Using a new disk within Ubuntu is very easy and can be done from the command-line shell.
Partitioning the Disk
Once the disk has been fitted, boot into Ubuntu and open a GNOME Terminal window. Use the cfdisk command to initially partition the disk. Assuming that you’ve added the new disk as a slave on the primary channel, use the following command:
sudo cfdisk /dev/hdb
Working out how Ubuntu refers to the hard disks installed on the system isn’t hard. Usually, they’re given letters from a through to d. So, /dev/hda is the primary master, /dev/hdb is the primary slave, /dev/hdc is the secondary master (usually the CD/DVD-ROM drive), and /dev/ hdd is the secondary slave. If your system uses SCSI drives, you’ll find they’re named /dev/sda, /dev/sdb, and so on.
The first thing to do within the cfdisk program is create a new partition. Use the cursor keys to highlight New, and then press Enter. The default partition size should automatically be
C H A P T E R 3 1 ■ O P T I M I Z I N G Y O U R S Y S T E M |
461 |
all of the disk space, so press Enter again to confirm this. With the new partition created, highlight Write on the menu and press Enter. This will write the new partition information. After this, highlight Quit and press Enter. You should then reboot the system to ensure the new partition is made available.
However, it won’t yet be accessible without a little more work. When Ubuntu is back up and running, open a GNOME Terminal window and issue the following command (again assuming that the new hard disk is /dev/hdb):
sudo mkfs.ext3 /dev/hdb1
Note that you need to specify the partition number in this instance. Because there’s only one partition on the disk, this is number 1. Had you created two or more partitions, each would be numbered 1, 2, and 3 consecutively.
You’ve created an ext3-formatted partition, because this is the preferred standard used within Ubuntu. Other versions of Linux might use different file systems, such as ReiserFS.
Configuring Ubuntu to Use the Drive
Now the new drive is ready for use, but you need a way of making it available within the Ubuntu file system. Therefore, you need to create a mount point and also configure the system so that the disk is mounted automatically at boot.
As discussed in Chapter 14, creating a mount point is simply a matter of creating an empty folder. Therefore, you can create a directory in the root of the hard disk (or anywhere else) and call it something like second_disk. This directory must then be made writable, as follows:
sudo mkdir /second_disk sudo chmod a+w /second_disk
Then you must edit the /etc/fstab file in order to make the new disk mount automatically. All you need to do is add a line at the end of the file, such as this:
/dev/hdb1 /second_disk ext3 |
default 0 2 |
Note that it’s important that you add a carriage return (press Enter) after the line.
You can test your new hard disk by rebooting. When Ubuntu returns, you should find that the new disk is available by accessing the /second_disk directory. You can check its capacity by typing df -h.
Summary
In this chapter, we looked at streamlining your installation of Ubuntu. This involved speeding up the boot procedure by decreasing the boot menu delay and deactivating various unnecessary run-level scripts that get loaded at boot time. We also looked at optimizing your hard disk settings to allow for greater efficiency in loading and saving files.
Additionally, we investigated prelinking programs so that they load faster, recompiling the kernel so that it’s optimized for your system, freeing disk space by various means, and adding a second hard disk.
In the next chapter, you’ll learn how to perform backups to safeguard your data.

C H A P T E R 3 2
■ ■ ■
Backing Up Data
Every computer user knows that backing up data is vital. This is usually because every computer user has lost data at some point, perhaps because of a corrupted file or accidental deletion.
Some of the people behind Unix were highly aware of such occurrences, and built in several advanced and useful backup tools. These have been mirrored within Linux, with the result that creating and maintaining backups is easy.
In this chapter, we’ll first look at what data should be backed up, and then explore two ways to make backups: using the SBackup utility and from the command line.
What Data Should You Back Up?
Data on your system can be classified into three broad types: program data, configuration data, and personal data. It’s traditionally reasoned that backing up all types of data is inefficient and difficult, largely because it would mean backing up practically the entire hard disk. Because of this, you usually want to back up the latter two types of data: configuration and personal. The theory is that if your PC is hit by a hard-disk-wrecking disaster, you can easily reinstall the operating system from the CD/DVD. Restoring your system from backup is then simply a matter of ensuring the configuration files are back in place, so your applications work as you would like them to, and making sure that your personal data is once again made accessible.
Practically all the personal configuration data for programs you use everyday, as well as your personal data, is stored in your /home folder (although the configuration files for software used system-wide are stored in the /etc folder). If you take a look in your /home directory, you might think that previous sentence is incorrect. On a freshly installed system, the directory appears largely empty. However, most, if not all, of the configuration files are hidden; their directory and filenames are preceded with a period (.), which means that Linux doesn’t display them during a standard directory listing.
To view hidden files and folders in the Nautilus file manager, select View Show Hidden Files. This can be quite an eye-opener when you see the masses of data you didn’t even realize were there, as shown in the example in Figure 32-1. To view hidden files at the shell prompt, simply use the -a command option with the ls command:
ls -a
463

464 |
C H A P T E R 3 2 ■ B A C K I N G U P D A T A |
Figure 32-1. Most of the configuration files for programs are hidden—literally—in your /home folder.
The configuration files held in your /home folder relate solely to your user account. Any other users will have their own configuration files, entirely independent of yours. In this way, all users can have their own configuration settings for various applications, which can be backed up independently.
Under Ubuntu, you can back up both configuration data and personal files using Simple Backup Suite (SBackup), which can be downloaded from the Ubuntu software repositories.
Keep in mind that there’s little point in making backups if you leave the resultant archive files on your hard disk. For full backup protection, the archives should be stored elsewhere, such as on an external hard disk, network mount or CD/DVD-ROM. Consider using GNOME CD/DVD Creator (click Go CD/DVD Creator on the menu of any open Nautilus window).
Using SBackup
Simple Backup Suite, also known as SBackup, is a series of programs that enables the quick and easy backup and also restoration of files. SBackup can back up personal data as well as system configuration files, and can store the resultant backup file on your hard disk (or a network mount attached to it), or in a remote Internet location, such as an FTP server.
SBackup was created courtesy of the Google Summer of Code sponsorship scheme and was designed with the help of Ubuntu developers. It’s a new member of Ubuntu software

C H A P T E R 3 2 ■ B A C K I N G U P D A T A |
465 |
family, and it’s likely that new features will be added all the time, so be sure to regularly update your system (see Chapter 9).
To install SBackup, open Synaptic Package Manager (System Administration), and then search for sbackup. Click its entry in the list of results, mark it for installation, and click Apply. Log out and back in again in order to update the system menus. You’ll then find entries for the backup and restoration components of SBackup on the System Administration menu.
Backing Up Data via SBackup
To configure a backup, select System Administration Simple Backup Config. You’ll see the Backup Properties dialog box, as shown in Figure 32-2. Using this dialog box, you can choose the files that SBackup backs up, as well as when it does so.
Figure 32-2. SBackup can work automatically or with custom settings you specify.
As listed on the General tab of the Backup Properties dialog box, SBackup can operate in three different modes:
Recommended backup: This is by far the best choice for fuss-free operation. SBackup will perform a daily backup of your /home folder, as well as the vital system data held in /etc, /usr/local, and /var. However, it will deliberately exclude any multimedia files (because of their large size), along with any temporary files and files of any type that exceed 100MB (again for size reasons). By default, the backup file created is placed in /var/backup.
Custom backup: This is effectively the same as the recommended backup, and includes the same list of file inclusions and exceptions, but you are able to edit the settings manually. For example, you might choose to include MP3 files, rather than excluding them, as with the recommended backup. The custom backup option lets you alter where the eventual backup file is saved and also lets you alter the time when the backup is made.

466 |
C H A P T E R 3 2 ■ B A C K I N G U P D A T A |
Manual backups: This effectively deactivates SBackup, so that it no longer periodically backs up files. However, you can still click the Backup Now! button to manually perform a backup according to the settings on the other Backup Properties dialog box tabs.
■Note SBackup doesn’t create a new backup file each time it runs because that would take too long. Instead, it creates an incremental backup, which means that it updates the last backup with files that have changed or been created since. Any files that haven’t been updated since the last backup are unchanged.
Including Files and Folders in the Backup Job
Assuming that you’ve chosen a custom backup, and so are able to alter the backup settings, clicking the Include tab allows you to specifically define directories and files that you wish to include in the backup. Simply click the Add File or Add Directory button, and then browse to the relevant location (to add a directory, you’ll need to click to open it before clicking the Open button).
Bear in mind that adding a directory does so recursively, which means that any directories contained within that directory are also backed up. For this reason, you don’t need to specifically add your /home/<username> folder, because the entire /home folder is included in the backup by default. This means the backup will also include all other users’ directories within
/home, too.
Excluding Files and Folders From the Backup Job
You have a wide range of choices when it comes to excluding files and folders from the list. While directories can be excluded based on location, files can be excluded based on location, type of file, or size.
Clicking the Exclude tab reveals a set of side tabs on the left side of the program window, which allow you to exclude items from the backup as follows:
Paths: To exclude a specific file or folder, click this side tab. As with including files, click the Add File or Add Directory button, and then browse to the relevant location.
File Types: To exclude certain types of files, click this side tab, as shown in Figure 32-2. After clicking the Add button, you’ll see that you can choose from a brief list of standard file types or filter by file extension (such as .mp3 for MP3 files or .zip for compressed Zip files).
Regex: If you’re competent at using regular expressions, as outlined in Chapter 15, you can use them to specify extremely precise rules by clicking this side tab.
Max Size: Any files larger than the stated size on this tab aren’t backed up. By removing the check next to the Do Not Backup line, you can deactivate this feature (although that could lead to massive backup files).

C H A P T E R 3 2 ■ B A C K I N G U P D A T A |
467 |
Figure 32-3. Excluding certain types of large files will lead to far smaller backup files.
Changing the Backup File Destination
By default, the backup file created by SBackup is stored in the /var/backup directory. By clicking the Destination tab, you can choose to save it in a different location on your hard disk. Of course, if you have a network mount, you can also opt to save it there.
■Note Remember that there’s little point in retaining backups on your hard disk. They should be copied to a removable storage device, such as a CD-R/RW disc.
You can even transfer the backup file across the Internet via SSH file transfer or the older FTP standard. To do so, simply enter the protocol, username, password, and URL in the following format:
ftp://username:password@myftpsite.com
It’s important to precede the address with the protocol you intend to use, whether it’s SSH or FTP.
Changing the Time Period Between Backups
Clicking the Time tab lets you set the frequency of the backup. You can opt to back up hourly, daily, weekly, or monthly, You can also set the exact time of the backup if necessary. For example, you could set a backup to take place ever week on a Tuesday at 12.30 p.m. Simply select the interval period from the Do Backups drop-down list, and then select from the Day of Month, Day of Week, Hour, and Minute lists, as necessary.