

Beginning Ubuntu Linux - From Novice To Professional (2006)
.pdf
C H A P T E R 1 8
■ ■ ■
Digital Music
Today’s PC is a multimedia powerhouse, and it’s hard to come across a home computer that doesn’t have at least a set of speakers attached. Some people take this to extremes and have surround-sound speakers on their computers, as well as large monitors for crystal-clear video playback.
The people behind Ubuntu aren’t blind to this and include not only an audio player, but also a video player with the distribution. In this chapter, you’ll learn how to listen to MP3s, CDs, and Internet radio on your Ubuntu system. In the next chapter, you’ll learn how to manage video playback.
Understanding the Legalities of Playback
As you might have read in the press, multimedia playback on computer devices, and Linux in particular, is hindered by a number of issues, including the following:
Software patents: Audio and video playback technologies such as MP3 and MPEG are patented in countries that allow software to be patented, such as the United States. A patent protects the implementation of an idea, as opposed to copyright, which protects the actual software. Patents are designed to restrict use of the technology unless permission is granted, usually via a payment to the license holder. Because Linux is based on the sharing of computing technology and knowledge, organizations like Ubuntu are fundamentally and philosophically opposed to any kind of software patenting. While this doesn’t make playback of popular music and video files impossible under Ubuntu, it does mean that extra software must be downloaded and installed. Furthermore, depending on where you live in the world, there may be legal issues surrounding using such patented software.
Digital Rights Management (DRM): Much more devastating than patenting is DRM, a technology tied into audio or video playback software. It’s designed to control how, where, when, and on what device you can play certain media. For example, Apple’s iTunes DRM scheme means you can play back MP3s bought from iTunes only on their iPod range of devices (including the Motorola Rokr phone) or using the iTunes software. DVD movie players include a form of DRM called Content Scrambling System (CSS), which prevents users from playing DVDs on computers unless special software is purchased. Perhaps it goes without saying that the Linux community, including the Ubuntu project, is also fundamentally opposed to DRM. Because of this, practically no DRM software has been officially ported to Linux, so you can’t, for example, play music purchased via the iTunes or Napster online stores.
279

280 |
C H A P T E R 1 8 ■ D I G I T A L M U S I C |
Linux and other open-source programmers are very resourceful and are often able to reverse-engineer technology formats in order to get around DRM or patent issues. But the laws in many countries—with the United States as a particularly strident example—prohibit reverse engineering in this way. In addition, the laws in some countries seek to prohibit use of software resulting from this process.
■Note You may be wondering why music and movie corporations are so intent on enforcing DRM and patenting if these schemes give their customers such a hard time. To learn more, and to find out what you can do to help halt the progress of such technology, visit the Electronic Frontier Foundation’s website: www.eff.org.
Programmers have also come up with Free Software alternatives to proprietary formats. Examples include the Ogg media format, which is every bit as good as MP3, but is unencumbered by patent issues. We’ll look at using Ogg later in this chapter, in the “Choosing a Format” section. But at the moment, there’s no ideal open-source video format, or at least not one that’s in widespread use.
Therefore, you’ll probably want to add support for MP3 and other popular music file formats. Throughout this and the next chapter, we’ll examine installing media playback software, some of which may have issues surrounding patenting. In one case, the software is designed to bypass the DRM scheme that protects DVD movie discs.
■Note The United States and Japan both have laws allowing software to be patented. Most other countries, including those within the European Union, do not currently allow software patents.
Playing Music Files
Music playback under Ubuntu is handled by the Rhythmbox player. Like many modern music players, Rhythmbox can also manage your music collection, arranging it into a library so you can locate songs easily.
But before using Rhythmbox, you need to add support for MP3 and other popular music file formats.
Installing Codecs
The piece of software that handles the decoding (and also encoding) of digital music files is called a codec. The word is a shortened version of coder-decoder. For any digital multimedia file type you want to play back on your computer, you’ll need an appropriate codec. This includes both audio and video files. In addition, if you wish to create your own multimedia files, you might need to download an additional codec that allows the encoding of files.
C H A P T E R 1 8 ■ D I G I T A L M U S I C |
281 |
The necessary audio and video codec software for playback can be found in Ubuntu’s online software repositories. (See Chapter 8 for details on setting up the Synaptic Package Manager to access these repositories.) To obtain them, open the Synaptic Package Manager (Settings Administration), click the Search button, and then type gstreamer. In the list of results, look for the following packages:
•gstreamerx.x-plugins
•gstreamerx.x-plugins-multiverse
•gstreamerx.x-ffmpeg
The x.x represents the package version (0.8 was the latest at the time of writing). Look for the newest versions.
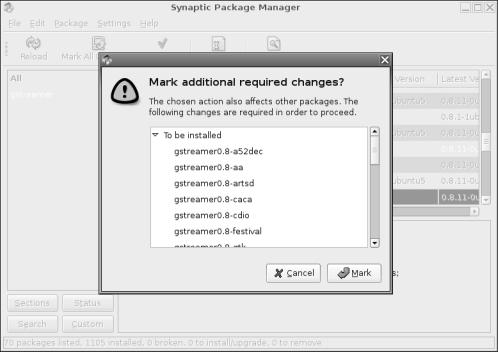
Click the check box alongside each and select Mark for Installation. You’ll be told that each package needs additional software, as shown in Figure 18-1. Don’t worry—this is why I recommend these particular packages! The set of packages contain support for just about every form of audio playback possible on a PC (with the exception of DRM technology like the iTunes .m4p files).
Figure 18-1. Installing the gstreamer packages will install all the audio codecs you need.
Click the Apply button, and the Synaptic Package Manager will download and install the software. Once this task has completed, quit the program.
282 |
C H A P T E R 1 8 ■ D I G I T A L M U S I C |
Using Rhythmbox
You’ll find Rhythmbox on the Applications Sound & Video menu. The first time you run the program, it will ask you where your music files are stored. Simply click the Browse button, and then double-click the folder that holds those files. Then click OK.
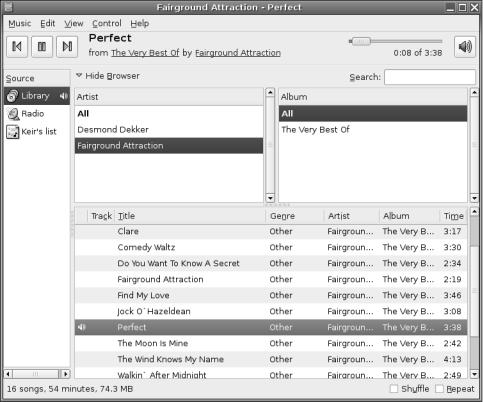
When the program starts, your music files are listed at the bottom of the program window. At the top left of the program window, you’ll find a listing of the artists behind the MP3s in your collection, and on the right, you’ll see the album that the music track is taken from (provided that information is included in the music file itself, such as the MP3 ID3 tags). Figure 18-2 shows an example of a Rhythmbox window.
Figure 18-2. Rhythmbox will organize your music tracks by artist or album.
Playing a track is simply a matter of double-clicking it in the list. Once the track is finished, Rhythmbox will play the next track in the MP3 file list.
To create a playlist, right-click under the Source heading on the left side of the program window and select New Playlist. Click the new entry to type its name. To add tracks to the playlist, click Library, and then drag-and-drop files onto your new playlist entry. To start the playlist, click the first track in its list.
C H A P T E R 1 8 ■ D I G I T A L M U S I C |
283 |
■Note I noticed that whenever I double-clicked an MP3 in a Nautilus window, Ubuntu would try to start the Totem Movie Player rather than Rhythmbox. This was easy to fix: right-click any MP3 file, select Properties, and click the Open With tab. Then click the Add button, select Rhythmbox, and ensure that the radio button alongside its entry in the list is selected.
Listening to Audio CDs
Playing back audio CDs is simple. Just insert the CD, and then click Applications Sound & Video CD Player. This will start Ubuntu’s simple but effective CD playback application, as shown in Figure 18-3. If you’re online, the application will immediately attempt to look up the CD artist and track listing information from an online repository. This means that it should show the names of the tracks being played.
■Note On one occasion during my testing, the online lookup resulted in several entries for a CD I was playing. All I had to do was choose the one that I was happiest with (not hard considering the other two were in German!). From then on, whenever I played that CD, the track listing I had chosen was used.
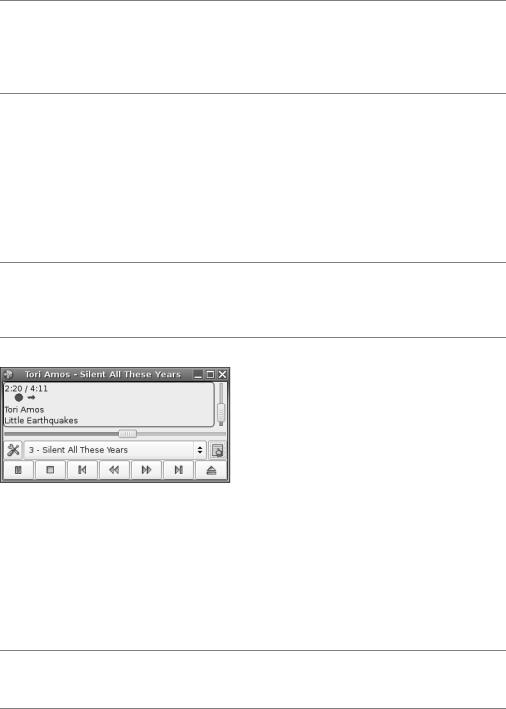
Figure 18-3. Ubuntu’s CD Player application is simple but effective and can look up artist and track information online.
The controls work in the same way as those on any other audio player. Clicking the Play button plays the current track, which you can select from the drop-down list above the player controls. You can skip to the next track by clicking the Next Track button and cue backwards and forwards using the relevant buttons. The time display in the top left of the program window shows the track’s progress.
■Tip As with all GNOME applications, hover the mouse cursor over each button to display a tooltip that describes what it does.
284 |
C H A P T E R 1 8 ■ D I G I T A L M U S I C |
If you find the track listing information is incorrect, you can correct it by clicking the Track Editor button on the right side of the program window. In the window that appears, doubleclick the track entry with the incorrect information and edit it as you see fit.
Tuning in to Online Radio Stations
You can listen to online radio stations (known as streaming audio) by downloading the Streamtuner software. This isn’t an actual audio player, but is instead a kind of digital listings program that lets you search for stations to match just about any musical taste. It relies on the XMMS media player program to actually allow you to listen to the streams.
To obtain the software, open Synaptic Package Manager (Settings Administration), search for streamtuner, and mark it for installation. Then search for xmms and mark it for installation, too. Click Apply to install all the packages.
Configuring XMMS
Before using XMMS, you’ll need to quickly reconfigure its sound output plug-in so that its volume control works properly. Here are the steps:
1.Start XMMS by clicking its entry on the Applications Sound & Video menu.
2.Right-click its title bar and select Options Preferences.
3.In the dialog box that appears, look for the Output Plugin heading under the Audio I/O Plugins tab, and select eSound Output Plugin.
4.Click OK, and then quit XMMS.
On my installation of Ubuntu, I also had to create a desktop shortcut for Streamtuner because, for some reason, it wasn’t added to the Sound & Video submenu. If you need to do this, right-click a blank spot on the desktop and select Create Launcher. In the Name box, enter Streamtuner, and in the Command box, enter streamtuner. Click to add an icon, and then enter the following in the Path field of the icon selection dialog box:
/usr/share/streamtuner/python/icons/basic.ch.png.
Using Streamtuner
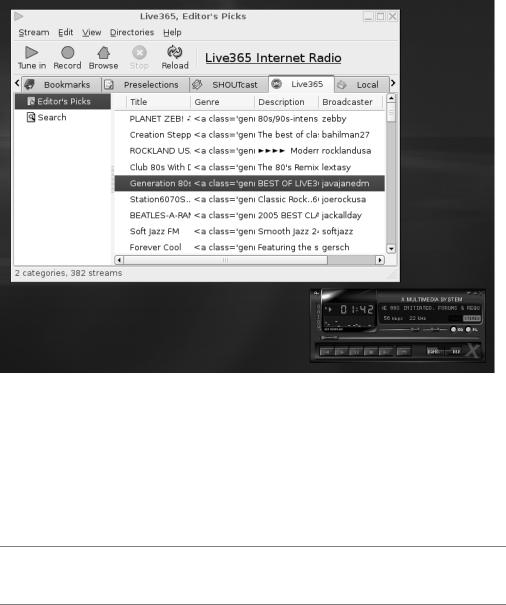
Using Streamtuner is easy. When it launches, click one of the tabs to browse through the stations. In addition, some tabs have subcategories of stations on the left. The Shoutcast tab probably contains the most comprehensive selection, but some people prefer Live365, shown in Figure 18-4.
Double-click a stream to start it playing. Most streams will play in XMMS, which will start automatically, but some are RealAudio streams, and you’ll need to have RealPlayer installed to play them. See Chapter 19 for instructions on installing RealPlayer.
C H A P T E R 1 8 ■ D I G I T A L M U S I C |
285 |
Figure 18-4. With Streamtuner and XMMS, you can tune into a massive range of Internet radio stations.
Ripping Music from CDs
Converting audio tracks on a CD into digital music files you can store on your hard disk for personal use is informally known as ripping. It’s handled under Ubuntu using the Sound Juicer application, which can be found on the Applications Sound & Video menu.
■Note Because of the way audio CDs work, you can’t simply insert the disc and then drag-and-drop the tracks onto your hard disk. They must be converted first.
Before you start to rip CDs, however, you’ll need to decide the format in which you wish to store the audio files.
Choosing a Format
You have three basic choices for audio file formats: Ogg Vorbis, FLAC, and MP3. Let’s look at what each has to offer.

286 |
C H A P T E R 1 8 ■ D I G I T A L M U S I C |
Ogg Vorbis: This is the Free Software alternative to MP3. Unless you have a trained ear, you won’t be able to tell the difference between an Ogg and MP3 file (if you do have a trained ear, then you’ll find Ogg better!). The two technologies generate files of around the same size, an average of 4MB to 5MB per song. The downside of Ogg is that not many portable audio players support it (although this situation is slowly changing), and other operating systems like Windows won’t be able to play back Ogg files unless some additional software is installed (see www.vorbis.com/setup/).
FLAC: This stands for Free Lossless Audio Codec, and it’s the choice of the audiophile. Ogg and MP3 are lossy formats, which means that some of the audio data is lost in order to significantly shrink the file. FLAC doesn’t lose any audio data but still manages to compress files to a certain degree (although they’re still much larger than an equivalent MP3 or Ogg file). FLAC scores points because it’s Free Software, like Ogg, but you’ll face the same lack of support in portable audio players and other operating systems (unless additional software is installed; see http://flac.sourceforge.net/download.html).
MP3: This is by far the most ubiquitous music file format and practically everyone who owns a computer has at least a handful of MP3 tracks. This means software support for MP3 playback is strong and, of course, portable audio players are built around the MP3 format. The only problem for you, as a Linux user, is the issue of surrounding patents, as explained at the beginning of this chapter. Using the MP3 format is to go against a lot of what the Free Software movement stands for. But in the end, the choice is up to you.
Adding MP3 Support to Sound Juicer
Support for Ogg and FLAC is built into Ubuntu, but if you wish to encode CD tracks as MP3s, you’ll need to enter some configuration details into Sound Juicer.
■Note The software that’s required to encode MP3s is installed with the gstreamer packages. If you didn’t already download them, follow the instructions earlier in the chapter, in the “Installing the Codecs” section.
Follow these steps to configure MP3 support:
1.Select Applications Sound & Video Sound Juicer to start the program.
2.Click Edit Preferences. In the dialog box that appears, click the Edit Profiles button.
3.Click New, and then type MP3. Then click Create.
4.Select the new MP3 entry in the list and click Edit.
5.In the Profile Name box, type MP3.
6.In the Profile Description box, type MP3.
7.In the GStreamer Pipeline box, type the following: audio/x-raw-int,rate=44100,channels=2 ! lame name=enc
C H A P T E R 1 8 ■ D I G I T A L M U S I C |
287 |
8.In the File Extension box, type mp3.
9.Put a check in the Active? box.
10.Click OK.
11.Restart Sound Juicer.
12.Click Edit Preferences again, and select your new MP3 entry from the Output dropdown list.
Ripping Tracks
When you’re ready to rip some music, insert the audio CD, and then start Sound Juicer. If the CD isn’t read immediately, click Disc Re-read. As with CD Player, Sound Juicer will automatically look up the artist and track information of the CD.
Click Edit Preferences. In the Format part of the dialog box, choose the type of audio files you want to create. In addition, you can select where you would like the files to be saved to by clicking the drop-down list under the Music Folder heading.
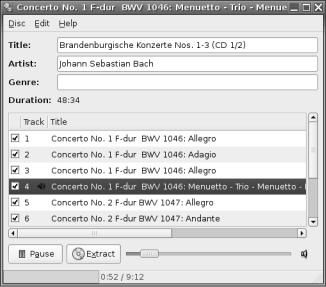
Any track in the listing with a check in its box will be ripped. When you insert a CD, Sound Juicer assumes that all the tracks are to be ripped, as shown in Figure 18-5. If this isn’t the case, remove the checks from the tracks you don’t want to rip. By selecting a track and clicking the Play button, you’ll be able to audition the track. This can be helpful if you’re deciding on exactly which tracks to rip. Finally, check that the Title and Artist information is correct.
Figure 18-5. Audio tracks can be ripped from CDs using the Sound Juicer program.
To begin the process, click the Extract button. It will take up to a minute or so to rip each track, so ripping an entire CD may take some time. However, it’s safe to leave Sound Juicer working in the background.