

Beginning Ubuntu Linux - From Novice To Professional (2006)
.pdf178 C H A P T E R 1 1 ■ U B U N T U R E P L A C E M E N T S F O R W I N D O W S P R O G R A M S
Figure 11-14. Dictionary
You’ll find the Dictionary program, shown in Figure 11-14, on the Applications Accessories menu. As soon as you start typing, the program will begin to look up the word in the dictionary, and this can cause a momentary delay before the letters appear on your screen. To access the online dictionary, simply select On a Web Site from the drop-down list next to the Look Up field.
Gaim Internet Messenger
Gaim is the instant messaging software provided with Ubuntu. Unlike most other messaging programs, Gaim isn’t exclusive to one chat protocol. In other words, you can use it to connect to MSN, AOL/ICQ, Yahoo!, and many other services. The program can be found on the Applications Internet menu.
Details for setting up Gaim are in Chapter 8. Once the program is up and running, you can chat with any of your buddies by double-clicking their icon, as shown in Figure 11-15. To set your status, click the Away icon at the bottom left and select an appropriate message.
The rest of the program can be administered by right-clicking the notification area icon that appears when the program starts. For example, you can initiate file transfers or sign off from there.
■Note If you’re interested in learning more about how Gaim is built, check out Open Source Messaging Application Development: Building and Extending Gaim, authored by Gaim project leader Sean Egan (1-59059-467-3; Apress, 2005).

C H A P T E R 1 1 ■ U B U N T U R E P L A C E M E N T S F O R W I N D O W S P R O G R A M S |
179 |
Figure 11-15. Gaim Internet Messenger
Mines
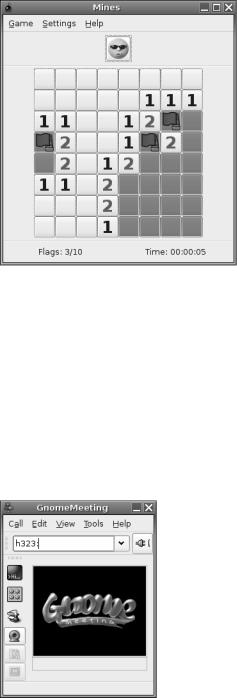
Mines is the Ubuntu equivalent of Minesweeper and, in fact, is almost exactly the same as the Windows program, as you can see in Figure 11-16. The rules are identical, too: on each grid are several hidden mines, and it’s your job to locate them. After you’ve clicked one square at random, you’ll see a series of empty squares and several with numbers in them. Those with numbers indicate that a bomb is near. Your job is to use logic to work out where the bombs are, and then mark them by right-clicking them. Oh, and you have to do this as quickly as possible because you’re being timed.
To change the grid size, click Settings Preferences. Your choices are Small, Medium, Large, and Custom.
180 C H A P T E R 1 1 ■ U B U N T U R E P L A C E M E N T S F O R W I N D O W S P R O G R A M S
Figure 11-16. Mines
GnomeMeeting
If you want to conduct a video conference using Ubuntu, then GnomeMeeting is for you.
It supports the commonly-used H.323 protocol, as used by Microsoft’s NetMeeting, and also lets you register to an Internet Locator Service (ILS) directory, as well as take part in multiple-user calls via a Multipoint Control Unit (MCU). In addition, by registering using the link provided, you can make PC telephone calls, although this requires paying a fee and setting up an account.
When the program starts, it will walk you through setup via a wizard. Simply answer the questions with the details of your setup. Once the program is up and running, as shown in Figure 11-17, type the URL of the person you would like to call into the address bar and click Call Connect.
Figure 11-17. GnomeMeeting
C H A P T E R 1 1 ■ U B U N T U R E P L A C E M E N T S F O R W I N D O W S P R O G R A M S |
181 |
Summary
In this chapter, we’ve taken a look at some Ubuntu programs that provide vital functions that you might have used daily under Windows. The aim was to get you started with this software as quickly as possible by pointing out key features. You’ve seen how some programs mirror the look and feel of their Windows counterparts almost to the letter, while others resolutely strike out on their own path. It takes just a little time to become familiar with Ubuntu software, and then using these programs will become second nature.
In the next chapter, we’ll move on to more fundamental Ubuntu tasks: manipulating files. However, once again, this is not too dissimilar from the Windows experience, which makes getting used to the system very easy.

C H A P T E R 1 2
■ ■ ■
Managing Your Files
Files are what make the world of Linux go round. They’re the currency of any kind of operating system, because every time you use your computer, you generate new files, even if they’re only temporary.
How Linux views files, as well as the disks and partitions that contain them, varies somewhat from how Windows handles files. In many ways, the Linux system of file management is far simpler than that in Windows (which, ironically, was created as an attempt to make everything easy!). The Linux system is also much more established.
In this chapter, I will explain how you can manage your files under Ubuntu. This isn’t a definitive guide; you’ll need to wait until Chapter 15 to learn the technical ins and outs of the file system. However, it provides enough information for you to understand how the system works, and where and how you should store your data.
Understanding File System Concepts
Just like Windows, Ubuntu has a file system that is shared among software components and your own personal data, which you generate within various applications, or perhaps download from the Internet. However, Ubuntu differs from Windows in a couple of important ways.
Drive References
Perhaps the most important differences in Linux are that it doesn’t use drive letters and it uses a forward slash (/) instead of a backslash (\) in filename paths. In other words, something like
/home/john/myfile is typical under Ubuntu, as opposed to C:\Documents and Settings\John\ myfile under Windows. The root of the hard disk partition is usually referred to as C:\ under Windows. In Ubuntu, it’s referred to simply with a forward slash (/).
If you have more than one drive, the drives are usually combined together into the one file system under Linux. This is done by mounting, so that the any additional drives appear as virtual folders under the file system. In other words, you browse the other hard disks by switching to various directories within the main file system. I’ll explain mounting in Chapter 15.
183

184 |
C H A P T E R 1 2 ■ M A N A G I N G Y O U R F I L E S |
Case Sensitivity
Another important difference between Ubuntu and Windows is that filenames in Ubuntu are case-sensitive. This means that MyFile is distinctly different from myfile. Uppercase letters are vitally important. In Windows, filenames might appear to have uppercase letters in them but, actually, these are ignored when you rename or otherwise manipulate files.
Because of this case sensitivity, you could have two separate files existing in the same place, one called MyFile and another called myfile. In fact, you could also have myFile, Myfile, MYFILE, and so on, as shown in Figure 12-1.
Figure 12-1. Ubuntu filenames are case-sensitive, so many similar filenames can exist, differing only in which letters are capitalized.
File Access and Storage
Under Windows on a desktop computer, you have access to the entire hard disk. You can write, read, or delete files anywhere (unless the system has specifically been configured otherwise). You can save your personal files in C:\Windows, for example. Under Ubuntu, ordinary users can browse most of the hard disk, but they aren’t able to write files to the majority of folders (in some cases, they won’t even be able to access files).

C H A P T E R 1 2 ■ M A N A G I N G Y O U R F I L E S |
185 |
Although we’ll cover the file system in much more depth in Chapter 15, for the moment, it’s enough to know that you’ve been given your own part of the hard disk in which to store your stuff. This is a directory located within the /home directory, and its name is taken from your username. If your login name is louisesmith, your place for storing files will be /home/louisesmith. Figure 12-2 shows an example of a user’s home directory.
■Note Linux generally uses the terms directory and subdirectory for the places you put files, whereas Windows XP refers to them as folders. It’s merely a matter of semantics. However, within the Nautilus file browser, directories are pictured as folders and are referred to as such, thus furthering the confusion!
Figure 12-2. Your personal area on the hard disk is in the /home directory and is named after your username.
Some programs might create subdirectories in your home directory in order to store and organize their output. For example, a digital camera program might create a Pictures directory within your /home directory. It’s up to you whether you use these. The standard practice within the Linux community is to simply save everything into your /home subdirectory (for example, /home/keir) and sort it out later!

186 |
C H A P T E R 1 2 ■ M A N A G I N G Y O U R F I L E S |
Files within Ubuntu remember who owns them. If user johnsmith creates a file, he can make it so that only he can read or write the file (the default setting is that other users will be able to read the file but not write any new data to it). Directories, too, are owned by people, and the owner can set access permissions. By default, all users on a system can access each other’s /home directories and read files, but they won’t be able to change the files or write new files to any directory within /home that isn’t theirs.
■Note Any user with superuser powers has access to all of the system and can create, edit, and delete files in all directories. This is so that user can perform essential system maintenance.
Using Nautilus
Nautilus is the name of the default file browser in Ubuntu. It’s not dissimilar to
My Computer/Windows Explorer under Windows in that it presents a list of files on the right side of the window and a series of shortcuts to popular locations within the file system on the left side.
Starting Nautilus is simply a matter of clicking the Places menu and choosing a location, as shown in Figure 12-3. Alternatively, you can click Applications Accessories File Browser, which will open the default browsing location (your /home folder).
Figure 12-3. You can open a file browser window by selecting a location under the Places menu.
The Nautilus window (see Figures 12-1, 12-2, and 12-4) consists of several elements:
Menu bar: The menus offer options for controlling the way files are displayed in the Nautilus window, as well as the look and feel of Nautilus itself. The Bookmarks menu lets you create web-browser-like shortcuts to certain locations in your file system so you can access them instantly.
Toolbar: As in a web browser, the toolbar allows you to quickly move backward and forward from place to place in your browsing history. In addition, you can reload the file listing, in order to reflect any changes that might have taken place since the Nautilus window opened, and quickly navigate to popular file system locations, such as your /home folder.

C H A P T E R 1 2 ■ M A N A G I N G Y O U R F I L E S |
187 |
Location bar: This feature, located beneath the toolbar, is unique to Nautilus and lets you see where you are in your file system, as well as quickly and easily move through your file-browsing history. For example, if you to start in /home/keir and then browse to /home/ keir/pictures/holiday/disneyworld, clicking the Pictures button will return you to /home/keir/pictures. The other folders listed on the location bar (holiday and disneyworld in this example) won’t disappear, so you can return to those as well. It’s best demonstrated by example, so give it a try!
Zoom controls: To the right of the location bar are the zoom controls. These make the icons representing the files bigger or smaller. When you’re browsing a lot of files at once, shrinking them will fit more in the window. On the other hand, when you’re viewing photo thumbnails, it can be handy to increase the zoom setting so you can see more detail in the pictures.
View As Icons/List: To the right of the zoom controls is a drop-down list that switches between icon and list view. List view shows details about the files, such as file size, the type of file, its permissions, and so on. Icon view presents the files as a series of large icons. In many cases, the icons will give a clue as to the nature of the file; for example, MP3 files appear with speaker and musical note graphics. If the folder you’re browsing contains image files (or certain document files, such as PDFs), these will be automatically thumb- nailed—the icon will be a small version of the contents of the file, as shown in Figure 12-4. This is very handy when browsing pictures for printing or editing.
Figure 12-4. Whenever you view a folder full of pictures in icon view, they will be automatically thumbnailed.