

Beginning Python - From Novice To Professional (2005)
.pdf520 |
C H A P T E R 2 8 ■ P R O J E C T 9 : F I L E S H A R I N G I I — N O W W I T H G U I ! |
def OnInit(self):
"""
Sets up the GUI. Creates a window, a text field, and a button, and lays them out. Binds the submit button to self.fetchHandler.
"""
win = wx.Frame(None, title="File Sharing Client", size=(400, 45))
bkg = wx.Panel(win)
self.input = input = wx.TextCtrl(bkg);
submit = wx.Button(bkg, label="Fetch", size=(80, 25)) submit.Bind(wx.EVT_BUTTON, self.fetchHandler)
hbox = wx.BoxSizer()
hbox.Add(input, proportion=1, flag=wx.ALL | wx.EXPAND, border=10) hbox.Add(submit, flag=wx.TOP | wx.BOTTOM | wx.RIGHT, border=10)
vbox = wx.BoxSizer(wx.VERTICAL) vbox.Add(hbox, proportion=0, flag=wx.EXPAND)
bkg.SetSizer(vbox)
win.Show()
return True
def fetchHandler(self, event):
"""
Called when the user clicks the 'Fetch' button. Reads the query from the text field, and calls the fetch method of the server Node. If the query is not handled, an error message is printed.
"""
query = self.input.GetValue() try:
self.server.fetch(query, self.secret) except Fault, f:
if f.faultCode != UNHANDLED: raise print "Couldn't find the file", query

C H A P T E R 2 8 ■ P R O J E C T 9 : F I L E S H A R I N G I I — N O W W I T H G U I ! |
521 |
def main():
urlfile, directory, url = sys.argv[1:] client = Client(url, directory, urlfile) client.MainLoop()
if __name__ == "__main__": main()
To run this program, you need a URL file, a directory of files to share, and a URL for your Node. Here is a sample run:
$ python simple_guiclient.py urlfile.txt files/ http://localhost:8080
Note that the file urlfile.txt must contain the URLs of some other Nodes for the program to be of any use. You can either start several programs on the same machine (with different port numbers) for testing purposes, or run them on different machines.
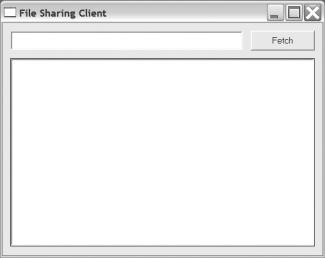
See Figure 28-1 for a screenshot of the client.
Figure 28-1. The simple GUI client
Second Implementation
The first prototype was very simple. It did its job as a file sharing system, but wasn’t very userfriendly. It would help a lot if the user could see which files he or she had available (either located in the file directory when the program starts, or subsequently downloaded from another Node).
The second implementation will address this file listing issue. The full source code can be found in Listing 28-2 later in this section.
To get a listing from a Node, you must add a method. You could protect it with a password like you have done with fetch, but making it publicly available may be useful, and it doesn’t represent any real security risk. Extending an object is really easy: you can do it through subclassing. You simply construct a subclass of Node called ListableNode, with a single additional method, list, which uses the method os.listdir, which returns a list of all the files in a directory:
class ListableNode(Node):
def list(self):
return listdir(self.dirname)
To access this server method, the method updateList is added to the client:
def updateList(self): self.files.Set(self.server.list())
522 |
C H A P T E R 2 8 ■ P R O J E C T 9 : F I L E S H A R I N G I I — N O W W I T H G U I ! |
The attribute self.files refers to a list box, which has been added in the OnInit method. The updateList method is called in OnInit at the point where the list box is created, and again each time fetchHandler is called (because calling fetchHandler may potentially alter the list of files).
And that’s it. You now have a GUI-enabled peer-to-peer file sharing program, which can be run with the command
$ python guiclient.py urlfile.txt files/ http://localhost:8080
To see what it looks like, see Figure 28-2. The full source code is found in Listing 28-2.
Figure 28-2. The finished GUI client
Of course, there are plenty of ways to expand the program. For some ideas, see the next section, “Further Exploration,” as well as the section with the same title in Chapter 27. Beyond that, just let your imagination go wild.
Listing 28-2. The Finished GUI Client (guiclient.py)
from xmlrpclib import ServerProxy, Fault from server import Node, UNHANDLED
from client import randomString from threading import Thread from time import sleep
from os import listdir import sys
import wx
HEAD_START = 0.1 # Seconds
SECRET_LENGTH = 100
C H A P T E R 2 8 ■ P R O J E C T 9 : F I L E S H A R I N G I I — N O W W I T H G U I ! |
523 |
class ListableNode(Node):
"""
An extended version of Node, which can list the files in its file directory.
"""
def list(self):
return listdir(self.dirname)
class Client(wx.App):
"""
The main client class, which takes care of setting up the GUI and starts a Node for serving files.
"""
def __init__(self, url, dirname, urlfile):
"""
Creates a random secret, instantiates a ListableNode with that secret, starts a Thread with the ListableNode's _start method (making sure the Thread is a daemon so it will quit when the application quits),
reads all the URLs from the URL file and introduces the Node to them. Finally, sets up the GUI.
"""
# Give the server a head start: sleep(HEAD_START)
self.server = ServerProxy(url) super(Client, self).__init__() self.secret = randomString(SECRET_LENGTH)
n = ListableNode(url, dirname, self.secret) t = Thread(target=n._start)
t.setDaemon(1)
t.start()
for line in open(urlfile): line = line.strip() self.server.hello(line)
def updateList(self):
"""
Updates the list box with the names of the files available from the server Node.
"""
self.files.Set(self.server.list())
524 |
C H A P T E R 2 8 ■ P R O J E C T 9 : F I L E S H A R I N G I I — N O W W I T H G U I ! |
def OnInit(self):
"""
Sets up the GUI. Creates a window, a text field, a button, and a list box, and lays them out. Binds the submit button to self.fetchHandler.
"""
win = wx.Frame(None, title="File Sharing Client", size=(400, 300))
bkg = wx.Panel(win)
self.input = input = wx.TextCtrl(bkg);
submit = wx.Button(bkg, label="Fetch", size=(80, 25)) submit.Bind(wx.EVT_BUTTON, self.fetchHandler)
hbox = wx.BoxSizer()
hbox.Add(input, proportion=1, flag=wx.ALL | wx.EXPAND, border=10) hbox.Add(submit, flag=wx.TOP | wx.BOTTOM | wx.RIGHT, border=10)
self.files = files = wx.ListBox(bkg) self.updateList()
vbox = wx.BoxSizer(wx.VERTICAL) vbox.Add(hbox, proportion=0, flag=wx.EXPAND) vbox.Add(files, proportion=1,
flag=wx.EXPAND | wx.LEFT | wx.RIGHT | wx.BOTTOM, border=10)
bkg.SetSizer(vbox)
win.Show()
return True
def fetchHandler(self, event):
"""
Called when the user clicks the 'Fetch' button. Reads the query from the text field, and calls the fetch method of the server Node. After handling the query, updateList is called. If the query is not handled, an error message is printed.
"""
query = self.input.GetValue() try:
self.server.fetch(query, self.secret) self.updateList()
C H A P T E R 2 8 ■ P R O J E C T 9 : F I L E S H A R I N G I I — N O W W I T H G U I ! |
525 |
except Fault, f:
if f.faultCode != UNHANDLED: raise print "Couldn't find the file", query
def main():
urlfile, directory, url = sys.argv[1:] client = Client(url, directory, urlfile) client.MainLoop()
if __name__ == '__main__': main()
Further Exploration
Some ideas for extending the file sharing system are given in Chapter 27. Here are some more:
•Add a status bar that displays such messages as “Downloading” or “Couldn’t find file foo.txt.”
•Figure out ways for Nodes to share their “friends.” For example, when one Node is introduced to another, each of them could introduce the other to the Nodes it already knows. Also, before a Node shuts down, it might tell all its current neighbors of all the Nodes it knows.
•Add a list of known Nodes (URLs) to the GUI. Make it possible to add new URLs and save them in a URL file.
What Now?
Now you’ve written a full-fledged GUI-enabled peer-to-peer file sharing system. Although that sounds pretty challenging, it wasn’t all that hard, was it? Now it’s time to face the last and greatest challenge: writing your own arcade game.


528 |
C H A P T E R 2 9 ■ P R O J E C T 1 0 : D O - I T - Y O U R S E L F A R C A D E G A M E |
Specific Goals
The specific goals of this project revolve around the game design. The game should behave as it was designed (the banana should be movable, and the 16-ton weight should drop from above). In addition, the code should be modular and easily extensible (as always). A useful requirement might be that game states (such as the game introduction, the various game levels, the “game over” state) should be part of the design, and that new states should be easy to add.
Useful Tools
The only new tool you need in this project is Pygame, which you can download from the Pygame Web site (http://pygame.org). To get Pygame to work in UNIX, you may need to install some extra software, but it’s all documented in the Pygame installation instructions (also available from the Pygame Web site). The Windows binary installer is very easy to use—simply execute the installer and follow the instructions.
■Note The Pygame distribution does not include Numerical Python, which may be useful for manipulating sounds and images. Although it’s not needed for this project, you might want to check it out (http:// numeric.scipy.org). The Pygame documentation thoroughly describes how to use Numerical Python with Pygame.
The Pygame distribution consists of several modules, most of which you won’t need in this project. The following sections describe the modules you do need. (Only the specific functions or classes you’ll need are discussed here.) In addition to the functions described in the following sections, the various objects used (such as surfaces, groups, or sprites) have several useful methods that I discuss as they are used in the implementation sections.
■Tip You can find a nice introduction to Pygame in the “Line-by-Line Chimp Tutorial” on the Pygame Web site (http://pygame.org/docs/tut/chimp/ChimpLineByLine.html). It addresses a few issues not discussed here, such as playing sound clips.
pygame
This module automatically imports all the other Pygame modules, so if you place import pygame at the top of your program, you can automatically access the other modules, such as pygame.display or pygame.font.
The pygame module contains (among other things) the Surface function, which returns a new surface object. Surface objects are simply blank images of a given size that you can use for drawing and blitting. To blit (calling a surface object’s blit method) simply means to transfer