

Beginning Python - From Novice To Professional (2005)
.pdf470 C H A P T E R 2 4 ■ P R O J E C T 5 : A V I R T U A L T E A P A R T Y
def remove(self, session): Room.remove(self, session)
# Notify everyone that a user has left: self.broadcast(session.name + ' has left the room.\r\n')
def do_say(self, session, line): self.broadcast(session.name+': '+line+'\r\n')
def do_look(self, session, line):
'Handles the look command, used to see who is in a room' session.push('The following are in this room:\r\n')
for other in self.sessions: session.push(other.name + '\r\n')
def do_who(self, session, line):
'Handles the who command, used to see who is logged in' session.push('The following are logged in:\r\n')
for name in self.server.users: session.push(name + '\r\n')
class LogoutRoom(Room):
"""
A simple room for a single user. Its sole purpose is to remove the user's name from the server.
"""
def add(self, session):
# When a session (user) enters the LogoutRoom it is deleted try: del self.server.users[session.name]
except KeyError: pass
class ChatSession(async_chat):
"""
A single session, which takes care of the communication with a single user.
"""
def __init__(self, server, sock): async_chat.__init__(self, sock) self.server = server self.set_terminator("\r\n") self.data = []
self.name = None
# All sessions begin in a separate LoginRoom: self.enter(LoginRoom(server))
C H A P T E R 2 4 ■ P R O J E C T 5 : A V I R T U A L T E A P A R T Y |
471 |
def enter(self, room):
#Remove self from current room and add self to
#next room...
try: cur = self.room
except AttributeError: pass else: cur.remove(self) self.room = room room.add(self)
def collect_incoming_data(self, data): self.data.append(data)
def found_terminator(self): line = ''.join(self.data) self.data = []
try: self.room.handle(self, line) except EndSession:
self.handle_close()
def handle_close(self): async_chat.handle_close(self) self.enter(LogoutRoom(self.server))
class ChatServer(dispatcher):
"""
A chat server with a single room.
"""
def __init__(self, port, name): dispatcher.__init__(self)
self.create_socket(socket.AF_INET, socket.SOCK_STREAM) self.set_reuse_addr()
self.bind(('', port)) self.listen(5) self.name = name self.users = {}
self.main_room = ChatRoom(self)
def handle_accept(self):
conn, addr = self.accept() ChatSession(self, conn)
if __name__ == '__main__':
s = ChatServer(PORT, NAME) try: asyncore.loop()
except KeyboardInterrupt: print

472 C H A P T E R 2 4 ■ P R O J E C T 5 : A V I R T U A L T E A P A R T Y
Table 24-1. The Commands Available in the Chat Server
Command |
Available In . . . |
Description |
login name |
Login room |
Used to log into the server |
logout |
All rooms |
Used to log out of the server |
say statement |
Chat room(s) |
Used to say something |
look |
Chat room(s) |
Used to find out who is in the same room |
who |
Chat room(s) |
Used to find out who is logged on to the server |
|
|
|
Further Exploration
You can do a lot to extend and enhance the basic server presented in this chapter:
•You could make a version with multiple chat rooms, and you could extend the command set to make it behave in any way you want.
•You might want to make the program recognize only certain commands (such as login or logout) and treat all other text entered as general chatting, thereby avoiding the need for a say command.
•You could prefix all commands with a special character (for example, a slash, giving commands like /login and /logout) and treat everything that doesn’t start with the specified character as general chatting.
•You might want to create your own GUI client—but that’s a bit trickier than it might seem. The server has one event loop, and the GUI toolkit will have another. To make them cooperate, you will need to use threading. (For an example of how this can be done in simple cases where the various threads don’t directly access each other’s data, see Chapter 28.)
What Now?
Now you’ve got your very own chat server. In the next project you tackle a different type of network programming: CGI, the mechanism underlying most Web applications (as discussed in Chapter 15). The specific application of this technology in the next project is remote editing, which enables several users to collaborate on developing the same document. You may even use it to edit your own Web pages remotely.

474 |
C H A P T E R 2 5 ■ P R O J E C T 6 : R E M O T E E D I T I N G W I T H C G I |
As you’ll see, all of this is quite easy to do with the standard Python library module cgi and some plain Python coding. However, the techniques used in this application can be used for creating Web interfaces to all of your Python programs—pretty useful. (For example, you use the same CGI techniques in Chapter 15.)
Useful Tools
The main tool when writing CGI programs is, as discussed in Chapter 15, the cgi module, along with the cgitb module for debugging. See Chapter 15 for more information.
Preparations
The steps needed for making your CGI script accessible through the Web are described in detail in Chapter 15 in the section “Dynamic Web Pages with CGI.” Just follow those steps, and you should be fine.
First Implementation
The first implementation is based on the basic structure of the greeting script shown in Listing 15-7 (Chapter 15). All that’s needed for the first prototype is some file handling...
For the script to be useful, it must store the edited text between invocations. Also, the form should be made a bit bigger than in the greeting script (simple3.cgi from Listing 15-7 in Chapter 15) and the text field should be changed into a text area. You should also use the POST CGI method instead of the default GET method. (Using POST is normally the thing to do if you are submitting large amounts of data.)
The general logic of the program is as follows:
1.Get the CGI parameter text with the current value of the data file as the default.
2.Save the text to the data file.
3.Print out the form, with the text in the textarea.
In order for the script to be allowed to write to your data file, you must first create such a file (for example, simple_edit.dat). It can be empty or perhaps contain the initial document (a plain text file, possibly containing some form of markup such as XML or HTML). Then you must set the permissions so that it is universally writable, as described in Chapter 15. The resulting code is shown in Listing 25-1.
Listing 25-1. A Simple Web Editor (simple_edit.cgi)
#!/usr/bin/env python
import cgi
form = cgi.FieldStorage()
476 |
C H A P T E R 2 5 ■ P R O J E C T 6 : R E M O T E E D I T I N G W I T H C G I |
Second Implementation
Now that you’ve gotten the first prototype on the road, what’s missing? The system should be able to edit more than one file, and it should use password protection. (Because the document can be viewed by opening it directly in a browser, you won’t be paying much attention to the viewing part of the system.)
The main difference from the first prototype is that you’ll split the functionality into several scripts—one for each “action” your system should be able to perform:
index.html: This isn’t a script. It’s just a plain Web page with a form where you can enter a file name. It also has an Open button, which triggers edit.cgi.
edit.cgi: Displays a given file in a text area; has a text field for password entry and a Save button, which triggers save.cgi.
save.cgi: Saves the text it receives to a given file and displays a simple message (for example, “The file has been saved”). This script should also take care of the password checking.
index.html
The file index.html is an HTML file that contains the form used to enter a file name:
<html>
<head>
<title>File Editor</title> </head>
<body>
<form action='edit.cgi' method='POST'> <b>File name:</b><br />
<input type='text' name='filename' /> <input type='submit' value='Open' />
</body>
</html>
Note how the text field is named “filename”—that ensures its contents will be supplied as the CGI parameter filename to the edit.cgi script (which is the action attribute of the form tag). If you open this file in a browser, enter a file name in the text field, and click Open, the edit.cgi script will be run.
edit.cgi
The page displayed by edit.cgi should include a text area containing the current text of the file you’re editing, and a text field for entering a password. The only input needed is the file name, which the script receives from the form in index.html. Note, however, that it is fully possible to open the edit.cgi script directly, without submitting the form in index.html. In that case, you have no guarantee that the filename field of cgi.FieldStorage is set. So you have to add a check to ensure that there is a file name. If there is, the file will be opened from a directory that contains the files that may be edited. Let’s call the directory data. (You will, of course, have to create this directory.)

C H A P T E R 2 5 ■ P R O J E C T 6 : R E M O T E E D I T I N G W I T H C G I |
477 |
■Caution Note that by supplying a file name that contains path elements such as .. (“dot-dot”), it may be possible to access files outside this directory. To make sure that the files accessed are within the given directory, you should perform some extra checking, such as listing all the files in the directory (using the glob module, for example) and checking that the supplied file name is one of the candidate files (making sure you use full, absolute path names all around). See the section “Validating File Names” in Chapter 27 for another approach.
The code, then, becomes something like Listing 25-2.
Listing 25-2. The Editor Script (edit.cgi)
#!/usr/bin/env python
print 'Content-type: text/html\n'
from os.path import join, abspath import cgi, sys
BASE_DIR = abspath('data')
form = cgi.FieldStorage()
filename = form.getvalue('filename') if not filename:
print 'Please enter a file name' sys.exit()
text = open(join(BASE_DIR, filename)).read()
print """
<html>
<head> <title>Editing...</title>
</head>
<body>
<form action='save.cgi' method='POST'> <b>File:</b> %s<br />
<input type='hidden' value='%s' name='filename' /> <b>Password:</b><br />
<input name='password' type='password' /><br /> <b>Text:</b><br />
<textarea name='text' cols='40' rows='20'>%s</textarea><br /> <input type='submit' value='Save' />
</form>
</body>
</html>
""" % (filename, filename, text)

478 |
C H A P T E R 2 5 ■ P R O J E C T 6 : R E M O T E E D I T I N G W I T H C G I |
Note that the abspath function has been used to get the absolute path of the data directory. Also note that the file name has been stored in a hidden form element so that it will be relayed to the next script (save.cgi) without giving the user an opportunity to change it. (You have no guarantees of that, of course, because the user may write his or her own forms, put them on another machine, and have them call your CGI scripts with custom values.)
For password handling, the example code uses an input element of type password rather than text, which means that the characters entered will all be displayed as asterisks.
■Note This script is based on the assumption that the file name given refers to an existing file. Feel free to extend it so that it can handle other cases as well.
save.cgi
The script that performs the saving is the last component of this simple system. It receives a file name, a password, and some text. It checks that the password is correct, and if it is, the program stores the text in the file with the given file name. (The file should have its permissions set properly. See the discussion in Chapter 15 in the section “Step 3. Setting the File Permission.”)
Just for fun, you’ll use the sha module in the password handling. SHA (Secure Hash Algorithm) is a way of extracting an essentially meaningless string of seemingly random data (a “digest”) from an input string. The idea behind the algorithm is that it is almost impossible to construct a string that has a given digest, so if you know the digest of a password (for example), there is no (easy) way you can reconstruct the password or invent one that will reproduce the digest.
This means that you can safely compare the digest of a supplied password with a stored digest (of the correct password) instead of comparing the passwords themselves. By using this approach, you don’t have to store the password itself in the source code, and someone reading the code would be none the wiser about what the password actually was.
■Caution As I said, this “security” feature is mainly for fun. Unless you are using a secure connection with SSL or some similar technology (which is beyond the scope of this project), it is still possible to pick up the password being submitted over the network.
Here is an example of how you can use sha:
>>from sha import sha
>>sha('foobar').hexdigest() '8843d7f92416211de9ebb963ff4ce28125932878'
>>sha('foobaz').hexdigest() '21eb6533733a5e4763acacd1d45a60c2e0e404e1'
C H A P T E R 2 5 ■ P R O J E C T 6 : R E M O T E E D I T I N G W I T H C G I |
479 |
As you can see, a small change in the password gives you a completely different digest. You can see the code for save.cgi in Listing 25-3.
Listing 25-3. The Saving Script (save.cgi)
#!/usr/bin/env python
print 'Content-type: text/html\n'
from os.path import join, abspath import cgi, sha, sys
BASE_DIR = abspath('data')
form = cgi.FieldStorage()
text = form.getvalue('text') filename = form.getvalue('filename') password = form.getvalue('password')
if not (filename and text and password): print 'Invalid parameters.' sys.exit()
if sha.sha(password).hexdigest() != '8843d7f92416211de9ebb963ff4ce28125932878': print 'Invalid password'
sys.exit()
f = open(join(BASE_DIR,filename), 'w') f.write(text)
f.close()
print 'The file has been saved.'
Running the Editor
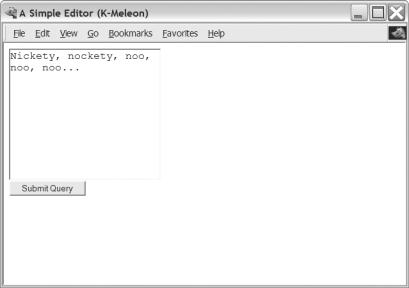
Follow these steps to use the editor:
1.Open the page index.html in a Web browser. Be sure to open it through a Web server (by using a URL of the form http://www.someserver.com/index.html) and not as a local file. The result is shown in Figure 25-2.