

Beginning Microsoft Word Business Documents - From Novice To Professional (2006)
.pdf126 |
C H A P T E R 7 ■ C R E A T I N G O R G A N I Z A T I O N C H A R T S |
Editing Pictures
When you click an image in Word, the Picture toolbar appears, as shown in Figure 7-5. It provides a number of options for editing your picture, such as adjusting brightness, contrast, and color. You can also crop images or rotate them.
Figure 7-5. The Picture toolbar
■Caution Word provides you with a number of options for editing pictures you insert in your document. I strongly advise that you avoid editing your images in Word. Rather, you should use a program that is designed specifically for editing images and edit the images before inserting them in the document for two reasons. First, you’ll get better images. Second, you won’t end up with a bloated file.
To crop a picture, click the Crop button. A black bar appears on each side of the picture, plus on each corner. Click and drag the bars to move the edge of the picture. When you’ve made your adjustments, click outside of the picture.
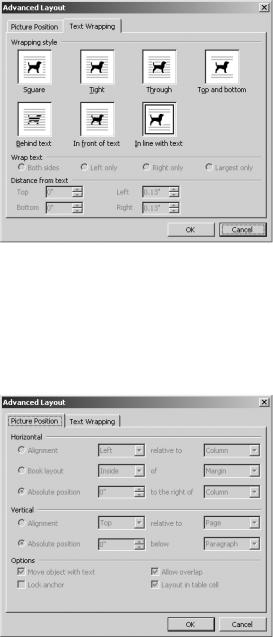
The Text Wrapping button helps you position the picture in relation to the text. Click the button and select an option from the drop-down menu, as shown in Figure 7-6.
Figure 7-6. Text wrapping options
To align your picture in relation to the document margins, select it and then click one of the alignment buttons on the Formatting toolbar.
You can resize the picture by clicking and dragging the black boxes on the edges and/or in the corners of the picture.
For more advanced formatting options, right-click your picture and select Format Picture to open the Format Picture dialog box.
C H A P T E R 7 ■ C R E A T I N G O R G A N I Z A T I O N C H A R T S |
127 |
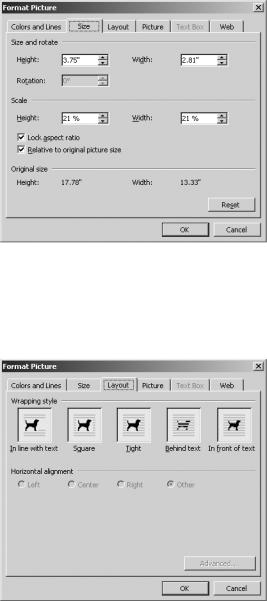
The Size tab, which you see in Figure 7-7, lets you manually set the size of your picture. You can also scale your picture by percentage. To keep the picture proportions, select Lock aspect ratio.
Figure 7-7. The Size tab of the Format Picture dialog box
On the Layout tab, shown in Figure 7-8, you can specify text wrapping and horizontal alignment.
Figure 7-8. The Layout tab of the Format Picture dialog box
128 |
C H A P T E R 7 ■ C R E A T I N G O R G A N I Z A T I O N C H A R T S |
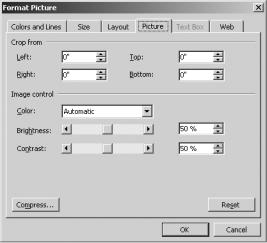
The Advanced button opens the Advanced Layout dialog box. On the Text Wrapping tab, shown in Figure 7-9, you can specify the distance between the picture and text. You can also specify text wrapping for specific sides of the picture.
Figure 7-9. The Text Wrapping tab of the Advanced Layout dialog box
On the Picture Position tab, shown in Figure 7-10, select both vertical and horizontal alignment options. You can also set the alignment in relation to specific elements of the document. Once you’ve made your changes, click OK to return to the Format Picture dialog box.
Figure 7-10. The Picture Position tab of the Advanced Layout dialog box
C H A P T E R 7 ■ C R E A T I N G O R G A N I Z A T I O N C H A R T S |
129 |
On the Picture tab, you can specify picture cropping in inches, as shown in Figure 7-11. You can also make changes to the image brightness and contrast.
Figure 7-11. The Picture tab of the Format Picture dialog box
Formatting Your Organization Chart
You can change attributes of the organization chart by right-clicking the border surrounding the chart. Select Format Organization Chart from the pop-up menu. In the dialog box that appears are several tabs that provide a number of options.
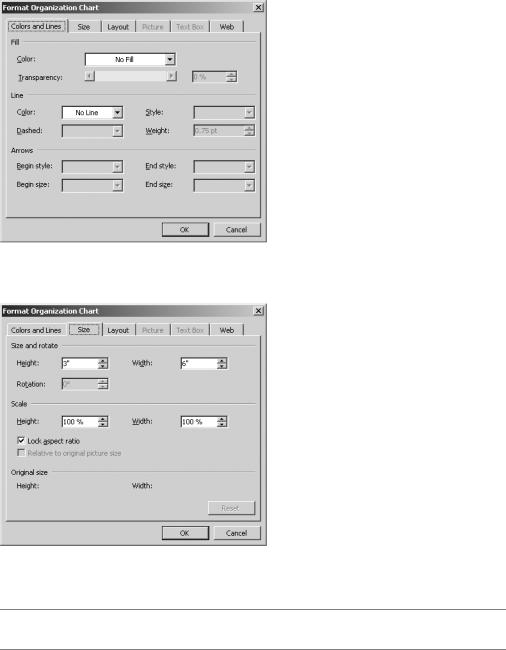
The Colors and Lines tab in the Format Organization Chart dialog box gives you a number of options for formatting the chart (see Figure 7-12). Use the color box to select a background color for the chart area. You can also use the slider or percentage boxes to set the transparency for the background color.
The Line section allows you to specify a color, style, weight, and dash pattern for the chart border. By default, the chart will not have a border line. But it can be helpful to add one, particularly if you are inserting the chart within a document.
The Size tab, shown in Figure 7-13, lets you specify the height and width for the organization chart. Or, you can use the scale tools to adjust the proportions of the organization chart. By default, Lock aspect ratio is selected, but you can deselect it if you do not want to constrain the proportions.
130 |
C H A P T E R 7 ■ C R E A T I N G O R G A N I Z A T I O N C H A R T S |
Figure 7-12. The Colors and Lines tab of the Format Organization Chart dialog box
Figure 7-13. The Size tab of the Format Organization Chart dialog box
■Note You can also use the white dots on the corners and sides of the organization chart to resize the chart.

C H A P T E R 7 ■ C R E A T I N G O R G A N I Z A T I O N C H A R T S |
131 |
The Layout tab is useful if you are inserting the chart into a larger document (see Figure 7-14). It specifies how the chart will appear in relation to the text on the rest of the page. Additionally, this tab contains an Advanced button. The options it brings up will give you greater control over how the chart appears in relation to other parts of the document, such as enabling you to specify the amount of space between the chart and text. You can also use the Text Wrapping button on the Organization Chart toolbar to set text wrapping options.
Figure 7-14. The Layout tab of the Format Organization Chart dialog box
When you’ve made your choices, select OK.
Arranging Your Organization Chart
When you’re creating your organization chart, it is best to start at the top level and work your way down to the lower levels. While the Insert Shape button allows you to insert more levels, it does not provide a way to insert levels above the top-most level.
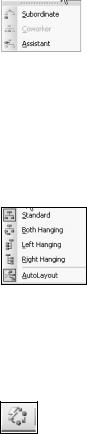
To insert a new level, first select the level that will be the reference for the new level or box of the reference chart. Then click the Insert Shape button and on the drop-down list select Subordinate, Coworker, or Assistant, as shown in Figure 7-15. Word will insert the shape at the appropriate position on the chart.
132 |
C H A P T E R 7 ■ C R E A T I N G O R G A N I Z A T I O N C H A R T S |
||
|
|
|
|
|
|
|
|
Figure 7-15. The Insert Shape button’s drop-down list
To change the appearance of the boxes in the chart, use the Layout button to choose a layout for the chart from a list of options for the layout of the chart—the levels can be linear or horizontal. For example, you can have subordinate levels hang to the right or to the left. Or you can have them hang on both sides (see Figure 7-16).
Figure 7-16. The Layout button’s drop-down list
If you’re unsure of the best layout for the table, select the AutoLayout option, as shown in Figure 7-17. It chooses the best layout for the table.
Figure 7-17. The AutoLayout button
Finally, you may not like the default style for the organization chart. Fortunately, you are not stuck with Word’s default layout. You can use the AutoFormat option to select a different style for the organization chart. Some are contemporary, while others are more traditional. But due to the wide selection, you are sure to find one that suits your needs.
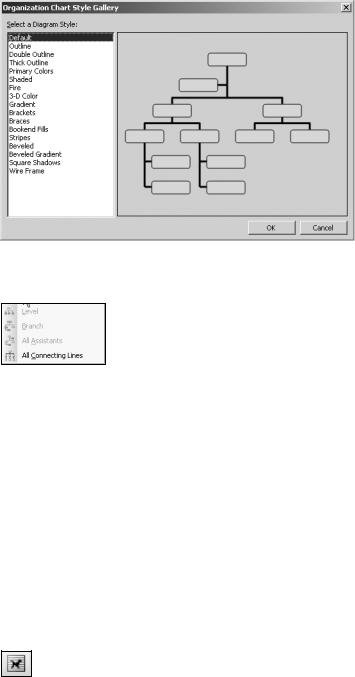
When you click the AutoFormat button, the Organization Chart Style Gallery dialog box opens, giving you many different choices. Click your choice on the left side to view a preview on the right, as shown in Figure 7-18. When you find one you like, click OK. It will change the current chart to match that style.
The Select button on the Organization Chart toolbar will allow you to select different aspects of the chart, such as connecting lines, a level, or a branch (see Figure 7-19). This will allow you to alter the characteristics of the elements or delete them altogether.
C H A P T E R 7 ■ C R E A T I N G O R G A N I Z A T I O N C H A R T S |
133 |
Figure 7-18. The Organization Chart Style Gallery dialog box
Figure 7-19. The Select button’s drop-down list
Rearranging Your Organization Chart
If you want to rearrange the order of boxes within an organization chart, you can move a shape, or even whole sections.
You can click and drag the different boxes within the organization chart. Simply click one and then drag the dotted border surrounding it. Move it to the desired location.
To move entire levels or branches, first select a box at the same level, and use the Select button to select the branch or level. Then drag the entire branch to a new location.
The Text Wrapping button on the toolbar, shown in Figure 7-20, gives you options for wrapping text around the organization chart, but you are better off using the Layout tab from the AutoFormat dialog box for this task.
Figure 7-20. The Text Wrapping button
134 |
C H A P T E R 7 ■ C R E A T I N G O R G A N I Z A T I O N C H A R T S |
To change the size of a box, click the border so that dots appear at the corners of the box and at the sides, as shown in Figure 7-21.
Figure 7-21. A selected shape
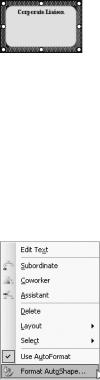
If you desire, you can change the colors for the relationship lines and for the individual shapes. Simply right-click the object and select Format AutoShape, as shown in Figure 7-22. Use the Colors and Lines tab to make changes to the colors and borders of the shapes and lines. To apply the same changes to all the boxes or lines, use the Select button to select the relationship lines, branch, or level. Then use the Format AutoShape options to make your changes.
Figure 7-22. The Format AutoShape context menu option
For added flexibility, you can add subordinates, coworkers, and assistants by rightclicking a shape and selecting the type you would like to add from the same context menu shown in Figure 7-22. The context menu also gives you the option of changing the layout of a sublevel or deleting a box from the organization chart.
Adding Captions to Your Organization Chart
You may want to add a caption to your organization chart, as it helps you identify the chart when you refer to it in your document.
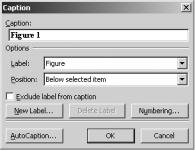
To insert a caption, select your chart. Click Insert Reference Caption. In the Label box, select the type of label. Then specify the position of the label. Enter the caption text in the box labeled Caption, as shown in Figure 7-23. Finally, click OK.
C H A P T E R 7 ■ C R E A T I N G O R G A N I Z A T I O N C H A R T S |
135 |
Figure 7-23. The Caption dialog box
Word inserts the caption as a field. The numbering updates automatically if you add more captions or rearrange captioned objects.
Once you have created and formatted your organization chart, you can incorporate it into an existing document by copying and pasting. Or, you can add text to the file containing the organization chart.