

Beginning Mac OS X Tiger Dashboard Widget Development (2006)
.pdfCreating a Widget
Figure 4-4
Now that you have the basic HTML for your widget and the Default.png created, you will need to create a Cascading Style Sheet for it in order to place the maps on top of your background and position them accurately.
Creating Widget Structure with CSS
If you have worked with Cascading Style Sheets, you know that they are a painless way to apply style attributes to all of the elements in your HTML pages without the niggling problem of touching the tag for each individual element. More important, Cascading Style Sheets give you precise layout control of your HTML pages in ways that HTML tables never allowed you to. For Dashboard widgets, this means that you are able to mix text and graphics in a way that gives your widget the polished and professional look of a commercial application.
If you test your Cascading Style Sheet in Safari while you are working out alignment issues, you will make your widget’s transition to Dashboard easier.
You can create a very basic CSS file to align the weather maps with the background. The Cascading Style Sheet needs only to contain a section for the body of the page, the location of the map, and the location of the background image.
61

Chapter 4
/*
pfterry, weathermaps, 2005 */
body { margin: 0;
}
#mapImage { position: absolute; top: 55px;
left: 16px;
}
.backgroundImage { position: absolute; top: 0px;
left: 0px;
}
In this CSS, the body rule is the first item and is a margin property with a value of 0. The next rule is the style used for the map image and it is named #mapImage. The hash sign before the name indicates that it is an ID selector and will be applied only to the element in your HTML page that has an ID selector with the same value.
<img id=”mapImage” src=”http://image.weather.com/web/radar/us_mkc_closeradar_large_usen.jpg” width=”432” height=”290”>
You can also see that the mapImage rule has position, top, and left properties, and their values.
ID selectors should be used only once in your HTML file to make applying the style easy and so the Javascript getElementByID() function will work.
The style used for the background is called .backgroundImage. The period before the name indicates that it is a class selector. Like the ID selector, the .backgroundImage style will be applied only to the HTML element with the value backgroundImage.
When the style sheet is applied to the widget, the body has no margins. Because the maps and any buttons or links will be placed on the background image, the image has an absolute position of 0 pixels from the top and 0 pixels from the left. All of the other items in the widget will be offset from the top and left edges of the background. The position of the map image, for instance, is 55 pixels from the top of the background and 16 pixels from the left.
To test the CSS file, you must save it with the same name as the HTML file and .css as the extension. You will need to make two modifications to the weathermaps.html file to incorporate the Cascading Style Sheet into the widget. First, the lines
<style type=”text/css”> @import “weathermaps.css”;
</style>
62

Creating a Widget
are added above the body and below the head in weathermaps.html. When the base HTML page of the widget loads, the weathermaps.css file is imported and used as the style sheet. Second, you need to
give the image the ID selector id=”mapImage” to place the map on the background image via JavaScript and CSS.
<!DOCTYPE html PUBLIC “-//W3C//DTD XHTML 1.0 Strict//EN” “http://www.w3.org/TR/xhtml1/DTD/xhtml1-strict.dtd”>
<html xmlns=”http://www.w3.org/1999/xhtml”> <head>
<title>weathermaps</title>
</head>
<style type=”text/css”> @import “weathermaps.css”;
</style>
<body>
<img src=”Default.png”>
<img id=”mapImage” src=”http://image.weather.com/web/radar/us_mkc_closeradar_large_usen.jpg” width=”432” height=”290”>
<!-- http://image.weather.com/web/radar/us_mkc_closeradar_medium_usen.jpg http://image.weather.com/images/maps/current/cen_curtemp_720x486.jpg
http://image.weather.com/images/maps/forecast/map_lotmpf_night1_3usc_enus_600x405.j pg http://image.weather.com/images/maps/forecast/map_hitmpf_day2_3usc_enus_600x405.jpg -->
</body>
</html>
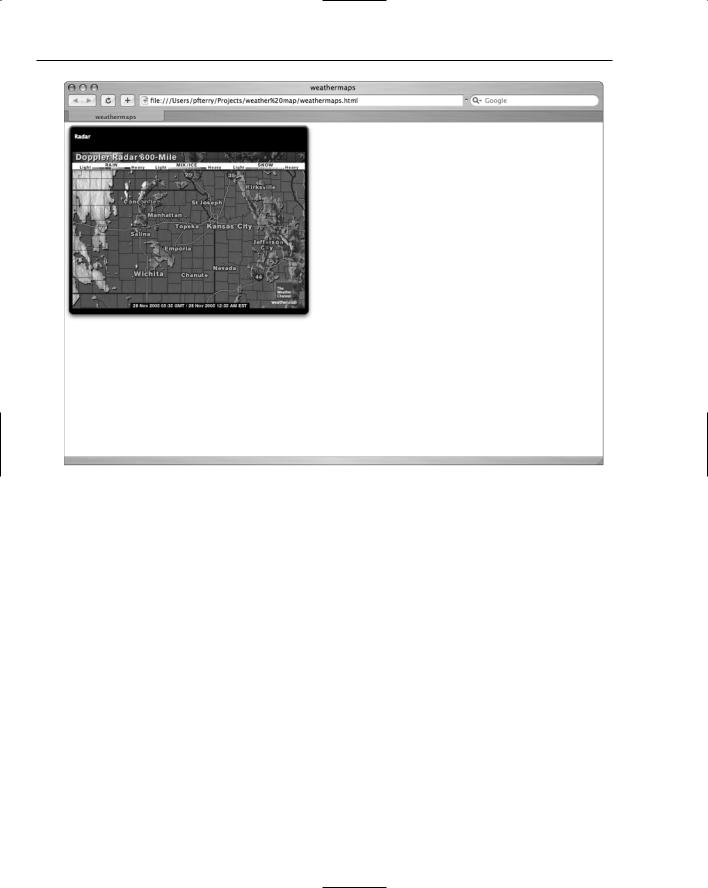
Figure 4-5 shows the result of placing the map at the bottom of the widget background and leaving space at the top for buttons or links to switch among the other maps.
At this point you could bundle your pages and create the widget, but you still have more work to do to add the links to load the other maps. You probably want to continue working in Safari while you add the remainder of the functionality to the widget.
<div> Regions
As you can see from the use of IDs in the weathermaps.html, you can use selectors in the CSS file to control placement in your widget as well as manipulate the content using JavaScript. You can also use <div> tags to create divisions for content in your widget. The <div> tag allows you to add logical divisions to your HTML page. It creates a division for the map, and you can use the ID selector with the <div> tag as the location to place the other maps as the user cycles through them.
By giving the <div> tag an ID, you are able to use that selector to change that portion of your widget with the style sheet. In this case, the position of the map on the background is determined by the #mapImage ID selector of the Cascading Style Sheet.
63

Chapter 4
Figure 4-5
By extension, you can see that you can create multiple divisions in your widget and give them each a different style via the <div> tag. For instance, you can add buttons or links for the three additional maps that you want to display in the widget: current temps, overnight temps, and tomorrow’s temps. You could add buttons above the map (Figure 4-5), but buttons take extra space. If you added the names of the maps above the current map, they will take less space than buttons and provide the same functionality.
Because you want to position the map names and you may want to use JavaScript to reference them, you need to use the <div> tag again. For instance, you can add a <div> tag with an ID selector for each one of the maps that you plan to display in your widget.
<!DOCTYPE html PUBLIC “-//W3C//DTD XHTML 1.0 Strict//EN” “http://www.w3.org/TR/xhtml1/DTD/xhtml1-strict.dtd”>
<html xmlns=”http://www.w3.org/1999/xhtml”> <head>
<title>weathermaps</title>
</head>
<style type=”text/css”> @import “weathermaps.css”;
</style>
64

Creating a Widget
<body>
<img src=”Default.png”>
<div id=”radar”>Radar</div>
<div id=”curTemp”>Current Temps</div> <div id=”nightTemp”>Overnight Temps</div>
<div id=”tomorrowHigh”>Tomorrow’s Highs</div>
<img id=”mapImage” src=”http://image.weather.com/web/radar/us_mkc_closeradar_large_usen.jpg” width=”432” height=”290”>
<!-- http://image.weather.com/web/radar/us_mkc_closeradar_medium_usen.jpg http://image.weather.com/images/maps/current/cen_curtemp_720x486.jpg
http://image.weather.com/images/maps/forecast/map_lotmpf_night1_3usc_enus_600x405.j pg http://image.weather.com/images/maps/forecast/map_hitmpf_day2_3usc_enus_600x405.jpg -->
</body>
</html>
For each map that you plan to display in the widget, you have added an ID selector and included its name: Radar, Current Temps, Overnight Temps, and Tomorrow’s Highs.
Try It Out |
Positioning Text Using CSS |
Now that you see how to use the Cascading Style Sheet to position text and graphics on your widget background, you can modify the weathermaps.css file for the four map names in the weathermaps.html file.
1.Open the weathermaps.css file and place the cursor above the #mapImage line and press Return.
2.Add a rule for the radar map assigning a font, font size, weight, and color. Your rule and its declaration should look something like this.
#radar {
font: 10px “Lucida Grande”; font-weight: bold;
color: white;
}
3.Place the cursor after the font color and press Return. Enter absolute for position, and enter the offset of 20 pixels from the top and 20 pixels from the left side of the widget for your text. The remainder of the #radar rule should look like this.
position: absolute; top: 20px;
left: 20px;
4.If you haven’t already, open weathermaps.html in Safari and press Command-R to reload your widget. You’ll see the map name Radar at the top of the widget window (Figure 4-6). When your widget is finished, this will take you back to the radar map that you see whenever the widget loads after you have looked at the temperature maps.
65
Chapter 4
Figure 4-6
5.Under the radar rule, add rules for the Current Temps, Overnight Temps, and Tomorrow’s Highs maps. As you add each rule, you will need to adjust the Left offset value to move the next map name to the right.
When you have finished your edits, the weathermaps.css file should look like this.
/*
pfterry, WeatherMaps, 2005 */
body { margin: 0;
}
#radar {
font: 10px “Lucida Grande”; font-weight: bold;
color: white;
66

Creating a Widget
position: absolute; top: 20px;
left: 20px;
}
#curTemp {
font: 10px “Lucida Grande”; font-weight: bold;
color: white; position: absolute; top: 20px;
left: 75px;
}
#nightTemp {
font: 10px “Lucida Grande”; font-weight: bold;
color: white; position: absolute; top: 20px;
left: 170px;
}
#tomorrowHigh {
font: 10px “Lucida Grande”; font-weight: bold;
color: white; position: absolute; top: 20px;
left: 280px;
}
#mapImage {
font: 20px “Lucida Grande”; font-weight: bold; text-align: center;
color: white; position: absolute; top: 55px;
left: 16px;
}
.backgroundImage { position: absolute; top: 0px;
left: 0px;
}
Once you save your changes and reload the HTML file, you’ll see the names of the maps listed along the top of your widget (Figure 4-7).
67

Chapter 4
Figure 4-7
How It Works
In a Cascading Style Sheet, each rule has two parts: the selector and the declaration. The declaration contains the properties and values of the style. In a typical rule, the selector and declaration matches a standard HTML element. In this rule, for instance,
h1 {font: 18px Verdana; color: grey}
Head 1 is the selector. It determines what the rule is applied to. The rule contains two declaration blocks between the curly braces — font and color, with their two values — separated by a semicolon. The rule can be written as a line, or it can be written like the ID selectors in your weathermaps.css file.
#radar {
font: 10px “Lucida Grande”; font-weight: bold;
color: white; position: absolute;
68

Creating a Widget
top: 20px; left: 20px;
}
In the rule above, radar is the selector the declaration will be applied to. In this case, however, it is an ID selector instead of a standard HTML element. Placing each declaration block on a separate line makes the rule easier to read. When Dashboard displays the widget, the rule in the CSS is applied to the radar ID selector when it is found in weathermaps.html.
<div id=”radar” onclick=’replaceMap(“radar”)’>Radar</div>
The division marker identifies the portion of the HTML file the CSS rule is applied to.
Doing the Work with JavaScript
Now that you have the basis for the widget, you can add the functionality of switching between the different temperature maps. You could just add the links to the maps as HREF tags in the weathermaps.html file, but that would give the map names the unmistakable look of a link on a web page. Because you are trying to create a widget that has the illusion of being an application rather than point to the widget’s web origins, you should use JavaScript to load the maps as you click the map names.
When you are developing a JavaScript to power your widget it is sometimes easier to begin inside of the HTML file. This is especially useful if you are using Safari and a text editor as your development environment. Keeping the JavaScript inside the HTML file means that you have to make your changes in one file only. When you have finished developing the script, you can move it into a separate file. If you are developing a complex JavaScript, however, you may want to separate HTML from CSS from JavaScript sooner to take advantage of a modular approach. In the end, the choice is a matter of personal preference and development style. For the purposes of this discussion, the JavaScript begins its life inside of the main HTML file.
If you think about the functionality that you are trying to achieve, you want the map to change each time you click one of the map names at the top of the widget. To accomplish this, you need a function that can take the result of a mouse click in the widget, associate that result with a map URL, and insert the correct map.
The simple JavaScript function would determine the correct map to insert by testing the result of the mouse click. Whenever you click in your widget, the name of the map is passed back to the replaceMap(mapLink) function as the mapLink value. The correct URL is then determined by comparing that value to the four possible values in a series of if . . . else if conditions.
function replaceMap(mapLink)
{
if (mapLink == “radar”) {
69

Chapter 4
var theImage = (src=’http://image.weather.com/web/radar/us_mkc_closeradar_large_ usen.jpg’);
} else if (mapLink == “curTemp”) {
var theImage = (src=’http://image.weather.com/images/maps/current/cen_curtemp_ 720x486.jpg’);
} else if (mapLink == “nightTemp”) {
var theImage = (src=’http://image.weather.com/images/maps/forecast/map_lotmpf_ night1_3usc_enus_600x405.jpg’);
} else if (mapLink == “tomorrowHigh”) {
var theImage = (src=’http://image.weather.com/images/maps/forecast/map_hitmpf_day2_ 3usc_enus_600x405.jpg’);
}
document.getElementById(“mapImage”).src = theImage;
}
For example, if your onclick returns the value nightTemp in the mapLink variable, the JavaScript compares that in each else . . . if condition. When it makes the comparison, it sets the variable theImage to the source URL and then executes the next statement in the JavaScript, which sets the mapImage <div> in the widget with the new map URL. It does this using the getElementByID() function.
This is what the JavaScript looks like incorporated into the weathermaps.html file.
<!DOCTYPE html PUBLIC “-//W3C//DTD XHTML 1.0 Strict//EN” “http://www.w3.org/TR/xhtml1/DTD/xhtml1-strict.dtd”>
<html xmlns=”http://www.w3.org/1999/xhtml”> <head>
<title>WeatherMaps</title>
<script type=”text/javascript”>
// simple script to switch between the different maps
function replaceMap(mapLink) { if (mapLink == “radar”) {
var theImage = (src=’http://image.weather.com/web/radar/us_mkc_closeradar_large_usen.jpg’);
}else if (mapLink == “curTemp”) { var theImage =
(src=’http://image.weather.com/images/maps/current/cen_curtemp_720x486.jpg’);
}else if (mapLink == “nightTemp”) { var theImage =
(src=’http://image.weather.com/images/maps/forecast/map_lotmpf_night1_3usc_enus_600 x405.jpg’);
} else if (mapLink == “tomorrowHigh”) {
var theImage = (src=’http://image.weather.com/images/maps/forecast/map_ hitmpf_day2_3usc_enus_600x405.jpg’);
70